
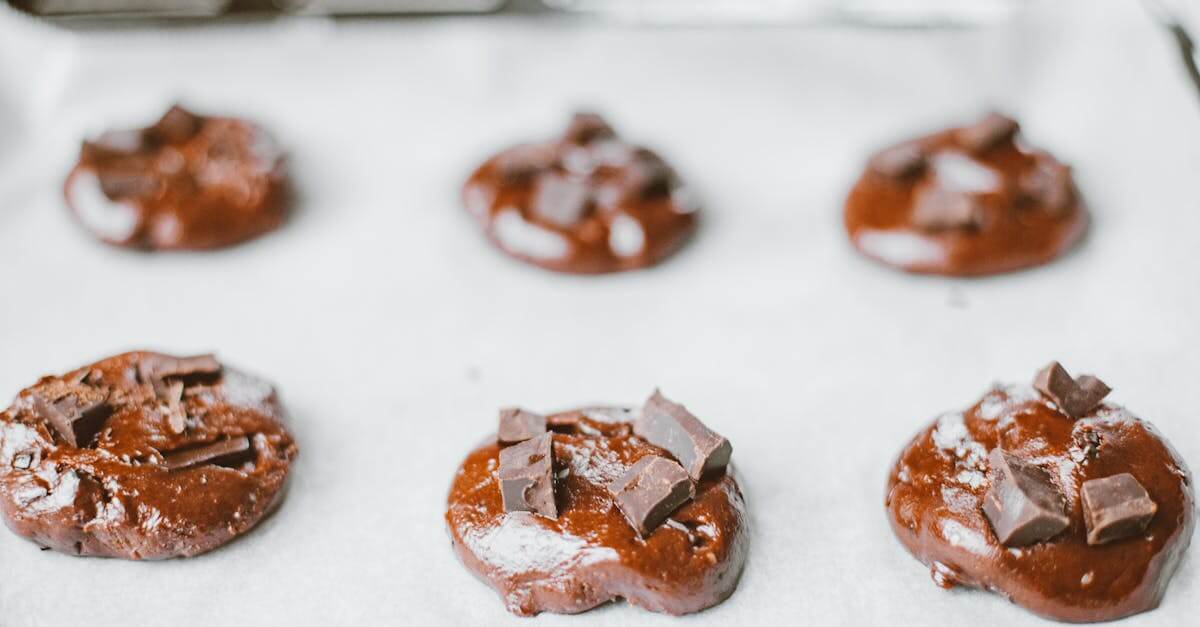
There’s something truly special about homemade fudge that instantly brings back sweet memories. Using Baker’s chocolate in our fudge recipe gives it that rich, creamy texture and deep chocolate flavor we all crave. This classic treat is perfect for holidays, special occasions, or just whenever we want a little indulgence.
Making fudge with Baker’s chocolate is surprisingly simple and rewarding. With just a few ingredients and easy steps we can create a decadent dessert that melts in our mouths. Whether we’re seasoned bakers or just starting out this recipe is sure to become a favorite in our kitchen. Let’s dive into crafting the perfect batch of fudge that’s smooth, luscious, and utterly irresistible.
Ingredients
To create the perfect Fudge Recipe with Baker’s Chocolate, we start by gathering the essential ingredients that deliver that classic rich and creamy texture. Below, we outline the core components along with optional add-ins to customize your fudge.
Main Ingredients
We use simple, quality ingredients that complement the intense flavor of Baker’s Chocolate and ensure a smooth, melt-in-your-mouth fudge.
- Baker’s Chocolate (unsweetened) — 12 ounces, chopped
- Granulated Sugar — 2 cups
- Whole Milk — 1 cup
- Unsalted Butter — 1/4 cup (half stick), cut into pieces
- Vanilla Extract — 2 teaspoons
- Salt — 1/4 teaspoon, enhances flavor balance
Optional Add-Ins
Customize your fudge with these ingredients to introduce unique textures and flavors. Add them after removing the fudge from heat but before pouring into the pan to ensure even distribution.
- Chopped Nuts (walnuts, pecans, or almonds) — 1/2 cup
- Mini Marshmallows — 1 cup
- Dried Fruits (cranberries or cherries) — 1/3 cup
- Chocolate Chips (semi-sweet or milk) — 1/2 cup
- Sea Salt Flakes — a sprinkle for topping, adds a savory contrast
| Ingredient | Quantity | Notes |
|---|---|---|
| Baker’s Chocolate | 12 ounces | Unsweetened, chopped |
| Granulated Sugar | 2 cups | |
| Whole Milk | 1 cup | |
| Unsalted Butter | 1/4 cup | Half stick, cubed |
| Vanilla Extract | 2 teaspoons | |
| Salt | 1/4 teaspoon | |
| Chopped Nuts | 1/2 cup | Optional |
| Mini Marshmallows | 1 cup | Optional |
| Dried Fruits | 1/3 cup | Optional |
| Chocolate Chips | 1/2 cup | Optional |
| Sea Salt Flakes | To taste | Optional topping |
Tip: Using high-quality Baker’s Chocolate is the key to homemade fudge with deep flavor and smooth texture.
Equipment Needed
To craft the perfect batch of fudge with Baker’s chocolate we must have the right equipment on hand. Using precise tools ensures smooth preparation and flawless texture.
- Heavy-bottomed saucepan: This is essential for even heat distribution to prevent scorching when melting the Baker’s chocolate with sugar and milk.
- Candy thermometer: Accurate temperature control is key to achieving that classic fudge consistency. We recommend a thermometer calibrated to read up to at least 240°F (115°C).
- Heat-resistant spatula or wooden spoon: For stirring the mixture continuously while it heats, preventing burning and ensuring a smooth blend.
- Mixing bowl: Use a medium bowl to combine ingredients like butter, vanilla extract, and salt after heating the chocolate mixture.
- 8×8-inch square baking pan: Lined with parchment paper or foil for easy removal of the fudge once set.
- Measuring cups and spoons: Precise measurements of sugar, milk, butter, and flavorings are critical to balance taste and texture.
- Knife and cutting board: To cut the fudge into bite-sized pieces after it cools completely.
| Equipment | Purpose |
|---|---|
| Heavy-bottomed saucepan | Even heat distribution, avoid scorching |
| Candy thermometer | Monitor precise cooking temperature (up to 240°F) |
| Heat-resistant spatula/wooden spoon | Constant stirring during heating |
| Mixing bowl | Mixing melted chocolate with other ingredients |
| 8×8-inch square baking pan | Shaping fudge, lined for easy removal |
| Measuring cups and spoons | Accurate ingredient measurements |
| Knife and cutting board | Cutting set fudge portions |
Having these tools ready before we begin guarantees a smooth and enjoyable fudge making experience. As the saying goes, “Preparation is the key to success.” This is especially true when crafting rich, creamy fudge using premium Baker’s chocolate.
Instructions
Follow these precise steps to create rich and creamy fudge with Baker’s chocolate. Our clear instructions ensure a smooth process from start to finish.
Prep Work
- Line an 8×8-inch square baking pan with parchment paper or lightly grease it for easy removal.
- Measure all ingredients accurately using measuring cups and spoons.
- Have a heavy-bottomed saucepan, candy thermometer, heat-resistant spatula, and medium mixing bowl ready.
Melting the Chocolate
- Chop 12 ounces of unsweetened Baker’s chocolate into small pieces for even melting.
- Place the chopped chocolate in the heavy-bottomed saucepan.
- Heat over low heat, stirring constantly with the spatula to prevent burning.
- Continue stirring until the chocolate is completely melted and smooth.
Mixing the Ingredients
- Add 2 cups granulated sugar, 1 cup whole milk, 1/4 cup unsalted butter, and 1/4 teaspoon salt to the melted chocolate.
- Stir continuously over medium heat until the mixture reaches 234°F (soft-ball stage) on a candy thermometer.
- Remove the pan from heat immediately to avoid overheating.
- Stir in 2 teaspoons vanilla extract thoroughly.
- If desired, fold in optional add-ins like chopped nuts or mini marshmallows now.
| Ingredient | Measurement | Notes |
|---|---|---|
| Unsweetened Baker’s chocolate | 12 ounces | Chopped |
| Granulated sugar | 2 cups | |
| Whole milk | 1 cup | |
| Unsalted butter | 1/4 cup | Softened |
| Vanilla extract | 2 teaspoons | |
| Salt | 1/4 teaspoon |
Setting the Fudge
- Pour the hot fudge mixture into the prepared baking pan.
- Spread it evenly with the spatula, smoothing the top.
- Let it cool at room temperature for about 2 hours until firm.
- For quicker setting, place the pan in the refrigerator for 1 hour.
Cutting and Serving
- Once the fudge is fully set, lift it out of the pan using the parchment paper edges.
- Place on a cutting board.
- Use a sharp knife to cut the fudge into bite-sized squares.
- Serve immediately or store in an airtight container at room temperature for up to one week.
Tips for the Best Fudge
To achieve the perfect fudge with Baker’s chocolate, we must pay close attention to technique and ingredients. Here are our top tips to ensure your fudge turns out rich, smooth, and delightfully creamy every time.
Use High-Quality Baker’s Chocolate
The foundation of great fudge is high-quality Baker’s chocolate. Its intense flavor and smooth meltability create that classic decadent texture. Avoid substitutes with fillers or low cocoa content to maintain authenticity.
Carefully Monitor Temperature
Achieving the soft-ball stage (between 234°F and 240°F or 112°C to 116°C) is critical for perfect fudge consistency. Use a reliable candy thermometer and watch it closely.
| Temperature Stage | Fahrenheit (°F) | Celsius (°C) | Description |
|---|---|---|---|
| Soft-ball stage | 234 – 240 | 112 – 116 | Fudge sets but remains soft |
| Firm-ball stage | 244 – 250 | 118 – 121 | Harder fudge texture |
| Hard-ball stage | 250 – 266 | 121 – 130 | Used for brittle candy |
Remember, removing the mixture at the right moment prevents grainy or too-soft fudge.
Stir Gently but Consistently
While simmering, stir gently and continuously but avoid vigorous whisking. This prevents sugar crystals from forming, which cause a gritty texture rather than a smooth melt.
Use Room Temperature Ingredients
Ingredients like butter and milk should be at room temperature to ensure even blending. Cold ingredients may cause the chocolate to seize or the sugar to crystallize prematurely.
Prep Your Pan and Tools Ahead
Line the baking pan with parchment paper or foil, allowing some overhang for easy fudge removal. Have your spatula, measuring tools, and cooling rack ready before starting.
Allow Fudge to Cool Properly
Once poured, let the fudge cool undisturbed at room temperature. Avoid refrigeration during the initial setting time as rapid cooling can cause cracking or a dull appearance.
Customize with Add-Ins Wisely
Incorporate optional flavors or textures like nuts or sea salt after removing the fudge from heat but before it sets, so they remain evenly distributed without sinking.
“Patience during the cooling process is our secret to fudge perfection.“
By following these tips we enhance the rich flavor and classic texture that make a fudge recipe with Baker’s chocolate irresistible every time.
Storing and Shelf Life
Proper storing of our fudge made with Baker’s chocolate is crucial to maintain its rich flavor, smooth texture, and overall freshness. Follow these guidelines to ensure your homemade fudge stays delicious for as long as possible.
Room Temperature Storage
- Place the fudge in an airtight container to prevent exposure to air and moisture.
- Keep the container in a cool, dry spot away from direct sunlight.
- Ideal shelf life: up to 2 weeks.
- We recommend placing parchment paper between layers if stacking multiple pieces to avoid sticking.
Refrigeration
- For longer storage or warmer climates, refrigerate the fudge in an airtight container.
- Before sealing, make sure the fudge has cooled completely to avoid condensation.
- Refrigerated fudge lasts: up to 3 weeks without compromising texture.
- Let it sit at room temperature for 15-20 minutes before serving to restore softness.
Freezing for Extended Storage
- Wrap individual fudge squares tightly in plastic wrap to avoid freezer burn.
- Place wrapped pieces in a freezer-safe airtight container or resealable freezer bag.
- Label the container with the date for reference.
- Frozen fudge remains good for: up to 3 months.
| Storage Method | Container Type | Storage Temperature | Shelf Life | Notes |
|---|---|---|---|---|
| Room Temperature | Airtight | 68–72°F (20–22°C) | Up to 2 weeks | Keep away from heat and sunlight |
| Refrigeration | Airtight | 35–40°F (1.5–4°C) | Up to 3 weeks | Cool fully before refrigerating |
| Freezing | Plastic wrap + Airtight | 0°F (-18°C) or below | Up to 3 months | Thaw at room temperature before use |
Tip: “Always use airtight containers to lock in freshness and avoid absorbing odors from other foods.”
By following these storage and shelf life methods, our fudge recipe with Baker’s chocolate will retain its decadent texture and intense flavor, ready to enjoy whenever we desire.
Conclusion
Making fudge with Baker’s chocolate is a rewarding experience that brings rich flavor and creamy texture to every bite. With just a few quality ingredients and the right techniques, we can create a timeless treat perfect for any occasion.
By paying attention to temperature and preparation, our fudge will turn out smooth and indulgent every time. Whether we enjoy it fresh or store it for later, this recipe is sure to become a favorite in our kitchens.
Frequently Asked Questions
What type of chocolate is best for making homemade fudge?
High-quality unsweetened Baker’s chocolate is best for fudge. It provides a rich flavor and smooth texture essential for classic, indulgent fudge.
What are the basic ingredients needed to make fudge?
You need 12 ounces of Baker’s chocolate, 2 cups granulated sugar, 1 cup whole milk, 1/4 cup unsalted butter, 2 teaspoons vanilla extract, and 1/4 teaspoon salt.
Can I add nuts or other mix-ins to the fudge?
Yes, optional add-ins like chopped nuts, mini marshmallows, dried fruits, chocolate chips, or sea salt flakes can enhance flavor and texture.
What equipment is necessary for fudge making?
You need a heavy-bottomed saucepan, candy thermometer, heat-resistant spatula or wooden spoon, mixing bowl, lined baking pan, measuring cups/spoons, knife, and cutting board.
How do I know when the fudge mixture is ready?
The mixture should reach the soft-ball stage, between 234°F and 240°F on a candy thermometer. This ensures the correct consistency.
How should I stir the fudge mixture?
Stir gently and continuously during cooking to prevent sugar crystals from forming and to achieve a smooth texture.
Is it important to prepare the baking pan before starting?
Yes, lining the pan with parchment or foil makes it easier to remove the fudge once set.
How long should I let fudge cool before cutting?
Allow fudge to cool at room temperature until firm, which usually takes a few hours, before cutting into squares.
What is the best way to store homemade fudge?
Store fudge in an airtight container. At room temperature for up to 2 weeks, in the fridge up to 3 weeks, or frozen up to 3 months.
Can I freeze fudge for long-term storage?
Yes, wrap fudge tightly and store in an airtight container or freezer bag to keep it fresh for up to 3 months.