
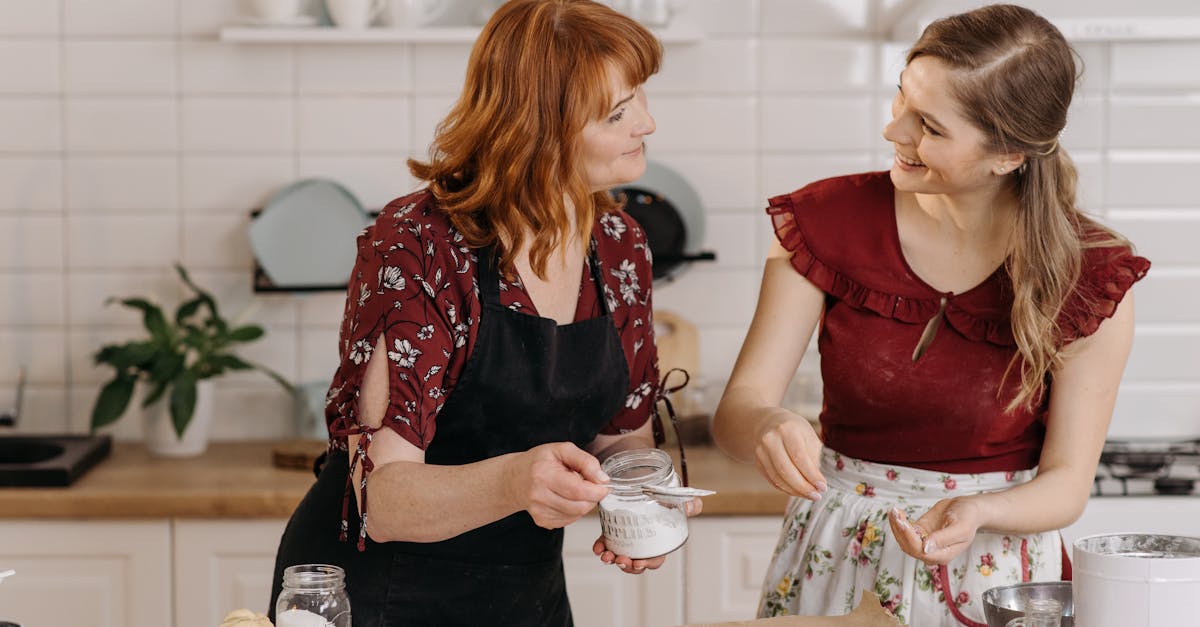
Friendship cookies are more than just a sweet treat—they’re a symbol of connection and shared moments. Originating from a tradition of baking together and exchanging goodies, these cookies bring warmth and joy to any gathering. They’re perfect for celebrating friendships or simply brightening someone’s day.
We love how easy it is to whip up a batch of these delightful cookies. With simple ingredients and a straightforward method, anyone can create these tasty bites that are crisp on the outside and tender inside. Whether you’re baking for a friend, a group, or just yourself, friendship cookies make every moment a little sweeter.
Ingredients
To create the perfect batch of Friendship Cookies, we will need simple, easy-to-find ingredients that come together beautifully. Each component plays a key role in delivering that warm, inviting flavor and texture that makes these cookies a heartfelt gift or a delightful treat for ourselves.
Here is the complete list of ingredients, measured precisely for best results:
| Ingredient | Quantity | Preparation Notes |
|---|---|---|
| All-purpose flour | 2 ½ cups (320 grams) | Sifted for lightness |
| Baking powder | 1 teaspoon | Fresh for proper rising |
| Salt | ½ teaspoon | Enhances overall flavor |
| Unsalted butter | 1 cup (226 grams) | Softened to room temperature |
| Granulated sugar | ¾ cup (150 grams) | For sweetness |
| Brown sugar | ¾ cup (165 grams) | Packed, adds moisture and depth |
| Eggs | 2 large | At room temperature |
| Pure vanilla extract | 2 teaspoons | Adds rich aroma and flavor |
| Chocolate chips | 1 ½ cups (270 grams) | Semi-sweet or milk chocolate |
| Chopped nuts (optional) | 1 cup (120 grams) | Walnuts or pecans, toasted |
Key Tips:
- Using softened butter ensures the dough blends smoothly without overworking.
- Sifting the flour and combining dry ingredients thoroughly improves the cookie’s texture.
- Room temperature eggs and vanilla create an emulsified batter for richer taste.
- Adding chocolate chips or nuts is optional but elevates the flavor and crunch, making these Friendship Cookies truly special.
By preparing these ingredients with attention and care, we set the foundation for a cookie that embodies the warmth and connection that define friendship.
Equipment Needed
To create our Friendship Cookies with ease and precision, having the right equipment is essential. Below is a list of tools that will help us prepare the dough, bake evenly, and achieve the perfect texture every time.
Essential Baking Tools
- Mixing Bowls: Use a large bowl for combining dry ingredients and a separate medium bowl for wet ingredients. Preferably choose stainless steel or glass for easy cleaning.
- Electric Mixer or Hand Mixer: This speeds up creaming butter and sugar, ensuring a light and fluffy dough.
- Measuring Cups and Spoons: Accurate measuring is crucial; invest in both dry and liquid measuring sets.
- Sifter: Helps aerate and remove lumps from flour for a smooth cookie dough.
- Rubber or Silicone Spatula: Ideal for scraping bowl sides thoroughly so no batter is wasted.
- Cookie Scoop or Tablespoon: Ensures uniform cookie sizes for even baking.
- Baking Sheets: Use rimmed cookie sheets to prevent dough from slipping off.
- Parchment Paper or Silicone Baking Mats: Prevents sticking and ensures easy cleanup.
- Cooling Rack: Allows cookies to cool evenly preventing sogginess.
Optional but Helpful
- Stand Mixer: Saves time and effort when mixing large batches.
- Kitchen Scale: For ultimate precision, especially when scaling recipes up or down.
| Equipment | Purpose | Recommended Material |
|---|---|---|
| Mixing Bowls | Mixing ingredients | Stainless steel or glass |
| Electric/Hand Mixer | Creaming butter and sugar | Electric |
| Measuring Cups/Spoons | Measuring ingredients | Plastic or metal |
| Sifter | Aerate flour | Metal |
| Rubber/Silicone Spatula | Scraping bowls | Heat-resistant silicone |
| Cookie Scoop/Tablespoon | Portioning cookie dough | Stainless steel/plastic |
| Baking Sheets | Baking cookies | Aluminum or non-stick |
| Parchment Paper/Mats | Lining sheets, non-stick surface | Paper or silicone |
| Cooling Rack | Cooling baked cookies | Wire rack |
Prep Work
Proper prep work sets the foundation for baking perfect Friendship Cookies. Let’s focus on precise measurements and preparing our baking sheets to ensure a smooth baking process.
Measuring Ingredients
Accurate Measuring Ingredients is crucial for achieving the ideal cookie texture and flavor. Here’s how we handle key components:
| Ingredient | Measurement Technique | Notes |
|---|---|---|
| All-purpose flour | Spoon into measuring cup and level with a straight edge | Avoid scooping directly; prevents dense cookies |
| Baking powder | Use level measuring spoons | Ensure freshness for proper rise |
| Salt | Level measuring spoon | Balances sweetness and enhances flavor |
| Unsalted butter | Measure by weight or use stick markings | Use softened butter for smooth dough |
| Granulated sugar | Scoop and level | Consistent sweetness and texture |
| Brown sugar | Pack firmly into measuring cup | Adds moisture and hints of caramel |
| Eggs | Use whole eggs at room temperature | Aids in binding and texture |
| Pure vanilla extract | Measure with liquid measuring spoon | Enhances aromatic flavor |
| Chocolate chips | Measure loosely | Adds bursts of chocolate in every bite |
| Chopped nuts (optional) | Measure according to preference | Provides crunch and nutty flavor |
We always recommend weighing ingredients when possible to improve consistency in your batches.
Preparing Baking Sheets
To prevent sticking and promote even baking, preparing baking sheets properly is essential:
- Line baking sheets with parchment paper for easy release and minimal cleanup.
- If parchment is unavailable, lightly grease the sheets with unsalted butter or nonstick spray.
- Use a cookie scoop to portion dough evenly and maintain consistent spacing—about 2 inches apart—allowing cookies room to spread.
- Preheat the oven fully before placing the baking sheets inside to ensure even baking from start to finish.
Remember: Well-prepared baking sheets directly impact the appearance and texture of our Friendship Cookies — crispy edges with chewy centers every time.
Making the Dough
Creating the perfect Friendship Cookies dough is essential to achieve that soft, chewy texture we all love. Let’s carefully mix our ingredients step by step to build the foundation of these delightful treats.
Mixing Dry Ingredients
We start by combining the dry ingredients to ensure even distribution and consistent flavor throughout the dough.
- Ingredients to mix:
- All-purpose flour
- Baking powder
- Salt
Step:
- In a medium bowl, sift together the flour, baking powder, and salt.
- Whisk gently to fully combine and aerate the mixture.
“Sifting the dry ingredients not only removes lumps but also lightens the flour for a tender cookie crumb.”
| Dry Ingredient | Amount | Purpose |
|---|---|---|
| All-purpose flour | 2 1/4 cups | Provides structure |
| Baking powder | 1/2 teaspoon | Leavening agent for rise |
| Salt | 1/4 teaspoon | Enhances flavor balance |
Creaming Butter and Sugar
Next, we focus on the key step of creaming butter with sugars to create a light and airy base for our dough.
- Ingredients to cream:
- Unsalted butter, softened
- Granulated sugar
- Brown sugar
Step:
- In a large bowl, beat the softened butter until smooth and creamy using an electric mixer on medium speed.
- Gradually add granulated sugar and brown sugar.
- Continue beating for about 3-4 minutes until the mixture is fluffy and pale in color.
“Creaming butter and sugar properly traps air, giving our cookies that perfect melt-in-your-mouth texture.“
| Ingredient | Amount | Preparation |
|---|---|---|
| Unsalted butter | 1 cup (2 sticks) | Softened to room temp |
| Granulated sugar | 3/4 cup | — |
| Brown sugar | 3/4 cup | Packed slightly |
Combining Ingredients
Now we bring all components together into one harmonious dough, ready for baking and sharing.
- Ingredients to combine:
- Creamed butter and sugar mixture
- Eggs
- Vanilla extract
- Dry ingredient mixture
- Chocolate chips (and optional chopped nuts)
Step:
- Beat in eggs one at a time into the creamed mixture.
- Add pure vanilla extract and mix well.
- Gradually add the dry flour mixture in three additions, mixing on low speed after each addition until just combined.
- Fold in chocolate chips and chopped nuts, if using, by hand with a spatula.
| Ingredient | Amount | Note |
|---|---|---|
| Eggs | 2 large | At room temperature |
| Vanilla extract | 1 teaspoon | Pure for best flavor |
| Chocolate chips | 2 cups | Semi-sweet or milk |
| Chopped nuts (optional) | 1 cup | Walnuts or pecans, toasted |
Shaping the Cookies
Shaping our Friendship Cookies properly is key to achieving the perfect texture and appearance that invite sharing. Let’s walk through how to form the dough and add meaningful touches that make these cookies truly special.
Forming the Cookie Balls
We begin by portioning the dough into evenly sized balls to ensure consistent baking. Using a cookie scoop or measuring spoon, we scoop out about 1 ½ tablespoons (22 grams) of dough per cookie. This size strikes the right balance between a chewy center and a slightly crisp edge.
Next, we gently roll each portion between our palms to create smooth, round balls. Avoid overworking the dough here to keep the texture tender and soft after baking. Placing the cookie balls about 2 inches apart on a parchment-lined baking sheet gives them room to spread without merging.
| Step | Measurement / Distance | Notes |
|---|---|---|
| Dough per cookie | 1 ½ tablespoons (22 grams) | Use a cookie scoop for consistency |
| Spacing on baking sheet | 2 inches apart | Prevents cookies from joining |
Forming uniform balls ensures that each Friendship Cookie bakes evenly, producing that iconic golden-brown edge with a soft, inviting center.
Adding Friendship Tokens or Decorations
To make these cookies a heartfelt gift or a memorable treat, we can add friendship tokens or decorative touches before baking.
Some popular options include:
- Pressing a few extra chocolate chips or chopped nuts on top for visual appeal
- Sprinkling coarse sugar or colored sugar crystals for sparkle and crunch
- Lightly pressing edible heart-shaped candies or letter sprinkles that symbolize friendship
When adding decorations, press them gently but firmly enough so they adhere during baking without sinking completely. This detail elevates the cookies from simple treats to meaningful symbols of connection.
“A cookie with a token is like a tiny message of love baked right in,” reminding us why these treats bring so much joy.
Incorporating these personalized decorations not only enhances the friendship theme but also turns every bite into a shared experience—making each cookie a little celebration of togetherness.
Baking Instructions
Baking our Friendship Cookies requires careful attention to oven settings and timing to achieve that perfect golden edge and soft center. Let’s guide you through each step for flawless results.
Preheating the Oven
We always preheat our oven to 350°F (175°C) before starting to bake. This ensures an even temperature from the moment the cookies go in. A well-preheated oven helps the cookies to spread evenly and develop a tender crumb with slightly crisp edges, making each bite a memorable experience.
Pro Tip: Use an oven thermometer to verify accuracy, especially if your oven tends to run hot or cold. This precision safeguards the texture and flavor we want in every batch of friendship cookies.
Baking Time and Temperature
Our cookies bake best at a consistent 350°F (175°C) temperature for optimal browning without over-drying. Bake times may vary slightly depending on your oven and cookie size, but the general guideline is between 10 to 12 minutes.
| Baking Temperature | Baking Time | Notes |
|---|---|---|
| 350°F (175°C) | 10-12 minutes | Adjust time for softer (less) or crispier (more) cookies |
Start checking the cookies at the 10-minute mark to avoid over-baking. The goal is a golden edge with a soft center that continues to cook slightly on the baking sheet after removal.
Checking for Doneness
To determine when our Friendship Cookies are perfectly baked, look for golden-brown edges and a set surface. The center should appear slightly soft and not dry or cracked.
Remember the cookies will firm up as they cool on the pan.
Here’s a quick checklist:
- Edges have a light golden hue
- Center is still slightly glossy or soft
- Cookies release easily from parchment or baking sheet
“The perfect cookie is a combination of texture and color — a beautiful golden rim surrounding a tender heart,” as we always say when baking together.
By following these baking instructions, we ensure every batch carries the warmth and joy that symbolize our Friendship Cookies.
Cooling and Storing
Proper Cooling and Storing are essential steps to preserve the freshness, texture, and flavor of our Friendship Cookies after baking. Let’s explore how to handle these cookies once they come out of the oven to ensure every bite remains delightful.
Cooling on Racks
After removing the cookies from the oven, we transfer them carefully onto cooling racks. This step allows air to circulate around the cookies, preventing sogginess and helping them set perfectly.
- Use a wire cooling rack with enough space to fit all cookies without overcrowding.
- Transfer cookies off the hot baking sheet after about 2 minutes; letting them rest on sheets can cause overcooking.
- Let cookies cool completely for at least 15-20 minutes; this helps retain the ideal chewy yet tender texture.
Tip: Avoid stacking warm cookies as this traps steam and makes them soft or greasy.
Storing Tips to Maintain Freshness
To keep our Friendship Cookies fresh and delicious for days, storing them correctly is critical. Here’s a handy guide:
| Storage Method | Best For | Duration | Tips |
|---|---|---|---|
| Airtight Container | Room temperature storage | Up to 5 days | Layer with parchment paper to prevent sticking |
| Freezer (sealed bag) | Long-term storage | Up to 3 months | Thaw at room temp; refresh in oven if desired |
| Cookie Tin | Short-term storage | 2-3 days | Place a slice of bread inside to absorb moisture |
- Always let cookies cool completely before storing to avoid condensation.
- Keep cookies away from strong-smelling foods to prevent flavor absorption.
- For an extra freshness boost, adding a fresh slice of bread in the container creates a moisture balance that keeps cookies soft longer.
“Proper cooling and storing make the effort we put into baking every batch of Friendship Cookies truly worthwhile, preserving their warmth and joy to share anytime.”
By following these steps, our Friendship Cookies will stay perfectly soft, flavorful, and ready to brighten anyone’s day.
Serving Suggestions
Our Friendship Cookies shine brightest when paired with thoughtful serving ideas that enhance their warmth and connection. Here’s how we can elevate the experience of sharing these sweet treats:
1. Pair with Beverages
Offering complementary drinks enhances the cookie’s flavor and creates a cozy atmosphere. Consider these perfect companions:
| Beverage | Serving Tips |
|---|---|
| Hot Coffee | Freshly brewed, medium roast with a splash of cream |
| Herbal Tea | Chamomile or mint for a soothing contrast |
| Cold Milk | Classic choice to balance sweetness |
| Hot Chocolate | Rich and creamy for indulgent moments |
“A warm cup and a sweet cookie are a timeless friendship formula.”
2. Create a Friendship Cookie Platter
Arrange cookies on a decorative plate or tiered tray for gatherings. Include:
- Assorted toppings like heart-shaped candies or colored sugar sprinkles
- Small notes or friendship quotes tucked beside each cookie
- Fresh fruit slices or nuts as a textured accompaniment
This visual appeal invites guests to connect as they enjoy the feast.
3. Package as Thoughtful Gifts
Wrap cookies in clear cellophane bags tied with colorful ribbons or place them in decorated boxes. Add personal touches:
- Handwritten tags with friendship quotes or baking dates
- Mini jars of jam or honey as sweet add-ons
Sharing these gifts directly supports the tradition of baking and exchanging treats that define Friendship Cookies.
4. Serve Warm or Room Temperature
We recommend serving the cookies either slightly warm—fresh from the oven or briefly reheated—or at room temperature to enjoy the perfect balance of crisp edges and tender centers.
“Let’s share these cookies while the aroma still lingers in the air—it’s a gift of warmth and connection.”
5. Complement with Ice Cream or Spreads
For an indulgent twist, serve cookies alongside:
- Vanilla or caramel ice cream
- Fruit preserves such as raspberry or apricot
- Nut butters like almond or peanut butter
This turns simple Friendship Cookies into a delightful dessert experience.
By following these serving suggestions, we not only delight our tastebuds but deepen the meaning behind every bite of our Friendship Cookies, making every moment together sweeter.
Make-Ahead Tips
Preparing Friendship Cookies in advance can save us time and ensure the flavors meld beautifully. Here are key make-ahead strategies to keep their taste and texture perfect for sharing:
Dough Preparation and Storage
- After mixing the dough, portion it into balls using a cookie scoop for even size.
- Place the balls on a parchment-lined baking sheet with ample space between them.
- Freeze the dough balls for at least 1 hour until firm.
- Transfer the frozen balls into an airtight container or freezer-safe bag.
- Label with the date and store in the freezer for up to 3 months.
| Step | Description | Storage Duration |
|---|---|---|
| Freeze dough balls | Place on sheet then freeze firm | At least 1 hour |
| Transfer & store | Use airtight container or bag | Up to 3 months |
“Freezing dough already portioned saves us the hassle of scooping when we want fresh cookies quickly.”
Baking from Frozen
- Preheat oven to 350°F (175°C).
- Place frozen cookie dough balls on a parchment-lined baking sheet.
- Slightly increase baking time by 2 to 3 minutes to compensate for frozen dough.
- Look for golden edges and a soft center as a sign of doneness.
Make-Ahead Baking and Storage
- Fully baked cookies cool completely on wire racks.
- Store in an airtight container layered with parchment paper to prevent sticking.
- Keep at room temperature for up to 5 days.
- For longer storage, freeze baked cookies in airtight containers for up to 2 months.
| Storage Method | Container Type | Duration | Notes |
|---|---|---|---|
| Room Temperature | Airtight container | Up to 5 days | Layer with parchment paper |
| Freezing | Airtight container | Up to 2 months | Thaw at room temperature |
Additional Make-Ahead Tips
- Use chilled ingredients when making dough to maintain structure during freezing.
- Avoid adding delicate topping decorations before freezing; add them fresh before or after baking.
- Consider prepping friendship tokens or packaging in advance, so presentation is swift on the day of gifting or sharing.
By following these make-ahead tips, our Friendship Cookies will be ready effortlessly whenever we want to spread the joy of baking and friendship.
Conclusion
Friendship Cookies are more than just a sweet treat—they’re a way to celebrate connection and create lasting memories. With simple ingredients and straightforward steps, anyone can bake these cookies and share a little warmth with friends and family.
By taking the time to prepare, bake, and present these cookies thoughtfully, we turn an ordinary moment into something special. Whether enjoyed fresh or gifted with care, Friendship Cookies remind us that the best recipes are those made with love and shared together.
Frequently Asked Questions
What are Friendship Cookies?
Friendship Cookies are homemade treats symbolizing connection and shared experiences. They are easy-to-make cookies baked and exchanged to celebrate friendship and bring joy to gatherings.
What ingredients do I need for Friendship Cookies?
Key ingredients include all-purpose flour, baking powder, salt, unsalted butter, granulated sugar, brown sugar, eggs, vanilla extract, chocolate chips, and optional chopped nuts.
Do I need special equipment to bake these cookies?
Basic equipment like mixing bowls, electric mixers, measuring cups, spatulas, cookie scoops, baking sheets, parchment paper, and cooling racks are essential. Optional tools are stand mixers and kitchen scales.
How do I prepare for baking Friendship Cookies?
Measure ingredients precisely, sift dry ingredients, soften butter, line baking sheets with parchment, use a cookie scoop for even portions, and preheat the oven to 350°F (175°C).
What is the best method for making the dough?
Start by mixing and sifting dry ingredients, cream softened butter with sugars until fluffy, then blend in eggs and vanilla. Combine wet and dry mixtures, fold in chocolate chips and nuts if desired.
How should I shape the cookies before baking?
Use a cookie scoop to form evenly sized balls and place them spaced apart on baking sheets. Add decorative touches like extra chocolate chips or heart candies for a friendship theme.
What is the recommended baking time and temperature?
Bake at 350°F (175°C) for 10 to 12 minutes or until edges are golden-brown and centers are slightly soft. Using an oven thermometer ensures accuracy.
How should I cool and store the cookies?
Cool cookies on wire racks for 15–20 minutes to avoid sogginess. Store in airtight containers up to 5 days, freeze for longer storage, or use cookie tins for short-term keeping.
What are some serving suggestions for Friendship Cookies?
Pair cookies with coffee, tea, milk, or hot chocolate. Serve on decorative platters with quotes, package as thoughtful gifts, or enjoy with ice cream and spreads for an extra treat.
Can I make Friendship Cookies ahead of time?
Yes, freeze portioned cookie dough balls for up to three months and bake from frozen. Store baked cookies airtight with parchment layers to maintain freshness.