
Fried deer backstrap is a delicious way to enjoy one of the most tender and flavorful cuts of venison. This recipe highlights the natural richness of the meat while adding a crispy, golden crust that makes every bite irresistible. Whether you’re an experienced hunter or simply love game meat, this dish brings a rustic yet refined touch to your dinner table.
We love how quick and simple this recipe is, making it perfect for a weeknight meal or a special occasion. With just a few ingredients and easy steps, you can create a mouthwatering meal that showcases the unique taste of deer backstrap. Let’s dive into a recipe that’s sure to become a favorite in your kitchen.
Ingredients
To prepare our fried deer backstrap, we will need fresh ingredients that highlight the tender, flavorful qualities of this prized cut. The components are divided into the meat, marinade, and an optional dipping sauce for added zest.
For the Fried Deer Backstrap
- 1 to 1.5 pounds fresh deer backstrap, trimmed of silver skin and cut into 1-inch medallions
- 2 tablespoons olive oil or another high smoke point oil for frying
- Salt and freshly ground black pepper, to taste
For the Marinade or Seasoning
- 2 cloves garlic, finely minced
- 1 tablespoon Worcestershire sauce
- 1 teaspoon smoked paprika
- 1 teaspoon dried thyme
- 1 tablespoon lemon juice, freshly squeezed
- 1/2 teaspoon cayenne pepper (optional for heat)
| Ingredient | Quantity | Notes |
|---|---|---|
| Garlic | 2 cloves | Finely minced |
| Worcestershire sauce | 1 tablespoon | Adds depth of flavor |
| Smoked paprika | 1 teaspoon | Enhances smoky aroma |
| Dried thyme | 1 teaspoon | Provides earthy herbal notes |
| Lemon juice | 1 tablespoon | Brightens and tenderizes meat |
| Cayenne pepper | 1/2 teaspoon | Optional: adds spicy kick |
For the Dipping Sauce (Optional)
- 1/4 cup sour cream
- 1 tablespoon Dijon mustard
- 1 teaspoon honey
- 1 tablespoon chopped fresh chives
- Salt and pepper, to taste
This sauce complements the crispy crust and rich venison flavor with a creamy, tangy contrast. We recommend mixing all ingredients until smooth for easy dipping.
Equipment and Tools Needed
To achieve the perfect fried deer backstrap, having the right equipment and tools is essential. We recommend using the following items to ensure a crispy golden crust and tender interior every time.
- Cast Iron Skillet: A sturdy cast iron skillet provides even heat distribution and excellent heat retention, key factors for frying the backstrap perfectly.
- Tongs: Use tongs for flipping the meat gently to maintain its integrity and avoid piercing the tender backstrap.
- Sharp Chef’s Knife: Essential for trimming silver skin or any excess fat from the backstrap before seasoning.
- Cutting Board: A large, stable cutting board provides a clean surface for cleaning and prepping the venison.
- Mixing Bowl: Use this to combine the oil and seasonings or to marinate the meat.
- Paper Towels: For patting the backstrap dry before seasoning and frying to achieve that crispy texture.
- Instant-Read Thermometer: To monitor the internal temperature accurately, preventing overcooking. Venison is best cooked medium-rare, around 130°F to 135°F.
- Small Whisk or Fork: For mixing the optional dipping sauce ingredients evenly.
| Equipment | Purpose |
|---|---|
| Cast Iron Skillet | Even heat for frying and browning |
| Tongs | Gentle flipping without piercing |
| Sharp Chef’s Knife | Trimming and prepping backstrap |
| Cutting Board | Stable surface for meat preparation |
| Mixing Bowl | Marinade and seasoning mix |
| Paper Towels | Drying meat for crisp crust |
| Instant-Read Thermometer | Check internal doneness temperature |
| Small Whisk or Fork | Mixing sauces and dressings |
We emphasize the use of a cast iron skillet and instant-read thermometer as critical tools—without these, achieving the perfect texture and doneness would be much harder. With these tools on hand, we can confidently proceed to prepare our delicious, crispy fried deer backstrap.
Prep Work
Proper Prep Work lays the foundation for achieving the perfect fried deer backstrap. We focus on cleaning, trimming, and optionally marinating the backstrap to enhance its natural flavors and ensure a tender, juicy bite.
Cleaning and Trimming the Backstrap
First, we rinse the deer backstrap under cold running water to remove any surface impurities. Then, we pat it dry thoroughly with paper towels. This step is crucial to prevent excess moisture from interfering with the frying process, helping us get that crispy, golden crust.
Next, we carefully trim away the silver skin and any visible connective tissue using a sharp chef’s knife. Removing silver skin is essential because it doesn’t break down during cooking and can make the meat tough. We also trim off any excess fat to avoid flare-ups when frying and to keep the flavors clean.
| Task | Details | Importance |
|---|---|---|
| Rinse | Cold running water | Remove dirt and debris |
| Dry | Pat dry with paper towels | Prevents moisture for crust |
| Trim silver skin | Use sharp knife carefully | Ensures tenderness |
| Remove excess fat | Trim visible fat | Avoids grease flare-ups |
Marinating the Meat (If Applicable)
Marinating can be optional but highly recommended to infuse the fried deer backstrap with complementary flavors while tenderizing the meat. We combine ingredients such as garlic, Worcestershire sauce, smoked paprika, dried thyme, lemon juice, and a dash of cayenne pepper for subtle heat.
We place the trimmed backstrap in a large mixing bowl and pour the marinade over it. Using our hands or a spoon, we coat the meat evenly. Then, we cover the bowl with plastic wrap and let it marinate in the refrigerator for at least 30 minutes, up to 2 hours for deeper flavor penetration.
Tip: Avoid marinating longer than 4 hours to prevent the lemon juice from breaking down the meat fibers too much, resulting in a mushy texture.
| Marinade Ingredient | Measurement | Purpose |
|---|---|---|
| Garlic | 2 cloves, minced | Aromatic depth |
| Worcestershire sauce | 2 tbsp | Umami complexity |
| Smoked paprika | 1 tsp | Earthy smoky flavor |
| Dried thyme | 1 tsp | Herbal notes |
| Lemon juice | 1 tbsp | Tenderizing acidity |
| Cayenne pepper | 1/4 tsp (optional) | Adds mild heat |
Once marinating is complete, we remove the backstrap from the fridge and let it reach room temperature for about 10 minutes before frying. This step helps ensure even cooking and a perfectly seared crust.
Instructions
Follow these clear and precise steps to achieve perfectly fried deer backstrap with a crispy crust and juicy interior.
Preparing the Backstrap for Frying
- Remove the backstrap from the marinade and place it on a clean cutting board.
- Using paper towels, gently pat the backstrap completely dry. This step is crucial to ensure a crispy sear.
- Let the meat rest at room temperature for about 10 minutes before cooking. This promotes even cooking.
- Optionally, lightly season again with salt and pepper just before frying to enhance flavor.
Heating the Oil and Frying Process
- Heat 2 to 3 tablespoons of olive oil in a cast iron skillet over medium-high heat.
- Allow the oil to heat until it shimmers but does not smoke. This typically takes about 3 to 4 minutes.
- Carefully place the dried backstrap in the hot oil using tongs to avoid splashing.
- Fry the backstrap for about 3 to 4 minutes on the first side without moving it. This forms the golden crust.
- Flip the backstrap gently using tongs and fry for an additional 3 minutes on the other side.
- If desired, baste the meat with the hot oil from the pan during the last minute of cooking for extra flavor and moisture.
Checking for Doneness
Use an instant-read thermometer to check the internal temperature of the backstrap:
| Doneness Level | Internal Temperature (°F) | Texture Description |
|---|---|---|
| Rare | 120-125 | Very tender, red center |
| Medium Rare | 130-135 | Juicy, pinkish center |
| Medium | 140-145 | Firm, slight pink throughout |
- Insert the thermometer into the thickest part of the backstrap.
- Remove the meat from heat when it reaches your preferred internal temperature.
- Let the backstrap rest for 5 minutes tented loosely with foil. This allows juices to redistribute for a tender bite.
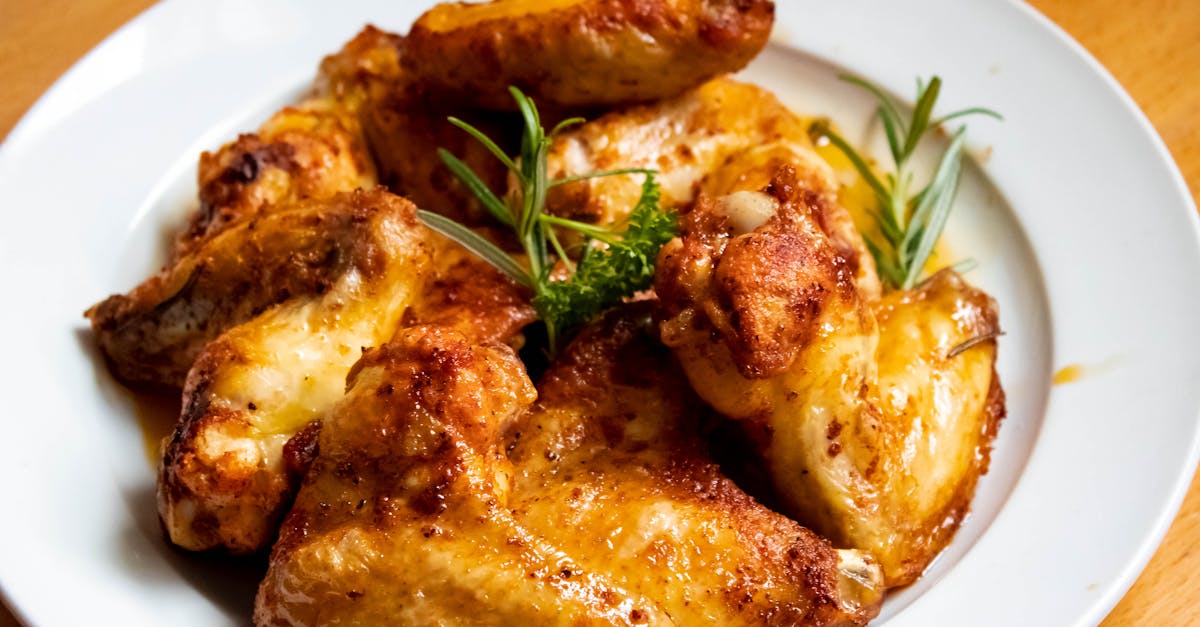
Directions for Serving
To fully appreciate the rich flavors and perfect texture of our Fried Deer Backstrap, proper serving is essential. Let’s ensure each bite is as tender and juicy as intended with these key steps and pairing suggestions.
Resting the Meat
After removing the fried deer backstrap from the skillet, we must allow it to rest for 5 minutes. This resting period is crucial because:
- It lets the juices redistribute throughout the meat.
- It results in a tender and juicy bite rather than dry or tough.
- It maintains the internal temperature for optimum flavor.
We suggest loosely tenting the backstrap with aluminum foil while it rests. This prevents heat loss without trapping steam, which could soften the crispy crust we achieved during frying.
Suggested Side Dishes and Garnishes
Pairing our succulent fried deer backstrap with complementary sides and garnishes enhances the overall dining experience. Here are our favorite accompaniments:
| Side Dish | Description | Why It Works |
|---|---|---|
| Roasted Garlic Mashed Potatoes | Creamy and flavorful mashed potatoes with roasted garlic | Balances the gamey richness with creaminess |
| Sautéed Green Beans with Almonds | Crisp green beans tossed with toasted almonds | Adds a fresh, crunchy texture contrast |
| Wild Rice Pilaf | Earthy wild rice cooked with herbs and mushrooms | Complements the smoky paprika notes |
| Fresh Arugula Salad | Peppery arugula with lemon vinaigrette and shaved Parmesan | Provides a bright, tangy counterpoint |
For garnishes, sprinkle freshly chopped chives or parsley over the sliced backstrap. A wedge of lemon on the side allows diners to add a splash of acidity that brightens the flavors.
We also recommend serving the optional creamy dipping sauce made from sour cream, Dijon mustard, honey, and fresh chives alongside the meat. This adds a rich, tangy dimension that pairs beautifully with the crispy crust and tender interior of the backstrap.
By resting our fried deer backstrap properly and pairing it with thoughtful sides and garnishes, we create a memorable meal that showcases this prime cut at its best.
Make-Ahead Tips and Storage
To enjoy our fried deer backstrap with maximum flavor and texture, planning ahead and proper storage are essential. Here’s how we handle make-ahead preparations and keep leftovers fresh:
Make-Ahead Tips
- Marinate in Advance: We can marinate the backstrap up to 2 hours before cooking to allow the spices and herbs to deeply penetrate the meat. Avoid marinating longer than 4 hours to prevent a mushy texture.
- Prep the Meat: Trim and clean the backstrap a day ahead, then store it wrapped tightly in plastic wrap or sealed in an airtight container in the refrigerator. This step saves time on cooking day.
- Mix the Dipping Sauce: Prepare the creamy dipping sauce (sour cream, Dijon mustard, honey, fresh chives) up to 24 hours before serving. Keep it refrigerated in a sealed container to enhance flavor melding.
Storage Guidelines for Leftovers
After enjoying our crispy, golden-fried deer backstrap, storing any leftovers properly ensures the best taste and texture for later. Follow these guidelines for safe storage and reheating:
| Storage Step | Instructions |
|---|---|
| Cool Down | Let cooked backstrap cool to room temperature before storing. |
| Packaging | Wrap tightly in aluminum foil or place in airtight containers. |
| Refrigeration | Store in the refrigerator for up to 3 days. |
| Freezing | For longer storage, freeze wrapped backstrap up to 3 months. |
| Labeling | Label packages with date for easy rotation. |
Reheating Tips
- Use a cast iron skillet or oven to reheat fried backstrap. Avoid microwaving to maintain the crispy crust.
- Preheat the oven or skillet to 325°F (163°C).
- Reheat slices for about 5-7 minutes until warmed through, flipping once for even heating.
- Let the meat rest for 2-3 minutes before serving again to restore juiciness.
Conclusion
Fried deer backstrap offers a delicious way to enjoy one of the most tender cuts of venison with minimal effort. With the right preparation and tools, it’s easy to achieve a crispy exterior and juicy interior that’s sure to impress.
Whether you’re cooking for a weeknight meal or a special gathering, this recipe fits seamlessly into any occasion. We encourage you to try it out and make it a staple in your kitchen rotation.
Frequently Asked Questions
What cut of venison is best for frying in this recipe?
The deer backstrap is the best cut for frying due to its tenderness and flavor, making it ideal for a crispy, juicy dish.
What ingredients do I need for fried deer backstrap?
You’ll need trimmed deer backstrap, olive oil, garlic, Worcestershire sauce, smoked paprika, dried thyme, lemon juice, and optionally cayenne pepper. A dipping sauce with sour cream, Dijon mustard, honey, and chives is optional.
What cooking equipment is recommended for this recipe?
A cast iron skillet for even heat, tongs for flipping, a sharp knife, cutting board, mixing bowl, paper towels, instant-read thermometer, and a small whisk or fork for sauces.
How do I prepare the backstrap before frying?
Clean and trim the meat by removing silver skin and fat, then marinate for 30 minutes to 2 hours with seasoning to boost flavor and tenderness.
How long should I fry the deer backstrap?
Fry for 3 to 4 minutes on each side in hot olive oil, then rest for 5 minutes to allow the juices to redistribute.
How do I know when the deer backstrap is cooked perfectly?
Use an instant-read thermometer: 125°F for rare, 130-135°F for medium rare, and 140°F for medium doneness.
Can I make the dipping sauce ahead of time?
Yes, the creamy dipping sauce can be prepared up to 24 hours in advance and stored in the refrigerator.
How should I store leftovers?
Cool the cooked backstrap to room temperature, wrap tightly, refrigerate for up to 3 days, or freeze for up to 3 months.
What’s the best way to reheat fried deer backstrap?
Avoid microwaving; reheat in a cast iron skillet or oven at 325°F (163°C) to preserve the crispy crust.
What sides pair well with fried deer backstrap?
Great options include roasted garlic mashed potatoes, sautéed green beans with almonds, wild rice pilaf, and fresh arugula salad.