
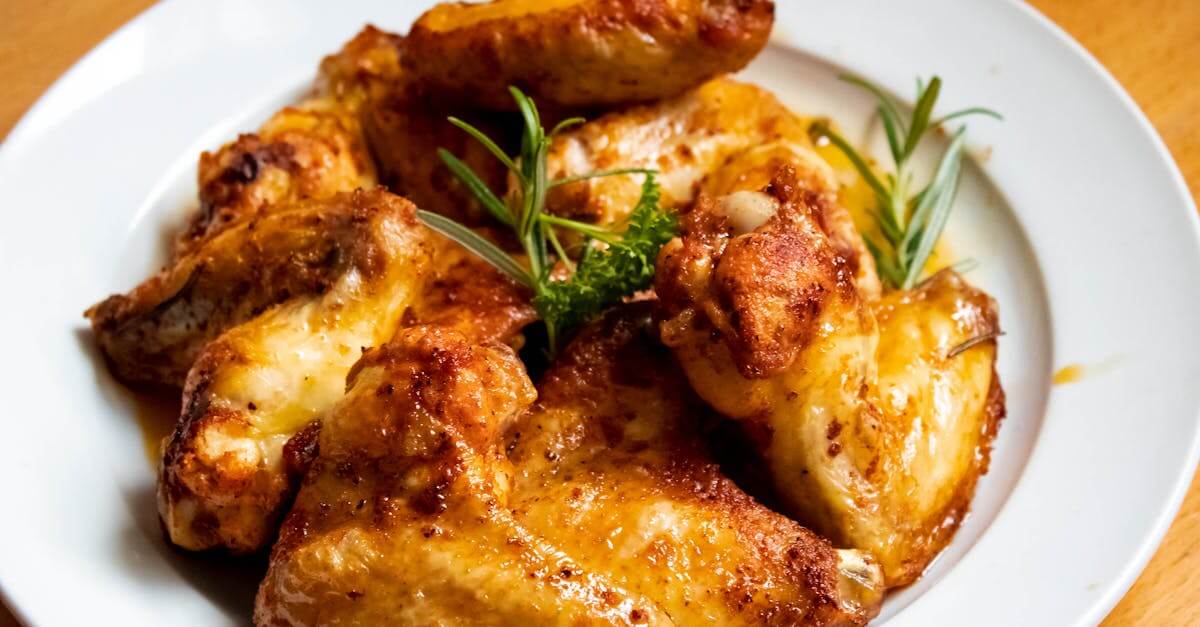
Fried chicken on the stick takes classic comfort food to a fun and convenient new level. This recipe transforms juicy, crispy fried chicken into a handheld treat perfect for parties, picnics, or a quick snack on the go. We love how the skewer makes it easy to enjoy without the mess.
Originating from street food culture, fried chicken on a stick combines bold flavors with a satisfying crunch. It’s a simple twist that delivers all the flavor of traditional fried chicken but with a playful presentation. Whether you’re serving it up for family or friends, this recipe is sure to be a crowd-pleaser.
Ingredients
To create our delicious Fried Chicken On The Stick, we need fresh ingredients that bring out bold flavors and a delightful crunch. Below, we detail the essentials for every component of this recipe.
For the Chicken
- 2 lbs boneless, skinless chicken thighs or breasts, cut into 1.5-inch cubes
- Wooden skewers, soaked in water for 30 minutes to prevent burning
For the Marinade
- 1 cup buttermilk (for tenderizing and subtle tang)
- 1 tablespoon hot sauce (adds a zesty kick)
- 1 teaspoon paprika (smoky warmth)
- 1 teaspoon garlic powder
- 1 teaspoon onion powder
- ½ teaspoon salt
- ½ teaspoon black pepper
For the Breading
| Ingredient | Amount | Purpose |
|---|---|---|
| All-purpose flour | 1 ½ cups | Base for crispy coating |
| Cornstarch | ½ cup | Extra crunch and lightness |
| Baking powder | 1 teaspoon | Helps crispness and puffiness |
| Paprika | 1 teaspoon | Flavor and color |
| Garlic powder | 1 teaspoon | Aromatic seasoning |
| Onion powder | 1 teaspoon | Depth of flavor |
| Salt | 1 teaspoon | Enhances all other flavors |
| Black pepper | ½ teaspoon | Mild heat |
For Frying
- Vegetable oil or peanut oil, enough for deep frying to a depth of about 3 inches
- Oil temperature: 350°F (175°C) for optimal crunch and juiciness
We use these ingredients to bring out the perfect balance of crispy crust and juicy tender chicken for this Fried Chicken On The Stick.
Equipment Needed
To prepare the Fried Chicken On The Stick perfectly, having the right equipment is essential. Here is a list of all the tools we will use to ensure our cooking process is smooth and efficient:
- Deep Fryer or Large Heavy-Bottomed Pot
We need a sturdy pot or a dedicated deep fryer to maintain a consistent oil temperature of 350°F (175°C) for even and safe frying.
- Cooking Thermometer
A reliable thermometer is crucial to monitor the oil temperature accurately. This guarantees that our chicken cooks through without absorbing excess oil.
- Wooden Skewers
Use long wooden skewers, soaked in water for at least 30 minutes prior to use. This prevents burning during frying and provides the classic stick presentation.
- Mixing Bowls
Two to three large bowls: one for the buttermilk marinade, another for the dry breading mixture, and a third empty one to place the coated chicken pieces on before frying.
- Wire Rack with Baking Sheet
To allow the fried chicken to drain excess oil and stay crispy, we place them on a wire rack set over a baking sheet once removed from the hot oil.
- Tongs or Slotted Spoon
Use these utensils to safely handle and turn the chicken in hot oil and lift it out without breaking the coating.
- Measuring Cups and Spoons
Precise measurements of flour, spices, and liquids are key to the perfect balance of flavor and texture.
| Equipment | Purpose |
|---|---|
| Deep Fryer / Heavy Pot | Frying chicken at controlled oil temperature |
| Cooking Thermometer | Monitoring oil heat for safety and crispness |
| Wooden Skewers (soaked) | Holding chicken pieces during frying |
| Mixing Bowls | Marinating and breading preparation |
| Wire Rack + Baking Sheet | Draining oil, maintaining crispiness |
| Tongs or Slotted Spoon | Handling and removing chicken from oil |
| Measuring Cups & Spoons | Accurate ingredient preparation |
By assembling this essential equipment beforehand, we set ourselves up for success in crafting crispy, juicy fried chicken on a stick every time.
Preparation
To craft the perfect Fried Chicken On The Stick, meticulous preparation is essential. Let’s break down the steps to ensure every bite bursts with flavor and crispness.
Preparing the Chicken
- Start with 2 lbs of boneless, skinless chicken breasts or thighs.
- Cut the chicken into uniform 1 to 1.5-inch cubes for even cooking.
- Pat the pieces dry with paper towels to remove excess moisture; this helps the coating adhere better.
Making the Marinade
Our marinade combines classic bold flavors and tenderizing ingredients to create juicy, flavorful chicken.
| Ingredient | Measurement | Purpose |
|---|---|---|
| Buttermilk | 1 cup | Tenderizes chicken |
| Hot sauce | 2 tablespoons | Adds heat and depth |
| Paprika | 1 teaspoon | Smoky flavor |
| Garlic powder | 1 teaspoon | Savory aroma |
| Onion powder | 1 teaspoon | Sweet and pungent notes |
| Salt | 1 teaspoon | Enhances all flavors |
| Black pepper | ½ teaspoon | Adds mild heat and spice |
- In a mixing bowl, whisk all ingredients together until well combined.
Marinating the Chicken
- Submerge the chicken cubes fully in the buttermilk marinade.
- Cover and refrigerate for at least 2 hours, preferably overnight.
- “The longer we marinate, the more tender and flavorful the chicken becomes.”
- Before breading, use tongs to lift the chicken pieces and let excess marinade drip off gently.
This thorough preparation ensures our Fried Chicken On The Stick boasts a juicy interior and a perfectly seasoned crust every time.
Breading the Chicken
Breading is the crucial step that transforms our fried chicken on the stick into a crispy, flavorful delight. Let’s set up our station properly and coat each piece for that perfect crunch and taste.
Setting Up the Breading Station
We create an efficient breading station to streamline the process and ensure every chicken cube gets an even, crunchy coat. Here’s what we prepare:
- A shallow bowl with the flour mixture (all-purpose flour, cornstarch, baking powder, paprika, garlic powder, onion powder, salt, and black pepper)
- A separate bowl with beaten eggs or buttermilk (if you prefer extra moisture in the coating)
- A clean plate or tray to place the breaded pieces before frying
Arranging our station like this promotes a smooth workflow, prevents clumping, and guarantees consistent coating across all pieces.
| Component | Purpose |
|---|---|
| Flour mixture | Provides the crispy, seasoned crust |
| Beaten eggs / buttermilk | Helps the breading stick firmly |
| Plate or tray | Holds coated chicken before frying |
Coating the Chicken
We begin by taking the marinated chicken cubes from the fridge. Patting them lightly with paper towels helps remove excess marinade to avoid sogginess in the final crust.
Step-by-step coating:
- Dredge each piece thoroughly in the flour mixture. Press lightly to ensure the coating sticks well.
- Dip into the beaten eggs or buttermilk, allowing the excess to drip off.
- Return the chicken to the flour mixture for a final dusting. This double coating creates a thick, crunchy shell.
- Place the breaded chicken cubes on the tray without crowding to prevent smudging.
“The key to perfect fried chicken on the stick lies in this double-dredging technique, which locks in moisture while delivering that irresistible crunch.”
With our chicken evenly coated and ready, we’re set for the next stage—deep frying to golden perfection.
Frying the Chicken On The Stick
Now that our chicken is perfectly breaded and ready, we move on to the crucial step: Frying the Chicken On The Stick to achieve that irresistible golden crunch and juicy interior.
Heating the Oil
To get that perfect crispy crust, it’s essential to heat the oil to the right temperature. We recommend using vegetable oil or peanut oil for their high smoke points and neutral flavors.
- Pour enough oil into a deep fryer or heavy-bottomed pot to submerge the skewers fully (about 3 inches deep).
- Heat the oil over medium-high heat until it reaches between 350°F and 375°F (175°C–190°C).
- Use a cooking thermometer to monitor the temperature precisely. Maintaining this temperature range ensures the chicken cooks evenly without absorbing excess oil.
| Oil Type | Ideal Frying Temperature | Smoke Point Approximate |
|---|---|---|
| Vegetable Oil | 350°F – 375°F | 400°F |
| Peanut Oil | 350°F – 375°F | 450°F |
Frying Process
With our oil at the perfect temperature, it’s time to fry:
- Carefully lift each skewer, allowing excess flour to fall off to prevent oil splatter.
- Gently lower the chicken skewers into the hot oil using tongs.
- Fry in batches without overcrowding the pot, maintaining consistent oil temperature and crispiness.
- Cook for 4 to 6 minutes, turning occasionally to ensure even browning on all sides.
- Aim for a rich golden brown color with a crunchy texture, signaling the chicken is cooked through and the coating is perfectly crisp.
Checking for Doneness
To ensure safe and juicy chicken:
- Use an instant-read thermometer to check the internal temperature of the largest piece on each skewer.
- The chicken is done when it reaches a minimum internal temperature of 165°F (74°C).
- Alternatively, pierce a piece with a fork to check that the juices run clear without any pink.
- Remove the chicken skewers with tongs and drain on a wire rack set over a baking sheet to keep the crust crispy.
By carefully controlling the oil temperature and cooking time, we lock in the flavor and juiciness while achieving the signature crunch of our fried chicken on the stick.
Serving Suggestions
To elevate our Fried Chicken On The Stick experience, pairing it with complementary sides and sauces enhances every bite. Here are our top serving ideas to impress family or guests:
Classic Dipping Sauces
Offering a variety of dipping sauces allows everyone to customize flavors. Consider these options:
| Sauce | Description | Best Paired With |
|---|---|---|
| Spicy Honey Mustard | Sweet with a tangy kick | Balances crispy crunchy coating |
| Garlic Aioli | Creamy with a hint of roasted garlic | Adds richness and smooth texture |
| BBQ Sauce | Smoky and slightly sweet | Compliments the bold spices |
| Ranch Dressing | Cool and herby | Perfect for neutralizing heat |
We recommend serving these in small ramekins alongside the skewers for easy dipping.
Side Dish Ideas
To create a well-rounded meal, complement the chicken sticks with sides that offer contrasting textures and flavors:
- Crisp Coleslaw: The fresh crunch and slight acidity cut through the richness of fried chicken.
- Cornbread Muffins: Slightly sweet and crumbly, they add a comforting, hearty touch.
- French Fries or Sweet Potato Fries: Both options provide an additional crisp element in the meal.
- Pickled Vegetables: Offer a tangy contrast and aid digestion.
Presentation Tips
Elevate your presentation using these simple techniques:
- Arrange skewers vertically in jars lined with parchment paper for a fun, street-food style display.
- Garnish serving platters with fresh herbs like parsley or cilantro for color and aroma.
- Use small chalkboard signs to label dipping sauces and sides, especially great for parties.
“The way we serve our Fried Chicken On The Stick plays a big role in the overall dining experience. Thoughtful accompaniments make each bite a celebration of texture and flavor.”
Beverage Pairings
Pair the dish with refreshing drinks to balance the fried crispiness:
| Beverage | Notes |
|---|---|
| Iced Lemonade | Citrus brightness refreshes the palate |
| Cold Beer | Adds a crisp, bitter contrast to richness |
| Sweet Iced Tea | Complements the savory with subtle sweetness |
| Sparkling Water | Cleanses the palate between bites |
By combining these serving suggestions, we ensure that our Fried Chicken On The Stick is enjoyed to its fullest potential with every flavor and crunch.
Storage and Leftovers
Proper storage of Fried Chicken On The Stick ensures we enjoy its crispy texture and juicy flavor even after the initial meal. Follow these steps to keep our leftovers fresh and delicious:
1. Cooling:
Allow the fried chicken skewers to cool at room temperature for no longer than 2 hours after frying. This prevents bacterial growth and helps retain crunchy coating.
2. Refrigeration:
Place the cooled chicken sticks in an airtight container or wrap them tightly with plastic wrap or aluminum foil. Store in the refrigerator for up to 3-4 days.
| Storage Method | Duration | Notes |
|---|---|---|
| Airtight container | 3-4 days | Keeps chicken moist and flavorful |
| Plastic wrap/foil | 3-4 days | Ensure tight seal to prevent drying out |
3. Freezing:
For longer storage, freeze the chicken sticks. Wrap them individually in plastic wrap and place in a freezer-safe zip-top bag or container. Label with date and store at 0°F (-18°C) for up to 2 months.
| Freezing Method | Duration | Thawing Instructions |
|---|---|---|
| Individually wrapped | Up to 2 months | Thaw in refrigerator overnight before reheating |
4. Reheating:
To restore the crispiness of the fried chicken on the stick, avoid microwaving. Instead, we recommend:
- Preheat oven to 375°F (190°C).
- Arrange chicken sticks on a wire rack over a baking sheet.
- Heat for 10-15 minutes until heated through and crispy.
- Alternatively, reheat in an air fryer at 350°F for 5-7 minutes.
Tip: Avoid covering the chicken while reheating to maintain its crunchy exterior.
By following these storage and reheating techniques, we keep our Fried Chicken On The Stick tasting fresh, crispy, and safe to eat for days after preparation.
Conclusion
Fried chicken on a stick brings a fresh twist to a beloved classic, making it perfect for any occasion. Its handheld convenience and crispy texture create a satisfying eating experience that’s both fun and flavorful.
With the right preparation and attention to detail, achieving that ideal balance of juicy chicken and crunchy coating is well within reach. Whether served at gatherings or enjoyed as a quick snack, this recipe is sure to become a favorite in our kitchen rotation.
Let’s keep experimenting with flavors and sides to make every bite memorable and delicious.
Frequently Asked Questions
What ingredients are needed for fried chicken on a stick?
You’ll need boneless, skinless chicken cubes, wooden skewers, buttermilk, hot sauce, paprika, garlic powder, onion powder, salt, black pepper, all-purpose flour, cornstarch, baking powder, seasoning, and vegetable or peanut oil for frying.
How do you marinate chicken for fried chicken on a stick?
Combine buttermilk, hot sauce, paprika, garlic powder, onion powder, salt, and black pepper. Submerge the chicken cubes in this marinade and refrigerate for at least 2 hours or overnight for best flavor and tenderness.
What is the best way to bread the chicken?
Use a double-dredging method: coat chicken in a flour mixture, dip in beaten eggs or buttermilk, then coat again in flour. This locks in moisture and creates a crispy, thick crust.
At what temperature should I fry the chicken?
Heat the oil to between 350°F and 375°F. Maintain this temperature for even browning and a crispy exterior while keeping the chicken juicy inside.
How long do I fry chicken on a stick?
Fry the skewered chicken for 4 to 6 minutes, or until the internal temperature reaches 165°F, ensuring the meat is fully cooked and the coating is crisp.
What are good dipping sauces for fried chicken on a stick?
Popular choices include spicy honey mustard, garlic aioli, BBQ sauce, and ranch dressing. Serve in small containers for easy dipping.
What sides pair well with fried chicken on a stick?
Try coleslaw, cornbread muffins, French fries, sweet potato fries, or pickled vegetables to complement the flavors and textures.
How should I serve fried chicken on a stick for parties?
Arrange skewers vertically in jars lined with parchment paper or on platters garnished with fresh herbs. This makes a fun and attractive presentation.
How do I store leftover fried chicken on a stick?
Keep cooled chicken in an airtight container or tightly wrapped in the fridge for 3-4 days, or freeze individually wrapped pieces for up to 2 months.
What’s the best way to reheat fried chicken on a stick?
Use an oven or air fryer to reheat and restore crispiness. Avoid microwaving, as it can make the coating soggy.