
When it comes to creating meals that impress both the eyes and the taste buds form recipes are our secret weapon. These dishes go beyond basic cooking by focusing on shape texture and presentation turning everyday ingredients into something truly special. Whether it’s a perfectly molded dessert or a savory main that holds its structure form recipes let us play with our food in the best way.
We love how these recipes blend creativity with technique making even simple meals feel like a celebration. From classic favorites to modern twists form recipes invite us to experiment in the kitchen and wow our guests with every bite. Let’s explore how a little attention to form can transform our cooking and bring a touch of artistry to our tables.
What Are Form Recipes?
Form recipes are culinary techniques that prioritize shape, structure, and presentation to elevate the sensory experience. Unlike standard recipes that focus solely on flavors or ingredients, form recipes combine methodical shaping processes with flavor pairing to create visually pleasing and texturally engaging dishes.
“A form recipe is where art and technique meet on the plate, transforming the ordinary into the extraordinary.”
Defining Features of Form Recipes
| Feature | Description |
|---|---|
| Shape & Structure | Focus on creating visually defined forms such as logs, spheres, towers, or stacks |
| Texture | Employ layering, molding, and folding for a multi-sensory texture |
| Presentation | Emphasize the final look with garnishes, sauces, or patterns |
| Ingredient Versatility | Allow us to use familiar pantry staples in inventive new ways |
Steps in Creating a Form Recipe
- Select a Base Ingredient
- Start with an ingredient that holds its shape well such as potatoes, rice, or ground meats.
- Prepare the Fillings or Layers
- Choose flavors that complement the base, using spreads, vegetables, or sauces to enhance both appearance and taste.
- Shape or Mold the Dish
- Use molds, hands, or utensils to build defined shapes such as balls, patties, spirals, or logs.
- Cook with Care
- Cook gently to preserve the intended form, whether by baking, steaming, or pan-searing.
- Assemble and Present
- Plate thoughtfully using garnishes, drizzles, or artistic arrangement for maximum impact.
Why Form Recipes Matter
Form recipes spark creativity, enable us to experiment confidently, and make every meal feel celebratory. By focusing intentionally on form and presentation, we encourage ourselves and our guests to savor each bite with their eyes and palate.
Essential Tools and Equipment for Form Recipes
To master form recipes and consistently achieve impressive presentation, we rely on a few essential tools that help us shape, mold, and elevate dishes. Proper equipment ensures clean lines, uniformity, and structural integrity, turning ordinary ingredients into artistic creations.
Shaping and Molding Equipment
A quality set of molds and rings is central to form recipes. These provide precise shape control for layered salads, tarts, cakes, and molded desserts.
- Stainless steel food rings (various sizes)
- Silicone molds for hot or cold preparations
- Springform pans for easy-release cakes and tarts
- Pastry cutters in assorted shapes
- Piping bags and nozzles for decorative forms and fillings
Cutting and Portioning Tools
Accurate cutting tools are key for achieving clean edges and consistent sizing in ingredient prep and final assembly.
- Chef’s knife (sharp, well-balanced)
- Paring knife for detail trimming
- Mandoline slicer for ultra-thin, uniform cuts
- Wire cake cutter for level cake layers
Assembly and Plating Utensils
We depend on a few core utensils for delicate plating and finishing touches. These tools let us handle intricate details without damaging forms.
- Offset spatula for smoothing and layering
- Tweezers for precise garnish placement
- Small ladles for controlled sauce application
- Palette knives for spreading and lifting
- Squeeze bottles for decorative sauces
Baking and Cooking Implements
Heat-safe, reliable bakeware and cookware are vital for form recipes that require baking or molding during cooking.
| Equipment | Purpose |
|---|---|
| Baking sheets | Support stability for molded and shaped foods |
| Nonstick mats | Prevent sticking and aid with clean demolding |
| Ramekins | Individual molds for soufflés and custards |
| Steaming baskets | Shape steamed puddings and buns |
Precision Measuring Tools
Form recipes demand accuracy. Consistent results depend on exact measurements.
- Digital scale for precise ingredient portioning
- Measuring spoons and cups for consistency in wet and dry ingredients
“The right equipment transforms our culinary ideas into reality. With each carefully shaped dish, we showcase both our creativity and technique.”
Mastering form recipes means paying close attention to the tools we use. Investing in these essentials unlocks our ability to experiment and expertly present every dish.
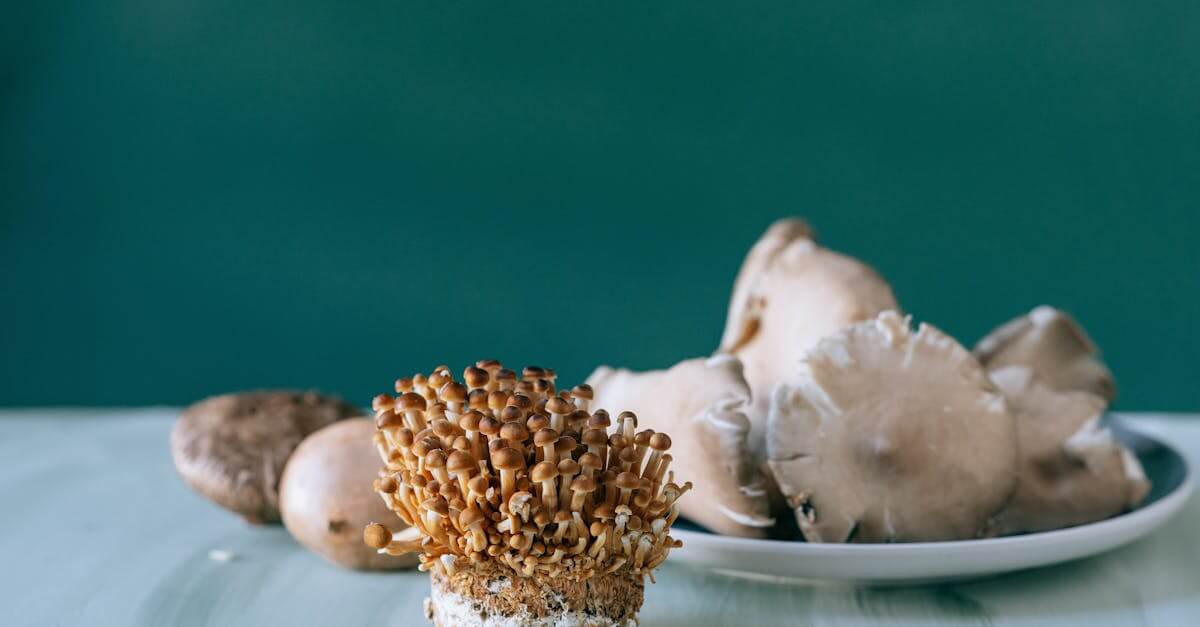
Ingredients for Form Recipes
Whether we are crafting vibrant molded salads or elegantly layered desserts, having the right ingredients is essential for creating standout form recipes. Our selection balances structure, flavor, and presentation, allowing for versatility and creativity in every bite.
Basic Pantry Staples
These foundational ingredients provide the building blocks we need for form recipes. Their textures and binding properties help us shape, layer, and mold dishes with confidence.
- Eggs — large, at room temperature
- All-purpose flour — sifted
- Milk or plant-based alternatives
- Butter — unsalted, softened
- Granulated sugar and brown sugar
- Salt
- Baking powder and baking soda
- Gelatin or agar-agar (for setting and molds)
- Heavy cream
- Olive oil
- Vinegar — white wine or apple cider
| Ingredient | Main Use in Form Recipes |
|---|---|
| Eggs | Binding, structure, leavening |
| Gelatin/Agar-agar | Setting, holding shapes in molds |
| Flour | Structure for baked or molded bases |
| Heavy cream | Smooth fillings, whipped toppings |
Optional Add-Ins and Variations
We enhance form recipes with creative add-ins that boost both flavor and visual appeal. Mix and match these elements according to the season or presentation style.
- Fresh herbs — parsley, dill, basil
- Grated cheeses — parmesan, cheddar, feta
- Spices — paprika, nutmeg, cinnamon
- Chopped nuts — almonds, pistachios, walnuts
- Diced vegetables — bell peppers, cucumbers, carrots
- Cooked grains — quinoa, rice, bulgur
- Protein options — shredded chicken, tofu, smoked salmon
- Dried fruits — cranberries, raisins, apricots
- Zests and extracts — lemon zest, almond extract
- Microgreens or edible flowers — for garnish
Directions for Making Form Recipes
Mastering form recipes begins with meticulous prep and a focus on structure. Let’s walk through the essential steps to create dishes that combine taste with visual artistry.
Prep Work
- Gather all ingredients and equipment before starting. Have our food rings or silicone molds ready.
- Measure dry and wet ingredients with precision. Use a kitchen scale for accuracy.
- Pre-chill or preheat equipment as needed. For example, chill molds for cold-set dishes or preheat pans for baked items.
- Prep fillings or layers: chop vegetables, grate cheeses, or whip creams according to the recipe.
- Prepare a clean surface and line trays with parchment if needed for easy release.
- Set out garnish components for swift, seamless final assembly.
Mixing and Combining Ingredients
- Combine dry ingredients like flour, baking powder, or seasoning in a large bowl. Sift if a lighter texture is desired.
- Blend wet ingredients such as eggs, milk, or melted butter separately.
- Gradually introduce wet to dry components, folding with a spatula or whisk. Avoid overmixing to maintain the optimal structure.
- For layered or filled form recipes, segment mixtures at this stage and incorporate add-ins.
- For gelatin or agar-based recipes, fully dissolve the gelling agent in warm liquid before integrating with the base.
Mixing Method Table
| Ingredient Type | Recommended Tool | Mixing Method |
|---|---|---|
| Dry ingredients | Whisk, Sifter | Sift and whisk gently |
| Wet ingredients | Bowl, Whisk | Blend until smooth |
| Thick batters/doughs | Spatula, Stand Mixer | Fold or beat on low |
Shaping and Forming Techniques
- Lightly grease molds or rings to prevent sticking.
- For tarts, press dough firmly into the form, smoothing edges for clean lines.
- For layered dishes, spoon fillings evenly, compressing gently to create defined layers.
- For quenelles or domes, use a pair of spoons or a small scoop for uniform shapes.
- Remove excess mixture for precise edges. Use an offset spatula or pastry scraper.
- Chill or briefly freeze as needed for firmer unmolding.
- Quote: “Precision in shaping is the difference between homestyle and professional form recipes.”
Cooking or Baking Tips
- Place shaped dishes on a stable, flat baking sheet for even cooking.
- Monitor oven temperature with an instant-read thermometer to avoid over-baking or undercooking.
- Rotate dishes halfway through baking for even browning.
- For gelatin- or agar-based recipes, allow full setting time—generally at least 2 to 4 hours in a fridge.
- Use a thin, warm knife to release chilled forms, running around the edge for a clean finish.
- Garnish immediately before serving to maintain visual impact and texture.
Use these steps to ensure each form recipe is not only delicious but also visually stunning and texturally engaging.
Make-Ahead and Storage Tips
Successfully executing form recipes often depends on our ability to prepare in advance and store components properly. Let’s dive into our top strategies for make-ahead success and smart storage for peak flavor, texture, and stunning presentation.
Make-Ahead Strategies
- Prepare Elements Separately
We recommend assembling core components like bases, fillings, and garnishes ahead of time. For instance, bake shells, chill custards, and slice vegetables the day before.
- Shape in Advance
When possible, form or mold your main ingredient a few hours before serving. This helps set and maintain defined shapes for elegant plating.
- Batch Cooking
Double recipes for elements like dough or sauces. Extra portions save time and ensure consistency across servings.
Storage Tips for Form Recipes
| Component | Storage Method | Shelf Life | Key Considerations |
|---|---|---|---|
| Dough | Fridge (airtight wrap) | Up to 3 days | Let rest at room temp before forming |
| Shaped Items | Fridge (covered tray) | 1-2 days | Keep separated with parchment to prevent sticking |
| Custards/Gels | Fridge (sealed container) | 2-3 days | Cover surface to prevent skin formation |
| Cooked Meat/Proteins | Fridge (sealed) | Up to 3 days | Reheat gently to protect texture |
| Sauces/Fillings | Fridge (airtight jar) | 3-4 days | Stir well before use for even consistency |
Pro Tips for Maximizing Freshness
- “Wrap tightly and label clearly”: This practice ensures we know dates and contents, preventing mystery leftovers.
- Avoid strong aromas: Store form recipes away from pungent foods to safeguard delicate flavors.
- Assembly timing: Final assembly or finishing touches should be done just before serving to preserve structure and visual appeal.
- Freezing: Many doughs and some molded dishes freeze beautifully, extending make-ahead potential. Thaw slowly in the fridge to maintain texture.
With these Make-Ahead and Storage Tips for our form recipes, we streamline prep, uphold brilliant presentation, and deliver impressive results from fridge to table.
Serving Suggestions
Form recipes shine brightest when presented with intention and creativity. We elevate both taste and texture by paying close attention to arrangement, plating, and accompaniments. Here are our best ways to highlight the unique appeal of form-based dishes:
Plating for Visual Impact
- Use Contrasts: Pair structured elements like mousse domes or vegetable towers with vibrant coulis or sauces for visual drama.
- Choose Statement Dishes: Opt for wide white plates or slate boards. These amplify the shapes and colors of form recipes, turning the meal into art.
- Precision Placement: Employ tweezers to arrange microgreens, herbs, or edible flowers right where we want them for a polished finish.
Ideal Pairings and Accompaniments
We love adding side dishes and garnishes that bring harmony and balance to each form recipe. Here are tried-and-true pairings:
| Main Form Recipe Style | Suggested Accompaniment | Plating Enhancement |
|---|---|---|
| Savory tarts or timbales | Fresh herb salad, citrus vinaigrette | Drizzle vinaigrette in a swirl |
| Layered mousse or panna cotta | Sliced berries, edible petals, mint sprigs | Stagger fruit for color contrast |
| Shaped rice or grain molds | Roasted vegetables, spiced yogurt | Dot yogurt around the plate |
| Structured meatloaf or terrine | Pickled vegetables, toasted bread | Stack bread crisps for height |
Temperature and Texture Tips
- Serve Warm or Chilled as Needed: Follow temperature guidelines for optimal flavor and structure—let cold-set desserts rest in the fridge until serving, and bring savory molds up to a slight warmth for comfort.
- Provide Texture Contrast: Pair smooth forms such as custards with crispy garnishes (breadcrumbs, fried shallots) for textural intrigue.
Entertaining and Portioning
- Individual Servings: Create mini versions in small molds or ramekins for easy entertaining, ensuring each guest receives a perfect showcase of the dish’s structure.
- Family Style Elegance: Present larger molded forms whole, then slice at the table with a sharp knife to reveal layers and interiors for a dramatic effect.
Troubleshooting Common Issues
Even with precise technique, form recipes can present challenges. Here we address frequent problems and offer actionable solutions to help us achieve flawless shape, texture, and presentation.
Table: Common Problems and Solutions in Form Recipes
| Issue | Possible Cause | Fix |
|---|---|---|
| Shapes not holding structure | Not enough binding agent (eggs, gelatin) | Increase binder or chill mixture before shaping |
| Forms stick to mold or ring | Lack of greasing or incorrect demolding technique | Grease molds thoroughly and chill before unmolding |
| Texture is dense or dry | Overmixing, wrong baking time, or temperature | Mix just until combined, check oven accuracy, monitor bake time |
| Dish collapses after unmolding | Incomplete setting, excess moisture | Allow to set fully in fridge or oven, drain off extra liquid |
| Uneven browning or color | Uneven oven heat, overcrowding on pan | Space pieces apart, rotate pan halfway, use an oven thermometer |
Handling Structure and Shaping Problems
If our form recipe lacks definition or loses shape:
- Chill the shaped mixture thoroughly before unmolding or baking
- Ensure proportions of thickening agents or binders are correct
- Use a gentle touch when handling finished forms
Tip: Quoting a classic rule — “Cooler is always firmer.” Keep molded dishes cold for clean edges.
Solving Sticking and Demolding Issues
When products stick to molds or tools:
- Coat molds with a thin layer of neutral oil or spray before adding ingredients
- For baked forms, line with parchment where possible
- Let the finished item sit for several minutes to loosen edges naturally
- To demold, run a thin-bladed knife around the edges or use a damp towel to gently warm the outside
Moisture and Texture Solutions
Form recipes often struggle with watery textures or unintended dryness:
- If too wet or limp, increase add-ins like breadcrumbs, flour, or almond meal for absorption
- If dry or crumbly, reduce baking time or add a small amount of liquid to the mixture
- Quote: “Moisture balance is the secret to perfect forms.”
Presentation Fixes for Visual Appeal
If the final result lacks a wow factor:
- Wipe plates before serving for a clean presentation
- Garnish with fresh herbs, a drizzle of sauce, or textural contrast (crispy bits, toasted seeds)
- Split a failed form into individual portions, reshape, and retop for salvageable presentation
Tips for Achieving Consistency
- “Measure twice, mix once.” Accuracy prevents texture mishaps
- Batch test a single form before shaping or cooking the rest
- Keep cooling stages as recommended to lock in shape and set structure
With strategic troubleshooting, we empower ourselves to master every stage of form recipes—from molding and shaping to their final, show-stopping appearance.
Conclusion
Form recipes invite us to see every meal as an opportunity for creativity and celebration. By focusing on shape and presentation we’re able to transform everyday ingredients into dishes that delight both the eyes and the palate.
With the right tools and a willingness to experiment we can elevate our cooking and impress at any occasion. Let’s embrace the art of form recipes and make every plate a work of culinary inspiration.