
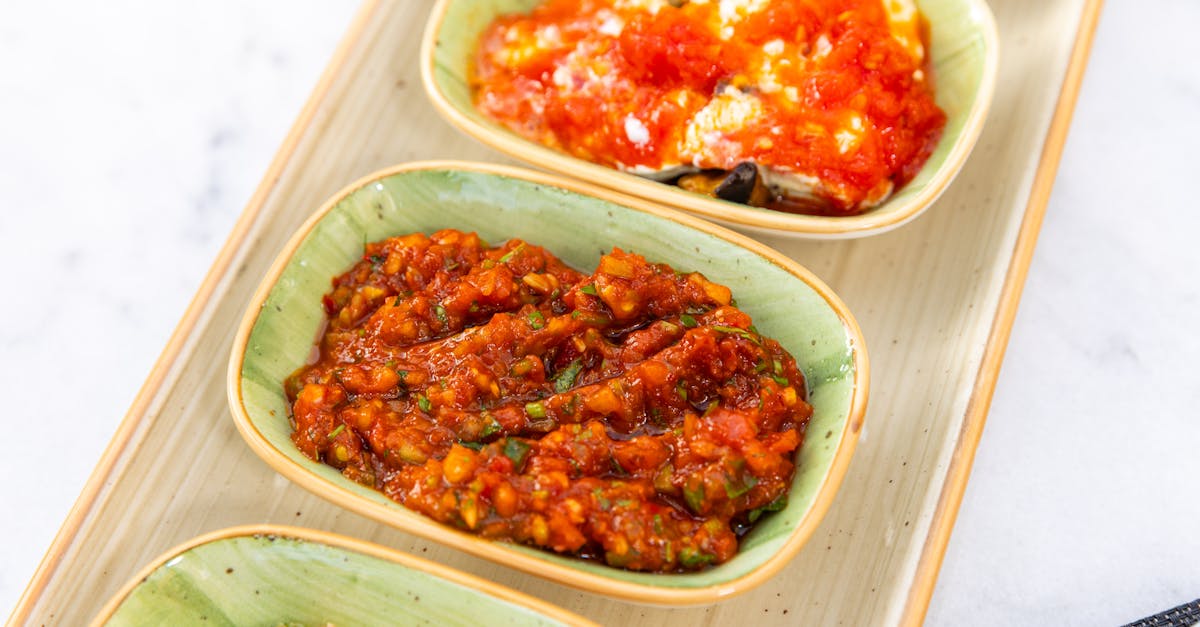
If there’s one dish that brings people together, it’s flija. This traditional Balkan delicacy is more than just food—it’s a celebration of patience, love, and community. With its signature layered crepe-like appearance, flija is a staple at gatherings and special occasions, often served alongside yogurt or a refreshing salad.
Originating in Albania and Kosovo, flija is a testament to the region’s rich culinary heritage. What makes it so unique is the process: layers of batter are cooked one at a time, creating a beautifully golden, crispy exterior with a soft, tender center. It’s not just a meal; it’s an experience.
What Is Flija?
Flija is a traditional dish deeply rooted in the culinary heritage of Albania and Kosovo. This iconic dish is recognizable by its distinctive layered structure, resembling a stack of crepe-like sheets with alternating batter and cream. It is more than just food; it is a symbol of unity and togetherness, often prepared as part of community celebrations or family gatherings.
The preparation of flija is an art form that combines patience, precision, and tradition. Made using a basic batter of flour, water, salt, and sometimes a touch of butter, it is cooked in a unique process involving layer-by-layer assembly over a wood-fired grill or an open flame. Each layer of batter is carefully spread with a ladle, cooked, and then topped with a thin layer of butter or cream before the next layer is added. This process repeats until the flija takes its final multi-layered form, creating an irresistible combination of textures.
Key Characteristics of Flija
| Feature | Description |
|---|---|
| Origin | Albania and Kosovo |
| Texture | A mix of crispy edges on the outside and a soft, creamy interior |
| Preparation Time | Up to several hours, depending on the number of layers |
| Common Accompaniments | Often served with yogurt, fresh salads, or even a drizzle of honey for a sweet variation |
| Cooking Method | Traditionally cooked layer by layer on an open flame, using a domed lid to create even heat |
The beauty of flija lies not just in its flavor but also in its preparation process, which is often a communal activity. Families and friends gather around the heat source to take turns adding layers or tending the fire. As the alternating layers of batter are slowly added and cooked, the unique aroma fills the air, adding to the sense of occasion.
Rich in history and flavor, flija demonstrates how food can bring people together, connecting generations through the shared memory of time-honored traditions. Its versatility, combined with its distinct preparation method, makes it a standout dish that has earned its place as a treasured part of Balkan culinary culture.
Ingredients
To prepare flija, the heart of Balkan culinary tradition, we need a blend of simple pantry essentials. Each ingredient plays a pivotal role in creating the iconic flija layers, ensuring a perfectly balanced texture and flavor. Here’s the full list:
For the Batter:
- 4 cups all-purpose flour, sifted
- 1 teaspoon salt, for seasoning
- 4 cups lukewarm water, to form a smooth and pourable consistency
For the Cream Mixture:
- 1 cup heavy cream, for rich layers
- 2 tablespoons melted butter, slightly cooled
Optional Accompaniments:
- Plain yogurt, served on the side
- Fresh green salad, for a refreshing finish
- Honey, for a sweet variation
Note: Authentic flija is traditionally cooked over an open flame or wood-fired grill. A portable outdoor setup is modern-day friendly, but this dish can also be adapted for standard kitchen ovens using high heat.
With minimal ingredients and careful layering, we can achieve flija’s unique blend of crispy edges and a soft, creamy center that truly celebrates Balkan artistry.
Tools And Equipment Needed
To prepare flija authentically, we need to gather essential tools and equipment. Each piece plays a vital role in achieving the unique layered texture and rich flavor that defines this traditional dish. Below, we lay out the key items we’ll need, whether sticking to the traditional method or adapting the recipe for modern kitchens.
Traditional Tools
If you’re aiming for an authentic preparation, these tools are indispensable:
- Open flame or wood-fired grill: This highlights the traditional cooking process, adding a smoky flavor to the flija.
- Saç (domed lid): A metal dome used to evenly distribute heat as layers cook.
- Wooden spatula or spoon: Ideal for spreading the batter thinly and evenly across the cooking surface.
- Large iron or steel pan: Serves as the flat surface where we layer and cook the batter.
Modern Kitchen Tools
For a convenient adaptation at home, we can use modern alternatives:
- Non-stick skillet or griddle: Ensures even cooking of the batter with minimal sticking.
- Conventional oven or stovetop: A flexible and accessible option for multi-layer cooking.
- Ladle: Perfect for measuring and pouring consistent portions of batter.
- Pastry brush: Helps to apply melted butter or cream smoothly between layers.
Additional Supplies
These items enhance preparation and ease of cooking:
- Mixing bowls: For combining and resting the batter. Use separate bowls for batter and butter/cream.
- Whisk: Ensures the batter is lump-free for a smooth texture.
- Measuring cups and spoons: Guarantees we achieve precise proportions for the recipe.
| Tools | Purpose |
|---|---|
| Open flame/Wood-fired grill | Traditional cooking and smoky flavor addition |
| Saç (domed lid) | Even heat distribution over the layers |
| Wooden spatula/spoon | Spreading batter smoothly |
| Large iron/steel pan | Base for layering batter |
| Non-stick skillet | Adapted option for modern kitchens |
| Pastry brush | Butter or cream application |
| Whisk | Smooth, lump-free batter preparation |
Tips for Effective Preparation
- Preheat the cooking surface, whether using a pan or an open flame, to ensure layers cook evenly.
- Always keep tools, especially the pastry brush and spatula, clean to avoid residue buildup during layering.
- For traditional setups, ensure the flame remains steady and moderate to prevent uneven cooking.
Using the right tools and equipment guarantees the rich textures and aromas that make flija so special.
Directions
Preparing flija is a labor of love that demands precision and patience. Follow these detailed steps to ensure your flija turns out with its signature crispy layers and soft, creamy interior.
Prepare The Batter
- In a large mixing bowl, combine 4 cups of all-purpose flour with 1 teaspoon of salt.
- Gradually add 6 cups of lukewarm water, whisking continuously to avoid lumps. The batter should be smooth and slightly runny, similar in consistency to pancake batter.
- Let the batter rest for about 30 minutes to hydrate the flour fully.
- If you’d like a richer flavor, incorporate 1/4 cup of melted butter into the batter before cooking.
Prepare The Filling
- In a separate bowl, prepare the filling by combining 1 cup of heavy cream with 1/2 cup of melted butter. Stir until fully blended.
- Optionally, season the filling lightly with a pinch of salt if not serving with sweet accompaniments.
- Keep the filling warm and easily spreadable throughout the layering process by placing it near your cooking area, as we’ll use this between every crepe layer.
Setting Up The Baking Surface
For traditional preparation:
- Heat an open flame or wood-fired grill.
- Place a saç lid over the grate, and preheat a large iron or steel pan until the cooking surface is evenly hot.
For modern kitchens:
| Tool | Alternative Option |
|---|---|
| Large Pan | Non-stick skillet |
| Open Flame | Preheated oven at 400°F |
| Saç Lid | Foil or oven-safe domed cover |
- Preheat the baking surface or oven for about 15 minutes.
- Grease the pan or skillet lightly with melted butter or a neutral oil to prevent sticking.
- Ensure the pastry brush, ladle, and other tools are clean and within reach for efficient layering.
This setup is key to achieving the authentic texture of flija with a crisp exterior and soft, creamy layers inside.
Cooking Flija
Preparing flija is as much an art as it is a cooking process, requiring patience and a careful layering technique to achieve its signature crispy texture and creamy interior. Let’s dive into each step in detail to create this traditional Balkan delight.
Layering The Batter
We start by preheating our cooking surface, whether it’s a traditional wood-fired grill or a modern oven. Using a ladle, we pour a small amount of the prepared batter onto the greased pan or metal plate, spreading it into a thin, even layer. It’s important that this layer is not too thick, as flija relies on its delicate layering for its airy texture.
Once the batter is spread, we cover it with the saç (if using a wood-fired setup) or place it under the broiler in the oven. We cook this layer until the edges turn golden-brown and the top becomes firm. This step sets the base for the subsequent layers.
Adding The Filling
After the first batter layer is cooked, we brush a generous amount of the filling mixture—a luscious blend of melted butter and heavy cream—over the top. This filling not only adds flavor but also creates the signature creamy interior that perfectly balances the crispiness of flija.
The filling layer should be thin, almost glazing the surface, to ensure it doesn’t overpower the batter layers. Using a pastry brush ensures even distribution and precise application.
Repeating The Layers
The most crucial part of making flija is the repetition of layering and filling. We alternate between pouring batter and adding the filling, cooking each layer individually before adding the next. This process builds the characteristic look and texture of the dish.
A typical flija can have anywhere between 10 to 20 layers, depending on how thick or tall we want it to be. Each layer requires careful monitoring to avoid overcooking and to maintain a consistent structure. This step-by-step technique ensures that each bite delivers both crisp edges and soft, creamy interiors.
Here’s a quick breakdown for reference:
| Step | Action | Visual Cue |
|---|---|---|
| 1 | Spread batter | Thin, even layer |
| 2 | Cook batter layer | Golden-brown edges |
| 3 | Add filling | Thin butter and cream glaze |
| 4 | Repeat until desired layers | Crisp edge, creamy structure |
Final Bake
Once all the layers of flija are assembled, we give the dish a final bake to ensure the layers are fully set and the top is beautifully golden-brown. If using an oven, we place the flija on the middle rack at 375°F (190°C) for about 10-15 minutes. For traditional methods, we leave it covered under the saç for 5-10 minutes over a gentle flame.
The final bake not only melds together the intricate layers of batter and filling but also enhances the overall aroma, complementing its rich, golden exterior. Once ready, we let it cool briefly before serving—typically with a side of yogurt, fresh salad, or even a drizzle of honey for a sweeter variation.
Serving Suggestions
Flija’s versatility shines brightest when served alongside complementary dishes that enhance its layers of crispy edges and creamy interior. Whether you prefer savory accompaniments or a sweet finish, the options are both traditional and adaptable.
Traditional Pairings
- Yogurt or Sour Cream
A dollop of plain yogurt or sour cream is a classic companion. The tangy notes contrast beautifully with flija’s buttery richness. For an extra kick, sprinkle a pinch of sea salt over the yogurt.
- Fresh Salad
A light, refreshing salad with crisp cucumbers, juicy tomatoes, and thinly sliced red onions pairs perfectly with flija. Toss the vegetables with olive oil, lemon juice, and a pinch of salt for a vibrant and healthy side.
- Cheese Plate
Serve flija with slices of soft cheese like feta or ricotta. Their creamy profile complements the buttery layers, creating a harmonious balance.
- Honey Drizzle
For those who enjoy sweetness, drizzle warm honey over the flija. The golden syrup seeps into the layers, adding a delightful depth of flavor.
Modern Twists
To contrast traditional Balkan accompaniments, we can pair flija with modern, fusion-inspired options. These combinations invite a global touch to this time-honored dish:
- Avocado Spread: Mash ripe avocados with salt, lime, and chili flakes for a creamy and zesty topping.
- Roasted Vegetables: Oven-roasted zucchini, eggplant, and bell peppers add a smoky layer to the dish.
- Caramelized Onions: Slow-cooked onions bring a sweet-savory contrast to each bite of flija.
Beverage Pairings
Flija is best enjoyed with beverages that complement its comforting richness. Here’s a handy guide for drink ideas:
| Beverage | Why It Works |
|---|---|
| Ayran (Salted Yogurt) | Traditional and refreshing, balancing the dish’s butteriness. |
| Hot Black Tea | Cuts through the richness with mild tannins and warmth. |
| Sparkling Water | Provides a bubbly cleanse between bites. |
| Sweet White Wine | Enhances flija’s creamy texture, especially when served with honey. |
Presentation Tips
For a feast, arrange freshly baked flija on a large wooden platter to highlight its rustic charm. Place small bowls of accompaniments like yogurt, honey, and cheese around the platter, allowing guests to mix and match flavors. Garnish the setup with fresh parsley or edible flowers to add color and elevate the presentation. Be sure to serve flija warm to preserve its crispy top and soft, tender center.
Tips For Making The Perfect Flija
Creating flija is an art that requires patience and attention to detail. With the right techniques, you can achieve the perfect balance of crispy edges and a soft, creamy interior. Below, we share our top tips to help you master this traditional Balkan dish.
1. Prepare The Batter Carefully
- Use high-quality all-purpose flour for the batter to ensure smooth consistency.
- Gradually add lukewarm water to the flour while whisking to avoid lumps.
- Let the batter rest for at least 30 minutes. This allows the gluten to relax, making the batter easier to spread and enhancing the texture of the flija.
2. Maintain Ideal Cooking Conditions
- Preheat the cooking surface thoroughly—this ensures the layers cook evenly.
- If using a traditional method, ensure the wood-fired grill or open flame maintains a steady, medium heat.
- For modern ovens, set the temperature to 400°F and preheat prior to starting.
3. Layer With Precision
- Spread a thin, even layer of batter for each step using a ladle. A pastry brush can help smooth it out if needed.
- Let each layer cook until it is golden and slightly crispy before applying the next.
- Alternate layers of the batter with melted butter and heavy cream, ensuring the filling is distributed evenly for richness.
4. Monitor Timing And Texture
A consistent routine is critical:
| Layer | Cook Time (Approx.) | Visual Cue |
|---|---|---|
| 1st | 3-4 minutes | Golden edges, soft center |
| 2nd+ | 2-3 minutes | Slightly darker golden hue |
| Final | 5-10 minutes | Uniform crispness throughout |
Check each layer frequently to avoid overcooking or burning.
5. Keep Tools Clean And Functional
- Use a clean ladle and pastry brush to prevent buildup of batter or butter residues between layers.
- Keep a small towel nearby for wiping tools as needed—this ensures smooth application.
6. Embrace The Traditional Experience
If possible, use a saç (domed lid) for cooking as it allows for the heat to circulate, creating flija’s signature texture. If working with an open flame, rotate the pan carefully to cook evenly.
7. Garnishes And Accompaniments
Flija shines best when paired with the right sides. Serve it warm with creamy yogurt, fresh salad, or a drizzle of honey for added flavor. Finish with a garnish of fresh parsley or edible flowers for a stunning presentation.
Following these tips will make your flija preparation an enjoyable, successful, and delicious experience. Each layer becomes part of a culinary masterpiece connecting you with centuries of rich Balkan tradition.
Make-Ahead And Storage Instructions
Flija is a dish that shines not just when freshly made but also when prepared ahead of time or stored properly. Its layered structure and unique texture hold up well if handled correctly. Let’s dive into the essential aspects of making flija ahead and storing it to keep it fresh and flavorful.
Make-Ahead Tips
Preparing flija in advance can simplify your meal planning for gatherings or busy days. Here’s how you can streamline the process:
- Batter Preparation: Mix the batter up to 24 hours ahead. After preparing, transfer the batter to an airtight container and refrigerate. Stir well before using to ensure a smooth consistency.
- Layer Cooking: You can partially cook the layers ahead of time. Prepare and cook multiple layers, leaving the final baking step for later. This allows you to finish and serve freshly baked flija without starting from scratch.
- Storage of Crepes: If you’ve prepared individual crepes or layers, stack them with parchment paper in between to prevent sticking. Cover them with plastic wrap or store in a sealable bag.
Storage Instructions
To preserve the flavor and texture of your flija, follow these storage guidelines:
| Storage Method | Duration | Instructions |
|---|---|---|
| Refrigerator | Up to 3 days | Transfer flija portions to an airtight container or tightly wrap in aluminum foil. Reheat in an oven preheated to 300°F to restore its crispy texture without drying it out. |
| Freezer | Up to 3 months | Wrap each portion in plastic wrap and place inside a freezer-safe bag for an extra layer of protection. Thaw in the fridge overnight before reheating. |
Reheating Flija
To enjoy stored flija, reheating it properly is critical. Use these methods to revive its delightful textures:
- In the oven, preheat to 300°F. Place flija on a baking sheet and cover lightly with aluminum foil to prevent drying. Heat for 10-12 minutes or until adequately warmed.
- On the stovetop, use a non-stick skillet over low heat. Reheat individual portions gently, flipping once to avoid burning.
- Avoid using a microwave as it tends to soften the crispy edges, compromising flija’s signature texture.
Tips for Frozen Flija
- Always thaw frozen flija in the refrigerator overnight to ensure it retains optimal moisture.
- Refresh the layers by brushing lightly with melted butter or cream after reheating for an authentic taste.
Conclusion
Flija is more than a dish; it’s a celebration of tradition, patience, and togetherness. Its unique preparation and rich flavors make it a standout representation of Balkan culture. Whether cooked traditionally over an open flame or adapted to modern kitchens, flija brings people together with its aroma, texture, and taste.
By embracing the art of making flija, we connect with a culinary heritage that transcends generations. It’s a dish that invites us to slow down, savor the process, and enjoy the company of loved ones. Let’s keep this tradition alive, one delicious layer at a time.
Frequently Asked Questions
What is flija, and where does it originate?
Flija is a traditional Balkan dish made of layered, crepe-like batter and typically served at gatherings. It originates from Albania and Kosovo, symbolizing community and celebration through its unique preparation process.
What are the ingredients needed to make flija?
Flija requires all-purpose flour, salt, lukewarm water, heavy cream, and melted butter. It can be paired with yogurt, fresh salads, or honey for added flavor.
How is flija traditionally cooked?
Flija is typically cooked layer by layer over a wood-fired grill or open flame. Each layer is spread, cooked, and topped with butter or cream before adding the next.
Can flija be made in a modern kitchen?
Yes, flija can be adapted for a modern kitchen using tools like a non-stick skillet, conventional oven, ladle, and pastry brush while following the traditional layering technique.
How long does it take to prepare flija?
The preparation of flija can take several hours, as each layer needs to be cooked individually to achieve its signature crispy texture and creamy interior.
What are the best accompaniments for flija?
Flija pairs well with yogurt, fresh salads, sour cream, cheese, or honey. For a modern twist, it can be served with avocado spread, roasted vegetables, or caramelized onions.
Can flija be made ahead of time?
Yes, flija can be made in advance. The batter can be mixed up to 24 hours ahead, and partially cooked layers can be stored properly for reheating before serving.
How do you store and reheat flija?
Store cooked flija in the refrigerator or freezer, separating layers with parchment paper to prevent sticking. Reheat in the oven and refresh with melted butter or cream to restore its texture.
What makes flija special?
Flija is more than just a dish; it represents unity and tradition. Its labor-intensive preparation and communal cooking process reflect the rich heritage of the Balkan region.
Are there any tips for successfully making flija?
Use high-quality ingredients, maintain ideal cooking conditions, and preheat the cooking surface. Pay close attention to layering and ensure tools are clean for the best results.