
Who doesn’t love the bold, comforting flavors of enchiladas? Our flat enchiladas recipe takes a delightful twist on the classic rolled version, offering layers of cheesy, saucy goodness in every bite. This dish is perfect for busy weeknights or casual gatherings, bringing everyone together around a hearty, satisfying meal.
Flat enchiladas are a regional favorite in parts of the Southwest, known for their simplicity and rich flavor. Instead of rolling each tortilla, we stack them with layers of savory filling, making the preparation quicker without sacrificing taste. It’s a fun, fuss-free way to enjoy a beloved classic.
Whether you’re a fan of traditional enchiladas or looking to try something new, this recipe is sure to hit the spot. With its vibrant spices, melty cheese, and tender tortillas, it’s a dish that’ll have everyone asking for seconds! Let’s dive into this flavorful, easy-to-make favorite.
Flat Enchiladas Recipe
This Flat Enchiladas Recipe provides a simple yet delightful take on classic enchiladas, perfect for quick assembly and loaded with bold flavors. By layering tortillas with fillings and sauce instead of rolling them, we simplify the preparation process while delivering the ultimate comfort food.
Ingredients
Here’s what we’ll need to bring this dish to life:
- 12 corn tortillas (lightly warmed to avoid cracking)
- 3 cups enchilada sauce (store-bought or homemade)
- 2 cups shredded cheese (a mix of cheddar and Monterey Jack works best)
- 1 ½ cups cooked and shredded chicken (or use beef, turkey, or plant-based protein as desired)
- 1 medium onion, finely diced
- ½ cup sliced black olives (optional, for garnish)
- ½ cup chopped fresh cilantro (for garnish)
- 1 tablespoon cooking oil (for tortillas)
Instructions
Follow these step-by-step instructions to make delicious flat enchiladas:
- Preheat the oven to 375°F (190°C).
This ensures even cooking while allowing the flavors to meld.
- Heat the tortillas:
Add 1 tablespoon of cooking oil to a skillet over medium heat. Briefly warm each tortilla for about 30 seconds per side. This keeps them soft and prevents them from breaking in the layers.
- Prepare the filling:
In a large bowl, mix the shredded chicken with 1 cup of the enchilada sauce. Stir until the chicken is evenly coated.
- Assemble the layers:
- Step 1: Lightly coat the bottom of a 9×13 inch baking dish with a thin layer of enchilada sauce.
- Step 2: Place 4 tortillas in a single layer, slightly overlapping as needed.
- Step 3: Spread half of the chicken mixture over the tortillas.
- Step 4: Sprinkle ⅓ of the shredded cheese evenly over the chicken layer.
- Step 5: Pour 1 cup of enchilada sauce over this layer to ensure it stays moist.
- Repeat the layers until all tortillas, chicken, and sauce are used, finishing with a layer of tortillas topped with sauce and cheese.
Here’s a breakdown of the general layering:
| Layer Order | Ingredient Description |
|---|---|
| 1 | Thin sauce layer at the bottom |
| 2 | Tortillas (4, slightly overlapping) |
| 3 | Shredded chicken mixture |
| 4 | Shredded cheese |
| 5 | Sauce (repeat until final tortilla layer) |
| Final Layer | Tortillas topped with sauce and cheese |
- Bake the enchiladas:
Cover the dish with aluminum foil and bake for 20 minutes. Remove the foil and bake for an additional 10 minutes until the cheese is bubbling and browned slightly.
- Garnish and serve:
Once out of the oven, let the enchiladas cool for 5 minutes. Sprinkle with sliced black olives and chopped fresh cilantro before serving.
Enjoy the irresistible layers of stacked tortillas, savory filling, and melted cheese, creating a dish perfect for sharing with family or guests.
Ingredients
For our flat enchiladas recipe, we will use simple yet flavorful components that come together beautifully. Here’s a complete list of fresh, pantry-friendly ingredients you’ll need to create this delicious dish at home:
Main Ingredients:
- 12 corn tortillas (6-inch size) – Lightly warmed or toasted for easier layering.
- 2 cups enchilada sauce – Use homemade or your favorite store-bought brand.
- 2 cups shredded cheese – A blend of cheddar and Monterey Jack works perfectly.
- 1 ½ cups cooked chicken – Shredded (rotisserie chicken or leftover roasted chicken is great).
Optional Toppings and Garnishes:
- ½ cup sliced black olives – Gives a briny, bold kick.
- ¼ cup chopped fresh cilantro – Adds a fresh, vibrant touch.
- ½ cup chopped onions – For added crunch and savoriness.
- 1 diced avocado – For a creamy, buttery topping.
- Lime wedges – Optional, for a hint of citrus.
Pantry Staples:
- ½ teaspoon salt (optional)
- ½ teaspoon ground cumin (optional, adds warmth to the flavor profile)
Tools And Equipment
To create the perfect flat enchiladas, we need a few essential tools and equipment to ensure a smooth cooking process and impeccable results. Here’s a breakdown of the items we’ll be using:
Essential Tools:
- Large Baking Dish: A 9×13-inch glass or ceramic dish works best for layering and holding the enchiladas. This ensures even cooking and easy cleanup.
- Non-stick Skillet: For lightly warming the tortillas or preparing any fillings as needed.
- Mixing Bowls: Use medium-sized bowls for combining ingredients like shredded cheese or chicken.
- Silicone Spatula or Spoon: Perfect for spreading the enchilada sauce and evenly layering the fillings without damaging delicate tortillas.
- Ladle: To drizzle the sauce uniformly between layers.
- Sharp Knife: For chopping garnishes like fresh cilantro, onions, or slicing the enchiladas for serving.
Optional Tools for Efficiency:
- Pastry Brush: Ideal for brushing a light layer of oil on tortillas if frying or warming them briefly.
- Cheese Grater: If you prefer freshly shredded cheese over store-bought.
- Cutting Board: Use a non-slip board for prepping additional garnishes like avocado and limes.
Oven Requirements
Our recipe calls for baking, so having a preheated oven at 375°F (190°C) is crucial. Make sure your oven has a reliable temperature gauge to avoid under or overcooking.
Quick Tools Summary:
| Tool/Equipment | Purpose |
|---|---|
| Large Baking Dish | Layering tortillas, sauce, and filling |
| Non-stick Skillet | Warming tortillas or heating fillings |
| Mixing Bowls | Combining and holding ingredients |
| Silicone Spatula/Spoon | Spreading sauce and layer assembly |
| Ladle | Drizzling enchilada sauce |
| Sharp Knife | Chopping garnishes and slicing servings |
| Optional: Pastry Brush | Lightly oiling tortillas |
| Optional: Cheese Grater | Grating fresh cheese |
| Cutting Board | Prepping garnishes like cilantro/lime |
Directions
Crafting Flat Enchiladas is a straightforward and rewarding process. Follow our step-by-step guide to build layers of bold flavors and achieve a bubbling, golden finish.
Prep
- Preheat the oven to 375°F (190°C). This ensures even cooking and a perfect texture.
- Lightly grease a 9×13-inch baking dish to prevent sticking.
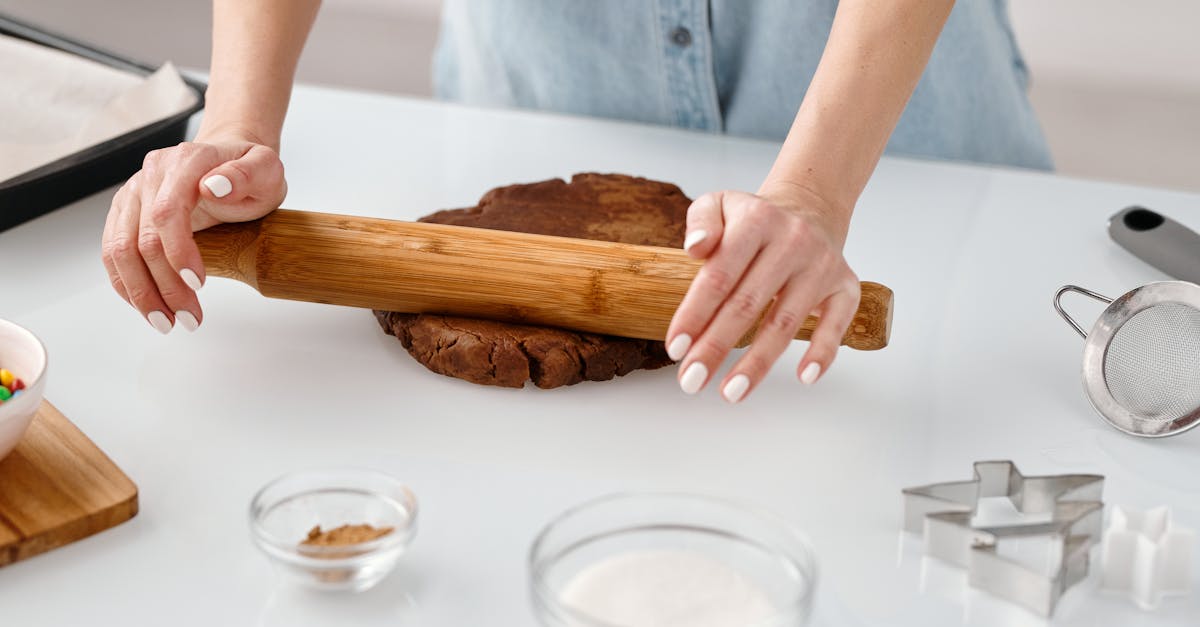
- Warm the corn tortillas in a non-stick skillet over medium heat for 15-20 seconds per side. This step makes them pliable and less likely to tear during assembly.
Make The Sauce
If using store-bought enchilada sauce, warm it in a saucepan over low heat for a smoother consistency. To elevate the flavor, we recommend adding:
- ½ teaspoon ground cumin
- A pinch of salt
- A dash of smoked paprika (optional)
Give it a quick stir and let it simmer for 2-3 minutes. This creates a deeper flavor that’s perfect for layering.
Prepare The Fillings
- In a mixing bowl, combine 1 ½ cups of shredded cooked chicken with a pinch of ground cumin and a dash of salt for enhanced seasoning.
- Grate your cheese blend (cheddar and Monterey Jack) if not pre-shredded, ensuring about 2 cups total.
- Prepare optional garnishes such as chopped cilantro, sliced black olives, and diced avocado for serving.
Assemble The Enchiladas
- Spread ½ cup of enchilada sauce evenly on the bottom of the greased baking dish.
- Layer 4 corn tortillas, slightly overlapping, to create the base layer.
- Sprinkle a third of the shredded cheese and a third of the seasoned chicken over the tortillas.
- Drizzle ½ cup of enchilada sauce across the layer.
- Repeat the layering process twice more, finishing with a generous topping of cheese on the final layer.
| Layer | Tortillas | Cheese | Chicken | Sauce |
|---|---|---|---|---|
| Base | 4 | ⅓ total | ⅓ total | ½ cup |
| Middle 1 | 4 | ⅓ total | ⅓ total | ½ cup |
| Middle 2 | 4 | ⅓ total | ⅓ total | ½ cup |
| Top | – | Remaining | Remaining | Remaining |
Cook The Enchiladas
- Cover the dish loosely with aluminum foil and bake for 20 minutes.
- Remove the foil and bake for an additional 10-15 minutes until the cheese is melted, bubbly, and golden.
- Let the enchiladas sit for 5 minutes before slicing for easier serving.
Serve immediately with garnishes like fresh cilantro, avocado, lime wedges, or any of your favorite toppings.
Serving Suggestions
When it comes to enjoying these flat enchiladas, the versatility truly shines. Whether you’re serving a weeknight family dinner or impressing guests at a get-together, pairing this dish with complementary sides and garnishes will elevate the flavors.
Suggested Pairings
For a well-rounded meal, consider serving the flat enchiladas alongside a mix of side dishes and toppings that balance the rich, cheesy layers of the dish. Here’s a quick guide:
| Dish/Item | Flavor Profile | Serving Style |
|---|---|---|
| Spanish Rice | Adds a warm, slightly spiced balance to the enchiladas. | Serve on the side in small bowls. |
| Refried Beans | Creamy and hearty, perfectly complements the cheesy layers. | Pair in a small ramekin to avoid meal mixing. |
| Guacamole | Fresh, zesty, and creamy for a refreshing contrast. | Scoop on top or serve as a side option. |
| Fresh Garden Salad | Crisp and tangy, lightens up the meal. | Drizzle with lime vinaigrette for zestiness. |
| Mexican Street Corn (Elote) | Sweet, smoky, and tangy flavors align beautifully. | Serve as whole cobs or cut into kernels. |
Garnish Ideas
The garnishes are key to bringing a fresh, vibrant touch to our dish. Sprinkle the following on top just before serving to customize each bite:
- Chopped fresh cilantro: Brightens up the overall flavor.
- Diced avocado or guacamole: Adds a creamy texture with mild richness.
- Lime wedges: Squeeze over the enchiladas for a burst of citrus tang.
- Sour cream or Mexican crema: Drizzle for a cooling layer.
- Sliced black olives: Offers a briny, savory pop.
- Chopped green onions: Introduces sharp, fresh notes.
Beverage Pairings
Pairing beverages with the dish enhances the overall dining experience. Here are some beverages that tie seamlessly with the bold flavors of the flat enchiladas:
- Classic Margaritas: The hint of lime and touch of sweetness cut through the richness.
- Agua Fresca: Opt for fruit-based options like watermelon or pineapple for a cool and refreshing touch.
- Mexican Beer: Light lagers like Corona or Modelo are fantastic for balancing the spices.
- Iced Horchata: The creamy, cinnamon-spiced drink adds a sweet contrast.
Serving Tips
- Serve the flat enchiladas warm directly from the oven for that delightful bubbling cheese and sauce consistency. Use a wide spatula for clean slices.
- Arrange all garnishes and sides on the table so everyone can customize their own plate. Make it a fun, interactive dining experience.
- For leftovers, reheat the enchiladas in the oven to maintain their texture and avoid sogginess.
With these Serving Suggestions, the flat enchiladas are sure to become a highlight of any meal, bringing both flavor and joy to every table.
Make-Ahead And Storage Tips
Preparing flat enchiladas in advance or storing leftovers is convenient and ensures quick, hassle-free meals. Here’s how we can manage make-ahead preparation and properly store this flavorful dish while retaining its quality.
Make-Ahead Preparation
- Assemble ahead: Prepare and assemble the enchiladas up to the baking step. Layer the tortillas, enchilada sauce, shredded cheese, and cooked chicken in the baking dish as instructed.
- Refrigerate: Cover the assembled enchiladas tightly with plastic wrap or aluminum foil. Refrigerate for up to 24 hours before baking.
- Bake when ready: When it’s time to bake, remove the dish from the refrigerator and let it sit at room temperature for about 20-30 minutes. Preheat the oven to 375°F (190°C) and bake as directed, adding a few extra minutes to account for the chilled ingredients.
Freezing Instructions
- Freeze before baking: If we want to freeze the enchiladas for later use, construct the dish as usual but skip the baking step. Wrap the dish tightly in a double layer of plastic wrap and foil to prevent freezer burn. Label with the date for easy identification.
- Storage time: Store in the freezer for up to 3 months.
- Thawing: When ready to bake, transfer the dish to the refrigerator and thaw it overnight. Bake according to the recipe instructions, adding 5-10 extra minutes as needed.
Storing Leftovers
- Refrigeration: Transfer any leftover flat enchiladas to an airtight container or a resealable bag. Store in the refrigerator for up to 4 days.
- Freezing cooked enchiladas: To freeze leftovers, place individual portions in tightly sealed containers or wrap them in layers of plastic and foil. These can be frozen for up to 2 months.
Reheating Guide
Use the following methods to reheat the enchiladas while retaining their texture and flavor:
| Method | Instructions |
|---|---|
| Oven | Preheat to 350°F (175°C). Place enchiladas in a baking dish, cover with foil, and heat for 20-25 minutes. |
| Microwave | Place a portion on a microwave-safe plate, cover lightly, and heat on medium power for 2-3 minutes. |
| Stovetop | Use a non-stick skillet over low heat. Cover with a lid and warm for 5-7 minutes, turning once halfway through. |
Tips for Best Results
- Avoid adding fresh garnishes like cilantro, diced avocado, or sour cream to the enchiladas before storing. Add these toppings after reheating for the freshest taste.
- Make sure the enchiladas are cooled to room temperature before storing to prevent condensation, which can affect texture.
- Label all containers with the date to track freshness easily.
These make-ahead and storage tips ensure that our flat enchiladas are ready to enjoy whenever we need them, without compromising on their bold, satisfying flavor.
Conclusion
Flat enchiladas bring a fresh take on a classic favorite, offering bold flavors and effortless preparation. This dish is perfect for sharing with loved ones, whether it’s a busy weeknight or a casual gathering. With its customizable layers and endless garnish options, it’s a recipe that suits every taste and occasion.
By making it ahead or storing leftovers, we can enjoy this comforting meal anytime without extra hassle. Flat enchiladas are more than just a recipe—they’re a delicious way to bring everyone together around the table.
Frequently Asked Questions
What are flat enchiladas, and how are they different from traditional rolled enchiladas?
Flat enchiladas are a variation of the traditional dish where tortillas are layered with filling and sauce like a casserole instead of rolling them. This method simplifies preparation while maintaining the bold flavors, making it perfect for busy weeknights or gatherings.
What ingredients do I need for flat enchiladas?
Basic ingredients include 12 corn tortillas, 2 cups enchilada sauce, 2 cups shredded cheese (cheddar and Monterey Jack), and 1 ½ cups shredded chicken. Optional garnishes include black olives, cilantro, onions, avocado, and lime.
How do I assemble flat enchiladas?
Layer tortillas, cheese, chicken, and sauce in a baking dish, repeating until the dish is full. Bake at 375°F (190°C) until bubbling and golden, then garnish before serving.
Can I make flat enchiladas ahead of time?
Yes! Assemble the dish and refrigerate for up to 24 hours. Alternatively, you can freeze it for longer storage. Thaw in the fridge before baking as instructed.
What tools do I need to prepare flat enchiladas?
Essential tools include a baking dish, skillet, mixing bowls, sharp knife, silicone spatula, and a ladle. Optional tools like a pastry brush and cheese grater can help streamline the process.
What sides pair well with flat enchiladas?
Serve with Spanish rice, refried beans, guacamole, fresh salad, or Mexican street corn (elote) for a complete meal. Beverage pairings like margaritas or horchata also elevate the dish.
How should I store leftovers, and can they be reheated?
Store leftovers in an airtight container in the refrigerator for up to 3 days or freeze for up to 2 months. Reheat in the oven or microwave. Avoid adding garnishes before storing for better results.
Can I customize the fillings for flat enchiladas?
Absolutely! You can swap chicken for beef, pork, or veggies, and use your favorite cheese blend. Add personal touches like beans, sautéed vegetables, or spices.
How do I enhance the flavor of store-bought enchilada sauce?
To boost flavor, heat the sauce with a pinch of ground cumin, chili powder, garlic powder, or a splash of lime juice before using it in the recipe.
Why are flat enchiladas ideal for gatherings?
Flat enchiladas are easy to prepare in large batches, customizable, and perfect for sharing. Guests can add their preferred garnishes, making it an interactive and crowd-pleasing dish.