
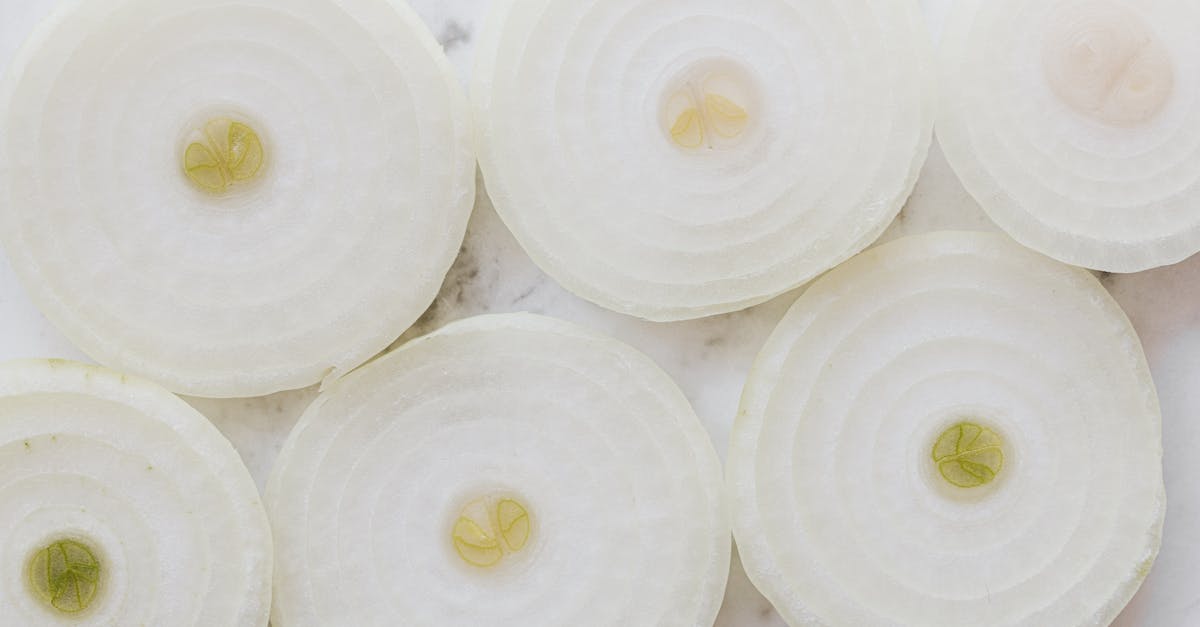
There’s something magical about the way figs transform when baked—juicy centers turn jammy and sweet while their flavor deepens with every bite. Our Fig Crisp recipe celebrates this underrated fruit with a golden, buttery topping that’s both crisp and comforting. It’s a dessert that feels special yet comes together with ease.
We love serving this crisp when figs are at their peak, adding a rustic touch to any gathering or weeknight treat. Whether we’re using fresh figs from the market or a handful of ripe ones from our own backyard, this recipe always brings out their best. Let’s turn those luscious figs into a dessert everyone will remember.
Why You’ll Love This Fig Crisp Recipe
We know searching for the perfect dessert means craving a treat that is both familiar and a bit luxurious. Our Fig Crisp Recipe stands out because it captures the naturally sweet, jammy essence of fresh figs and pairs them with a golden, buttery crisp topping. Here’s why we think you’ll reach for this recipe every fig season:
1. Seasonal Simplicity With Extraordinary Results
We emphasize the use of ripe, fresh figs—whether from the market or your garden. Baking brings out their natural sweetness, creating a “comfort food” dessert that feels both nostalgic and refined.
2. Buttery Crisp Perfection
Our crisp topping delivers the ideal contrast—crisp, buttery, and lightly spiced saltiness against the lush fruit. Every spoonful offers a harmonious blend of soft baked fruit and golden crunchy topping.
3. Quick to Assemble, Easy to Enjoy
With straightforward steps and simple ingredients, our Fig Crisp Recipe makes it easy to deliver bakery-quality results from your own oven. From prepping the figs to sprinkling the crumble, you’ll have dessert in the oven in under 20 minutes.
| Step | Action | Time Needed |
|---|---|---|
| Prep | Slice figs, prepare filling | 10 minutes |
| Mix | Make crisp topping | 5 minutes |
| Assemble | Layer and top the figs | 2 minutes |
| Bake | Oven time | 35-40 minutes |
4. Versatility for Every Occasion
This Fig Crisp Recipe shines for dinner parties, family gatherings, or cozy nights at home. Serve it warm with a scoop of vanilla ice cream for an impressive finish or enjoy it cold for breakfast the next day—yes, it works!
5. Satisfying Texture and Flavor
Each bite boasts an irresistible mix of textures—soft, jammy fig filling gives way to crumble topping with just the right amount of crunch. The warmth of cinnamon, nutmeg, and brown sugar infuses every spoonful with inviting aroma and taste.
“It’s a dessert that celebrates the fleeting magic of fresh figs—every bite feels like a special occasion.”
6. Perfect for Customization
Add nuts for extra crunch or use gluten-free oats to suit dietary needs. This recipe adapts to your pantry and your tastes.
We love how this Fig Crisp Recipe turns simple ingredients into a crave-worthy dessert that feels both rustic and extraordinary.
Ingredients
These essential ingredients transform simple figs into a memorable Fig Crisp dessert with a golden, buttery topping and a jammy, fruit-forward filling. For best results, use ripe, fresh figs and quality pantry staples.
For the Fig Filling
- 5 cups fresh figs, stems trimmed and quartered
- 1/3 cup granulated sugar
- 1 tablespoon fresh lemon juice
- 1 teaspoon pure vanilla extract
- 2 tablespoons cornstarch or arrowroot powder
- 1/4 teaspoon ground cinnamon
- Pinch of sea salt
“Jammy figs meet a hint of spice—this is comfort in every spoonful.“
For the Crisp Topping
- 3/4 cup old-fashioned rolled oats
- 1/2 cup all-purpose flour (substitute with almond flour for gluten-free option)
- 1/2 cup light brown sugar, packed
- 1/2 teaspoon ground cinnamon
- 1/4 teaspoon ground nutmeg
- 1/4 teaspoon fine sea salt
- 1/2 cup unsalted butter, cold and cubed
- 1/3 cup chopped walnuts or pecans (optional, for extra crunch)
| Ingredient | Fig Filling | Crisp Topping |
|---|---|---|
| Fresh Figs | 5 cups | |
| Granulated Sugar | 1/3 cup | |
| Lemon Juice | 1 tbsp | |
| Vanilla Extract | 1 tsp | |
| Cornstarch/Arrowroot | 2 tbsp | |
| Ground Cinnamon | 1/4 tsp | 1/2 tsp |
| Sea Salt | pinch | 1/4 tsp |
| Old-Fashioned Oats | 3/4 cup | |
| All-Purpose Flour | 1/2 cup | |
| Light Brown Sugar | 1/2 cup | |
| Ground Nutmeg | 1/4 tsp | |
| Unsalted Butter | 1/2 cup, cubed | |
| Walnuts/Pecans | 1/3 cup, optional |
We focus on simple pantry items for crisp success. These amounts yield enough to fill a standard nine-inch baking dish with a thick, buttery topping worthy of bakery status.
Equipment Needed
To achieve the perfect Fig Crisp texture and flavor, we rely on a few essential tools. Each piece of equipment plays a vital role in ensuring even baking, thorough mixing, and an irresistible crisp-topping finish.
List of Essential Equipment
- 9×9-inch Baking Dish: Ideal size for spreading figs and topping evenly, allowing consistent baking.
- Mixing Bowls: At least two medium bowls for separating wet and dry ingredients.
- Measuring Cups and Spoons: For precision when working with sugar, flour, and spices.
- Cutting Board and Paring Knife: Perfect for trimming and quartering fresh figs safely and smoothly.
- Pastry Cutter or Fork: Helps us cut cold butter into the oat topping, giving that “bakery-style” crumble.
- Spatula or Wooden Spoon: For stirring fillings and scooping the crisp into the baking dish.
- Oven Mitts: Necessary for safely transferring the hot, bubbling crisp from oven to counter.
- Wire Cooling Rack: Allows our crisp to set for a few minutes after baking, ensuring it firms up for serving.
Equipment Table
| Equipment | Purpose |
|---|---|
| 9×9-inch Baking Dish | Even baking and golden topping |
| Mixing Bowls | Separating and combining filling and topping |
| Measuring Tools | Precise ingredient portions for consistent results |
| Knife & Cutting Board | Clean, accurate fig prep |
| Pastry Cutter/Fork | Creates crumbly, buttery topping |
| Spatula/Spoon | Evenly mixes and transfers filling/topping |
| Oven Mitts | Ensures safe removal of hot dish from oven |
| Cooling Rack | Cools the crisp, encouraging the topping to firm up |
With the right Fig Crisp equipment, we streamline the process and guarantee delicious, show-stopping results every time. As we move to the next steps, each tool ensures accuracy, safety, and ease, supporting our quest for the ultimate fruit crisp experience.
Make-Ahead Tips
To make our Fig Crisp Recipe even more convenient for busy schedules or special occasions, we can plan ahead using these simple strategies:
Prepare the Fig Filling in Advance
We can mix the fresh figs, sugar, lemon juice, vanilla, and cornstarch up to 24 hours ahead. Transfer the mixture to an airtight container and refrigerate. This step allows the figs to release their juices and deepens their flavor, providing a more jam-like texture when baked.
Assemble the Crisp Topping the Night Before
Combine the oats, flour, brown sugar, and butter for the crisp topping. Keep this mixture in a sealed bag or container in the refrigerator. When we’re ready to bake, we simply sprinkle the chilled mixture over the figs, saving valuable prep time.
Bake and Store for Later Enjoyment
The entire Fig Crisp can be baked up to 2 days ahead. Once cooled, cover tightly and refrigerate. To serve, reheat in a 350°F oven for about 15 minutes for a freshly-baked effect, or serve cold—both options deliver delicious results.
Portion and Freeze for Extended Storage
For longer storage, we can portion the cooled Fig Crisp into individual servings, wrap well, and freeze for up to 2 months. To enjoy, thaw overnight in the refrigerator and reheat as desired.
| Step | Prep Time Ahead | Storage Method | Recommended Duration |
|---|---|---|---|
| Make fig filling | Up to 24 hours | Airtight container, fridge | 24 hours |
| Prepare crisp topping | Up to 24 hours | Sealed container, fridge | 24 hours |
| Fully bake & cool | Up to 2 days | Covered, fridge | 2 days |
| Portion and freeze | Up to 2 months | Wrapped, freezer | 2 months |
Quick Tip
“For best texture, add the crisp topping just before baking. This keeps it golden and crunchy, ensuring bakery-quality results every time.”
By following these Make-Ahead Tips, we streamline our baking process while preserving the fresh, buttery flavors our Fig Crisp Recipe is loved for.
Directions
Let us walk step-by-step through our Fig Crisp Recipe for a flawless dessert every time. These directions guide us from prepping figs to enjoying golden, bakery-worthy crisp perfection.
Prep the Figs
- Select and Wash Figs:
We choose ripe, fresh figs for the richest flavor. Rinse the figs under cool water and pat them dry with a towel.
- Trim and Slice:
On a sturdy cutting board, remove the stems from each fig. Slice the figs into quarters or halves, depending on size and preference.
- Mix the Filling:
In a large mixing bowl, combine the cut figs with:
- 1/4 cup granulated sugar
- 1 tablespoon lemon juice
- 1 teaspoon vanilla extract
- 1 tablespoon cornstarch
- 1/2 teaspoon ground cinnamon
- 1/4 teaspoon ground nutmeg
Toss gently to coat the figs evenly. Pour the mixture into a greased 9×9-inch baking dish.
Tip: For a deeper, jammy flavor, chill the mixed filling for 30 minutes to 1 hour before baking.
Prepare the Crisp Topping
- Combine Dry Ingredients:
In another bowl, add:
- 3/4 cup old-fashioned oats
- 1/2 cup all-purpose flour
- 1/2 cup light brown sugar
- 1/2 teaspoon kosher salt
Stir to mix.
- Add Butter:
Cut 1/2 cup (1 stick) of cold, unsalted butter into small cubes. Use a pastry cutter or fork to blend the butter into the oat mixture. The mixture should look crumbly, with pieces no larger than a pea.
Topping Texture Table
| Crisp Element | Description |
|---|---|
| Oats + flour + sugar | Light, toasty, caramelized |
| Chilled butter | Pebbly, holds shape when baked |
Assemble the Fig Crisp
- Layer the Topping:
Sprinkle the crisp topping evenly over the fig filling, ensuring full coverage for beautifully golden results.
- Add Optional Crunch:
For extra texture, scatter 1/4 cup chopped nuts (such as walnuts or pecans) over the topping.
Bake the Crisp
- Preheat Oven:
Set the oven to 350°F (177°C).
- Bake:
Place the assembled baking dish in the center rack. Bake uncovered for 40 to 45 minutes until the topping is golden brown and the fig filling is bubbling at the edges.
- Monitor Browning:
If the topping browns too quickly, lightly cover with foil for the last 10 minutes.
Cooling and Serving
- Cool:
Remove the crisp from the oven and place it on a wire rack. Cool for at least 20 minutes. This helps the filling set for neat serving.
- Serve:
Enjoy the Fig Crisp warm for a classic dessert, topped with vanilla ice cream or whipped cream. For a breakfast treat, serve cold with Greek yogurt.
| Serving Style | Accompaniment | Experience |
|---|---|---|
| Warm dessert | Vanilla ice cream | Melts into crisp, creamy |
| Room temperature | Whipped cream | Fluffy, light, balanced |
| Cold, for breakfast | Greek yogurt | Tangy, nourishing |
Storing and Reheating
Properly storing our Fig Crisp keeps it fresh and maintains its irresistible texture. After the crisp cools to room temperature, cover the baking dish tightly with plastic wrap or transfer the leftovers to an airtight container. Store in the refrigerator for up to 4 days.
| Storage Method | Container Type | Shelf Life |
|---|---|---|
| Refrigeration | Airtight container | Up to 4 days |
| Freezer | Freezer-safe container | Up to 2 months |
Freezing Fig Crisp
We can freeze our Fig Crisp for longer storage. Allow the crisp to cool completely, then portion it into individual servings or freeze the entire dish. Wrap portions tightly in plastic wrap or place them in freezer-safe containers. Label with the date to ensure optimal flavor.
Quote:
“Freezing preserves the buttery topping and jammy fig filling, so every bite bursts with flavor even after weeks in the freezer.”
Reheating Instructions
For best results, we recommend reheating our Fig Crisp in the oven to restore its signature crisp topping.
- Oven: Preheat to 350°F. Place the crisp in an oven-safe dish. Cover loosely with foil to prevent over-browning. Heat for 15-20 minutes or until warmed through.
- Microwave: Use only for single portions. Place on a microwave-safe plate. Heat for 45-60 seconds. The topping may soften slightly but the flavor remains vibrant.
Serving After Reheating
Let the reheated Fig Crisp rest for a few minutes to regain its structure. For maximum enjoyment, we love adding a scoop of vanilla ice cream or a dollop of whipped cream while the crisp is still warm. This simple step preserves the irresistible contrast between the golden, crunchy topping and the jammy fig filling.
Tip:
If reheating from frozen, thaw the crisp in the refrigerator overnight before using the oven method for best results.
Variations and Substitutions
We can easily customize our Fig Crisp Recipe to suit different tastes, dietary needs, or ingredient availability. Whether you wish to highlight seasonal flavors or cater to special diets, see our favorite ways to switch things up below.
Fruit Combinations
- Mix fresh figs with berries – Try adding blueberries, raspberries, or blackberries for extra color and a tart balance.
- Combine figs and apples – Diced Granny Smith apples soften well and add a mellow texture.
- Swap figs for stone fruit – Use chopped peaches, plums, or apricots when figs aren’t in season.
“Figs pair particularly well with summer berries—just keep the overall fruit measurement the same to maintain the right fruit-to-topping ratio.”
Topping Adjustments
- Nutty crisp topping – Fold in 1/2 cup chopped walnuts, pecans, hazelnuts, or almonds for extra crunch and warmth.
- Gluten-free option – Replace all-purpose flour with a one-to-one gluten-free baking blend or oat flour.
- Dairy-free or vegan – Use vegan butter or coconut oil in place of traditional butter.
Sweetener Swaps
- Use coconut sugar, maple syrup, or honey in the filling and topping for natural sweetness.
- Reduce sugar by 2-3 tablespoons for a less sugary, more fruit-forward crisp.
Flavor Enhancers
- Warm spices – Add 1/2 teaspoon ground cardamom, ginger, or allspice for a more aromatic twist.
- Citrus note variations – Swap lemon juice for orange or lime juice.
- Extract upgrades – Substitute almond or orange extract for vanilla in the filling.
Allergen-Friendly Substitutions Table
| Ingredient | Substitute Option | Diet Type |
|---|---|---|
| All-purpose flour | Gluten-free flour blend | Gluten-free |
| Butter | Vegan butter or coconut oil | Vegan/Dairy-free |
| Brown sugar | Coconut sugar | Refined sugar-free |
| Oats (regular) | Certified gluten-free oats | Gluten-free |
Serving and Presentation Options
- Individual ramekins – Portion the crisp into small baking dishes for personalized servings.
- Skillet crisp – Use a cast iron skillet for extra rustic presentation and even browning.
- Toppings – Garnish with a sprinkle of sea salt, orange zest, or chopped pistachios for stunning color and bold flavors.
Serving Suggestions
Our Fig Crisp shines with versatile serving options that transform every bite into a memorable experience. Here are our favorite ways to enjoy this sweet, jammy dessert:
Serve Warm for Comfort
- Scoop the Fig Crisp fresh from the oven into shallow bowls.
- Pair it with a large spoonful of vanilla ice cream to highlight the contrast between the golden, crunchy topping and the soft, bubbling fig filling.
- “The warmth of the crisp melts the ice cream into silky rivers, intensifying every spoonful.”
Room Temperature Delight
- Let the dessert cool to room temperature for easy slicing and serving.
- Top each portion with a generous cloud of whipped cream or a drizzle of honey.
- For entertaining, present individual ramekins on elegant dessert plates with a mint sprig garnish.
Chilled for Breakfast or Brunch
- Enjoy leftovers straight from the fridge the next day.
- Add a dollop of thick Greek yogurt for protein and tang, plus a sprinkle of sliced almonds or walnuts for added crunch.
- This approach turns the dessert into a rustic, wholesome breakfast treat.
Serving Ideas at a Glance
| Serving Style | Topper | Occasion |
|---|---|---|
| Warm | Vanilla Ice Cream | Dessert, Celebrations |
| Room Temperature | Whipped Cream, Honey | Afternoon Tea, Gatherings |
| Chilled | Greek Yogurt, Nuts | Breakfast, Brunch |
| Festive | Citrus Zest, Mint | Holidays, Special Events |
Plating & Presentation Tips
- For a refined touch, dish the Fig Crisp in clear glass bowls to show off the rich fruit and crisp layers.
- Scatter fresh fig slices or berries over the top for color and freshness.
- “Individual ramekins or small cast-iron skillets give this classic dessert an upscale twist for dinner parties.”
Beverage Pairings
- Serve with hot drinks like freshly brewed coffee or Earl Grey tea for cozy gatherings.
- For an adult spin, pair with a splash of dessert wine, such as late harvest Riesling, or a light Prosecco for brunch.
Our Fig Crisp adapts beautifully to any table, whether you’re hosting a crowd or indulging solo. Each serving method brings out unique textures and flavors, making it the centerpiece of every mealtime moment.
Conclusion
When fig season arrives there’s nothing quite like the aroma and taste of a homemade Fig Crisp. This dessert brings out the best in fresh figs and lets us celebrate their natural sweetness with a touch of comfort and elegance.
Whether we’re hosting a gathering or simply treating ourselves we can count on this recipe for a memorable finish to any meal. With a few simple steps and quality ingredients we turn everyday moments into something special—one delicious bite at a time.