
Crafting our own facial soap lets us take control of what touches our skin every day. With just a few simple ingredients we can skip the harsh chemicals and tailor a gentle cleanser that suits our unique needs. It’s a great way to care for our skin while embracing a bit of DIY creativity.
Homemade facial soap isn’t just about clean skin—it’s about peace of mind. We know exactly what goes into each bar and can choose soothing oils and natural additives that nourish and refresh. Whether we’re new to soap making or looking to upgrade our skincare routine this recipe makes it easy to get started.
Why Make Your Own Facial Soap?
Crafting our own facial soap gives us control over every ingredient that touches our skin. We can skip synthetic fragrances and harsh chemicals often found in commercial cleansers. By choosing what goes into our soap, we ensure a more gentle and nourishing skincare experience.
Using natural ingredients like shea butter, coconut oil, and essential oils supports sensitive and acne-prone skin. When we make facial soap at home, we tailor each bar to our unique skin type—dry, oily, combination, or sensitive—bringing out the best in our natural complexion. As we select additives like clay, oatmeal, or aloe vera, we customize your soap’s texture and benefits.
Benefits of Homemade Facial Soap
| Benefit | Homemade Facial Soap | Typical Store-Bought Soap |
|---|---|---|
| Ingredient Control | Full control | Limited or none |
| Customization | Personalized blends | Standard formulas |
| Cost Efficiency | Cost-effective | Can be expensive |
| Sustainability | Eco-friendly options | Often less sustainable |
| Skin Friendliness | Fewer allergens | Potential irritants |
“Making our own facial soap allows us to align our skincare with our values and address our skin’s specific needs on our terms.”
By embracing DIY facial soap, we eliminate guesswork and offer our skin the purest cleanse possible. As we control the process from start to finish, we foster healthier habits and a deeper connection to our daily self-care.
Ingredients for Facial Soap Recipe
To create our own facial soap recipe at home, we select ingredients known for their gentle cleansing and nourishing qualities. Each component is carefully chosen to ensure our skin feels refreshed, moisturized, and soothed.
Essential Oils and Fragrances
We use essential oils to add both scent and skin benefits to our facial soap recipe. Select oils that complement your skin type:
- Lavender essential oil (gentle and calming)
- Tea tree essential oil (clarifying)
- Geranium essential oil (balancing)
- Rose essential oil (hydrating and soothing)
- Unscented option for sensitive skin
“Essential oils offer botanically derived fragrances and unique skincare properties for our handmade facial soap.”
Base Oils and Butters
Base oils and butters provide structure, lather, and nourishment. Our favorites for a well-balanced bar include:
- Olive oil (5 oz, moisturizing and gentle)
- Coconut oil (3 oz, cleansing and creates lather)
- Shea butter (2 oz, rich and creamy)
- Sweet almond oil (1 oz, soothing and softening)
- Castor oil (1 oz, boosts lather)
- All oils should be cold-pressed and unrefined for maximum benefit
| Base Oil / Butter | Measurement | Benefit |
|---|---|---|
| Olive oil | 5 oz | Moisturizing/gentle |
| Coconut oil | 3 oz | Cleansing/lather |
| Shea butter | 2 oz | Nourishing/creamy |
| Sweet almond oil | 1 oz | Soothing/softening |
| Castor oil | 1 oz | Lather boosting |
Lye Solution
A Lye Solution is essential for the saponification process that leads to handcrafted facial soap:
- Sodium hydroxide (lye) (1.5 oz, food or cosmetic grade)
- Distilled water (3.5 oz, not tap water)
Always add lye to water (never the reverse) for safety.
Additives and Colorants (Optional)
For added benefits and visual appeal, we can include optional additives and colorants:
- Finely ground oats (1 tsp, gentle exfoliation)
- French green clay (1 tsp, detoxifying and oil absorbing)
- Aloe vera gel (1 tbsp, soothing)
- Vitamin E oil (5-10 drops, antioxidant boost)
- Rose clay or activated charcoal (for natural color)
Natural additives support customized care in our facial soap recipe, targeting unique skin concerns.
Equipment and Safety Precautions
Proper equipment and strict safety are critical when making homemade facial soap. Let’s gather our tools and set up a safe workspace to ensure our DIY skincare project is enjoyable and accident-free.
Tools You’ll Need
We rely on the right tools for precise measurements, safe handling, and smooth blending of our facial soap ingredients. Below is a checklist of essentials:
| Equipment | Purpose |
|---|---|
| Digital Kitchen Scale | Accurate ingredient measuring |
| Heat-Resistant Bowls | Melting oils and combining mixtures |
| Stainless Steel Pot | Heating and blending base oils |
| Immersion Blender | Achieving smooth and even saponification |
| Silicone Spatula | Scraping and mixing soap batter |
| Soap Mold | Shaping and setting the final soap bars |
| Thermometer | Monitoring oil and lye temperatures |
| Safety Goggles | Protecting eyes from lye splashes |
| Nitrile Gloves | Preventing skin contact with lye and oils |
| Apron | Shielding clothes and skin from spills |
| Measuring Spoons | Precise measurement of additives |
| Disposable Paper Towels | Quick cleanup of drips and spills |
We always dedicate our soapmaking equipment to this purpose—never mix food and soap gear.
Important Safety Measures
When working with lye and essential oils, maintaining strict safety protocols is non-negotiable for skin safety and ideal results. Here’s what we prioritize every time:
- Wear safety goggles and nitrile gloves: We never handle lye without full protection to prevent burns or irritation.
- Work in a well-ventilated area: Lye fumes can be harmful. We open windows and turn on exhaust fans.
- Add lye to water, never the reverse: “Always sprinkle lye into water—not water into lye—to prevent dangerous splashing.”
- Keep vinegar nearby: Spills happen. A splash of vinegar will help neutralize lye on surfaces.
- Store ingredients out of reach: We keep children and pets away from the workspace and store all materials safely.
- Label all containers: Every ingredient and finished soap should be clearly labeled to avoid confusion and mishaps.
- Never leave hot oils or lye unattended: Focus and full attention are vital during soapmaking.
- Clean up thoroughly: We wash our tools and wipe all surfaces immediately after use, using gloves until the job is done.
By following these Equipment and Safety Precautions, we ensure each batch of our natural facial soap is safely and expertly crafted.
Directions for Making Facial Soap
We follow several essential steps to craft our own facial soap. Each stage ensures a gentle, effective bar that soothes and cleanses our skin.
Prep: Setting Up and Measuring Ingredients
- Set up our workspace in a well-ventilated area with safety goggles and gloves on.
- Gather all pre-cleaned equipment and our precise digital kitchen scale.
- Measure the following ingredients accurately:
| Ingredient | Recommended Weight | Prep Specifics |
|---|---|---|
| Olive oil | 8 ounces | Room temperature |
| Coconut oil | 4 ounces | Solid or melted |
| Shea butter | 2 ounces | Softened |
| Sweet almond oil | 2 ounces | Room temperature |
| Castor oil | 1 ounce | Room temperature |
| Distilled water | 4 ounces | Chilled |
| Lye (sodium hydroxide) | 1.7 ounces | Measured carefully |
| Essential oils | 0.5–1 ounce | As preferred |
| Optional additives | See previous section | Measured as desired |
“Accurate measurements are crucial for safe, effective facial soap.”
Mix: Creating the Lye Solution
- Pour distilled water into a heat-resistant bowl. Never add water to lye.
- Slowly sprinkle lye crystals into the water while stirring gently. Avoid inhaling fumes.
- Mix until the lye completely dissolves and the solution becomes clear.
- Set the lye solution aside in a safe place, allowing it to cool to about 100–110°F.
Safety tip: Always add lye to water, never the reverse, to prevent splashing or reaction.
Blend: Combining Oils and Lye
- Combine all measured base oils (olive oil, coconut oil, shea butter, sweet almond oil, castor oil) in a large heatproof bowl.
- Heat the oils gently until fully melted and blended, checking temperature to reach about 100–110°F.
- Slowly pour the cooled lye solution into the oils while blending with a stick blender.
- Blend on low for short bursts until the mixture thickens to light trace—the texture is similar to a thin custard.
Reaching “light trace” ensures our facial soap recipe emulsion has formed.
Pour: Adding Additives and Pouring Into Molds
- Quickly stir in essential oils and optional additives (e.g. finely ground oats, clay, vitamin E) with a spatula.
- Pour the soap batter evenly into prepared silicone or lined molds.
- Tap the molds gently to release air bubbles and level the tops as needed.
- Cover the molds lightly with wax paper or a clean towel.
Cure: Setting and Curing the Soap
- Let the soap rest in the molds for 24–48 hours until firm enough to unmold.
- Remove bars from the molds and place on a wire rack in a well-ventilated, dry spot out of direct sunlight.
- Allow the bars to cure for at least 4 weeks. This process hardens the soap and completes saponification, creating a gentle, long-lasting facial cleanser.
| Step | Time Required | Purpose |
|---|---|---|
| In-mold setting | 24–48 hours | Initial solidification |
| Open-air curing | 4+ weeks | Hardening and full saponification |
Tips for Customizing Your Facial Soap Recipe
Customizing our facial soap recipe opens the door to a truly personal skincare experience. We can adapt each batch to suit our complexion, preferred scents, or specific sensitivities. Here are our top recommendations to maximize results and make each bar uniquely ours.
Choose the Right Base Oils
Selecting the base oil determines the soap’s core qualities. For dry or mature skin, olive oil and shea butter provide deep nourishment. If we desire a soap with rich lather, coconut oil and castor oil work beautifully. For a lighter formula, try sweet almond oil or grapeseed oil.
| Base Oil | Key Benefit | Skin Type |
|---|---|---|
| Olive Oil | Moisturizing, gentle | Dry, sensitive |
| Coconut Oil | Cleansing, foaming | Normal, oily |
| Shea Butter | Nourishing, soothing | Dry, mature |
| Castor Oil | Increases lather | All types |
| Sweet Almond Oil | Lightweight, softening | Normal, combination |
Select Essential Oils by Skin Type
Personalize fragrance and benefits with essential oils. We always choose high-quality, skin-safe oils and keep usage below recommended thresholds, generally 1–3 percent of the total batch weight for facial skin.
- Dry or Mature Skin: Rose, frankincense, or lavender oil for soothing hydration
- Oily or Acne-Prone Skin: Tea tree, geranium, or lemon for balancing and purification
- Sensitive Skin: Chamomile or calendula for extra calmming properties
“A small drop of lavender or chamomile can add luxurious relaxation to our facial ritual.”
Add Natural Colorants and Exfoliants
Give our homemade facial soap visual appeal and extra benefits with natural additives.
- Oats: Finely ground for gentle exfoliation and soothing effect
- French Green Clay: Balances oil and provides a subtle earthy color
- Activated Charcoal: Detoxifies and deep cleanses for clear pores
- Rose Clay: Gently draws out impurities and adds a soft pink hue
Adjust Additives Based on Skin Goals
We use optional ingredients to take our soap to the next level:
- Aloe Vera Gel: Moisturizes and soothes sensitive skin
- Vitamin E Oil: Antioxidant boost for anti-aging effects
- Honey: Natural humectant that locks in moisture
| Additive | Main Benefit | Best For |
|---|---|---|
| Aloe Vera Gel | Calms, hydrates | Irritated skin |
| Vitamin E Oil | Antioxidant protection | Aging skin |
| Honey | Moisturizing, soothing | All types |
Experiment With Scents and Designs
We blend citrus notes with florals for uplifting fragrances or swirl in colored clays for unique designs. Using silicone molds of various shapes gives each bar a distinct look. Personal touches make our DIY facial soap a reflection of our style and needs.
Patch Test All Variations
Before using a new combination or ingredient, we always patch test a small amount on our inner arm. This step helps us avoid adverse reactions and ensures our custom recipe is gentle for daily use.
By thoughtfully selecting oils, essential oils, additives, and colors, we make each facial soap recipe a handcrafted creation tailored for glowing results.
How to Store and Use Homemade Facial Soap
Storing Homemade Facial Soap
Proper storage is key to preserving our homemade facial soap and maintaining its nourishing quality. Here is how we can ensure long-lasting bars:
- Allow Soap to Cure Completely
Let bars cure for at least four weeks in a cool, dry, and well-ventilated area. This step ensures the soap hardens fully and lasts longer during use.
- Keep Away from Moisture
Always store finished bars in a dry environment. Excess humidity softens the soap and causes it to dissolve quickly.
- Use an Airtight Container or Wrap
If storing for future use or gifting, wrap bars in parchment paper or place them in airtight containers. This protects them from dust and retains their scent.
- Avoid Direct Sunlight
Keep bars out of direct sunlight to prevent fading of natural colors and scents.
- Separate Scents
Store different varieties or scents separately to avoid fragrance blending.
Soap Storage Tips Table
| Storage Method | Benefit |
|---|---|
| Cure in open air | Hardens soap, increases longevity |
| Wrap in parchment | Keeps out dust, preserves freshness |
| Airtight container | Maintains scent, protects texture |
| Keep off damp surfaces | Prevents mushiness and early spoilage |
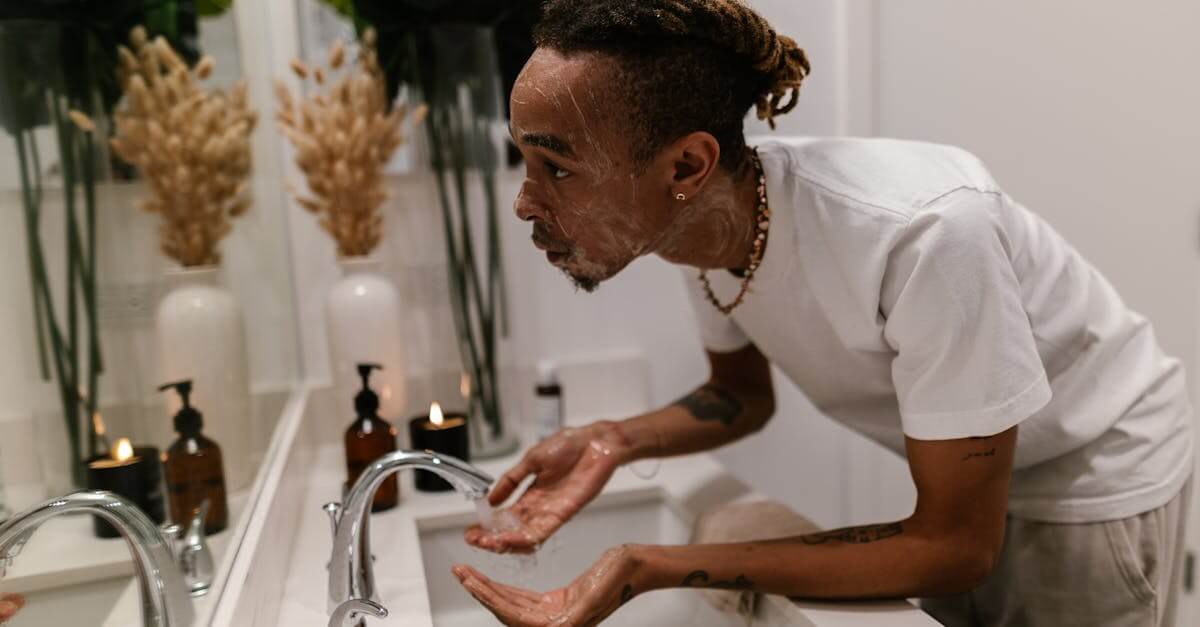
Using Homemade Facial Soap
To enjoy the full benefits of our natural facial soap in your daily routine:
- Wet Your Face
Use lukewarm water to open pores and prepare your skin.
- Lather Gently
Rub the soap between your hands with water until a creamy lather forms. Apply the lather to your face with gentle, circular motions.
- Rinse Thoroughly
Use cool or lukewarm water to thoroughly rinse off all soap, preventing residue buildup.
- Pat Dry
Pat your face gently with a clean towel to preserve skin’s moisture.
- Follow With Moisturizer
Complete your routine by applying a favorite moisturizer or serum.
“Use a fresh, clean towel for your face every day to avoid spreading bacteria or irritating sensitive skin.”
Usage Frequency Table
| Skin Type | Recommended Use |
|---|---|
| Normal/Dry | Once daily, evening |
| Oily/Combination | Morning and evening |
| Sensitive | 3–4 times per week |
Pro Tips for Maximum Effectiveness
- Keep the facial soap on a slatted soap dish between uses for faster drying and longer-lasting bars.
- Don’t leave soap in standing water, as it will dissolve and lose its shape.
- If using exfoliating additives, gently massage in small circles to avoid irritation.
- Patch-test new recipes on your inner arm before full facial use.
With mindful storage and gentle application, our homemade facial soap provides a pure, effective cleansing ritual tailored to our unique skincare needs.
Conclusion
Creating our own facial soap lets us take charge of our skincare in a way that’s both rewarding and empowering. With a few simple tools and quality ingredients we can craft a cleanser that’s gentle effective and tailored to our specific needs.
This hands-on approach not only supports healthier skin but also encourages mindful habits and a deeper connection to our daily routines. Let’s embrace the process and enjoy the benefits of natural homemade facial soap every day.