
There’s something magical about making ice cream at home. With the Elite Gourmet Ice Cream Maker, we can whip up creamy, delicious treats in no time. This handy appliance takes the guesswork out of the process and lets us experiment with endless flavors.
Ingredients for Elite Gourmet Ice Cream Maker Recipes
To craft delicious and creamy ice cream with the Elite Gourmet Ice Cream Maker, it’s essential to have the right ingredients on hand. Below we outline the basic essentials and a variety of Optional Flavor Add-Ins and Toppings to customize your homemade creations.
Basic Ingredients Needed
For every classic batch of ice cream, these fundamental components create the perfect creamy texture and balanced flavor:
- Heavy cream – 2 cups (provides richness and smoothness)
- Whole milk – 1 cup (balances creaminess for scoopable texture)
- Granulated sugar – ¾ cup (sweetens without overpowering)
- Pure vanilla extract – 1 teaspoon (boosts classic flavor)
- Pinch of salt (enhances overall taste and balances sweetness)
These ingredients form the base for nearly all Elite Gourmet Ice Cream Maker recipes, giving us flexibility to transform them into endless flavors.
| Ingredient | Measurement | Purpose |
|---|---|---|
| Heavy cream | 2 cups | Creates richness |
| Whole milk | 1 cup | Balances creaminess |
| Granulated sugar | ¾ cup | Adds sweetness |
| Pure vanilla extract | 1 teaspoon | Enhances flavor |
| Pinch of salt | To taste | Balances sweetness and flavor |
Optional Flavor Add-Ins and Toppings
To make each batch truly unique, we often add various mix-ins and toppings. Consider these popular options to elevate your ice cream experience:
- Fresh fruits — strawberries, blueberries, mango chunks, or banana slices
- Chocolate chips or chunks — dark, milk, or white chocolate varieties
- Nuts — toasted almonds, pecans, walnuts, or pistachios
- Syrups and sauces — caramel drizzle, hot fudge, or fruit coulis
- Spices and extracts — cinnamon, mint extract, or almond extract
- Cookie pieces or brownie chunks — for added texture
- Marshmallows or candy bits — to create fun dessert flavors
By blending these flavor add-ins during the final minutes of churning, we ensure even distribution and enhanced taste in every scoop. Toppings are best sprinkled over ice cream just before serving for optimal texture contrast.
Use this versatile list to customize our Elite Gourmet Ice Cream Maker recipes and turn simple ingredients into delightful frozen treats.
Equipment and Tools
To master the art of homemade ice cream using the Elite Gourmet Ice Cream Maker, having the right equipment and tools is essential. These instruments ensure smooth preparation, consistent texture, and delightful flavors in every batch.
Elite Gourmet Ice Cream Maker Overview
The Elite Gourmet Ice Cream Maker is a compact and user-friendly appliance designed to simplify ice cream creation at home. Its built-in freezing bowl requires pre-chilling for optimal results, allowing us to churn creamy, smooth ice cream in under 30 minutes. Key features include:
- Built-in motor with auto-shutoff for convenient churning
- Freezing bowl capacity ranging from 1 to 1.5 quarts, ideal for family portions
- Transparent lid with a spout perfect for adding ingredients during churning
- Easy-to-clean removable parts
By understanding and utilizing these features, we maximize the efficiency and output quality of our ice cream recipes.
Additional Kitchen Tools Needed
While the Elite Gourmet Ice Cream Maker is the centerpiece, several other tools enhance our ice cream-making experience. These tools help with measuring, mixing, and preparing ingredients before and after churning:
| Tool | Purpose |
|---|---|
| Measuring cups and spoons | Precise measurements of dairy, sugar, and flavorings |
| Mixing bowls | Combining ingredients thoroughly before pouring into the machine |
| Whisk | Whipping eggs or cream to the desired consistency |
| Rubber spatula | Scraping down bowl sides to incorporate all ingredients |
| Freezer-safe containers | Storing finished ice cream for firming and serving |
| Thermometer | Monitoring temperature of base mixtures for safety and quality |
Having these tools ready allows us to maintain clean workflows and create consistent ice cream batches with the Elite Gourmet Ice Cream Maker. Together, this equipment forms the backbone of every delicious homemade recipe we craft.
Preparation Steps
To create the perfect batch of Elite Gourmet Ice Cream Maker recipes, we must follow precise preparation steps. These ensure smooth operation and deliciously creamy results every time.
Prepping Ingredients
Before turning on our Elite Gourmet Ice Cream Maker, let’s gather and prepare the key ingredients carefully:
- Heavy cream: Measure exactly 2 cups for a rich creamy texture.
- Whole milk: Use 1 cup to balance creaminess and smoothness.
- Granulated sugar: Add 3/4 cup for balanced sweetness.
- Pure vanilla extract: Include 1 tablespoon to enhance flavor depth.
- Pinch of salt: A small 1/4 teaspoon to elevate overall taste.
Optional add-ins should be prepped in advance so they can be folded in during the last 5 minutes of churning:
- Slice fresh fruits into bite-size pieces
- Chop nuts finely to distribute evenly
- Prepare syrups and spices for swirl effects
- Crush cookie pieces lightly for crunchy texture
| Ingredient | Quantity | Prep Details |
|---|---|---|
| Heavy cream | 2 cups | Measured precisely |
| Whole milk | 1 cup | Cold from refrigerator |
| Granulated sugar | 3/4 cup | Dissolved or ready to mix |
| Pure vanilla extract | 1 tablespoon | High quality, pure extract |
| Salt | 1/4 teaspoon | Pinch for flavor enhancement |
Setting Up the Ice Cream Maker
Proper setup of our Elite Gourmet Ice Cream Maker is critical for consistent creamy ice cream:
- Freeze the bowl: Place the removable freezing bowl in the freezer at least 12 hours before use. The bowl must be fully frozen to reach optimum consistency.
- Assemble the machine: Secure the frozen bowl onto the base. Insert the paddle and position the transparent lid tightly to prevent spills.
- Prepare workspace: Have measuring cups, whisk, and rubber spatula within reach. Keep freezer-safe containers ready for post-churn storage.
- Power up: Plug in the ice cream maker and confirm the auto-shutoff feature is functional for safe operation.
“A fully frozen bowl is the secret to achieving that smooth creamy texture quickly and efficiently.”
Following these Preparation Steps ensures our Elite Gourmet Ice Cream Maker performs at its best, enabling us to explore endless delicious flavor options with perfect results.
Instructions for Making Ice Cream
Follow these step-by-step instructions to create creamy, flavorful ice cream using the Elite Gourmet Ice Cream Maker. Precision and timing are key to perfect results every time.
Making the Base Mixture
To start, we focus on preparing a smooth and rich ice cream base. This forms the foundation for any flavor variation.
- Measure Ingredients Accurately:
- Heavy cream: 1 cup (240 ml)
- Whole milk: 1 cup (240 ml)
- Granulated sugar: ¾ cup (150 g)
- Pure vanilla extract: 1 ½ teaspoons
- Pinch of salt
- Combine and Whisk:
- In a large mixing bowl, whisk the heavy cream, whole milk, and granulated sugar until the sugar is fully dissolved.
- Stir in the pure vanilla extract and pinch of salt to balance and enhance the flavor.
- Chill the Base (Optional but recommended):
- Cover and refrigerate the base for 30 minutes to 1 hour to improve texture and flavor depth.
| Ingredient | Quantity | Preparation Notes |
|---|---|---|
| Heavy cream | 1 cup (240 ml) | Chilled |
| Whole milk | 1 cup (240 ml) | Chilled |
| Granulated sugar | ¾ cup (150 g) | Fully dissolved |
| Pure vanilla extract | 1 ½ tsp | High-quality for best flavor |
| Salt | Pinch | Enhances overall taste |
Churning Ice Cream with the Elite Gourmet Machine
Using the Elite Gourmet Ice Cream Maker correctly ensures a creamy and smooth final product.
- Prepare the Freezing Bowl:
- Freeze the bowl for at least 12 hours until solid frozen for optimal churning performance.
- Set Up the Ice Cream Maker:
- Assemble the machine according to the included instructions.
- Place the frozen bowl securely on the base.
- Attach the paddle and cover with the transparent lid.
- Pour the Base:
- Slowly pour the chilled ice cream base into the frozen bowl through the lid opening.
- Start Churning:
- Turn on the machine and let it churn for 20 to 30 minutes or until the mixture thickens to soft-serve consistency.
- The built-in motor will automatically shut off when churning is complete.
- Monitor Texture:
- Check periodically to avoid over-churning which may cause iciness or grainy texture.
Adding Mix-Ins and Flavors
For personalized and exciting variety, add your favorite flavorings during the last stage of churning.
- Prepare Mix-Ins:
- Chop or slice optional ingredients like nuts, fresh fruit, cookie pieces, or chocolate chips.
- Add During Last 5 Minutes:
- With the machine running, slowly introduce mix-ins through the lid opening.
- Allow the paddle to evenly distribute ingredients throughout the ice cream.
- Transfer and Freeze:
- Use a rubber spatula to transfer the ice cream into a freezer-safe container.
- Seal and freeze for 2 to 4 hours for firm scooping consistency.
- Serve and Enjoy:
- Your custom ice cream is ready to savor. Add toppings or syrups as desired for extra indulgence.
By mastering these precise Instructions for Making Ice Cream with the Elite Gourmet Ice Cream Maker, we unlock endless possibilities for delicious homemade treats.
Specific Elite Gourmet Ice Cream Maker Recipes
With our Elite Gourmet Ice Cream Maker, we unlock a world of creamy, flavorful homemade ice cream. Below are five easy-to-follow, delicious recipes perfect for crafting in this compact machine.
Classic Vanilla Ice Cream
This timeless recipe highlights the simplicity and richness of pure vanilla paired with a creamy base.
Ingredients:
- 2 cups heavy cream
- 1 cup whole milk
- 3/4 cup granulated sugar
- 1 tablespoon pure vanilla extract
- Pinch of salt
Instructions:
- Whisk together the heavy cream, whole milk, sugar, and salt until sugar dissolves completely.
- Stir in vanilla extract.
- Chill the mixture in the fridge for at least 2 hours.
- Pour into the Elite Gourmet Ice Cream Maker and churn for 25–30 minutes until thick and creamy.
- Transfer to a freezer-safe container and freeze for 2 hours before serving.
Chocolate Fudge Swirl
A decadent chocolate treat with ribbons of rich fudge swirled through velvety ice cream.
Ingredients:
- 2 cups heavy cream
- 1 cup whole milk
- 3/4 cup granulated sugar
- 1/2 cup unsweetened cocoa powder
- 1 teaspoon pure vanilla extract
- Pinch of salt
- 1/2 cup hot fudge sauce, chilled but pourable
Instructions:
- Whisk cream, milk, sugar, cocoa powder, and salt until well blended.
- Add vanilla extract, stir to combine.
- Refrigerate mixture for 2 hours.
- Churn in the ice cream maker until thickened, about 25 minutes.
- Once churned, transfer half the ice cream to a container, drizzle with half the hot fudge sauce, then add the remaining ice cream and top with the rest of the fudge.
- Use a spatula to gently swirl fudge through.
- Freeze for 2 hours before serving.
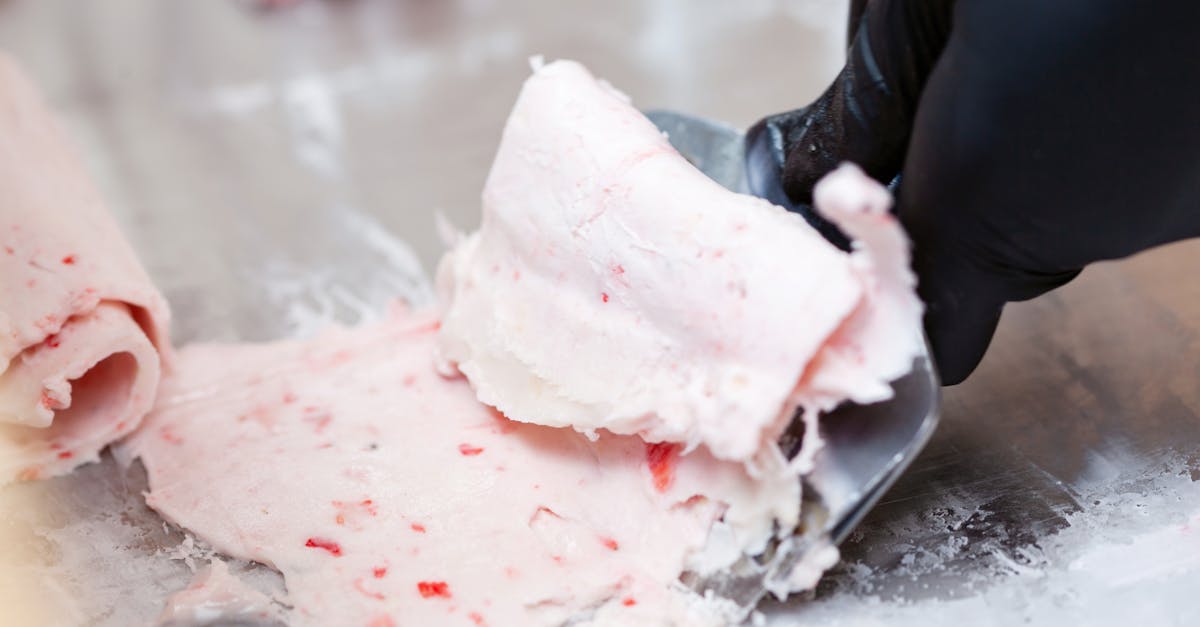
Strawberry Delight
Celebrate fresh strawberries in this bright, fruity frozen delight.
Ingredients:
- 2 cups heavy cream
- 1 cup whole milk
- 3/4 cup granulated sugar
- 1 teaspoon pure vanilla extract
- Pinch of salt
- 1 1/2 cups fresh strawberries, hulled and chopped
Instructions:
- Puree strawberries with 1/4 cup sugar until smooth (leave some chunks for texture if preferred).
- Combine cream, milk, remaining sugar, salt, and vanilla extract. Whisk well.
- Stir in strawberry puree.
- Chill mixture for 2 hours.
- Pour into Elite Gourmet Ice Cream Maker, churn for 25–30 minutes.
- Freeze for 2 hours before serving for best texture.
Mint Chocolate Chip
A refreshing blend of cool mint and crunchy chocolate bits for a fan-favorite ice cream.
Ingredients:
- 2 cups heavy cream
- 1 cup whole milk
- 3/4 cup granulated sugar
- 1 teaspoon peppermint extract
- Pinch of salt
- 1/2 cup mini chocolate chips
Instructions:
- Mix cream, milk, sugar, and salt until sugar dissolves.
- Add peppermint extract.
- Chill the base in the fridge for 2 hours.
- Churn in the ice cream maker for 20 minutes.
- Add mini chocolate chips during the last 5 minutes of churning.
- Transfer to container and freeze 2 hours before serving.
Mango Sorbet
A dairy-free refreshing sorbet bursting with tropical mango flavor.
Ingredients:
- 4 cups ripe mango, peeled and chopped
- 3/4 cup granulated sugar
- 1/2 cup water
- 1 tablespoon fresh lime juice
Instructions:
- Blend mango, sugar, water, and lime juice until smooth.
- Chill mixture for 1 hour.
- Pour into the Elite Gourmet Ice Cream Maker.
- Churn for approximately 25 minutes until sorbet consistency forms.
- Freeze for an additional hour to firm up.
| Recipe | Churn Time (minutes) | Chill Time (hours) | Freeze Time (hours) | Special Tips |
|---|---|---|---|---|
| Classic Vanilla | 25-30 | 2 | 2 | Chill base fully for creaminess |
| Chocolate Fudge Swirl | 25 | 2 | 2 | Swirl fudge gently |
| Strawberry Delight | 25-30 | 2 | 2 | Use fresh ripe strawberries |
| Mint Chocolate Chip | 20 | 2 | 2 | Add chips near end of churn |
| Mango Sorbet | 25 | 1 | 1 | Use ripe mangoes for best flavor |
With these specific recipes, our Elite Gourmet Ice Cream Maker transforms simple ingredients into irresistible frozen delights every time.
Tips for Perfect Ice Cream
Mastering the art of making creamy, smooth, and delicious ice cream with the Elite Gourmet Ice Cream Maker requires attention to detail and a few expert tips. These guidelines ensure each batch turns out perfect every time, maximizing the potential of our appliance and ingredients.
Achieving Ideal Consistency
To achieve the ideal ice cream consistency—rich, smooth, and scoopable—consider these key factors:
- Chill the ice cream base thoroughly before churning. A cold base freezes faster and churns into a smoother texture.
- Use the Elite Gourmet Ice Cream Maker’s built-in freezing bowl properly by ensuring it is fully frozen for at least 24 hours before use.
- Monitor the churning process carefully. Ice cream is ready when it thickens, resembling soft-serve texture. Over-churning can cause the mixture to become too hard or icy.
- Incorporate fat content properly—heavy cream and whole milk provide the creaminess, while sugar balances the freezing point.
- Add mix-ins like nuts or chocolate chips in the last few minutes of churning to prevent sinking and maintain texture.
| Tip | Purpose | Impact on Ice Cream |
|---|---|---|
| Chill base 4+ hours | Faster freezing during churning | Creamier and smoother texture |
| Freeze bowl 24 hours prior | Proper freezing of bowl | Efficient ice cream formation |
| Avoid over-churning | Monitor soft-serve stage | Prevent icy or grainy texture |
| Use full-fat dairy | Enhances creaminess | Rich, luscious mouthfeel |
| Add mix-ins late | Even distribution without sinking | Consistent texture and flavor |
Troubleshooting Common Issues
Even with the Elite Gourmet Ice Cream Maker, some challenges can arise. Here’s how we address the most common issues:
- Ice cream too soft or runny: Ensure the base is sufficiently chilled and the freezing bowl is fully frozen. Also, check churning time; sometimes longer churning is needed.
- Ice cream icy or grainy: Avoid using low-fat ingredients and make sure sugar is fully dissolved in the base. Over-churning or short freezing time can cause poor texture.
- Ice cream sticks to the bowl: Before starting we can lightly coat the bowl with a small amount of oil or spray to prevent sticking.
- Mix-ins sinking to the bottom: Add nuts, fruits, or chocolate chips near the end of churning to keep them suspended evenly.
“Perfect homemade ice cream is all about patience and attention to temperature control.”
Storage and Serving Suggestions
- Transfer finished ice cream into an airtight, freezer-safe container. Smooth the top with a spatula and press a piece of parchment paper or plastic wrap directly on the surface to prevent freezer burn.
- Freeze for at least 2–4 hours for firmer texture before serving.
- Let the ice cream sit at room temperature for 5 to 10 minutes before scooping to ease serving.
- Store homemade ice cream for up to 2 weeks for best flavor and texture retention.
- Serve with complementary toppings such as fresh fruits, nuts, syrups, or crushed cookies to enhance presentation and flavor.
| Storage Step | Detail | Recommended Timeframe |
|---|---|---|
| Airtight container | Use freezer-safe, sealable containers | Prevents freezer burn |
| Press plastic wrap | Cover surface to minimize air exposure | Keeps ice cream fresh |
| Freeze after churning | Allows ice cream to harden | 2–4 hours before serving |
| Serving ease | Let soften slightly at room temperature | 5–10 minutes for easier scooping |
| Maximum storage duration | Consume for best taste and texture | Up to 2 weeks |
Make-Ahead and Storage Instructions
Proper make-ahead planning and storage are essential to preserve the rich creaminess and vibrant flavors of our Elite Gourmet Ice Cream Maker recipes. Below we share reliable methods to freeze, store, and prepare your homemade ice cream for maximum enjoyment.
Freezing and Storing Ice Cream
To maintain the ideal texture and taste of our homemade ice cream when storing:
- Transfer freshly churned ice cream into an airtight, freezer-safe container. This prevents ice crystals and freezer burn.
- Press a piece of plastic wrap or parchment paper directly on the surface before sealing the container lid, which helps retain moisture and smoothness.
- Store the container in the coldest part of your freezer, ideally between -5°F to 0°F (-20°C to -18°C), to maintain optimal texture.
- Allow the ice cream to harden for at least 4 hours before serving for the best scoopability.
- Homemade ice cream is best consumed within 2 weeks for premium flavor and creaminess.
| Storage Tip | Recommended Practice |
|---|---|
| Container | Airtight, freezer-safe plastic or glass |
| Covering Surface | Plastic wrap or parchment paper |
| Freezer Temperature | -5°F to 0°F (-20°C to -18°C) |
| Hardening Time | Minimum 4 hours |
| Optimal Consumption Time | Within 2 weeks |
“The key to luscious homemade ice cream lies in freezing it quickly in a sealed container and storing it at consistent low temperatures.”
Best Practices for Make-Ahead Preparations
Planning ahead allows us to enjoy our Elite Gourmet creations with ease. Follow these tips to get ahead without sacrificing freshness:
- Prepare the ice cream base up to 2 days in advance and keep it tightly covered in the refrigerator. This allows flavors to meld and improves texture during churning.
- Ensure the freezing bowl of the ice cream maker is thoroughly frozen overnight for efficient churning.
- When adding mix-ins like nuts, fruits, or cookie pieces, fold them in after churning just before transferring to the storage container to avoid sogginess.
- Portion ice cream into single-serve containers for convenient quick treats and easier thawing.
- Label containers with the flavor and date to track freshness and rotation.
By integrating these make-ahead strategies into our workflow, we guarantee smooth preparation and perfectly creamy ice cream every time.
Pro Tip: Let the ice cream sit at room temperature for 5-10 minutes before scooping to soften for optimal texture.
Cleaning and Maintenance of the Elite Gourmet Ice Cream Maker
Keeping our Elite Gourmet Ice Cream Maker in pristine condition is essential for consistent performance and delicious results every time. Proper cleaning and maintenance prolong the life of the appliance and ensure food safety. Let’s walk through the best practices step-by-step.
Step 1: Disassemble After Each Use
- Unplug the ice cream maker to ensure safety.
- Remove the freezing bowl, lid, and paddle carefully.
- Detach any removable parts for thorough cleaning.
Step 2: Wash Components Correctly
- Wash the freezing bowl and detachable parts in warm soapy water using a soft sponge.
- Avoid abrasive cleaners or scrubbers to protect the surfaces.
- Rinse thoroughly under running water to remove soap residue.
- Dry all parts completely with a clean towel or air dry to prevent moisture buildup.
Step 3: Clean the Base Unit with Care
- Wipe the motor base and exterior with a damp cloth; never immerse it in water.
- Use a soft brush or cloth to clean any crevices gently.
- Keep the motor dry at all times to avoid damage.
Step 4: Special Care for the Freezing Bowl
- Always store the freezing bowl in the freezer upright to maintain its efficacy.
- Avoid pre-freezing liquids inside the bowl; only freeze empty to preserve the cooling gel.
- If you notice any residue or odors, soak the bowl in warm water for 10 minutes and wipe clean.
Step 5: Routine Maintenance Tips
- Inspect the paddle and lid seals regularly for cracks or wear; replace if necessary.
- Store your ice cream maker in a cool, dry place when not in use.
- Before each use, ensure the freezing bowl is completely frozen (about 12-18 hours in the freezer).
- Periodically check the power cord for damage to maintain electrical safety.
Cleaning and Maintenance Quick Guide
| Component | Cleaning Method | Drying Method | Maintenance Tip |
|---|---|---|---|
| Freezing Bowl | Warm soapy water; soft sponge | Air dry or towel dry | Store frozen upright, no liquids |
| Paddle & Lid | Warm soapy water; gentle wash | Towel dry | Inspect seals; replace if damaged |
| Motor Base | Wipe with damp cloth | Wipe dry | Never submerge in water |
| Power Cord | Wipe with dry cloth | Air dry | Check for frays or cracks regularly |
Following these steps ensures our machine remains reliable and hygienic, ready to churn out creamy treats whenever inspiration strikes.
Conclusion
Making ice cream at home with the Elite Gourmet Ice Cream Maker opens up endless possibilities to create delicious and personalized frozen treats. With the right ingredients, careful preparation, and a bit of creativity, we can enjoy creamy, flavorful ice cream anytime.
By following the tips and recipes tailored for this handy appliance, we ensure every batch turns out smooth and satisfying. Proper storage and maintenance keep our ice cream fresh and the machine running efficiently for many sweet adventures ahead.
Frequently Asked Questions
What ingredients do I need to make ice cream with the Elite Gourmet Ice Cream Maker?
You need heavy cream, whole milk, granulated sugar, pure vanilla extract, and a pinch of salt for the base. Optional add-ins include fruits, chocolate chips, nuts, syrups, spices, and cookie pieces to customize flavors.
How long does it take to make ice cream using this machine?
The Elite Gourmet Ice Cream Maker churns and prepares creamy ice cream in under 30 minutes, making it quick and convenient.
What is the capacity of the Elite Gourmet Ice Cream Maker’s freezing bowl?
The freezing bowl has a capacity of 1 to 1.5 quarts, suitable for making small to medium batches of ice cream.
What kitchen tools do I need besides the ice cream maker?
You’ll need measuring cups, mixing bowls, a whisk, a rubber spatula, freezer-safe containers, and a thermometer for smooth preparation.
How do I avoid icy or grainy ice cream texture?
Chill the ice cream base thoroughly before churning, freeze the bowl completely, and avoid over-churning to achieve a creamy texture.
Can I prepare the ice cream base ahead of time?
Yes, preparing the base in advance and chilling it improves flavor and texture. Just keep it refrigerated until ready to churn.
How do I store homemade ice cream to keep it fresh?
Store ice cream in airtight containers, cover the surface with plastic wrap or parchment paper, and keep it at optimal freezer temperatures.
What is the best way to clean the Elite Gourmet Ice Cream Maker?
Clean the freezing bowl, paddle, and lid with warm soapy water after use. Wipe the motor base with a damp cloth and regularly inspect seals and the power cord.
Can I add mix-ins during the churning process?
Yes, use the transparent lid to add mix-ins like fruits or chocolate chips while churning for even distribution.
What are some easy recipes to try with this ice cream maker?
Try Classic Vanilla, Chocolate Fudge Swirl, Strawberry Delight, Mint Chocolate Chip, or Mango Sorbet for delicious homemade treats.