
Cooking over a campfire doesn’t have to be complicated. With a trusty Dutch oven, we can whip up hearty, delicious meals that make camping even more enjoyable. This versatile cookware lets us simmer, bake, and roast right in the great outdoors without needing a lot of gear or fuss.
Whether we’re craving a savory stew, fresh bread, or a sweet dessert, Dutch ovens deliver flavors that rival any kitchen. These easy recipes are perfect for campers of all skill levels who want to spend less time prepping and more time enjoying nature. Let’s explore some simple yet satisfying Dutch oven dishes that will become staples on every camping trip.
Essential Tools and Equipment for Camping with a Dutch Oven
To master easy Dutch oven recipes for camping, having the right tools and equipment is just as important as selecting your cookware. With proper preparation, we can ensure a smooth cooking experience in the great outdoors.
Choosing the Right Dutch Oven
Selecting the perfect Dutch oven is the foundation of successful campfire cooking. Here’s what we focus on:
- Material: We recommend a cast iron Dutch oven for its excellent heat retention and even cooking. It develops a natural non-stick surface with use.
- Size: Depending on our group size, sizes between 6 to 12 inches in diameter usually cover most camping meals. Larger sizes cook more food but require more coals.
- Lid Design: A flat lid with a lip allows us to place hot coals on top, enabling roasting and baking.
- Weight: Although cast iron is heavy, opting for a model with easier-to-handle handles or including a lid lifter can make transport simpler.
- Pre-seasoning: It’s best to buy a pre-seasoned Dutch oven to avoid seasoning it ourselves before the trip.
| Feature | Recommendation | Reason |
|---|---|---|
| Material | Cast iron | Superior heat distribution and retention |
| Size | 6 to 12 inches in diameter | Suitable for most group sizes |
| Lid | Flat with lip | Enables top heat for baking and roasting |
| Weight | Balanced (easy handle) | Easier to carry and manage |
| Seasoning | Pre-seasoned | Ready for immediate use |
Additional Tools Needed
To optimize our camping Dutch oven cooking, these essential tools and accessories come highly recommended:
- Lid Lifter: A sturdy tool with a hooked end to safely remove hot lids without burns.
- Heat-resistant Gloves: Thick gloves protect our hands when handling the hot Dutch oven or coals.
- Dutch Oven Stand or Tripod: Keeps the Dutch oven stable over the fire and allows us to manage heat sources more effectively.
- Charcoal or Hardwood Briquettes: We use these to control cooking temperature evenly around the Dutch oven.
- Campfire Tongs or Coal Shovel: Useful for moving coals around the oven’s base and lid.
- Dutch Oven Cleaning Supplies: A stiff brush and mild soap keep the oven clean while preserving the seasoning.
- Aluminum Foil: Ideal for wrapping foods and creating steam traps inside the oven.
- Meat Thermometer: Helps check doneness, especially when baking or roasting.
| Tool | Purpose |
|---|---|
| Lid Lifter | Removes hot lid safely |
| Heat-resistant Gloves | Protect hands from heat |
| Dutch Oven Stand/Tripod | Stabilizes oven over fire |
| Charcoal/Briquettes | Provides controllable heat source |
| Campfire Tongs/Coal Shovel | Moves hot coals for temperature control |
| Cleaning Supplies | Maintains oven hygiene and seasoning |
| Aluminum Foil | Wrapping and moisture retention |
| Meat Thermometer | Ensures food is perfectly cooked |
Ingredients for Easy Dutch Oven Recipes
When preparing easy Dutch oven recipes for camping, having the right ingredients on hand is essential. Let’s explore the key pantry staples and fresh ingredients that make outdoor cooking both simple and delicious.
Basic Pantry Staples for Camping Meals
These pantry staples form the backbone of most Dutch oven dishes. They are non-perishable, lightweight, and versatile for building hearty meals with minimal prep.
- Dried beans and lentils — Great for stews and chilis
- Rice and pasta — Quick side dishes or main course bases
- Canned tomatoes and sauces — Essential for rich flavor and moisture
- Broth or bouillon cubes — Adds depth to soups and braises
- Flour and baking powder — For Dutch oven breads or cobblers
- Sugar, salt, and pepper — Basic seasoning essentials
- Cooking oil (olive or vegetable) — For sautéing and moisture
- Spices and dried herbs — Such as paprika, cumin, garlic powder, thyme for flavoring
| Ingredient Type | Common Examples | Purpose |
|---|---|---|
| Legumes | Dried beans, lentils | Protein and texture in stews |
| Grains | Rice, pasta | Filling base or side |
| Canned Goods | Tomatoes, beans, sauces | Flavor and moisture |
| Seasonings | Salt, pepper, spices | Enhance flavor |
| Baking Essentials | Flour, baking powder | For bread and desserts |
| Fats | Olive oil, vegetable oil | Cooking medium and flavor carrier |
Fresh Ingredients to Bring Along
Bringing select fresh ingredients amplifies the taste and nutritional value of Dutch oven meals. We recommend compact, sturdy items that travel well.
- Onions and garlic — The base for many savory recipes
- Carrots, potatoes, and bell peppers — Good for roasting or stewing
- Fresh herbs like parsley or cilantro — Added at the end for brightness
- Lemons or limes — For a splash of acidity and freshness
- Meat and sausages (pre-portioned) — Chicken thighs, sausages, or beef chunks for protein
- Hard cheeses like cheddar or parmesan — Adds richness and texture
Tip: Pack fresh ingredients in airtight containers or resealable bags to keep them safe and fresh around the campfire.
Having these ingredients organized and ready allows us to cook a variety of easy Dutch oven recipes that keep everyone fueled and satisfied during our camping adventures.
Prep Work Before Camping
Proper preparation sets the stage for success when cooking easy Dutch oven recipes for camping. Let’s focus on key steps to streamline our cooking experience and maximize flavor without stress.
Preparing Ingredients at Home
We begin by portioning and prepping ingredients in advance to save time around the campfire. Here’s how to get started:
- Pre-cut fresh vegetables like onions, garlic, bell peppers, and carrots into uniform sizes for even cooking. Store in airtight containers or resealable bags.
- Pre-measure spices and dry ingredients in small containers or zip-lock bags. This avoids carrying bulky jars and simplifies seasoning.
- Pre-season meats or marinate in advance to deepen flavor and reduce prep at the campsite.
- Par-cook tough ingredients like dried beans or root vegetables for quicker cooking onsite.
- Prepare doughs or bread batters at home, then refrigerate or freeze in airtight tins to bake fresh from the Dutch oven.
| Ingredient Preparation | Tips for Storage | Cooking Benefit |
|---|---|---|
| Chopped Vegetables | Airtight containers/bags | Cuts down chopping time |
| Measured Spices | Small resealable bags | Faster seasoning, less mess |
| Pre-marinated Meats | Vacuum seal or airtight wrap | Richer flavor, time saver |
| Par-cooked Beans | Airtight containers/refrigerate | Shorter cook time onsite |
| Pre-made Dough | Refrigerate or freeze | Fresh bread with minimal effort |
Packing Tips for Ingredients and Equipment
Packing smartly ensures our Dutch oven cooking is hassle-free at camp. We prioritize organization and protection for both ingredients and gear:
- Use sturdy coolers or insulated bags for fresh perishable items to maintain freshness.
- Pack dry staples like rice, beans, and spices separately in waterproof airtight containers or resealable bags to prevent moisture damage.
- Bring portable shelving or stackable bins to organize ingredients, utensils, and Dutch oven tools clearly.
- Wrap your Dutch oven in heavy-duty foil or a thick cloth to protect seasoning and prevent rust during transport.
- Place lid lifters, heat-resistant gloves, and charcoal briquettes in accessible compartments for quick retrieval.
- Create a checklist to ensure nothing essential gets left behind, including cleaning brushes and fire starters.
| Packing Item | Recommended Container | Reason |
|---|---|---|
| Fresh Ingredients | Insulated cooler or bags | Preserve freshness and safety |
| Dry Staples | Airtight waterproof bags | Protect from moisture |
| Dutch Oven & Lid | Heavy-duty foil or cloth | Prevent rust and damage |
| Cooking Tools (gloves, lifters) | Compartmentalized bins | Easy access and organization |
| Charcoal/Briquettes | Metal or fireproof container | Safe transport |
Easy Dutch Oven Recipes for Camping
Dutch ovens unlock a world of easy, flavorful meals perfect for camping. With minimal prep and versatile cooking methods, we can enjoy hearty dishes that satisfy any appetite in the great outdoors.
Breakfast Recipes
Starting the day with a robust meal fuels our adventures. These Breakfast Recipes are simple to prepare, requiring just a few ingredients and our trusty Dutch oven.
Dutch Oven Breakfast Casserole
Ingredients:
- 6 large eggs, beaten
- 1 cup shredded cheddar cheese
- 1/2 lb breakfast sausage, browned and drained
- 1 small onion, diced
- 1 bell pepper, diced
- 2 cups frozen hash browns
- Salt and pepper to taste
- Cooking oil or butter
Instructions:
- Preheat the Dutch oven over medium heat, adding a small amount of cooking oil or butter to prevent sticking.
- Sauté onion and bell pepper until soft, about 5 minutes.
- Layer frozen hash browns evenly on the bottom of the Dutch oven.
- Spread cooked sausage, sautéed vegetables, and shredded cheese over the hash browns.
- Pour beaten eggs evenly over all, seasoning with salt and pepper.
- Cover with the Dutch oven lid and cook over low heat or coals for 20 to 25 minutes until eggs set and edges begin to brown.
- Remove from heat and let rest for 5 minutes before serving.
Campfire Cinnamon Roll Bake
Ingredients:
- 1 can refrigerated cinnamon rolls with icing
- 1/4 cup brown sugar
- 2 tablespoons butter, melted
- 1 teaspoon vanilla extract
- 1/2 teaspoon ground cinnamon
Instructions:
- Grease the Dutch oven lightly with butter.
- Remove cinnamon rolls from the can and place them evenly in the Dutch oven.
- Combine brown sugar, melted butter, vanilla extract, and ground cinnamon in a bowl; drizzle mixture over rolls.
- Cover and place Dutch oven over medium coals, placing some coals on the lid to ensure even heat.
- Bake for 15 to 20 minutes until rolls are golden and cooked through.
- Drizzle the included icing on top just before serving for a sweet morning treat.
| Recipe Name | Cooking Time | Key Ingredients | Heat Source |
|---|---|---|---|
| Dutch Oven Breakfast Casserole | 20-25 mins | Eggs, cheese, sausage, hash browns | Low heat campfire/coals |
| Campfire Cinnamon Roll Bake | 15-20 mins | Cinnamon rolls, brown sugar, butter | Medium heat campfire |
These breakfast options highlight how our Dutch oven simplifies cooking while delivering warm, satisfying flavors to start our camping day right.
Lunch and Dinner Recipes
For our camping adventures, hearty and straightforward meals make all the difference. Our Easy Dutch Oven Recipes for Camping include satisfying dishes that cook with minimal fuss and maximum flavor. Let’s explore three classic options that deliver comfort and convenience right over the campfire.
One-Pot Chili
This One-Pot Chili recipe requires just your Dutch oven and basic ingredients. It simmers into a rich, smoky meal perfect for warming up after a day outdoors.
Ingredients:
- 1 lb ground beef or turkey, browned
- 1 medium onion, diced
- 2 cloves garlic, minced
- 1 can (15 oz) kidney beans, drained and rinsed
- 1 can (14.5 oz) diced tomatoes
- 1 can (6 oz) tomato paste
- 1 cup beef broth or water
- 2 tsp chili powder
- 1 tsp cumin
- 1 tsp smoked paprika
- Salt and pepper to taste
- Optional: 1 diced bell pepper
Instructions:
- Heat the Dutch oven over medium heat on the campfire, then add ground meat and brown thoroughly.
- Stir in onion and garlic, cooking until translucent.
- Add kidney beans, diced tomatoes, tomato paste, and broth. Mix well.
- Sprinkle chili powder, cumin, paprika, salt, and pepper, then stir to combine.
- Cover the lid and let chili simmer gently for 30–40 minutes, stirring occasionally.
- Serve hot with optional shredded cheese, sour cream, or tortilla chips for a complete meal.
Dutch Oven Roast Chicken with Vegetables
Our Dutch Oven Roast Chicken with Vegetables is a one-dish marvel that fills your campsite with the aroma of tender, juicy poultry and caramelized roots.
Ingredients:
- 1 whole chicken (3–4 lbs), patted dry
- 3 tbsp olive oil or melted butter
- 4 large carrots, peeled and cut into chunks
- 3 medium potatoes, quartered
- 2 onions, quartered
- 4 cloves garlic, smashed
- 1 tbsp dried thyme
- 1 tbsp dried rosemary
- Salt and freshly ground black pepper
- 1 cup chicken broth
Instructions:
- Preheat the Dutch oven over coals. Rub chicken inside and out with olive oil or butter, thyme, rosemary, salt, and pepper.
- Arrange carrots, potatoes, onions, and garlic evenly in the Dutch oven base.
- Place the chicken on top of the vegetables, breast side up.
- Pour chicken broth around vegetables—not over the chicken.
- Cover and cook with consistent heat (about 350°F / 175°C), swapping coals between the lid and base, for roughly 1.5 to 2 hours. Check internal temperature — it should reach 165°F (74°C).
- Let rest 10 minutes before carving. The vegetables will be tender and infused with chicken juices.
| Step | Detail |
|---|---|
| Chicken Weight | 3–4 lbs |
| Cooking Temperature | 350°F (175°C) approx. |
| Cooking Time | 1.5 to 2 hours |
| Internal Temp (Safe) | 165°F (74°C) |
Campfire Mac and Cheese
No camping trip is complete without a creamy, comforting Campfire Mac and Cheese. The Dutch oven transforms simple ingredients into a velvety, cheesy delight everyone loves.
Ingredients:
- 8 oz elbow macaroni
- 3 cups water or broth
- 2 cups shredded sharp cheddar cheese
- 1 cup milk
- 2 tbsp butter
- 1 tsp mustard powder
- Salt and pepper to taste
- Optional: 1/2 cup cooked bacon bits or breadcrumbs for topping
Instructions:
- Bring water or broth to a boil in the Dutch oven. Add macaroni and cook until just tender (about 7–8 minutes), stirring occasionally. Drain excess liquid if needed.
- Lower heat to medium-low. Stir in butter, milk, and mustard powder until melted and smooth.
- Gradually add shredded cheese while stirring continuously until fully melted and creamy. Season with salt and pepper.
- For a crispy top layer, sprinkle bacon bits or breadcrumbs and place lid back on; heat for an additional 5 minutes.
- Serve immediately for a rich and satisfying camping meal.
These lunch and dinner recipes clearly show how a Dutch oven turns simple ingredients into memorable campfire feasts. Each dish is designed for easy preparation and clean-up so we can focus on enjoying nature’s beauty after a delicious meal.
Dessert Recipes
Our Easy Dutch Oven Recipes for Camping wouldn’t be complete without satisfying dessert options. These sweet treats are simple to prepare and perfect for sharing around the campfire, delivering rich flavors with minimal effort.
Campfire Dutch Oven Cobbler
This classic cobbler combines fresh or canned fruit with a tender biscuit topping, baked to golden perfection right in our Dutch oven. The result is a warm, juicy, and comforting dessert that’s an ideal finish to any camp meal.
Ingredients:
- 4 cups mixed fruit (berries, peaches, or apples), fresh or canned (drained)
- 1 cup granulated sugar (adjust based on fruit sweetness)
- 1 cup all-purpose flour
- 1 teaspoon baking powder
- ½ teaspoon salt
- ½ cup milk
- ½ cup unsalted butter (melted)
- 1 teaspoon ground cinnamon (optional)
- Aluminum foil (for easy lid protection)
Instructions:
- Prepare the Fruit:
Place the fruit in the Dutch oven. Mix in half the sugar and cinnamon for a balanced sweetness.
- Make the Batter:
In a bowl, combine flour, baking powder, salt, and remaining sugar. Stir in milk and melted butter until smooth.
- Assemble:
Pour the batter evenly over the fruit in the Dutch oven. Do not stir.
- Cook:
Cover with the Dutch oven lid, then place 10 hot coals underneath and 15 on top for consistent heat. Bake for 35-40 minutes or until the top is golden brown and a toothpick inserted in the biscuit layer comes out clean.
- Serve:
Let cool slightly before serving. Enjoy with campfire coffee or vanilla ice cream for an extra treat.
| Step | Detail | Temperature Control | Time |
|---|---|---|---|
| Preheat Dutch oven | Place coals under and on top | 350°F (approximate) | 5 minutes |
| Bake Cobbler | Maintain heat distribution | 350°F (approximate) | 35-40 mins |
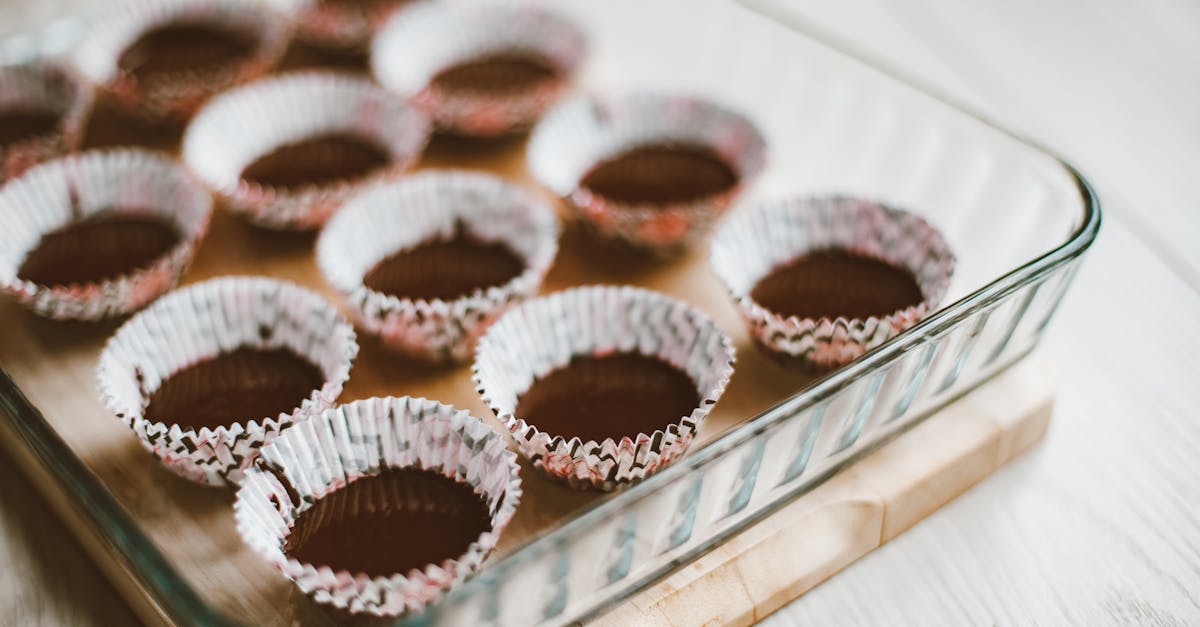
Dutch Oven Brownies
Our Dutch Oven Brownies bring fudgy rich chocolate goodness to your campsite. Easy to mix and bake, they deliver a dense, gooey texture with a crisp crust—perfect for sharing or savoring by the fire.
Ingredients:
- 1 cup unsalted butter (melted)
- 2 cups granulated sugar
- 1 cup unsweetened cocoa powder
- 4 large eggs
- 1 teaspoon vanilla extract
- 1 cup all-purpose flour
- ½ teaspoon salt
- ½ teaspoon baking powder
- Optional: 1 cup chopped nuts or chocolate chips
Instructions:
- Combine Wet Ingredients:
In a large bowl, mix melted butter, sugar, eggs, and vanilla until smooth.
- Add Dry Ingredients:
Sift together cocoa powder, flour, salt, and baking powder. Gently fold into wet mixture until just combined. Stir in nuts or chocolate chips if desired.
- Prepare Dutch Oven:
Grease the Dutch oven with butter or cooking spray. Pour brownie batter in and smooth the top.
- Bake:
Place 12 coals beneath and 18 on the lid. Bake for 25-30 minutes or until a toothpick inserted near center comes out with moist crumbs.
- Cool & Serve:
Let brownies cool slightly before slicing. Serve warm with marshmallows toasted over the fire for an extra campfire treat.
| Ingredient | Amount | Purpose |
|---|---|---|
| Unsalted butter | 1 cup (melted) | Richness and moist texture |
| Granulated sugar | 2 cups | Sweetness |
| Cocoa powder | 1 cup | Chocolate flavor |
| Eggs | 4 large | Structure and moisture |
| Flour | 1 cup | Binding and texture |
| Baking powder | ½ teaspoon | Leavening |
| Optional nuts/chips | 1 cup | Texture and extra flavor |
“Dutch oven desserts like these cobblers and brownies transform simple ingredients into cozy campfire memories, making outdoor cooking fun and rewarding.”
Step-by-Step Directions for Each Recipe
Mastering easy Dutch oven recipes for camping starts with knowing how to cook efficiently over campfire coals and managing heat and timing accurately. These steps ensure our dishes come out perfectly every time.
Cooking Over Campfire Coals
Cooking with a Dutch oven over campfire coals requires careful placement and control of heat to avoid burning or undercooking. Here is how we handle it step-by-step:
- Prepare the Fire and Coals
- Light a campfire well in advance to allow plenty of wood to burn down into glowing coals.
- Use hardwood such as oak or hickory for longer-lasting heat.
- Arrange the Coals Properly
- Use a shovel or tongs to gather the hot coals.
- Place a layer of coals directly under the Dutch oven for bottom heat.
- Place additional coals on the lid for even cooking and baking.
- Maintain a ratio depending on the dish:
- For simmering or roasting: Use fewer coals on top (typically ⅔ the number of coals underneath)
- For baking: Use equal or more coals on top than underneath.
- Position the Dutch Oven on a Stand or Use Rocks
- Set the Dutch oven on a stable stand or arrange flat rocks to keep it elevated above base ashes for better heat circulation.
- Monitor and Rotate
- Rotate the Dutch oven every 15 to 20 minutes to ensure even cooking.
- Also rotate the lid by 90 degrees each time to prevent hot spots.
- Check the Food
- Use a wooden spoon to stir stews or check bread with a toothpick to test doneness.
“Direct contact with coals makes all the difference in achieving the perfect texture and flavor in our campfire meals.”
| Task | Details |
|---|---|
| Firewood choice | Hardwood (oak, hickory) for steady coals |
| Coal placement ratio | Simmer/roast: ~3 coals bottom, 2 top |
| Burn time before cooking | 30-45 minutes to form coals |
| Rotation frequency | Every 15-20 minutes |
Managing Heat and Timing
Heat control and timing are crucial to all easy Dutch oven recipes for camping. Here is our approach:
- Control Heat Through Coal Quantity
- Add or remove coals to adjust cooking temperature.
- More coals = higher heat; fewer coals = lower heat for gentle simmering or slow cooking.
- Adjust for Altitude and Weather
- Higher altitudes require longer cooking times and possibly more heat due to lower boiling points.
- Wind or rain can lower oven temp; add extra coals or shield the fire accordingly.
- Set Timers for Each Recipe Step
- Use a watch or timer to avoid overcooking.
- Some recipes require fast cooking (10-15 minutes), others slow (up to 1.5 hours).
- Preheat the Dutch Oven Before Adding Food
- Place it over coals for 5-10 minutes to ensure even cooking from the start.
- Use Thermometers When Possible
- A meat thermometer helps check internal temperature for roasts and chicken.
| Heat Management Tips | Timing Guidelines |
|---|---|
| Add coals gradually | Stir or rotate every 15-20 minutes |
| Monitor coal ash level | Cooking times vary: 10min–1.5hrs |
| Preheat Dutch oven 5-10 minutes | Adjust timing for weather/altitude |
| Shield fire in bad weather | Use thermometer for accurate doneness |
Perfect heat management transforms simple ingredients into hearty campfire meals. Following these step-by-step directions enables us to maximize flavors and minimize fuss while enjoying easy Dutch oven camping recipes.
Cleaning and Maintenance of Your Dutch Oven
Proper cleaning and maintenance of your Dutch oven after each camping trip ensures it stays in great condition and performs beautifully for every adventure. Let’s walk through the best practices to keep your cast iron Dutch oven seasoned and ready to use.
Cleaning After Camp Cooking
Right after cooking, while the Dutch oven is still warm but safe to handle, follow these steps:
- Remove Food Residue: Use a plastic scraper or wooden spatula to gently scrape off stuck-on food. Avoid metal tools to protect the seasoning.
- Rinse with Hot Water: Rinse the oven with hot water. Avoid soap as it can strip the seasoning. For stubborn spots, scrub gently with a non-metal brush or coarse salt.
- Dry Immediately: Thoroughly dry the Dutch oven with a clean cloth or paper towel. We can also place it on low heat over coals or a stovetop to evaporate any remaining moisture.
- Inspect for Stuck Food: If residue persists, repeat rinsing and scrubbing with coarse salt and warm water. Never soak the Dutch oven as prolonged water exposure causes rust.
- Avoid Dishwasher Use: Dishwashers will remove the seasoning and may cause rust.
“Tip: For a natural abrasive cleaner, coarse kosher salt works wonders without damaging the seasoned surface.”
Seasoning and Storage Tips
Maintaining the seasoning layer extends your Dutch oven’s life and improves nonstick performance. Follow these seasoning and storage tips every time after cleaning:
| Step | Action |
|---|---|
| Oil Application | Apply a thin, even coat of vegetable oil or flaxseed oil inside and outside the oven. |
| Heat Treatment | Place the oiled Dutch oven upside down over coals or in an oven at 350°F (175°C) for 1 hour to set the seasoning. |
| Complete Cooling | Let it cool completely before storing to prevent moisture buildup. |
| Storage Location | Store in a dry, well-ventilated place with the lid slightly ajar to allow air circulation. |
| Rust Prevention | Sprinkle a little dry rice or place a paper towel inside to absorb any residual moisture. |
We always remember: Never store a damp Dutch oven. Moisture leads to rust, which compromises both seasoning and cooking quality.
“Pro Tip: Re-season your Dutch oven periodically, especially if you notice dull spots or food starts sticking.”
By committing these cleaning and maintenance habits to our camping routine, our Dutch ovens remain seasoned, rust-free, and ready to deliver delicious campfire meals time after time.
Conclusion
Dutch oven cooking opens up a world of delicious and hassle-free meals right at your campsite. With the right tools, ingredients, and a little preparation, we can enjoy hearty breakfasts, satisfying dinners, and sweet treats without spending hours on meal prep.
Mastering heat control and proper maintenance ensures our Dutch oven stays in top shape for many trips to come. Embracing these easy recipes lets us focus on what really matters—making memories around the campfire and savoring every bite outdoors.
Frequently Asked Questions
What is a Dutch oven and why is it ideal for campfire cooking?
A Dutch oven is a heavy cast iron pot with a tight-fitting lid, perfect for campfire cooking. It retains and distributes heat evenly, allowing for baking, roasting, and simmering outdoors without complicated gear.
What size Dutch oven should I bring camping?
For most groups, a 6 to 12-inch cast iron Dutch oven works best. It offers enough capacity for meals without being too heavy or bulky to transport.
What tools do I need to cook with a Dutch oven at camp?
Essential tools include a lid lifter, heat-resistant gloves, a Dutch oven stand, charcoal or briquettes for heat control, and cleaning supplies for maintenance.
What ingredients should I pack for Dutch oven camping recipes?
Pack pantry staples like dried beans, rice, canned tomatoes, and baking essentials, plus fresh items such as onions, garlic, and pre-portioned meats in airtight containers.
How can I prepare food ahead for easier Dutch oven cooking?
Pre-cut vegetables, pre-measure spices, marinate meats, par-cook tough ingredients, and prepare doughs before your trip to save time and boost flavor.
What are some easy Dutch oven breakfast recipes for camping?
Try a Dutch Oven Breakfast Casserole with eggs and sausage or a Campfire Cinnamon Roll Bake using refrigerated rolls, both simple and hearty.
Can I make full meals like dinners in a Dutch oven?
Yes, recipes like One-Pot Chili, Dutch Oven Roast Chicken with Vegetables, and Campfire Mac and Cheese are hearty, easy, and perfect for camping.
What desserts can I make in a Dutch oven while camping?
Popular options include Campfire Dutch Oven Cobbler with mixed fruits and Dutch Oven Brownies, both of which are easy to prepare and delicious.
How do I manage heat when cooking with a Dutch oven on a campfire?
Arrange coals on top and beneath the oven for even heat. Adjust the number of coals based on altitude and weather. Preheat the oven and monitor cooking times closely.
How should I clean and maintain my cast iron Dutch oven after camping?
Remove food residue with hot water, avoid soap and dishwashers, dry immediately to prevent rust, and re-season regularly to keep it nonstick and ready for future use.