
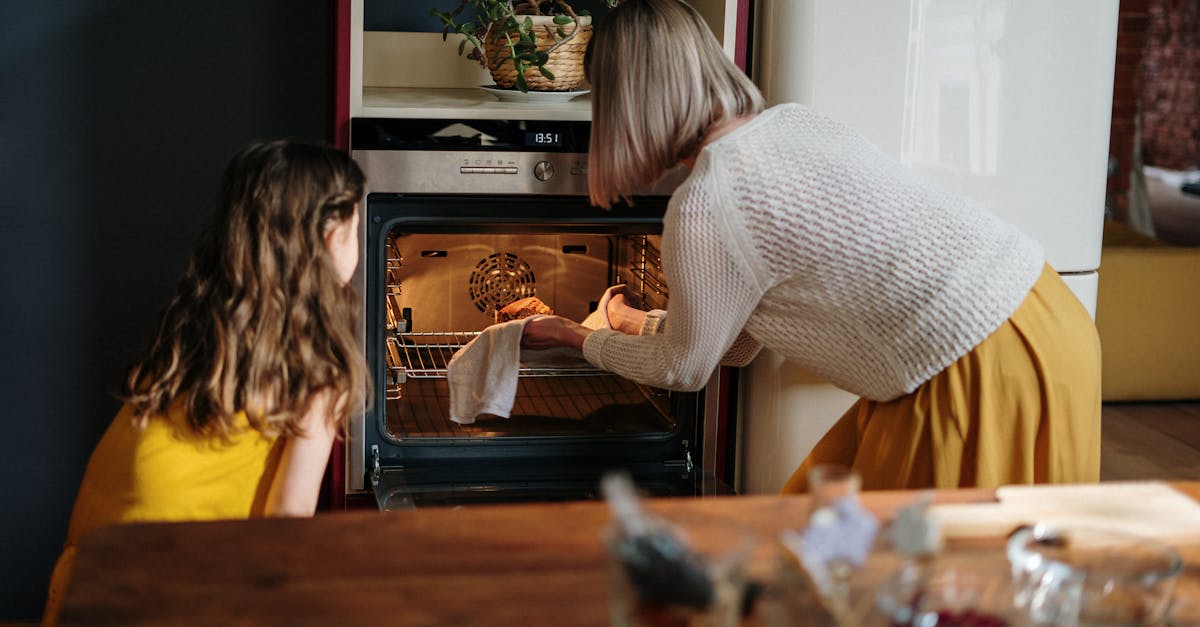
Thanksgiving is all about gathering around the table and sharing delicious, comforting dishes. Using a Dutch oven for your holiday cooking brings a whole new level of flavor and convenience. This versatile cookware locks in moisture and evenly distributes heat, making it perfect for everything from tender turkey to rich side dishes.
We love how Dutch ovens simplify the cooking process while enhancing traditional Thanksgiving recipes. Whether you’re preparing a savory stuffing or a hearty stew, these recipes will help you create memorable meals that impress your guests. Let’s explore some of our favorite Dutch oven Thanksgiving recipes that combine ease and taste for a stress-free holiday feast.
Essential Tools for Dutch Oven Thanksgiving Recipes
To master Dutch Oven Thanksgiving recipes, having the right tools at our disposal is crucial. These essentials ensure our dishes cook perfectly and elevate the entire holiday meal preparation experience.
Choosing the Right Dutch Oven
Selecting the ideal Dutch oven is the cornerstone of successful Thanksgiving cooking. Here are the key features to consider:
| Feature | Importance |
|---|---|
| Material | Cast iron offers excellent heat retention and even cooking. |
| Size | A 5 to 7-quart Dutch oven suits most recipes for a family feast. |
| Lid Fit | A tight-fitting lid locks in moisture, essential for tender dishes. |
| Finish | Enameled interiors prevent sticking and ease cleaning. |
| Weight | A heavier pot maintains steady heat but should be manageable. |
“A quality Dutch oven is an investment that transforms your Thanksgiving cooking, locking in flavors and moisture with every meal.”
Additional Equipment You May Need
Beyond the Dutch oven itself, these tools enhance our cooking efficiency and safety:
- Heat-resistant gloves or mitts: Protect hands from high temperatures when handling a hot Dutch oven.
- Long-handled spoon or spatula: Allows easy stirring without risking burns.
- Trivet or heatproof surface: To rest the Dutch oven safely without damaging countertops.
- Lifting tool or lid holder: Aids in removing the heavy lid safely, especially if it’s hot.
- Meat thermometer: Ensures perfectly cooked meats and casseroles.
- Heavy-duty aluminum foil: Useful for tenting dishes in the oven or covering during resting.
With these tools, Dutch oven Thanksgiving recipes become straightforward, safe, and rewarding, enriching the flavors and textures that make our holiday meals unforgettable.
Ingredients for Dutch Oven Thanksgiving Recipes
To create unforgettable Dutch Oven Thanksgiving Recipes we rely on fresh quality ingredients that bring out rich flavors and hearty textures. Below are the essential ingredients categories that form the backbone of our festive meals.
Main Ingredients
Our main ingredients focus on hearty proteins and vegetables that roast beautifully in a Dutch oven, locking in moisture and enhancing taste.
- Whole turkey (12-14 lbs), thawed and patted dry
- Boneless chicken thighs or drumsticks (for alternative smaller roasts)
- Beef chuck roast (4-5 lbs) for rich stews
- Carrots, peeled and cut into chunks
- Celery stalks, sliced
- Yellow onions, quartered
- Potatoes, rustic cut or baby potatoes
- Butternut squash, cubed
Herbs and Spices
We emphasize aromatic herbs and spices to infuse the dishes with warmth and festive notes, increasing the complexity of flavors.
| Herb / Spice | Typical Use | Flavor Profile |
|---|---|---|
| Fresh rosemary | Turkey rub, stews | Piney, woody |
| Sage | Stuffing, poultry seasoning | Earthy, slightly peppery |
| Thyme | Vegetables, gravies | Lemony, minty |
| Bay leaves | Stocks, stews | Herbal, slightly floral |
| Garlic powder | Seasoning all dishes | Aromatic, pungent |
| Paprika | Roasts, stews | Sweet, smoky |
| Black pepper | Universal seasoning | Sharp, pungent |
| Salt | Enhances all flavors | Essential mineral seasoning |
Side Dish Ingredients
Our Dutch oven sides complement the main course, ranging from classic stuffing to creamy mashed potatoes, all designed for simplicity and rich flavor.
- Cubed bread (day-old or breadcrumbs for stuffing)
- Chicken or vegetable broth (4 cups) for moist stuffing and braising
- Butter (unsalted, ½ cup) for richness
- Green beans, trimmed and blanched
- Cranberries, fresh or dried for tartness
- Chestnuts, roasted or canned for texture
- Sweet potatoes, peeled and diced
- Heavy cream or milk (1 cup) for mashed potatoes
- Shallots, finely chopped for stuffing and sauces
- Parmesan cheese, grated for topping vegetables
Dessert Ingredients
Our Dutch oven can even double as the perfect vessel for baking classic Thanksgiving desserts, creating comforting finales to our meal.
- Apples, peeled and sliced (for apple cobbler)
- Pumpkin puree (1 can or 2 cups homemade) for pumpkin cobbler or bread pudding
- Brown sugar (1 cup), packed for sweetness
- Cinnamon (2 tsp) and nutmeg (1 tsp) for warm spice
- Pie crust dough or biscuits for topping
- Evaporated milk (1 cup) for custard recipes
- Eggs (3 large) for binding and structure
- Vanilla extract (1 tsp) for aroma enhancement
- Chopped pecans or walnuts for crunch and flavor
With these precise ingredients in hand we set the stage for crafting Dutch Oven Thanksgiving Recipes that deliver comfort, tradition, and a depth of flavor that raises the holiday meal to new heights.
Prep Work for Dutch Oven Thanksgiving Recipes
Proper prep work lays the foundation for successful Dutch oven Thanksgiving recipes. Organizing and preparing ingredients ensures smooth cooking that maximizes flavor and texture. Let’s break down the essential steps to get us ready.
Preparing the Turkey or Main Protein
- Thaw the Protein: Plan ahead to fully thaw your whole turkey or beef roast in the refrigerator. This can take several days depending on the size.
- Season Generously: Pat the turkey or meat dry with paper towels. Apply a seasoning rub of salt, pepper, and fresh herbs like rosemary and sage to enhance flavor.
- Truss the Bird: If cooking whole turkey, tie the legs and wings close to the body with kitchen twine. This ensures even cooking and helps retain moisture.
- Preheat the Dutch Oven: Before placing the protein inside, heat the Dutch oven over medium heat to form a sear that locks in juices.
- Use a Meat Thermometer: Insert the thermometer into the thickest part of the protein to monitor doneness and avoid overcooking.
| Step | Details | Purpose |
|---|---|---|
| Thawing | Refrigerate for several days | Ensures even cooking |
| Seasoning | Use salt, pepper, rosemary, sage | Boost flavor |
| Trussing | Tie legs and wings tightly with twine | Promotes even cooking |
| Preheating | Heat Dutch oven over medium heat | Locks in juices with sear |
| Thermometer Setup | Insert thermometer into thickest meat | Monitors internal temperature |
Prepping Vegetables and Sides
- Wash and Chop: Rinse all vegetables like carrots, onions, celery, and butternut squash thoroughly. Chop them uniformly for even cooking.
- Parboil Dense Vegetables: For hard vegetables such as potatoes or carrots, parboil briefly to reduce total cooking time in the Dutch oven.
- Soak Bread for Stuffing: If making stuffing, cube bread and soak it in broth or stock to absorb moisture and flavor.
- Measure Ingredients: Weigh and measure herbs, spices, and other side dish components to keep the cooking process efficient.
| Vegetable | Prep Action | Reason |
|---|---|---|
| Carrots | Wash and chop | Uniform cooking |
| Onions | Peel and dice | Even texture |
| Butternut squash | Peel and cube | Faster cooking |
| Potatoes | Parboil if dense | Cuts down cooking time |
| Bread (stuffing) | Cube and soak broth | Adds moisture and flavor |
Making the Dough or Breading (If Applicable)
- Mix Ingredients: Combine flour, butter, water, and seasonings until your dough reaches the right consistency for any casseroles or pot pies.
- Rest Dough: Let the dough rest in the refrigerator for at least 30 minutes. This helps gluten relax for easier rolling and flakier crust.
- Prepare Breading: For dishes requiring breading, set up a station with flour, beaten eggs, and breadcrumbs for a seamless coating process.
- Avoid Overhandling: Handle dough lightly to maintain tender texture, avoiding overworking which causes toughness.
| Step | Ingredients/Materials | Purpose |
|---|---|---|
| Mixing | Flour, butter, water, seasoning | Forms dough base |
| Resting | Refrigerate 30+ minutes | Ensures tender flaky crust |
| Breading Setup | Flour, eggs, breadcrumbs | Preps coating station |
| Handling | Gentle manipulation | Prevents toughness |
Instructions for Dutch Oven Thanksgiving Recipes
Mastering Dutch oven Thanksgiving recipes requires precise steps for each dish. Following these detailed instructions ensures our holiday meal is perfectly cooked with rich flavors and ideal textures.
Cooking the Main Dish in a Dutch Oven
- Preheat the Dutch oven over medium heat for 5 to 10 minutes before adding ingredients. This helps achieve even cooking.
- Sear the protein (turkey, beef chuck roast, etc.) on all sides in a small amount of oil or butter to lock in juices and create a golden crust.
- Add aromatics and herbs such as rosemary, sage, and thyme to the pot to infuse flavor.
- Layer vegetables like onions, carrots, and celery underneath or around the protein for added moisture and taste.
- Pour broth or stock — about 1 to 2 cups — into the Dutch oven to maintain moisture during the cooking process.
- Cover with the lid and cook at a steady low simmer on the stove or inside a preheated oven at 325°F (163°C) for slow roasting.
- Check internal temperature regularly, aiming for:
| Protein | Target Internal Temperature |
|---|---|
| Whole Turkey | 165°F (74°C) |
| Beef Chuck Roast | 190°F (88°C) |
- Let the meat rest inside the Dutch oven for 15 minutes after cooking to allow juices to redistribute.
Preparing Side Dishes Using a Dutch Oven
- Sauté base ingredients like onions and garlic in butter or oil directly in the Dutch oven until translucent.
- Add chopped vegetables (potatoes, squash, Brussels sprouts) and cook until slightly tender.
- Mix in herbs and spices like sage, thyme, salt, and pepper for traditional Thanksgiving flavors.
- Stir in broth or cream depending on the side dish consistency required (e.g., mashed potatoes vs. stuffing).
- Cover and simmer on low heat for 15 to 30 minutes, stirring occasionally for even cooking.
- For stuffing, optionally bake with the lid off in the oven at 350°F (177°C) for 20 minutes to crisp the top.
Baking Desserts in a Dutch Oven
- Prepare dessert batter or filling as per recipe, such as apple cobbler or pumpkin bread pudding.
- Line the Dutch oven with parchment paper or lightly grease to prevent sticking.
- Pour dessert mixture evenly into the Dutch oven.
- Place hot coals on the lid if cooking outdoors or bake in the oven at a steady 350°F (177°C).
- Bake for 45 to 60 minutes until the dessert is golden brown and a toothpick inserted comes out clean or with moist crumbs.
- Allow dessert to cool slightly in the Dutch oven before serving for easier portioning.
Using our trusty Dutch oven steps guarantees moist, tender, and authentically flavored Thanksgiving dishes every time.
Directions for Serving Dutch Oven Thanksgiving Recipes
Serving our Dutch oven Thanksgiving recipes with care ensures every dish shines and impresses our guests. Let’s walk through the best ways to carve, present, and serve each component for a memorable holiday feast.
Carving and Presenting the Main Dish
Proper carving highlights the juicy tenderness locked in by the Dutch oven’s slow, even cooking.
- Let the main protein rest 15-20 minutes after removing it from the Dutch oven to allow juices to redistribute.
- Use a sharp carving knife for clean slices. For turkey, carve along the breastbone removing the breast meat in firm, even cuts.
- Arrange the sliced meat on a warmed platter to keep it hot longer.
- Garnish with fresh herbs like rosemary or sage to visually elevate the presentation and reinforce the herbaceous aromas.
- Serve with a small bowl of pan juices or homemade gravy on the side for added moisture and flavor.
Serving Suggestions for Sides
Sides cooked in the Dutch oven offer hearty comfort and vibrant flavors — let’s serve them with that in mind.
| Side Dish | Serving Tips |
|---|---|
| Stuffing | Fluff gently with a fork before scooping onto plates. Serve warm with a sprinkle of toasted nuts or fresh herbs. |
| Mashed Potatoes | Spoon generously onto plates, optionally topping with a pat of butter or a drizzle of gravy. |
| Roasted Veggies | Present family-style in the Dutch oven or on large platters, garnished with chopped parsley or a squeeze of citrus for brightness. |
| Apple Cobbler | Serve warm directly from the Dutch oven with vanilla ice cream or whipped cream on the side. |
- Use warm serving dishes to maintain temperature.
- Encourage guests to help themselves family-style to retain the rustic feel of Dutch oven meals.
Plating and Garnishing Desserts
End your Dutch oven Thanksgiving feast on a sweet note with elegant yet simple dessert plating.
- Slice desserts like apple cobbler or pumpkin bread pudding into generous portions.
- Place each serving on dessert plates pre-warmed for optimal enjoyment.
- Add a scoop of vanilla ice cream or a dollop of whipped cream beside the dessert.
- Garnish with a light dusting of powdered sugar or a cinnamon stick for visual appeal and added aroma.
- Serve with a small cup of coffee or spiced tea to complement the warm flavors.
By following these directions for serving, our Dutch oven Thanksgiving recipes will delight every guest from the first slice to the last bite.
Make-Ahead Tips for Dutch Oven Thanksgiving Recipes
Planning ahead makes Thanksgiving cooking smoother and more enjoyable. Here are our top make-ahead strategies to help you maximize time and flavor with your Dutch oven Thanksgiving recipes.
Preparing Ingredients in Advance
Getting ingredients ready early reduces stress on the big day. Here’s how to prep efficiently:
- Chop vegetables like onions, carrots, celery, and herbs up to 2 days ahead. Store in airtight containers in the fridge to maintain freshness.
- Season proteins the night before to allow flavors to penetrate deeply. For instance, rub turkey or beef with your spice blend and refrigerate overnight.
- Mix dry ingredients for dishes such as stuffing or dessert bases in advance. Store in labeled bags or containers to save prep time.
- Pre-cook dense ingredients like root vegetables or potatoes until just tender. This step shortens cooking time in the Dutch oven on Thanksgiving.
- Assemble components for layered dishes the day before. Keep them covered and chilled until ready to cook.
| Ingredient Type | Prep Action | Storage Method | Max Prep Time Ahead |
|---|---|---|---|
| Vegetables | Chop and store | Airtight container | 2 days |
| Proteins | Season and refrigerate | Wrapped or covered | Overnight (12-24 hrs) |
| Dry ingredients | Mix and label | Sealed bags/containers | 3 days |
| Root Vegetables | Par-cook to tenderness | Airtight container | 1 day |
| Layered dishes | Assemble components | Covered and chilled | 1 day |
Storing and Reheating Dutch Oven Dishes
Proper storage and reheating techniques keep your Dutch oven meals tasting fresh and moist for Thanksgiving.
- Cool dishes quickly before refrigerating. Transfer the cooked food to shallow containers to help it cool evenly and avoid bacterial growth.
- Cover tightly with lids or foil. This prevents drying and protects from absorbing other fridge odors.
- For most cooked Dutch oven dishes, refrigerate for up to 3 days or freeze for longer storage.
- To reheat, preheat your oven to 325°F. Transfer contents back to your Dutch oven and cover.
- Heat slowly for 25–40 minutes depending on dish size, stirring occasionally to ensure even warming.
- For best moisture retention, add a splash of broth or water before reheating, especially for roasted or stewed proteins.
“Reheating Dutch oven dishes gently prevents drying out and preserves those rich holiday flavors that make Thanksgiving meals unforgettable.”
By following these make-ahead tips, we can enjoy a stress-free, flavorful Thanksgiving with the full benefits of our Dutch oven Thanksgiving recipes ready to shine.
Cleaning and Caring for Your Dutch Oven After Thanksgiving
Proper cleaning and care extend the life and maintain the performance of our Dutch oven. After tackling a festive feast, following these steps keeps our cookware in prime condition for many meals to come.
Step 1: Let It Cool Naturally
Allow the Dutch oven to cool completely at room temperature. Placing a hot Dutch oven directly in cold water or on a cold surface can cause thermal shock, leading to cracking or warping.
Step 2: Hand Wash with Gentle Tools
Use warm water and a soft sponge or brush to wash the Dutch oven. Avoid abrasive cleaners or steel wool that can damage the enamel coating or surface.
- For stubborn food residues, fill the pot with warm soapy water and let it soak for 15–20 minutes.
- Gently scrub with a nylon brush or non-abrasive sponge.
Step 3: Remove Stains and Residue
If discoloration or stuck-on residue remains, try one of these natural methods:
| Method | Instructions |
|---|---|
| Baking Soda Paste | Mix baking soda with water to form a paste. Apply to stain and scrub gently after 15 minutes. |
| White Vinegar Soak | Fill with equal parts water and vinegar, heat on stove until simmering, then let cool and wash. |
| Salt and Water Scrub | Sprinkle coarse salt with a bit of water and scrub gently with a sponge to lift residue. |
Step 4: Dry Thoroughly
Wipe the Dutch oven dry immediately with a clean towel. To prevent rusting on cast iron or enamel edges, place it on a low heat burner for a few minutes to ensure complete drying.
“Never leave your Dutch oven wet or to air dry, as moisture can cause rust or damage the enamel coating.”
Step 5: Apply a Light Oil Coating (For Cast Iron)
If our Dutch oven is bare cast iron (uncoated), apply a thin layer of vegetable oil or flaxseed oil to the interior while still warm. This preserves the seasoning and prevents rust.
| Care Tip | Purpose |
|---|---|
| Light oiling after drying | Maintains seasoning and protects against rust |
| Avoid cooking acidic foods | Preserves seasoning layer; use enameled Dutch oven for acidic dishes |
Step 6: Proper Storage
Store the Dutch oven with the lid slightly ajar or use a paper towel between lid and pot. This allows air circulation, preventing moisture buildup and odors.
By following these cleaning and caring steps, our Dutch oven stays as reliable and beautiful as the first Thanksgiving dinner we cooked in it. With this simple routine, we ensure many future gatherings filled with rich flavors and joyful memories.
Conclusion
Dutch ovens truly transform our Thanksgiving cooking experience by making it easier and more flavorful. With the right tools, ingredients, and preparation, we can create memorable dishes that bring comfort and tradition to the table.
Taking time to plan ahead and care for our Dutch ovens ensures every holiday meal is stress-free and delicious. Embracing these recipes lets us focus on what matters most—enjoying great food and quality time with loved ones.
Frequently Asked Questions
What makes a Dutch oven ideal for Thanksgiving cooking?
A Dutch oven locks in moisture and distributes heat evenly, enhancing flavors and simplifying the cooking process. It’s perfect for traditional dishes like stuffing, stew, and roasting meats, making the holiday meal more flavorful and stress-free.
How do I choose the right Dutch oven for Thanksgiving recipes?
Look for a Dutch oven with durable material like cast iron, the right size for your meal, a tight-fitting lid, smooth finish, and manageable weight. These features ensure even cooking, ease of use, and long-term performance.
What essential tools complement Dutch oven cooking?
Must-have tools include heat-resistant gloves, long-handled utensils, trivets, lifting tools, meat thermometers, and aluminum foil. These items improve safety, cooking efficiency, and handling during preparation and serving.
What key ingredients should I prepare for Dutch oven Thanksgiving dishes?
Focus on hearty proteins like whole turkey or beef chuck roast, root vegetables, aromatic herbs such as rosemary and sage, traditional side dish ingredients, and classic dessert components like apples and pumpkin.
How should I prepare the main protein in a Dutch oven?
Preheat the Dutch oven, sear the protein for a golden crust, add aromatics and broth to maintain moisture, and cook slowly to ensure tender, juicy results with rich flavor.
Can I prepare Dutch oven Thanksgiving dishes ahead of time?
Yes, you can chop vegetables, season proteins, mix dry ingredients, and even par-cook some components in advance. Store them properly and reheat gently to keep dishes fresh and flavorful.
How do I clean and care for my Dutch oven after Thanksgiving?
Allow it to cool naturally, hand wash with mild tools, remove stains with natural methods, dry thoroughly, and apply a light oil coating if cast iron. Store it in a dry place to prevent rust and maintain durability.
What are some tips for serving Dutch oven Thanksgiving meals?
Let the main dish rest before carving, use a sharp knife, garnish with fresh herbs, serve sides family-style in warm dishes, and present desserts directly from the Dutch oven for a cozy, inviting meal experience.