
There’s something magical about baking brownies in a Dutch oven. Whether we’re camping under the stars or simply craving a cozy kitchen treat, this method delivers rich, fudgy brownies with a perfectly crisp crust. Using a Dutch oven lets us enjoy that classic homemade brownie flavor without needing a conventional oven.
Ingredients
To craft the perfect Dutch Oven Brownie that boasts a rich fudgy texture and a crisp crust, we carefully select every ingredient. Our recipe balances the essential components to create that irresistible homemade brownie flavor, whether we’re baking at home or outdoors.
Dry Ingredients
The dry mixture forms the chocolatey backbone of our brownies. Precision here ensures a smooth texture and deep flavor.
- 1 cup all-purpose flour (sifted for lightness)
- 1 cup granulated sugar (for balanced sweetness)
- ¾ cup unsweetened cocoa powder (rich and intense)
- ½ teaspoon baking powder (for slight lift)
- ¼ teaspoon salt (to enhance flavor depth)
| Ingredient | Quantity | Purpose |
|---|---|---|
| All-purpose flour | 1 cup | Structure |
| Granulated sugar | 1 cup | Sweetness |
| Unsweetened cocoa powder | ¾ cup | Chocolate flavor |
| Baking powder | ½ teaspoon | Light leavening |
| Salt | ¼ teaspoon | Flavor enhancer |
Wet Ingredients
Together the wet ingredients provide moisture and richness, delivering that fudgy consistency our brownies are known for.
- 2 large eggs (beaten)
- ½ cup unsalted butter (melted and slightly cooled)
- 2 teaspoons vanilla extract (for aromatic depth)
| Ingredient | Quantity | Purpose |
|---|---|---|
| Eggs | 2 large | Binding and moisture |
| Unsalted butter | ½ cup (melted) | Fat for richness and tenderness |
| Vanilla extract | 2 teaspoons | Flavor enhancer |
Optional Add-Ins
To personalize our Dutch Oven Brownies we can incorporate these delicious extras. They boost texture and add bursts of flavor while keeping the classic brownie essence.
- ½ cup chopped walnuts or pecans (for crunch)
- ½ cup chocolate chips or chunks (extra melty chocolate pockets)
- ¼ teaspoon instant espresso powder (intensifies chocolate depth)
- ½ cup dried cherries or cranberries (a tart contrast)
Equipment Needed
To create the perfect Dutch Oven Brownie, having the right equipment ensures smooth preparation and baking. Below is a detailed list of what we need to gather before starting our recipe.
Essential Tools for Dutch Oven Brownie Baking
- Dutch Oven: A heavy cast-iron Dutch oven with a well-fitting lid is crucial. Its thick walls and lid ensure even heat distribution to give us that classic fudgy brownie texture with a crisp crust.
- Heat Source: Whether we bake over charcoal, wood embers, or a stovetop, consistent heat is necessary to replicate oven conditions.
- Mixing Bowls: One large for combining dry ingredients and one medium for wet ingredients to keep mixing efficient and clean.
- Measuring Cups and Spoons: Accurate measurement of ingredients keeps the brownies balanced and delicious.
- Silicone Spatula or Wooden Spoon: To fold and mix batter smoothly without deflating it.
- Whisk: To evenly incorporate dry ingredients and blend wet components.
- Parchment Paper or Non-stick Spray: To line the Dutch oven, preventing sticking and simplifying cleanup.
- Cooling Rack: Essential for allowing brownies to cool evenly once taken out of the Dutch oven.
- Oven Mitts or Heat-resistant Gloves: For safe handling of the hot Dutch oven.
Equipment Overview Table
| Equipment | Purpose | Notes |
|---|---|---|
| Dutch Oven | Baking vessel for even heat distribution | Cast iron preferred for durability |
| Heat Source | Provides necessary heat for baking | Charcoal, wood embers, or stovetop option |
| Measuring Cups/Spoons | Precise measurement of ingredients | Use standard US measurements |
| Mixing Bowls | Combine dry and wet ingredients separately | Helps maintain batter consistency |
| Silicone Spatula/Wooden Spoon | Mixes batter without overworking | Flexible spatula ideal for folding |
| Whisk | Blend dry and wet ingredients | Ensures smooth batter texture |
| Parchment Paper/Non-stick Spray | Lining for Dutch oven to prevent sticking | Essential to easy removal |
| Cooling Rack | Cools brownies evenly | Prevents soggy bottoms |
| Oven Mitts/Heat Gloves | Safety handling of hot Dutch oven | Protects hands during baking |
► Tip: Using a lid stand or trivet helps place the Dutch oven on coals properly and controls heat exposure for even baking.
Gathering these tools before starting our Dutch Oven Brownie Recipe guarantees a seamless baking experience that produces brownies worthy of any kitchen or campfire setting.
Prep Work
Before we dive into baking our Dutch Oven Brownies let’s focus on the crucial preparation steps. Proper prep ensures even cooking and effortless cleanup for the best brownie outcome.
Preparing the Dutch Oven
To start, we prep the Dutch oven to create a non-stick surface and promote even heat distribution:
- Clean the Dutch oven thoroughly with warm water and a scrubber; avoid soap to preserve seasoning.
- Dry it completely with a towel to prevent rust.
- Line the bottom and sides with parchment paper or apply a thin layer of melted butter or non-stick spray for easy brownie removal.
- Preheat the Dutch oven over low heat briefly if possible to stabilize temperature before adding batter.
Pro Tip: Use a trivet or lid stand to avoid direct contact with coals or stovetop flames, preventing burned bottoms.
Prepping the Ingredients
Precise ingredient preparation is vital for the classic fudgy texture and rich flavor profile we want:
| Ingredient | Preparation |
|---|---|
| All-purpose flour | Measure accurately; sift to avoid clumps |
| Granulated sugar | Use as is for consistent sweetness |
| Cocoa powder | Sift for smooth chocolate base |
| Baking powder | Measure carefully to ensure proper rise |
| Salt | Use fine salt for even distribution |
| Eggs | Beat lightly to blend yolks and whites easily |
| Melted butter | Melt gently; should be warm but not hot |
| Vanilla extract | Use pure extract for best flavor |
| Optional add-ins | Chop nuts or prepare mix-ins like chocolate chips or espresso powder |
We always measure ingredients precisely with measuring cups and spoons for consistent results. Mixing dry ingredients separately before combining with wet ingredients ensures a smooth, lump-free batter ready for our Dutch oven bake.
Instructions
Follow these steps carefully to create perfectly Dutch Oven Brownies with a fudgy center and crisp crust. Our detailed instructions guide you from mixing to baking for outstanding results every time.
Mixing the Batter
- In a large mixing bowl, sift together the dry ingredients:
- 1 cup all-purpose flour
- 1 cup granulated sugar
- 3/4 cup unsweetened cocoa powder
- 1/2 teaspoon baking powder
- 1/4 teaspoon salt
- In a separate bowl, whisk the wet ingredients until smooth:
- 2 large eggs, lightly beaten
- 1/2 cup melted butter, warm but not hot
- 2 teaspoons vanilla extract
- Gradually fold the wet mixture into the dry ingredients using a silicone spatula. Mix just until combined to avoid overworking the batter, which keeps the brownies tender and fudgy.
- If desired, gently stir in optional add-ins such as:
- 1/2 cup chopped nuts
- 1/2 cup chocolate chips
- 1 tablespoon espresso powder
- 1/3 cup dried fruits
“Mixing with care is key to achieving the perfect brownie texture — thick, fudgy, and rich.”
Preparing the Dutch Oven for Baking
- Thoroughly clean and dry the Dutch oven to ensure no moisture remains.
- Line the bottom and sides with parchment paper or liberally coat with a non-stick spray. This prevents sticking and makes cleanup effortless.
- Preheat the Dutch oven briefly over your heat source (charcoal, wood embers, or stovetop) for 3 to 5 minutes to stabilize the temperature.
- Place a trivet or lid stand inside the Dutch oven to keep the batter from direct heat at the bottom, preventing burning and promoting even cooking.
| Step | Purpose |
|---|---|
| Clean and dry oven | Remove moisture for even browning |
| Line with parchment paper | Prevent sticking and aid in easy removal |
| Preheat oven | Stabilize temperature for consistent baking |
| Use trivet or lid stand | Protect bottom from direct heat |
Cooking the Brownies in the Dutch Oven
- Pour the prepared batter evenly into the lined Dutch oven.
- Cover with the Dutch oven lid firmly.
- Arrange hot coals around and on the lid:
- Bottom heat: place 10-12 coals beneath the Dutch oven.
- Top heat: place 10-12 coals evenly on the lid to create balanced heat distribution.
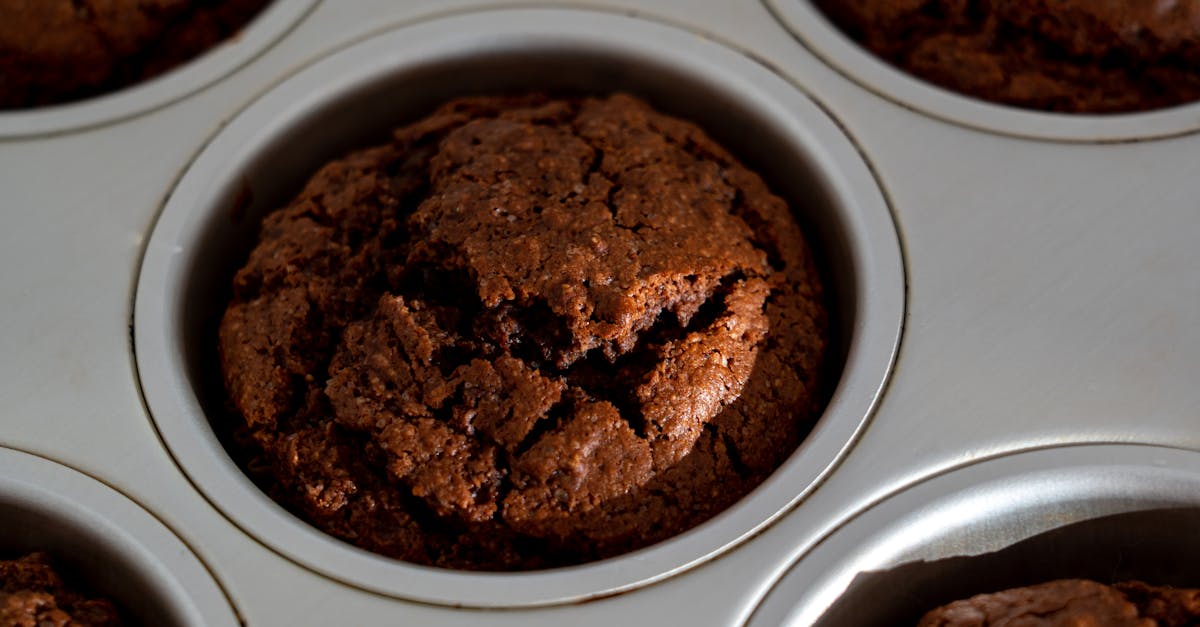
- Bake for 25 to 30 minutes. Check for doneness by inserting a toothpick in the center; it should come out with moist crumbs but no wet batter.
- Using heat-resistant gloves, carefully remove the Dutch oven from the heat source. Remove the lid cautiously as steam will escape.
- Let the brownies cool for 10 to 15 minutes in the Dutch oven to set before lifting them out using the parchment paper.
| Cooking Parameter | Detail |
|---|---|
| Bottom coals | 10-12 |
| Top coals | 10-12 |
| Baking time | 25-30 minutes |
| Doneness test | Toothpick with moist crumbs |
| Cooling time | 10-15 minutes before slicing |
Serving Suggestions
To elevate our Dutch Oven Brownie experience, we recommend serving these rich, fudgy treats with complementary toppings and sides that highlight their decadent texture and bold chocolate flavor.
Classic Toppings
Enhance the brownies by adding:
- Vanilla ice cream: The creamy chill contrasts beautifully with the warm, dense brownies.
- Whipped cream: Light and airy, it balances the richness without overpowering.
- Fresh berries: Raspberries or strawberries add a touch of tartness and freshness.
- Chopped nuts: Toasted walnuts or pecans add crunch and depth.
Creative Serving Ideas
For a more indulgent presentation, try:
- Drizzle caramel sauce or chocolate ganache over the slices for an extra touch of sweetness and moisture.
- Sprinkle sea salt flakes on top to intensify the chocolate and highlight the fudgy texture.
- Serve with a dusting of powdered sugar combined with a pinch of cinnamon for warm spiced notes.
Pairing Beverages
Our Dutch Oven Brownie pairs wonderfully with these drinks:
| Beverage | Description |
|---|---|
| Coffee (black or latte) | Complements the chocolate’s bitterness and enhances depth. |
| Red wine (Merlot or Zinfandel) | Offers fruity notes that balance the sweetness. |
| Milk (cold or warm) | Classic pairing that softens the brownie’s richness. |
Presentation Tips
- Cut brownies into uniform squares for an appealing look.
- Use parchment paper liners to serve individual portions for easy handling, especially at outdoor gatherings or camping trips.
- Arrange on a rustic wooden board or cast-iron skillet to emphasize the Dutch oven baking theme.
By combining these serving suggestions, we transform our Dutch Oven Brownie recipe into a memorable dessert experience suitable for any occasion.
Storage Tips
Proper storage is essential to keep our Dutch Oven Brownies fresh, moist, and delicious. Follow these guidelines to extend their shelf life and maintain that perfect fudgy texture.
Short-Term Storage
- Allow the brownies to cool completely on a cooling rack before storing.
- Place them in an airtight container or wrap them tightly with plastic wrap to prevent air exposure.
- Store at room temperature away from direct sunlight or heat sources.
Room temperature storage duration:
| Condition | Time Frame | Notes |
|---|---|---|
| Airtight container | Up to 3 days | Keeps brownies moist and fresh |
| Wrapped tightly | 2-3 days | Ideal for maintaining crisp crust |
Refrigeration
- If we plan to keep the brownies longer than three days, refrigerate them.
- Wrap the brownies tightly in plastic wrap, then place them in an airtight container to prevent drying out and absorbing odors.
- The brownies will last up to one week in the fridge.
- Before serving, bring them to room temperature or warm gently in the microwave for 10-15 seconds to regain softness.
Freezing for Extended Storage
- For long-term storage, freeze the brownies.
- Cut brownies into individual portions before freezing for easy thawing.
- Wrap each piece tightly in plastic wrap, then place them in a freezer-safe bag or airtight container.
- Label with the date to track freshness.
| Freezing Details | Time Frame | Thawing Recommendations |
|---|---|---|
| Wrapped individually | Up to 3 months | Thaw overnight in the fridge or microwave for 30 seconds |
“Storing brownies properly is key to preserving the rich fudginess and crisp crust that make our Dutch Oven Brownies irresistible.“
Additional Tips
- Avoid stacking brownies without separation to prevent sticking; use parchment paper between layers.
- Keep brownies away from moisture to maintain their crisp crust.
- Do not leave the brownies uncovered as they will dry out quickly.
By following these Storage Tips we ensure our Dutch Oven Brownies remain as delectable as freshly baked every time we enjoy them.
Conclusion
Baking brownies in a Dutch oven opens up new possibilities for rich, fudgy treats whether we’re camping or at home. This method combines rustic charm with reliable results, delivering that perfect balance of a crisp crust and moist interior. With the right tools and a bit of preparation, we can easily enjoy homemade brownies without a conventional oven.
By experimenting with add-ins and toppings, we make the recipe uniquely ours every time. Plus, proper storage ensures these delightful brownies stay fresh and ready to satisfy any sweet craving. Embracing the Dutch oven brownie recipe means bringing a cozy, delicious tradition into our kitchens and outdoor adventures alike.
Frequently Asked Questions
What makes Dutch oven brownies different from regular brownies?
Dutch oven brownies develop a unique texture with a crispy crust and a rich, fudgy center due to even heat distribution and slow cooking. This method works well outdoors or at home without a conventional oven.
What ingredients are essential for Dutch oven brownies?
Key ingredients include all-purpose flour, granulated sugar, cocoa powder, baking powder, salt, eggs, melted butter, and vanilla extract. Optional add-ins like nuts, chocolate chips, or espresso powder can customize the flavor.
What equipment do I need to bake brownies in a Dutch oven?
You’ll need a heavy cast-iron Dutch oven, a heat source (charcoal, wood embers, or stovetop), mixing bowls, measuring cups and spoons, spatula or wooden spoon, whisk, parchment paper or non-stick spray, cooling rack, and heat-resistant gloves.
How do I prepare the Dutch oven before baking?
Clean and dry the Dutch oven thoroughly, then line it with parchment paper or spray to prevent sticking. Preheat it briefly and use a trivet or lid stand to avoid direct heat contact during baking.
How should I mix the brownie batter for the best texture?
Gently fold wet ingredients into dry ingredients to avoid overmixing. This helps maintain a tender and fudgy texture in the brownies. Be sure to measure ingredients accurately for consistent results.
How do I bake the brownies in the Dutch oven?
Pour the batter into the lined Dutch oven, cover it, and arrange coals evenly on top and underneath to maintain balanced heat. Bake until a toothpick comes out mostly clean; check doneness periodically.
What toppings pair well with Dutch oven brownies?
Popular toppings include vanilla ice cream, whipped cream, fresh berries, chopped nuts, caramel sauce, chocolate ganache, sea salt flakes, powdered sugar, and cinnamon for an indulgent finish.
How should I store Dutch oven brownies to keep them fresh?
Cool the brownies completely and store them in an airtight container or wrap tightly in plastic wrap. For short-term, keep at room temperature up to 3 days. Refrigerate or freeze for longer storage, ensuring they’re well wrapped to prevent moisture loss.
Can Dutch oven brownies be made outdoors while camping?
Yes! Dutch oven brownies are perfect for camping because they don’t require an oven—just a Dutch oven and charcoal or wood embers provide the heat source for baking delicious brownies outside.
Are there any safety tips when handling a hot Dutch oven?
Always use oven mitts or heat-resistant gloves when handling the hot Dutch oven, and place it on a stable, heat-safe surface or a trivet to avoid burns or damage to surfaces.