
Duck cooked in a Dutch oven offers a rich and flavorful experience that’s hard to beat. This method locks in moisture and enhances the natural taste of the duck, creating tender meat with a crispy skin. Whether you’re cooking for a special occasion or simply craving a hearty meal, this recipe delivers impressive results without complicated steps.
Using a Dutch oven allows us to slow-cook the duck evenly while infusing it with aromatic herbs and spices. The versatility of this cookware means we can easily sear, braise, and roast all in one pot, making cleanup a breeze. Let’s dive into this delicious Duck Dutch Oven recipe and bring a touch of gourmet comfort to our table.
Ingredients
To create a perfectly tender and flavorful Duck Dutch Oven recipe, we carefully select ingredients that complement the duck’s rich flavor and bring out its natural succulence. Below are the essentials grouped into categories for easy preparation.
For the Duck
- 1 whole duck (4 to 5 pounds), cleaned and patted dry
- Salt (kosher or sea salt), for seasoning inside and out
- Black pepper, freshly ground for optimal flavor
- 1 tablespoon olive oil or duck fat, for searing
For the Marinade or Rub
Our marinade or rub enhances the duck’s natural flavors with aromatic herbs and spices. Choose either a marinade or dry rub depending on preference.
Marinade Ingredients:
| Ingredient | Amount | Purpose |
|---|---|---|
| Soy sauce | 1/4 cup | Adds umami depth |
| Honey | 2 tablespoons | Balances with sweetness |
| Garlic cloves, minced | 3 cloves | Adds pungent fragrance |
| Fresh ginger, grated | 1 tablespoon | Provides subtle spice |
| Star anise | 2 whole | Infuses warm licorice notes |
| Orange zest | 1 teaspoon | Adds bright citrus notes |
Dry Rub Ingredients:
- 1 tablespoon smoked paprika
- 1 teaspoon ground cumin
- 1 teaspoon brown sugar
- 1 teaspoon salt
- 1/2 teaspoon black pepper
- 1/2 teaspoon dried thyme or rosemary flakes
For the Vegetables and Sides
To complement the duck and make the most of the Dutch oven’s simultaneous cooking ability, we incorporate hearty vegetables that roast beautifully alongside the meat.
- 2 large carrots, peeled and cut into 2-inch chunks
- 1 large onion, quartered
- 3 celery stalks, cut into 2-inch pieces
- 4 cloves garlic, whole but smashed
- 1 cup baby potatoes, halved if large
- Fresh thyme sprigs, 3-4
- 1/2 cup dry white wine or chicken broth, for deglazing and braising moisture
This combination creates a delicious bed for the duck that soaks up rich drippings and offers a complete flavorful meal.
Equipment Needed
To achieve the perfect Duck Dutch Oven Recipe, selecting the right equipment is crucial. Our choice of tools will directly impact the flavor, texture, and overall success of the dish.
Dutch Oven Selection
For our duck recipe, we recommend a heavy-duty Dutch oven with a tight-fitting lid. Here’s what to consider when choosing the ideal Dutch oven:
| Feature | Recommendation | Reason |
|---|---|---|
| Material | Cast iron or enameled cast iron | Provides even heat distribution and retention for consistent cooking |
| Size | 5 to 7 quarts | Large enough to accommodate a whole duck and vegetables without crowding |
| Lid Type | Heavy, tight-fitting lid | Locks in moisture and heat to tenderize meat while crisping the skin |
| Oven-Safe Temperature | Up to 450°F | Allows for initial searing and finishing in the oven without damage |
A well-chosen Dutch oven enables us to sear, braise, and roast the duck to perfection within a single pot.
Additional Kitchen Tools
To complement our Dutch oven, we rely on essential kitchen tools that streamline the cooking process and deliver professional results:
- Tongs: For safely turning and handling the duck without piercing the skin.
- Sharp Chef’s Knife: To prepare vegetables like carrots, onions, and celery with precision.
- Cutting Board: Provides a sturdy surface for prep work.
- Meat Thermometer: Ensures the duck reaches the ideal internal temperature of 165°F for safe and juicy meat.
- Basting Brush: For evenly applying marinades or glazes to enhance flavor and promote crispness.
- Heat-Resistant Oven Mitts: Protects hands while transferring the Dutch oven between stovetop and oven.
- Roasting Rack (Optional): Allows air to circulate under the duck for extra crispy skin if your Dutch oven accommodates one.
With this essential equipment ensemble, we confidently create a succulent and flavorful duck dish that highlights the advantages of cooking in a Dutch oven.
Prep Work
Before cooking our Duck Dutch Oven Recipe, thorough prep work ensures every element harmonizes perfectly. Let’s break down the essential steps to get our duck, vegetables, and Dutch oven ready for roasting.
Preparing the Duck
- Start with a whole duck, preferably about 4 to 5 pounds for even cooking.
- Remove any excess fat and giblets from the cavity. Pat the duck dry with paper towels to achieve crispy skin later.
- Score the skin in a diamond pattern, being careful not to cut into the meat. This allows the fat to render out beautifully.
- Season the duck inside and out with salt and pepper. Consider a herb rub with thyme, rosemary, and garlic for enhanced aromatics.
- Let the duck rest at room temperature for 20-30 minutes before cooking. This promotes even cooking.
| Step | Details |
|---|---|
| Duck size | 4 to 5 pounds |
| Skin preparation | Pat dry, score in diamond pattern |
| Seasoning | Salt, pepper, optional herb rub |
| Rest time | 20-30 minutes at room temperature |
Preparing the Vegetables
- Choose sturdy vegetables like carrots, onions, celery, and baby potatoes which complement the duck’s rich flavor.
- Peel and cut carrots into 2-inch chunks. Slice onions into thick rounds.
- Trim celery stalks into 2-inch pieces.
- Halve or quarter baby potatoes depending on size.
- Toss vegetables lightly with olive oil, salt, and pepper to promote roasting and caramelization.
- Optionally, add a few sprigs of fresh herbs such as thyme or rosemary to the mix.
Preheating and Seasoning the Dutch Oven
- Preheat the oven to 350°F (175°C) to prepare for even roasting.
- Place the Dutch oven on the stove over medium heat.
- Add a small amount of oil or duck fat rendered from preparation to the bottom to prevent sticking.
- Heat until the oil shimmers but does not smoke.
- Lightly season the Dutch oven’s interior with salt and add a few more herbs for aroma.
- When adding the duck and vegetables, use tongs to avoid interfering with the olive oil layer.
Pro Tip: Using a heavy-duty cast iron or enameled Dutch oven locks in moisture and creates the perfect environment for our duck to roast evenly while preserving juiciness.
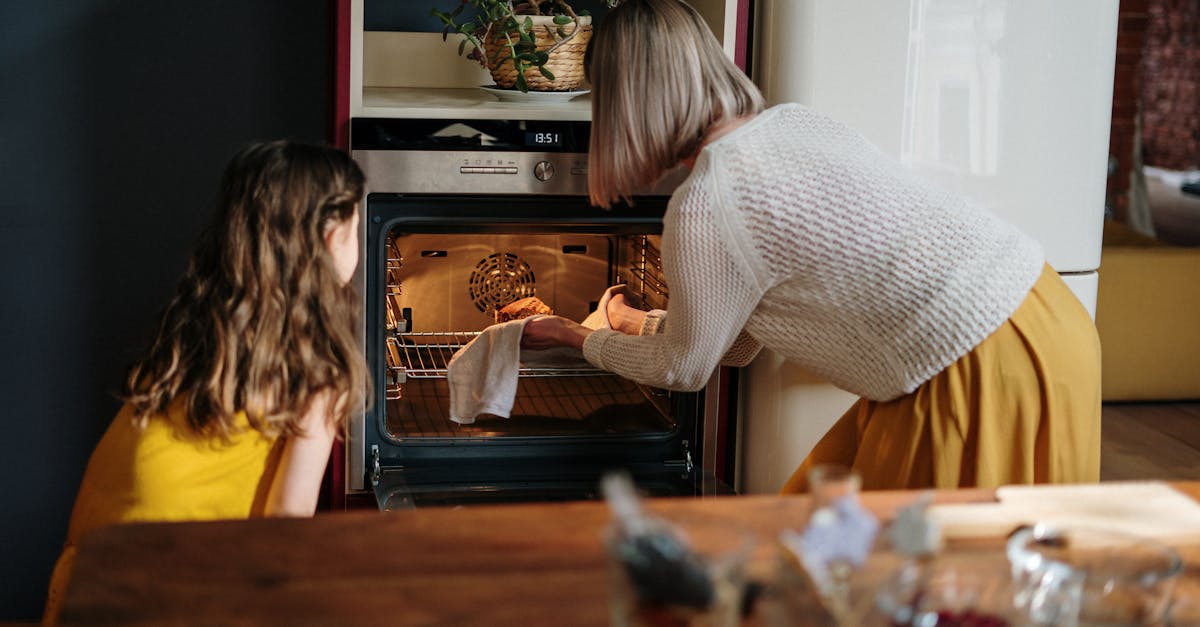
Cooking Instructions
Let’s walk through the step-by-step process to achieve a perfectly cooked Duck Dutch Oven recipe with a crispy skin and tender meat.
Browning the Duck
- Heat the Dutch oven over medium-high heat. Add 1-2 tablespoons of duck fat or olive oil.
- Once shimmering, place the duck breast side down. Sear each side for 5-6 minutes until the skin turns golden brown and crispy.
- Use tongs to carefully flip the duck and brown the legs and other sides evenly.
- Remove the browned duck and set aside on a plate to rest briefly.
Browning the duck locks in flavor and begins rendering fat that crisps the skin beautifully.
Adding Vegetables and Liquids
- Add the prepared carrots, onions, celery, and baby potatoes to the hot Dutch oven. Toss them in the rendered duck fat left behind for extra flavor.
- Spread the vegetables evenly.
- Place the browned duck on top of the vegetables, breast side up.
- Pour in 1 to 1.5 cups of liquid: a mix of chicken broth, white wine, or water. This will create steam to braise the duck gently.
- Optionally, add fresh herbs such as rosemary or thyme on top for enhanced aroma.
This layering allows the duck to roast above the vegetables while infusing them with rich drippings and moisture.
Cooking Time and Temperature Guidelines
Set the oven to 350°F (175°C) for a slow even roast.
| Step | Temp (°F) | Time | Notes |
|---|---|---|---|
| Initial Roasting | 350 | 60 minutes | Maintain covered with lid |
| Uncovered Crisping | 400 | 10-15 minutes | Remove lid for crispy skin |
| Internal Temp Goal | 165 | – | Use meat thermometer tip in thickest part of the thigh |
- Place the Dutch oven in the preheated oven with the lid on.
- After 60 minutes, remove the lid, increase oven temperature to 400°F, and roast for another 10-15 minutes to crisp skin.
- Use a meat thermometer to confirm internal temperature reaches 165°F (74°C).
- Remove from oven and let the duck rest for 15 minutes before carving.
Remember: resting allows juices to redistribute ensuring every bite is juicy and tender.
Serving Suggestions
To fully enjoy our Duck Dutch Oven Recipe, we recommend thoughtful presentation and complementary flavors. Serving your perfectly cooked duck with the right sides and garnishes will elevate the meal into a memorable dining experience.
Plating the Duck
When plating the duck, start by placing a generous portion of the tender, crispy-skinned duck at the center of the plate. We suggest slicing the duck breast against the grain for maximum tenderness and stacking the pieces slightly overlapping to showcase the beautiful sear. Arrange the roasted vegetables artfully around the duck to add color and balance. Use a spoon to drizzle some of the pan juices or sauce over the duck for added moisture and visual appeal.
Tip: Rest the duck for 15 minutes before slicing to lock in the juices, ensuring every bite is succulent and flavorful.
Recommended Side Dishes
The richness of duck pairs beautifully with sides that balance its deep flavors and add texture contrast. Here are some of our top picks:
| Side Dish | Description | Preparation Tips |
|---|---|---|
| Garlic Mashed Potatoes | Creamy and buttery to complement crispy duck | Use roasted garlic for a sweet undertone |
| Sautéed Green Beans | Crisp and fresh for a light, crunchy element | Toss with toasted almonds and lemon zest |
| Braised Red Cabbage | Slightly tangy and sweet, cuts richness | Cook with apple cider vinegar and spices |
| Wild Rice Pilaf | Nutty and earthy to contrast savory duck | Add mushrooms and fresh herbs for depth |
| Glazed Carrots | Sweet glaze balances duck’s savory notes | Use honey and thyme for subtle sweetness |
These side dishes harmonize well with the Dutch oven roasted duck, ensuring each mouthful is perfectly balanced.
Garnishes and Sauces
Garnishes and sauces enhance the overall presentation and flavor profile of our duck recipe. Consider the following:
- Fresh Herbs: Sprinkle chopped thyme, rosemary, or parsley to add freshness and a pop of color.
- Citrus Zest: A touch of orange or lemon zest brightens the dish and complements rich duck.
- Pan Sauce: Use the drippings from the Dutch oven to make a simple pan sauce. Deglaze with red wine or balsamic vinegar, add a splash of stock, reduce, and finish with butter for a silky finish.
- Fruit-based Sauces: Duck pairs well with fruit accents. Serve with a side of cranberry, cherry, or orange sauce to introduce a sweet tang.
Pro Tip: Keep sauces warm and drizzle just before serving to maintain the crispy skin texture.
By thoughtfully selecting plating, sides, and garnishes, our Duck Dutch Oven Recipe shines as a centerpiece for any occasion.
Make-Ahead Tips and Storage
Planning ahead with our Duck Dutch Oven Recipe makes mealtime effortless and ensures maximum flavor. Here’s how we can prepare in advance and store leftovers safely and deliciously.
Preparing in Advance
To save time without sacrificing taste, we recommend the following make-ahead steps:
- Season the Duck Early: Season the whole duck with salt, pepper, and herbs up to 24 hours before cooking. Cover tightly and refrigerate. This allows the seasoning to penetrate deeply, enhancing flavor and tenderizing the meat.
- Pre-cut and Toss Vegetables: Chop carrots, onions, celery, and baby potatoes the day before. Toss them with olive oil, salt, and pepper, then seal in an airtight container or bag in the refrigerator.
- Room Temperature Rest: Before cooking, remove the duck from the fridge 30 minutes prior for even roasting.
- Prepare Broth or Wine Mixture: Mix broth, white wine, or water and refrigerate in a sealed container in advance to streamline the cooking process.
| Make-Ahead Step | Recommended Timing | Benefit |
|---|---|---|
| Seasoning Whole Duck | Up to 24 hours ahead | Deep flavor and tender meat |
| Chopping & Tossing Veggies | 1 day ahead | Saves prep time on cooking day |
| Preparing Liquid Base | 1 day ahead | Smooth, continuous cooking flow |
Storing Leftovers
Proper storage maintains the quality and safety of our Duck Dutch Oven Recipe leftovers:
- Cool Promptly: Allow duck and vegetables to cool at room temperature no longer than 2 hours before refrigerating.
- Use Airtight Containers: Store leftovers in airtight containers or heavy-duty resealable bags. This prevents moisture loss and protects against odor transfer.
- Refrigerate or Freeze:
- Refrigerate for up to 3-4 days.
- Freeze for up to 3 months for long-term storage.
- Reheat Gently: Thaw frozen leftovers overnight in the refrigerator. Reheat covered in a 325°F oven until warmed through for best texture and flavor retention.
| Storage Method | Duration | Storage Tips |
|---|---|---|
| Refrigeration | 3-4 days | Airtight containers, cool promptly |
| Freezing | Up to 3 months | Freeze in portioned airtight bags |
“Proper make-ahead preparation and storage not only save us time but lock in the full richness of our duck dish.”
By following these tips, our Duck Dutch Oven Recipe remains as delightful on day two as it is freshly roasted.
Conclusion
Cooking duck in a Dutch oven brings out incredible flavors and textures with minimal effort. This method offers a perfect balance of crispy skin and tender meat, making it an impressive yet approachable dish for any meal.
With the right preparation and equipment, you can create a memorable dining experience that’s both satisfying and delicious. Whether you’re cooking for family or entertaining guests, the Duck Dutch Oven recipe is sure to become a favorite in your kitchen.
We encourage you to give it a try and enjoy the rich, savory results that this versatile cooking technique delivers.
Frequently Asked Questions
Why is a Dutch oven ideal for cooking duck?
A Dutch oven retains heat evenly, locks in moisture with its tight lid, and allows for versatile cooking methods like searing, roasting, and braising, which together help produce tender meat and crispy skin.
What size Dutch oven should I use for cooking duck?
A 5 to 7-quart heavy-duty cast iron or enameled cast iron Dutch oven is ideal, ensuring enough space for the whole duck and vegetables while maintaining even heat.
How do I prepare the duck before cooking?
Remove excess fat and giblets, pat the duck dry, score the skin, season with salt, pepper, and herbs, then let it rest at room temperature for 20-30 minutes before cooking.
Which vegetables pair best with duck in the Dutch oven?
Carrots, onions, celery, and baby potatoes work well as they roast alongside the duck, absorb flavors, and complement the rich meat.
What is the proper cooking temperature and timing for duck in a Dutch oven?
Roast the duck at 350°F for 60 minutes, then increase to 400°F for 10-15 minutes uncovered to crisp the skin, ensuring the internal temperature reaches 165°F.
How should I serve the Duck Dutch Oven dish?
Slice the breast against the grain, arrange roasted vegetables around it, drizzle with pan juices, and serve with sides like garlic mashed potatoes or sautéed green beans for balanced flavors.
Can I prepare the duck and ingredients ahead of time?
Yes, you can season the duck up to 24 hours earlier, pre-cut vegetables, and prepare the broth or wine mixture in advance to save time on cooking day.
How do I store leftover cooked duck?
Cool leftovers quickly, store them in airtight containers, refrigerate for up to 3-4 days, or freeze for longer storage to maintain freshness and flavor.