
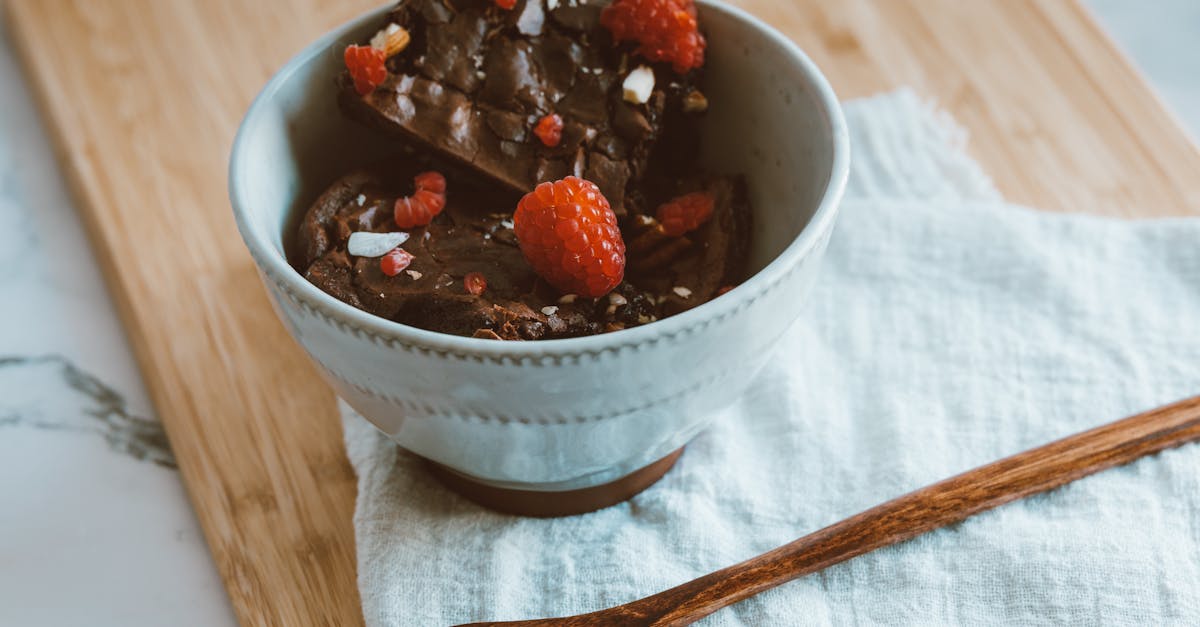
Drop fudge is a timeless treat that brings a burst of rich chocolate flavor with minimal effort. Unlike traditional fudge that requires careful stirring and precise timing, drop fudge lets us skip the fuss and still enjoy that creamy, melt-in-your-mouth texture. It’s perfect for those moments when we want a quick homemade dessert without sacrificing taste.
This recipe has roots in classic American kitchens where simple ingredients and straightforward methods created comforting sweets for family gatherings and holidays. With just a few pantry staples and a little patience, we can whip up batches of this luscious fudge that’s great for sharing or savoring on our own. Whether we’re seasoned bakers or beginners, drop fudge is a reliable crowd-pleaser that satisfies chocolate cravings every time.
Ingredients
To create the perfect Drop Fudge, we rely on a simple list of classic ingredients that come together effortlessly for rich, creamy results. Each component plays a vital role in achieving the ideal texture and flavor that drop fudge is known for.
| Ingredient | Measurement | Preparation Details |
|---|---|---|
| Unsalted butter | 1 cup (2 sticks) | Cut into cubes |
| Granulated sugar | 2 cups | |
| Evaporated milk | 1 cup | Use cold |
| Semi-sweet chocolate chips | 2 cups | |
| Marshmallow cream | 7 oz (about 1 jar) | Stir well before measuring |
| Vanilla extract | 1 teaspoon | Pure vanilla for best flavor |
We emphasize using unsalted butter to control the saltiness in the fudge precisely. The evaporated milk creates a smooth consistency while the semi-sweet chocolate chips provide rich chocolate depth.
Marshmallow cream acts as the secret ingredient, adding a luscious texture that makes our drop fudge irresistibly soft yet firm enough to hold its shape.
For the final touch, a splash of pure vanilla extract enhances the flavor, rounding out the chocolatey richness with a subtle aromatic sweetness.
Gathering these ingredients with exact measurements ensures we maintain consistency and deliver the classic homemade taste that makes Drop Fudge a favorite for quick yet indulgent treats.
Equipment Needed
To make our classic Drop Fudge Recipe with ease and precision, having the right equipment is essential. We want to ensure each step flows smoothly while maintaining the rich, creamy texture and distinctive flavor of the fudge. Here is the list of tools we recommend:
- Heavy-Bottomed Saucepan
We use this to cook the sugar, butter, and evaporated milk mixture evenly without burning. The heavy bottom ensures consistent heat distribution.
- Wooden Spoon or Heat-Resistant Silicone Spatula
These tools are perfect for stirring the mixture continuously. They resist heat well and prevent scratching the saucepan.
- Measuring Cups and Spoons
Precision is key for the right texture. We measure ingredients exactly for consistent results.
- Mixing Bowl (Heatproof)
After cooking, we transfer the hot fudge base here to stir in chocolate chips, marshmallow cream, and vanilla extract easily.
- Baking Pan or Dish
Use an 8×8-inch square pan or similar size. Lined with parchment paper or lightly greased for easy removal once the fudge sets.
- Cooling Rack (Optional)
To cool the baking pan evenly at room temperature.
| Equipment | Purpose |
|---|---|
| Heavy-Bottomed Saucepan | Even heat for cooking fudge base |
| Wooden Spoon/Silicone Spatula | Stirring to prevent sticking and burning |
| Measuring Cups/Spoons | Accurate ingredient measurement |
| Heatproof Mixing Bowl | Mixing in chocolate and marshmallow cream |
| 8×8-Inch Baking Pan | Shaping and setting the fudge |
| Cooling Rack | Evenly cooling the fudge after pouring |
Having this essential equipment ready makes our drop fudge preparation efficient and hassle-free, letting the rich flavors and smooth texture shine through perfectly.
Prep Work
Before we dive into making our rich and creamy Drop Fudge, thorough prep work ensures a smooth cooking process and the perfect texture every time. Let’s get everything ready to maximize flavor and ease.
Preparing the Baking Sheet
First, we prepare the baking surface to shape our delicious drop fudge. Line an 8×8-inch baking pan with parchment paper or lightly grease it with butter. This step prevents sticking and helps us lift the fudge out cleanly once set. If using parchment, leave about an inch overhang on the sides for easy removal. Having the baking sheet ready before cooking the fudge keeps us efficient and ensures the fudge cools evenly.
Measuring Ingredients
Precision in measuring makes or breaks our Drop Fudge Recipe. Use accurate measuring cups and spoons for each ingredient as we combine them. Here’s a quick overview for clarity:
| Ingredient | Measurement | Notes |
|---|---|---|
| Unsalted butter | 1/2 cup (1 stick) | Room temperature for smooth melting |
| Granulated sugar | 2 cups | Level off for exact sweetness |
| Evaporated milk | 2/3 cup | Shake well before measuring |
| Semi-sweet chocolate chips | 2 cups | Use quality for best flavor |
| Marshmallow cream | 7 oz jar | Adds creaminess and texture |
| Vanilla extract | 1 teaspoon | Pure extract enhances aroma |
Taking time now to measure will help us avoid texture issues later and guarantee that every bite delivers the ideal decadent flavor balance. We recommend gathering all ingredients on a clean surface before starting to streamline the cooking steps ahead.
Making the Drop Fudge
Let’s dive into the heart of our Drop Fudge Recipe by carefully cooking and combining the ingredients to achieve that perfectly rich and creamy texture we all love.
Cooking the Fudge Mixture
Begin by melting unsalted butter in a heavy-bottomed saucepan over medium heat. Once melted, add the granulated sugar and evaporated milk. Stir constantly with a wooden spoon or heat-resistant silicone spatula to prevent scorching.
Bring the mixture to a full rolling boil while stirring continuously. This means the mixture will keep boiling vigorously even when stirred. Maintain this boil for exactly 4 minutes to ensure the correct texture for the fudge.
| Ingredient | Quantity | Preparation |
|---|---|---|
| Unsalted butter | 1/4 cup (4 tbsp) | Cut into cubes |
| Granulated sugar | 2 cups | Measured accurately |
| Evaporated milk | 2/3 cup | Shake well before use |
Checking the Temperature
Correct temperature is critical in making drop fudge that sets perfectly. Use a reliable candy thermometer clipped to the saucepan.
- Target temperature: 234°F to 240°F (soft-ball stage)
- Maintain stirring to avoid burning and uneven cooking.
If you don’t have a thermometer, test by dropping a small amount of the boiling mixture into a glass of cold water: it should form a soft, pliable ball.
Adding Flavorings and Mix-ins
Once the mixture reaches the right temperature, remove it from heat immediately. Stir in:
- Semi-sweet chocolate chips (2 cups)
- Marshmallow cream (7 oz jar)
- Pure vanilla extract (1 tsp)
Mix vigorously until the chocolate chips melt and the mixture is smooth and glossy. The marshmallow cream adds luscious texture while vanilla enhances the classic fudge flavor.
Transfer the fudge quickly into a lined or greased 8×8-inch baking pan. Spread evenly and let it cool at room temperature until firm.
Key Tip: Avoid overmixing once the chocolate is melted to retain a silky, firm texture.
Shaping and Cooling the Fudge
Turning the hot fudge mixture into the perfect candy requires precise shaping and patient cooling. This step ensures our drop fudge achieves its iconic texture and bite-sized appeal.
Dropping the Fudge onto the Baking Sheet
Once the chocolate mixture is smooth and glossy, we move quickly and confidently. Using a teaspoon or small cookie scoop, drop spoonfuls of fudge directly onto the lined baking sheet. Keep these tips in mind:
- Space the drops at least 1 inch apart to avoid merging.
- If you prefer smoother edges, gently press down each drop with a spatula or the back of a spoon.
- Avoid spreading the fudge out; our goal is individual, thick morsels with luscious centers.
This method bypasses the need for cutting fudge bars later and provides classic drop fudge shapes that cool uniformly.
Cooling and Setting Time
Proper cooling is key to firming up our fudge without losing its creamy texture. Place the baking sheet on a flat surface or a cooling rack in a cool, dry place away from direct heat or sunlight. Follow the guide below:
| Cooling Method | Approximate Time | Notes |
|---|---|---|
| Room Temperature | 2 to 3 hours | Ideal for even, slow setting |
| Refrigeration | 45 minutes to 1 hr | Speeds firming, avoid chilling too long to prevent dryness |
| Freezing (Optional) | 20 to 30 minutes | Quick set for urgent needs, thaw before serving |
For best results, allow the fudge to set at room temperature. This delay helps maintain a tender, melt-in-your-mouth consistency. We recommend resisting the urge to refrigerate unless time is limited to preserve optimal flavor and texture.
Storing Your Drop Fudge
Proper storage is essential to maintain the rich flavor and creamy texture of our drop fudge. Follow these guidelines to keep your fudge fresh and delicious for days or weeks.
Room Temperature Storage
- Place the cooled drop fudge in an airtight container.
- Separate layers with parchment or wax paper to prevent sticking.
- Keep the container in a cool, dry place away from direct sunlight or heat sources.
- Store for up to 5 days for the best texture and flavor.
Refrigeration
- Use an airtight container to avoid absorbing odors from other foods in the fridge.
- Arrange pieces in a single layer or separate layers with parchment paper.
- Refrigerate for up to 2 weeks.
- Before serving, allow the fudge to sit at room temperature for 10 to 15 minutes to soften slightly.
Freezing for Longer Storage
- Wrap individual pieces tightly in plastic wrap or foil to prevent freezer burn.
- Place wrapped pieces in a freezer-safe airtight container or resealable bag.
- Freeze for up to 3 months.
- Thaw in the refrigerator overnight or at room temperature for a few hours before enjoying.
| Storage Method | Container Type | Duration | Notes |
|---|---|---|---|
| Room Temperature | Airtight with paper | 5 days | Keep cool and dry |
| Refrigeration | Airtight | 2 weeks | Avoid fridge odors |
| Freezing | Wrapped + airtight | 3 months | Prevent freezer burn, thaw properly |
“Storing drop fudge properly ensures every bite stays as indulgent as when it was first made.”
By following these steps, we maintain the luscious melt-in-your-mouth quality of our drop fudge while extending its shelf life.
Tips for Perfect Drop Fudge
To master our drop fudge recipe, we focus on several key tips that guarantee rich flavor and the perfect creamy texture every time.
1. Use Precise Temperature Control
Achieving the right temperature is critical. The sugar mixture must reach a full rolling boil for exactly 4 minutes and hit between 234°F and 240°F to set properly. We recommend using a reliable candy thermometer for accuracy.
| Temperature Stage | Description | Duration/Notes |
|---|---|---|
| Full Rolling Boil | Sugar mixture boiling vigorously | Exactly 4 minutes |
| Final Temperature Range | For proper fudge setting | 234°F to 240°F |
If you don’t have a thermometer, try the cold water test: drop a small sample into cold water; it should form a soft ball that can be flattened without breaking.
“Temperature precision is the backbone of silky smooth fudge.”
2. Stir Constantly but Avoid Overmixing
We stir constantly during boiling to prevent scorching and ensure even cooking. However, once we add the chocolate chips and marshmallow cream, we mix just until smooth to avoid overmixing. Overworking the mixture can cause the fudge to become grainy instead of creamy.
3. Use the Right Ingredients at the Right Temperature
- Use unsalted butter at room temperature to control saltiness.
- Evaporated milk contributes to smoothness; do not substitute.
- Ensure marshmallow cream is fresh and at room temperature for even blending.
- Use semi-sweet chocolate chips for classic flavor depth.
4. Proper Pan Preparation and Drop Spacing
We always line or grease our 8×8-inch baking pan to prevent sticking. When dropping the fudge onto a lined baking sheet, space drops at least 1 inch apart to prevent merging. For a neater look, gently press drops slightly flat.
“Spacing fudge drops properly means perfect bite-sized delights every time.”
5. Cooling Methods and Timing
Allow fudge to cool under the right conditions for the desired texture:
| Cooling Method | Time | Description |
|---|---|---|
| Room Temperature | 2 to 3 hours | Best flavor and creamy texture |
| Refrigerator | 45 minutes to 1 hour | Speeds up setting |
| Freezer | 20 to 30 minutes | Quickest option, use sparingly |
Patience during cooling yields melt-in-your-mouth richness.
6. Storage for Freshness and Texture
Storing drop fudge correctly preserves its indulgence. Use airtight containers and separate layers with parchment paper.
| Storage Location | Duration | Tips |
|---|---|---|
| Room Temperature | Up to 5 days | Keep airtight, cool dry place |
| Refrigerator | Up to 2 weeks | Allow fudge to come to room temp before serving |
| Freezer | Up to 3 months | Wrap individual pieces tightly |
By following these tips, we ensure every batch of drop fudge delights with perfect texture and flavor.
Conclusion
Drop fudge offers a quick and satisfying way to enjoy a classic chocolate treat without the fuss. With a few simple ingredients and some careful attention to technique, we can create rich, creamy fudge that’s perfect for any occasion.
By mastering the temperature and stirring methods, along with proper cooling and storage, we ensure every bite stays deliciously smooth and flavorful. Whether we’re sharing with friends or indulging ourselves, drop fudge is a reliable go-to for homemade chocolate goodness.
Frequently Asked Questions
What is drop fudge?
Drop fudge is a simple, no-fuss chocolate treat made by dropping spoonfuls of fudge mixture onto a baking sheet. It’s quicker and easier to make than traditional fudge but still rich and creamy in flavor.
What ingredients do I need to make drop fudge?
Basic ingredients include unsalted butter, granulated sugar, evaporated milk, semi-sweet chocolate chips, marshmallow cream, and vanilla extract.
What equipment is essential for making drop fudge?
Use a heavy-bottomed saucepan, a wooden spoon or silicone spatula, measuring cups and spoons, a heatproof mixing bowl, an 8×8-inch baking pan, and optionally a cooling rack.
How do I prevent fudge from sticking to the pan?
Line or grease your baking pan before pouring in the fudge to ensure easy removal once it’s set.
What temperature should the fudge reach when cooking?
The fudge mixture should reach 234°F to 240°F (the soft-ball stage) for the proper texture.
Can I make drop fudge without a candy thermometer?
Yes, you can use the cold water test—drop a small amount of fudge mixture into cold water; if it forms a soft ball that flattens when removed, it’s ready.
How long should I cool drop fudge?
At room temperature: 2 to 3 hours. Refrigerated: 45 minutes to 1 hour. Frozen: 20 to 30 minutes for quicker setting.
How should I store drop fudge to keep it fresh?
Store in an airtight container. At room temperature for up to 5 days, in the refrigerator for 2 weeks, or freeze tightly wrapped for up to 3 months.
What are tips for making perfect drop fudge?
Use precise temperature control, stir constantly without overmixing, prepare the pan well, space drops at least 1 inch apart, and cool properly for the best texture.
Is drop fudge suitable for beginners?
Yes, the recipe is straightforward and uses common ingredients, making it ideal for novice bakers seeking a quick and delicious chocolate treat.