
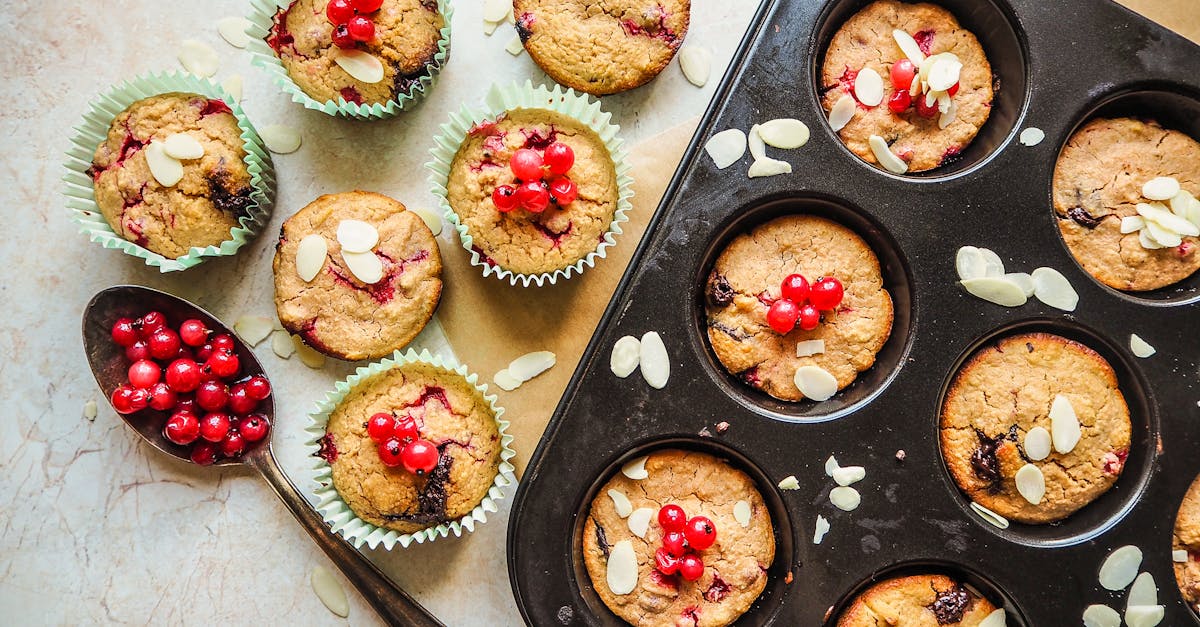
There’s something magical about the sweet-tart burst of dried cherries in a soft, fluffy muffin. These delightful treats are perfect for breakfast, an afternoon snack, or even a quick dessert. Packed with flavor and just the right amount of sweetness, they’re a simple yet satisfying way to elevate your baking game.
Dried cherries bring a unique twist to classic muffins, offering a chewy texture and a pop of fruity goodness in every bite. They’re also a great way to enjoy the taste of cherries year-round, no matter the season. Whether we’re baking for a weekend brunch or prepping snacks for the week, these muffins never disappoint.
Dried Cherry Muffins Recipe
Creating these dried cherry muffins is simple and rewarding. Let’s dive in step-by-step to craft these delicious, fluffy treats with the perfect balance of sweetness and tartness.
Ingredients
Here’s what we need:
- 1 ¾ cups all-purpose flour
- ¾ cup granulated sugar
- 2 teaspoons baking powder
- ½ teaspoon salt
- ½ cup whole milk (room temperature)
- ⅓ cup unsalted butter (melted and cooled)
- 1 large egg (room temperature)
- 1 teaspoon pure vanilla extract
- ¾ cup dried cherries (roughly chopped, if large)
- ½ teaspoon lemon zest (optional, but adds brightness)
Tools You’ll Need
Make sure you have these tools ready:
- Mixing bowls (medium and large)
- Whisk and spatula
- Muffin tin
- Muffin liners or non-stick spray
- Measuring cups and spoons
Step-by-Step Instructions
1. Preheat and Prepare
- Preheat the oven to 375°F (190°C).
- Line a muffin tin with paper liners or lightly coat each cavity with non-stick spray.
2. Combine Dry Ingredients
- In a medium mixing bowl, whisk together the flour, sugar, baking powder, and salt. This ensures the leavening is evenly distributed.
3. Mix Wet Ingredients
- In a large bowl, whisk together the milk, melted butter, egg, and vanilla extract until fully combined. If using lemon zest, stir it in at this stage for a subtle citrusy kick.
4. Gently Incorporate Cherries
- Add the dried cherries to the dry ingredients and toss them briefly. This step helps the cherries distribute better in the batter and prevents them from sinking.
5. Combine Wet and Dry Mixtures
- Gradually add the dry ingredients to the wet mixture. Use a spatula to fold everything together gently. The batter should be slightly lumpy—overmixing can lead to dense muffins.
6. Fill and Bake
- Using a spoon or scoop, divide the batter evenly among the prepared muffin cups. Each cup should be about ¾ full to allow room for rising.
- Bake in the preheated oven for 18-22 minutes, or until a toothpick inserted into the center comes out clean.
7. Cool and Enjoy
- Remove the muffins from the oven and let them cool in the pan for 5 minutes. Then transfer to a wire rack to cool completely. Serve warm or at room temperature for the best flavor.
Baking Tip
Yields
| Servings | Muffins |
|---|---|
| 12 | Standard-sized |
Ingredients
For these dried cherry muffins, we’ll need a balance of dry, wet, and additional ingredients to achieve their signature sweet-tart flavor and fluffy texture. Let’s gather everything we need for this delightful recipe.
Dry Ingredients
- 2 cups of all-purpose flour (sifted for a lighter texture)
- 1/2 cup of granulated sugar
- 1 tablespoon of baking powder
- 1/2 teaspoon of salt
Tip: Sifting the dry ingredients helps to evenly distribute the baking powder and ensures a lighter muffin.
Wet Ingredients
- 1 cup of whole milk (room temperature)
- 1/2 cup of unsalted butter (melted and slightly cooled)
- 1 large egg (room temperature)
- 1 teaspoon of pure vanilla extract
Note: Bringing wet ingredients to room temperature prevents the batter from curdling and allows for better mixing.
Additional Ingredients
- 3/4 cup of dried cherries (chopped if too large)
- Optional: 1 tablespoon of granulated sugar (for topping)
Pro Tip: Soak the dried cherries in warm water for 5 minutes before using. This enhances their flavor and ensures they stay plump while baking.
Equipment Needed
To create these delicious dried cherry muffins, we need the proper tools and equipment to ensure a seamless baking experience. Here’s a detailed breakdown of what we need:
Essential Baking Tools
- Mixing bowls: One large bowl for dry ingredients and one medium bowl for wet ingredients.
- Measuring cups and measuring spoons: For precise measurement of flour, sugar, milk, and other ingredients.
- Sifter or fine-mesh sieve: To sift the dry ingredients for a lighter, fluffier texture.
- Whisk: To combine and aerate the dry ingredients and thoroughly mix the wet ones.
- Rubber spatula or wooden spoon: For folding the wet and dry ingredients together gently without overmixing.
Muffin-Specific Equipment
- 12-cup muffin pan: Standard-sized, non-stick or greased with butter/spray, essential for perfectly shaped muffins.
- Paper muffin liners: Optional but ideal for reducing cleanup and giving muffins a neat appearance.
- Ice cream scoop or spoon: For evenly portioning the batter into the muffin cups.
Cooking Appliances
- Oven: Preheated to 375°F (190°C). Make sure to have an oven thermometer handy for accurate baking temperature.
Optional Add-Ons
- Hand mixer or stand mixer: If mixing by hand is not preferred, these can help speed up the batter preparation process.
- Wire cooling rack: To cool the muffins evenly after baking while preventing sogginess from trapped steam.
Equipment Preparation Checklist
Here’s a handy table to check all our equipment before starting:
| Equipment | Purpose |
|---|---|
| Mixing bowls | For combining dry and wet ingredients |
| Measuring cups & spoons | For accurate measurements |
| Sifter | To aerate dry components |
| Whisk | To mix ingredients smoothly |
| Rubber spatula or spoon | To fold ingredients gently |
| 12-cup muffin pan | To bake the muffins in perfect shape |
| Paper liners | For easier cleanup and better presentation |
| Ice cream scoop/spoon | For even portioning into the muffin tin |
| Oven | To bake the muffins |
| Cooling rack | To rest and cool muffins after baking |
Ensuring all these items are at hand before beginning will make the recipe flow smoothly and help us achieve perfect results for these dried cherry muffins.
Directions
Follow these step-by-step instructions to create fluffy, sweet-tart dried cherry muffins! This process ensures uniform results every time.
Prep
- Preheat the Oven: Set the oven temperature to 375°F (190°C) to properly heat while we prepare the batter.
- Prepare the Muffin Pan: Line a 12-cup muffin pan with paper liners or lightly grease the cups using cooking spray.
- Soak the Dried Cherries: Place the dried cherries in a small bowl and cover them with warm water. Let them soak for about 10 minutes to plump up, then drain and pat them dry with a paper towel.
- Gather Tools and Ingredients: Ensure all equipment and ingredients are measured and within reach. Wet ingredients like milk, eggs, and butter should be at room temperature to prevent curdling.
Mixing The Batter
- Combine Dry Ingredients: In a large mixing bowl, whisk together:
- 2 cups all-purpose flour
- 2/3 cup granulated sugar
- 2 teaspoons baking powder
- 1/2 teaspoon salt
Sifting the dry ingredients ensures a lighter texture for the muffins.
2. Mix Wet Ingredients: In a separate bowl, whisk:
- 1 cup whole milk
- 1/2 cup unsalted butter (melted and cooled)
- 1 large egg
- 1 teaspoon vanilla extract
Whisk until everything is smooth and well-combined.
3. Incorporate Wet into Dry: Gradually pour the wet ingredients into the dry ingredients while stirring gently with a rubber spatula or wooden spoon. Mix until just combined. Avoid overmixing as this can make the muffins dense.
Adding The Dried Cherries
- Fold in the Cherries: Add the soaked and dried cherries to the batter. Use a spatula to gently fold them through the mixture, ensuring even distribution. Be careful not to overwork the batter, maintaining its airy texture.
- Optional Add-Ins: If desired, sprinkle a few extra dried cherries or a handful of chopped nuts into the batter for added flavor and texture.
Portioning The Batter
- Fill the Muffin Pan: Using an ice cream scoop or a large spoon, evenly portion the batter into the prepared muffin pan, filling each cup about 3/4 full.
- Tap the Pan: Gently tap the muffin pan on the counter to remove any air bubbles, ensuring an even rise during baking.
- Optional Topping: Sprinkle a little granulated sugar or oats over the tops for an extra touch of texture and sweetness once baked.
Baking Instructions
Let’s bring our dried cherry muffins to life by following these precise baking instructions. With everything prepped, it’s time to bake them to golden perfection.
Preheating The Oven
We start by preheating the oven to 375°F (190°C). This ensures even heat distribution, crucial for perfectly baked muffins. While the oven warms, we prepare a 12-cup muffin pan. Use paper liners for easy cleanup or grease cups thoroughly with a small amount of butter or non-stick cooking spray to prevent sticking.
If you’re using paper liners, take care to align them evenly to prevent batter spillage during baking.
Baking The Muffins
Begin by evenly spooning the prepared muffin batter into the muffin cups, filling each about ¾ full to allow space for rising. For precision and uniform muffins, we recommend using an ice cream scoop or a large spoon to portion out the batter.
Place the muffin pan in the center of the preheated oven to promote even airflow and consistent baking. Bake for 18-22 minutes, keeping an eye on the muffins as each oven may vary slightly. When the tops are a beautiful golden-brown and a toothpick inserted into the center of a muffin comes out clean, they’re ready.
Keep a timer handy and avoid opening the oven door mid-baking to retain consistent heat.
Here’s a quick reference table for baking times based on muffin sizes:
| Muffin Size | Baking Time |
|---|---|
| Standard-sized muffins | 18–22 minutes |
| Mini muffins | 10–12 minutes |
| Jumbo muffins | 25–30 minutes |
Once baked, remove the muffins from the oven and let them cool in the pan for 5 minutes. Afterward, transfer them to a wire rack to cool completely, allowing air to circulate around them and preserve their texture.
For an extra touch of indulgence, dust the tops lightly with powdered sugar or drizzle a simple glaze. Enjoy these sweet-tart, fluffy treats straight from the oven or store them for later.
Cooling And Serving
Once the muffins are baked to a golden perfection and a toothpick inserted into the center comes out clean, it’s important to allow proper cooling to ensure the best texture and flavor. Here’s how we recommend cooling and serving your dried cherry muffins:
Step 1: Immediate Cooling Preparation
- Remove the muffin pan from the oven and set it on a heat-safe cooling rack or stovetop.
- Let the muffins sit in the pan for 5 minutes. This helps them firm up slightly and makes removal easier.
Step 2: Transferring Muffins
- Gently use a rubber spatula or a butter knife to loosen each muffin from the edges, especially if you didn’t use paper liners.
- Carefully remove the muffins and place them directly onto a cooling rack. Allow them to cool for an additional 15-20 minutes to reach room temperature.
Step 3: Serving Suggestions
- Serve the muffins while they’re still slightly warm for a cozy, fresh-baked experience. If cooled completely, they pair wonderfully with:
- A pat of softened butter.
- A drizzle of honey or your favorite fruit preserves.
- A dollop of whipped cream for a dessert-like treat.
Optional Presentation Touches
- Add a dusting of powdered sugar for sweet elegance.
- Drizzle a simple vanilla glaze or melted white chocolate over the top for added decadence.
Storage and Reheating
If not serving immediately, store your muffins to maintain their freshness. Here’s a quick guide:
| Storage Method | Duration | Tips |
|---|---|---|
| Room Temperature | 2-3 days | Store in an airtight container or ziplock bag. |
| Refrigeration | Up to 1 week | Wrap each muffin in plastic wrap to prevent drying. |
| Freezing | Up to 3 months | Freeze individually wrapped muffins; thaw and reheat in the microwave for 15-20 seconds. |
These dried cherry muffins are versatile and can be presented as a spontaneous morning treat or an elegant teatime snack. Whether warm or at room temperature, their sweet-tart flavor shines through beautifully.
Make-Ahead And Storage Tips
Storing and preparing our dried cherry muffins in advance ensures that they stay fresh and delicious for whenever the craving strikes. Here are foolproof tips for make-ahead preparation and storage, guaranteeing optimal flavor and texture.
Room Temperature Storage
Once completely cooled, store the muffins in an airtight container or zip-top bag. Place a paper towel at the bottom of the container to absorb excess moisture and keep the muffins from becoming soggy. Another layer of paper towel on top adds extra protection. These muffins stay fresh for 2-3 days at room temperature.
Refrigeration Guide
If you’d like to extend their freshness, refrigerate the muffins. Transfer them to an airtight container and refrigerate for up to 1 week. To reheat, warm them in the microwave for 10-15 seconds for that just-baked softness.
Freezing Dried Cherry Muffins
For long-term storage, freezing is our go-to method. Allow the muffins to cool fully before wrapping each muffin individually in plastic wrap. Once wrapped, place them in a freezer-safe zip-top bag or airtight container. Store in the freezer for up to 3 months.
Quick Reference Table for Storage Times
| Storage Method | Duration | Key Tips |
|---|---|---|
| Room Temperature | 2-3 days | Use paper towels to prevent sogginess. |
| Refrigeration | Up to 1 week | Keep in an airtight container. |
| Freezing | Up to 3 months | Wrap muffins individually before freezing. |
Reheating Frozen Muffins
To enjoy frozen muffins, remove the amount you need and follow these guidelines:
- Let the muffins thaw at room temperature for about 1 hour.
- For a warm treat, preheat your oven to 350°F (175°C) and bake the thawed muffins for 5-7 minutes, or microwave them for 20 seconds on high.
Make-Ahead Batter Tips
If you prefer fresh muffins without having to prepare the batter every time:
- Prepare the batter as directed in the recipe and transfer it into a covered airtight container.
- Refrigerate for up to 24 hours before baking. Make sure to give the batter a gentle stir before portioning it into the muffin pan.
- For the best results, allow refrigerated batter to sit at room temperature for 10-15 minutes prior to baking. This ensures even rising.
Conclusion
Dried cherry muffins bring a delightful combination of flavor, texture, and versatility to any table. Whether you’re planning a cozy breakfast, a quick snack, or a sweet treat to share, these muffins are a dependable choice. With simple ingredients and straightforward steps, they’re perfect for both seasoned bakers and beginners.
By following a few key tips and making use of proper tools, we can ensure every batch turns out beautifully. From their sweet-tart flavor to their fluffy texture, these muffins are sure to become a favorite in your recipe collection. Happy baking!
Frequently Asked Questions
What makes dried cherry muffins unique?
Dried cherry muffins stand out for their sweet-tart flavor and light, fluffy texture. The dried cherries add a tangy twist, making these muffins a versatile treat for breakfast, snacks, or dessert.
Can I substitute dried cherries with fresh cherries?
Yes, you can substitute fresh cherries, but ensure they are pitted and diced. Fresh cherries may release more moisture, so adjust the batter consistency if needed.
Should I soak dried cherries before baking?
Soaking dried cherries in warm water is recommended to plump them up, enhancing their flavor and texture during baking.
How do I store dried cherry muffins?
Store muffins in an airtight container with paper towels to absorb moisture. They stay fresh at room temperature for 2-3 days, in the refrigerator for up to a week, or in the freezer for up to three months.
Can I make the batter in advance?
Yes, you can prepare the batter ahead of time and store it in the refrigerator for up to 24 hours before baking.
What tools are needed to make dried cherry muffins?
You’ll need a 12-cup muffin pan, mixing bowls, a whisk, measuring cups, a sifter, a spatula, and optional items like paper liners and an ice cream scoop for even portioning.
How full should I fill the muffin cups?
Fill each muffin cup about ¾ full to prevent overflow and achieve even baking.
How long should I bake dried cherry muffins?
Bake the muffins at 375°F (190°C) for 18-22 minutes, or until they are golden brown and spring back when touched.
How should I serve dried cherry muffins?
Serve muffins warm with butter, honey, or fruit preserves. You can also add powdered sugar or a vanilla glaze for extra sweetness.
Can I freeze these muffins?
Yes, dried cherry muffins freeze well for up to three months. Wrap them tightly in plastic wrap or add to an airtight container. Reheat frozen muffins in the oven or microwave before serving.