
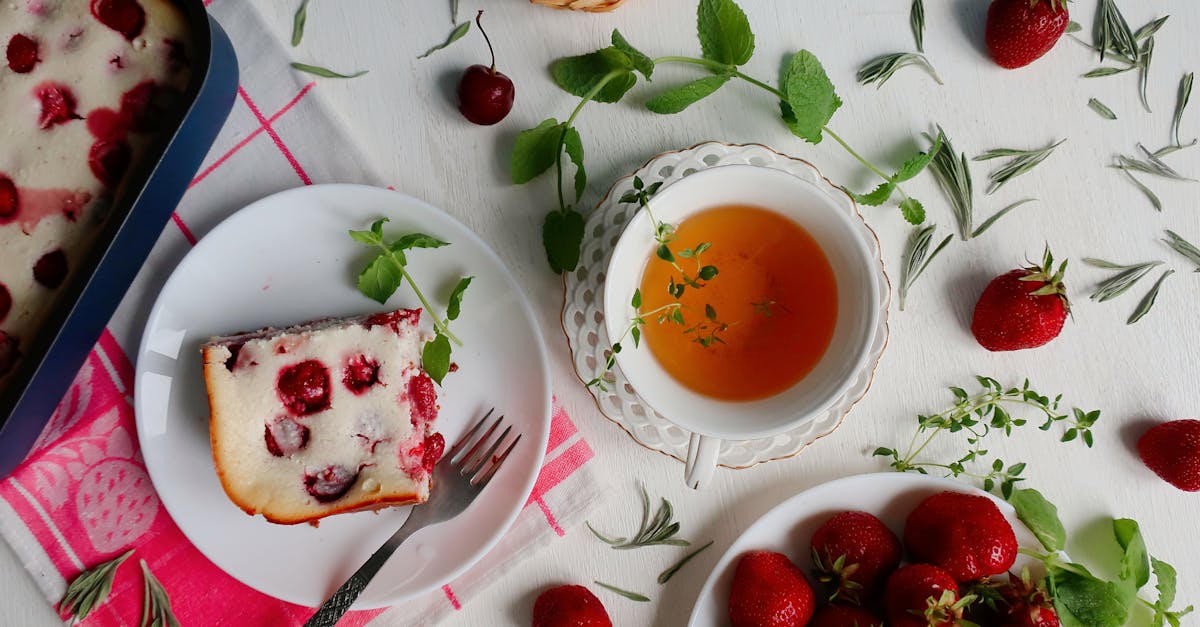
There’s something magical about Door County cherries. Nestled in Wisconsin, this charming region is famous for its tart, ruby-red cherries that burst with flavor. Every summer, locals and visitors alike savor these gems in everything from jams to desserts, but nothing captures the essence of Door County quite like a classic cherry pie.
Door County Cherry Pie Recipe
There’s nothing quite like a homemade Door County Cherry Pie to capture the essence of Wisconsin’s cherry season. Let’s walk through the step-by-step process to create this classic dessert, ensuring every bite is bursting with vibrant, tart cherry flavor.
Ingredients
Below is the list of ingredients we’ll need for this recipe. Be sure to prepare the ingredients as specified to make this baking process smooth and enjoyable:
For the Filling:
- 4 cups of fresh or frozen Door County tart cherries, pitted
- 1 cup granulated sugar
- 3 tablespoons cornstarch
- 1/4 teaspoon almond extract
- 1/4 teaspoon vanilla extract
- 1/4 teaspoon kosher salt
- 1 tablespoon unsalted butter, cut into small pieces
For the Crust:
- 2 1/2 cups all-purpose flour
- 1 teaspoon salt
- 1 tablespoon granulated sugar
- 1 cup unsalted butter, cold and cubed
- 6-8 tablespoons ice water
For Optional Topping:
- 1 egg, beaten for egg wash
- 1 tablespoon granulated sugar for sprinkling (optional)
Equipment Needed
Here’s a quick list of the tools we’ll use for efficiency:
- Large mixing bowl
- Pie dish (9-inch)
- Rolling pin
- Saucepan
- Pastry cutter or food processor
- Pastry brush
Instructions
Let’s start creating our Door County Cherry Pie step by step.
Step 1: Prepare the Crust
- In a large bowl, combine the flour, salt, and sugar.
- Using a pastry cutter or food processor, cut in cold butter until the mixture resembles coarse crumbs.
- Gradually add ice water, one tablespoon at a time, until the dough comes together. It should feel slightly sticky but not wet.
- Divide the dough into two disks, wrap each in plastic wrap, and refrigerate for at least 1 hour.
Step 2: Cook the Cherry Filling
- In a medium saucepan, combine cherries, sugar, cornstarch, and salt.
- Cook over medium heat, stirring constantly, until the mixture thickens and begins to bubble. This takes about 5-7 minutes.
- Remove from heat and stir in the almond and vanilla extracts. Let it cool completely.
Step 3: Roll Out the Dough
- On a floured surface, roll out one disk of dough into a 12-inch circle.
- Gently transfer the dough to your 9-inch pie dish, trimming any overhang to about 1 inch.
- Pour the cooled cherry filling into the crust and dot it with the small butter pieces.
Step 4: Add the Top Crust
- Roll out the second dough disk into a 12-inch circle.
- Place it over the cherry filling and trim, leaving a slight overhang. Seal the edges by crimping them together.
- Cut a few small slits in the center for steam to escape.
Step 5: Add Topping (Optional)
- Brush the crust with beaten egg using a pastry brush for a golden glaze.
- Sprinkle sugar evenly over the top for a slight sparkle and sweet crunch.
Step 6: Bake the Pie
- Preheat the oven to 375°F (190°C).
- Place the pie on the center rack and bake for 50-60 minutes, or until the crust is golden brown and the filling is bubbling.
- If the edges brown too quickly, cover them with aluminum foil.
Step 7: Cool and Serve
- Let the pie cool on a wire rack for at least 2 hours to allow the filling to set.
- Serve slices warm or at room temperature, with optional vanilla ice cream on the side for an indulgent treat.
Quick Reference for Baking Timeline
| Step | Action | Timeframe |
|---|---|---|
| Pie Dough | Chill the dough | 1 hour |
| Cherry Filling | Cook and cool | 15 minutes |
| Assemble Pie | Roll out dough and add filling | 20 minutes |
| Bake | Heat at 375°F | 50-60 minutes |
| Cooling Time | Allow pie to set | 2 hours |
Each step ensures the Door County cherries’ flavor shines through while balancing texture and sweetness. By following these steps, we’ll create a pie that’s golden, flaky, and packed with vibrant cherry goodness.
Ingredients
Here’s everything we need to make a classic Door County Cherry Pie. This includes the ingredients for both the filling and the crust. Be sure to follow the measurements closely for the perfect balance of tart and sweet flavors.
For the Cherry Filling:
- 4 cups Door County tart cherries, pitted (fresh or frozen)
- 1 1/4 cups granulated sugar
- 1/4 cup cornstarch
- 1/2 teaspoon almond extract
- 1/4 teaspoon vanilla extract
- 1 tablespoon lemon juice (freshly squeezed)
- 1 tablespoon unsalted butter (cut into small pieces)
For the Pie Crust:
- 2 1/2 cups all-purpose flour
- 1 cup unsalted butter, chilled and cubed
- 1/2 teaspoon salt
- 1 tablespoon granulated sugar
- 6-8 tablespoons ice water
Optional Toppings:
- 1 egg, beaten (for egg wash)
- 1 tablespoon granulated sugar (for sprinkling on crust)
Pro Tip: Always use fresh Door County cherries when available. Their tart profile elevates this pie to an authentic taste that’s unmatched.
Tools And Equipment
Making a Door County Cherry Pie requires the right tools and equipment to ensure smooth preparation and the best results. Here’s a list of must-haves for crafting this delicious dessert:
Essential Tools
- Mixing bowls (various sizes): For combining the dough ingredients and mixing the cherry filling.
- Pastry cutter or food processor: To cut the butter into the flour when making the pie crust.
- Rolling pin: To roll out the pie dough evenly and achieve the right thickness.
- 9-inch pie dish: A standard pie dish is essential for baking and presenting the pie.
- Cherry pitter: To easily remove the pits from fresh Door County cherries without damaging the fruit.
- Saucepan: For cooking the cherry filling and thickening it with cornstarch.
- Whisk: To blend cornstarch into the filling for a lump-free texture.
- Pastry brush: For applying the egg wash to achieve a golden, shiny crust.
- Knife or pastry wheel: To trim the crust edges or create a lattice design for the top crust.
- Cooling rack: To allow airflow under the baked pie for quicker and even cooling.
Optional but Helpful Tools
- Pie weights or dried beans: To prevent the crust from puffing during blind baking (if pre-baking the crust).
- Silicone baking mat or parchment paper: For rolling out the dough with ease and preventing sticking.
- Bench scraper: To help transfer dough or clean the surface while working.
Quick Checklist for Your Kitchen
| Category | Tools |
|---|---|
| Mixing and Preparation | Mixing bowls, cherry pitter, whisk, pastry cutter or food processor |
| Dough Crafting | Rolling pin, silicone baking mat, bench scraper |
| Assembly and Baking | Pie dish, knife or pastry wheel, pastry brush, pie weights or dried beans, cooling rack |
| Stovetop Cooking | Saucepan |
These tools play a crucial role in making sure the Door County Cherry Pie turns out perfectly golden, flaky, and full of tart cherry flavor. Having them ready before starting allows us to work efficiently and enjoy the baking process.
Directions
Let’s bring the flavors of Door County to life with this step-by-step guide. Follow each stage carefully to create a golden, flaky pie bursting with the vibrant flavor of Door County cherries.
Prep The Filling
- Start by adding 4 cups of pitted Door County tart cherries into a medium saucepan.
- Add 1 cup of granulated sugar, 3 tablespoons of cornstarch, and a pinch of salt. Stir to combine thoroughly.
- Heat the mixture over medium heat, stirring constantly, until the cherries release their juices and the filling thickens. This will take around 5–8 minutes.
- Remove the pan from the heat and stir in 1 teaspoon of almond extract, ½ teaspoon of vanilla extract, 1 tablespoon of lemon juice, and ½ tablespoon of unsalted butter.
- Let the filling cool to room temperature while preparing the crust.
Prepare The Pie Crust
- In a large mixing bowl, whisk together 2 ½ cups of all-purpose flour, 1 tablespoon of granulated sugar, and ½ teaspoon of salt.
- Add 1 cup of chilled unsalted butter, cut into small cubes. Use a pastry cutter or your fingers to work the butter into the flour until the mixture resembles coarse crumbs.
- Gradually add 6–8 tablespoons of ice water, 1 tablespoon at a time, mixing until the dough just comes together. Avoid overmixing to ensure a tender crust.
- Divide the dough into two equal portions. Shape each into a disc, wrap in plastic wrap, and refrigerate for at least 1 hour or up to 2 days.
Assemble The Pie
- Preheat the oven to 400°F (200°C). Position a rack in the center of the oven.
- Roll out one portion of the chilled dough on a lightly floured surface into a 12-inch circle, about ⅛-inch thick. Transfer it to a 9-inch pie dish, letting the excess dough hang over the edges.
- Spoon the cooled cherry filling into the pie crust, spreading it evenly.
- Roll out the second portion of dough into a 12-inch circle and carefully place it over the filling. Alternatively, cut the second crust into strips to create a lattice design.
- Trim any excess dough from the edges, leaving about a 1-inch overhang. Fold the edges under and crimp decoratively. Use a knife to cut small vents if using a full top crust.
- If desired, brush the top crust with a beaten egg for a golden finish and sprinkle with sugar for a sparkling crust.
Bake The Pie
- Place the assembled pie on a baking sheet to catch any drips.
- Bake the pie at 400°F for 20 minutes. Reduce the oven temperature to 375°F (190°C) and continue baking for an additional 30–35 minutes, or until the crust is golden brown and the filling begins to bubble.
- Allow the pie to cool for at least 2–3 hours so the filling can set properly. This step ensures clean slices when serving.
- Serve the pie as is, or pair it with a scoop of vanilla ice cream or a dollop of whipped cream for a truly indulgent treat.
| Baking Temperatures & Time | Details |
|---|---|
| Initial Baking Temperature | 400°F (200°C), 20 minutes |
| Reduced Temperature | 375°F (190°C), 30–35 minutes |
Make-Ahead Instructions
Preparing components ahead of time can make crafting our Door County Cherry Pie seamless and stress-free. Here’s how we can break down the prep work to save time while preserving the pie’s fresh, vibrant flavor.
1. Cherry Filling Preparation
We can cook the cherry filling in advance, ensuring it’s ready when we need it. Simply follow the steps for preparing the filling as outlined in the recipe, then allow it to cool completely before storing.
- Transfer the cooled cherry filling to an airtight container.
- Store it in the refrigerator for up to 3 days. If freezing, place it in a freezer-safe container and store it for up to 3 months.
- Before using, thaw the frozen filling overnight in the refrigerator and stir gently to restore its consistency.
2. Pie Crust Dough Preparation
Making pie crust dough in advance is a great way to ensure a tender, flaky crust without the rush.
- Prepare the dough: Follow our crust recipe, then divide it into two discs before wrapping each tightly in plastic wrap.
- Keep the dough refrigerated for up to 2 days. Alternatively, freeze the wrapped dough discs in freezer-safe bags for up to 3 months.
When it’s time to assemble, bring the refrigerated or thawed dough to a workable temperature, about 10-15 minutes at room temperature.
3. Fully Assembled Pie (Optional)
For ultimate convenience, we can assemble the entire pie ahead of time.
- After assembling the pie, do not apply the egg wash at this stage if freezing.
- Wrap the pie tightly in plastic wrap, then aluminum foil, and freeze for up to 2 months.
When ready to bake, we recommend baking the pie directly from frozen. Brush on the egg wash and sprinkle sugar on the crust before placing it in the oven. Add an extra 10-15 minutes of baking time as needed to ensure the filling is bubbling.
Storage Table for Make-Ahead Steps
| Prep Component | Refrigerator Storage | Freezer Storage |
|---|---|---|
| Cherry Filling | Up to 3 Days | Up to 3 Months |
| Pie Crust Dough | Up to 2 Days | Up to 3 Months |
| Fully Assembled Pie | Not Recommended | Up to 2 Months |
Adopting these make-ahead measures ensures that even on the busiest days, a delectable Door County Cherry Pie is just a few steps away from gracing our table.
Tips For The Perfect Door County Cherry Pie
1. Choose the Right Cherries
- The heart of this pie is the Door County tart cherries. Whenever possible, use fresh tart cherries for the most authentic flavor and vibrant color.
- Out of season? Opt for frozen tart cherries or high-quality jarred cherries packed in water to stay close to that classic Door County flavor. Avoid canned cherry pie fillings as they overpower with sweetness.
2. Achieve a Flawless Crust
- Use cold ingredients when making the crust. Place your butter, flour, and even your mixing bowl in the refrigerator before starting.
- Work quickly to prevent the butter from softening too much, which ensures a flaky texture. Using a pastry cutter or food processor helps achieve fine, butter-coated crumbs without over-mixing.
- Let the dough rest in the refrigerator for at least 1 hour before rolling it out. This prevents shrinkage and ensures the crust remains tender and crisp.
3. Prevent a Soggy Bottom
- To avoid a soggy crust, we recommend placing the assembled pie dish on a preheated baking sheet when baking. The direct heat will help cook the bottom crust faster.
- Sprinkle the bottom crust with a tablespoon of cornstarch or fine breadcrumbs before adding the cherry filling. This acts as insulation, absorbing any excess moisture from the juices as the pie bakes.
4. Master the Cherry Filling Consistency
- Cook the filling beforehand on the stovetop until it thickens slightly. This step prevents the filling from becoming too runny when baked.
- Make sure the mixture cools completely before assembling the pie. Hot filling can over-soften the crust and lead to an uneven cook.
5. Perfect Your Lattice or Crust Design
- Elevate the presentation by creating a lattice top crust. Use a pastry wheel or knife to cut even, wide strips of dough, then weave them over the filling.
- Seal the edges well by crimping them with a fork or your fingers. For a polished finish, brush the crust with a beaten egg wash and sprinkle a little sugar for extra shine and sweetness.
6. Bake to Perfection
| Temperature | Time | Details |
|---|---|---|
| Preheat to 425°F | Bake for 15 minutes | Blast of heat sets the crust. |
| Reduce to 375°F | Continue 35-40 minutes | Ensures cherries bubble and the crust is golden. |
- Keep an eye on the pie during the last 10 minutes. If the edges are browning too quickly, cover them with a foil shield or pie crust protector.
7. Let It Cool
- Cooling the pie completely (about 2-4 hours) is crucial. This allows the filling to set, making slicing clean and easy.
- Resist the urge to cut it too early! A warm pie may taste amazing but will lose its structure when served.
8. Pair It Like a Pro
- For a quintessential treat, serve your Door County Cherry Pie with a scoop of vanilla ice cream or a dollop of freshly whipped cream. These cool toppings perfectly balance the cherries’ tartness, creating an irresistibly indulgent dessert experience.
Conclusion
There’s something truly special about creating a Door County Cherry Pie from scratch. It’s not just a dessert; it’s a celebration of tradition, flavor, and the vibrant charm of Door County’s tart cherries. With the right ingredients, tools, and a little patience, we can craft a pie that’s as beautiful as it is delicious.
Whether we’re baking for a special occasion or simply indulging in a slice of summer, this recipe brings the essence of Door County right to our table. Let’s savor every bite and share this timeless treat with those we love.
Frequently Asked Questions
What makes Door County cherries special?
Door County cherries are renowned for their tart flavor, vibrant color, and versatility. Grown in Wisconsin’s unique climate, these cherries are a summer favorite and are often featured in jams, desserts, and the iconic Door County Cherry Pie.
Can I use frozen cherries for the Door County Cherry Pie?
Yes, frozen cherries can be used if fresh Door County cherries are unavailable. Ensure they are thawed and drained to avoid excess moisture in the pie filling.
How do I prevent the pie crust from getting soggy?
To prevent a soggy crust, bake the pie at a high temperature initially to set the crust, and avoid overloading the filling with liquid. Adding a light egg wash to the bottom crust can also help.
Can I make the cherry pie filling in advance?
Absolutely! The cherry pie filling can be made up to 3 days in advance and stored in the refrigerator, or frozen for up to 3 months for later use.
How long does the pie need to cool before serving?
Allow the pie to cool for at least 2-3 hours before serving. This helps the filling set properly, making slicing easier and ensuring the best texture.
Can I freeze the entire assembled pie?
Yes, you can freeze the fully assembled pie for up to 2 months. Bake it directly from frozen at 375°F, covering the edges to prevent over-browning, and extend the baking time as needed.
What tools are essential for making Door County Cherry Pie?
Key tools include a cherry pitter, rolling pin, pie dish, mixing bowls, pastry cutter or food processor, and a whisk. Optional tools like a silicone baking mat or pie weights can enhance the process.
How can I make my lattice crust look professional?
To create a perfect lattice crust, cut even strips of dough and alternate layering them over the pie in a basket-weave pattern. Use a pastry wheel for clean edges and press the ends into the base crust to seal.
Can I substitute almond extract in the recipe?
Yes, if almond extract is not available or desired, you can omit it or replace it with extra vanilla extract for a slightly different flavor profile.
What is the best way to serve Door County Cherry Pie?
Serve the pie slightly warm or at room temperature with a scoop of vanilla ice cream or a dollop of whipped cream for a classic, indulgent dessert.