
Few holiday treats capture the magic of the season quite like gingerbread cookies. Our Disney Gingerbread Cookie Recipe brings that festive spirit straight to your kitchen with a touch of classic Disney charm. These cookies are soft yet perfectly spiced, making them an irresistible holiday favorite for families and fans alike.
Ingredients
To create the perfect Disney Gingerbread Cookie that captures both festive magic and classic spice, we carefully combine the right dry and wet ingredients along with a signature Spice Mix. Here’s everything we need to bake these soft, flavorful cookies.
Dry Ingredients
These ingredients form the base of our gingerbread dough, providing structure and that traditional cookie crumb.
- 3 cups all-purpose flour, sifted
- 1 teaspoon baking soda
- 1/2 teaspoon salt
- 1/2 cup granulated sugar
- 1/2 cup packed dark brown sugar
Wet Ingredients
The wet ingredients blend warmth and richness into our dough, helping create that soft texture we love.
- 3/4 cup unsalted butter, softened
- 3/4 cup molasses (preferably dark or blackstrap for depth)
- 1 large egg
- 1 teaspoon pure vanilla extract
Spice Mix
This spice blend infuses our gingerbread cookies with the signature warm and aromatic flavors Disney fans adore.
| Spice | Amount | Notes |
|---|---|---|
| Ground ginger | 2 tablespoons | Freshly ground preferred |
| Ground cinnamon | 1 tablespoon | Sweet and warm |
| Ground cloves | 1 teaspoon | Intense and slightly bitter |
| Ground nutmeg | 1/2 teaspoon | Adds a nutty undertone |
| Ground allspice | 1/4 teaspoon | Enhances overall spice blend |
By carefully measuring and combining these ingredients, we ensure our Disney Gingerbread Cookies deliver the perfect balance of sweetness, spice, and soft texture every time.
Equipment Needed
To create the perfect Disney Gingerbread Cookies, having the right equipment is essential. The right tools ensure consistent results and make the baking process smooth and enjoyable. Here is a list of the equipment we recommend for this recipe:
- Mixing Bowls: Use medium and large bowls for combining dry and wet ingredients separately.
- Electric Mixer or Stand Mixer: An electric hand mixer or stand mixer will help us cream the butter and sugar efficiently, producing the ideal dough texture.
- Measuring Cups and Spoons: Accurate measurement of ingredients is crucial. Use standardized measuring cups for dry and liquid ingredients and spoons for spices.
- Rubber Spatula: Perfect for scraping down the sides of the bowl to ensure no ingredient is left out.
- Rolling Pin: A smooth rolling pin allows us to roll the dough evenly to the desired thickness.
- Cookie Cutters: To achieve the iconic Disney shapes, we recommend using gingerbread or themed cookie cutters. Shapes like Mickey Mouse ears add a festive touch.
- Baking Sheets: Use heavy-duty, rimmed baking sheets lined with parchment paper or silicone baking mats for even baking and easy cleanup.
- Cooling Rack: A wire cooling rack cools the cookies quickly and evenly preventing soggy bottoms.
- Pastry Brush: Useful for applying egg wash or glaze if desired.
| Equipment | Purpose |
|---|---|
| Mixing Bowls | Combine wet and dry ingredients |
| Electric Mixer | Cream butter and sugar efficiently |
| Measuring Cups/Spoons | Ensure accurate ingredient quantities |
| Rubber Spatula | Scrape down mixing bowls |
| Rolling Pin | Roll dough evenly |
| Cookie Cutters | Shape dough into festive Disney forms |
| Baking Sheets | Bake cookies evenly with easy cleanup |
| Cooling Rack | Cool cookies quickly with no sogginess |
| Pastry Brush | Apply washes or glazes for decoration |
Having these pieces of equipment ready before we start makes the entire baking process of our Disney Gingerbread Cookie Recipe easier and more enjoyable. Let’s gather our tools and get ready to bake!
Prep Work
Before diving into the delightful process of making Disney Gingerbread Cookies, precise preparation sets the stage for perfect results. Let’s ensure every step is ready for smooth baking.
Measuring Ingredients
Accurate measurements make all the difference in creating the ideal balance of spice and texture in our Disney Gingerbread Cookie Recipe. Use the following guidelines to measure each ingredient carefully:
| Ingredient | Measurement Tool | Notes |
|---|---|---|
| All-purpose flour | Dry measuring cup | Spoon into cup, level with knife |
| Baking soda | Measuring spoon | Level off for exact amount |
| Brown sugar | Dry measuring cup | Pack lightly |
| Granulated sugar | Dry measuring cup | Level off |
| Unsalted butter | Measuring stick or scale | Use softened butter at room temp |
| Molasses | Liquid measuring cup | Pour carefully, avoid splashes |
| Vanilla extract | Measuring spoon | Use exact teaspoons |
| Ground ginger | Measuring spoon | Use fresh ground for best aroma |
| Ground cinnamon | Measuring spoon | Level off for consistent flavor |
| Ground cloves | Measuring spoon | Use sparingly for balance |
| Ground nutmeg | Measuring spoon | Freshly grated preferred |
| Ground allspice | Measuring spoon | Add for warm spice notes |
Tip: Always double-check ingredient quantities before mixing to maintain the authentic Disney Gingerbread Cookie flavor and texture.
Preparing Baking Sheets
Properly preparing our baking sheets ensures even cooking and easy cookie removal without damage—crucial when working with delicate gingerbread shapes.
- Line baking sheets with parchment paper or a silicone baking mat to prevent sticking.
- For extra crisp edges, lightly grease the parchment paper with butter or non-stick spray.
- Arrange cookie shapes at least 2 inches apart to allow for spreading.
- Use heavy-duty baking sheets to prevent warping and aid in even heat distribution.
- Have a cooling rack handy near your baking area to transfer cookies immediately after baking.
Making the Dough
Preparing the dough is the heart of our Disney Gingerbread Cookie Recipe. By carefully mixing ingredients and incorporating our signature spice blend, we create that perfect balance of flavor and texture that brings the magic to life.
Mixing Dry Ingredients
Start by combining all the dry ingredients to ensure even distribution of leavening agents and flour. In a large mixing bowl, whisk together:
- 3 cups all-purpose flour (sifted for lightness)
- 1 teaspoon baking soda
- ½ teaspoon salt
These form the base structure of our dough. Mixing the dry components first guarantees a consistent texture throughout the cookies.
Combining Wet Ingredients
In a separate large bowl, cream the wet ingredients for a smooth and rich dough. Using an electric mixer set to medium speed, blend:
- ¾ cup unsalted butter, softened
- ¾ cup brown sugar, packed
- 1 large egg
- ½ cup molasses
- 1 teaspoon vanilla extract
Mix until the mixture is light and fluffy, about 3-4 minutes. This step adds moisture and sweetness that complements the spices, creating the tender crumb of the cookie.
Incorporating Spices
Our distinctive flavor relies on the precise addition of spices. Gently fold in the Spice Mix blend which includes:
| Spice | Quantity |
|---|---|
| Ground Ginger | 2 teaspoons |
| Ground Cinnamon | 1 teaspoon |
| Ground Cloves | ½ teaspoon |
| Ground Nutmeg | ½ teaspoon |
| Ground Allspice | ¼ teaspoon |
Sprinkle the spices evenly over the creamed wet ingredients. Mix just until combined to avoid overworking the dough and dulling the spice intensity.
Forming the Dough
Now it’s time to bring the dry and wet components together. Gradually add the dry ingredient mixture to the wet ingredients in three additions. Use a rubber spatula or mixer on low speed to combine thoroughly but gently.
Once incorporated, the dough will be slightly sticky but firm enough to shape. Turn dough onto a lightly floured surface and knead briefly, just 3-4 turns, to bring it into a smooth ball. Flatten into a disk, wrap in plastic wrap, and refrigerate for at least 1 hour. Chilling firms the dough, making it easier to roll and cut our iconic Disney shapes with precision.
Chilling the Dough
To achieve the perfect texture for our Disney Gingerbread Cookie Recipe, chilling the dough is a crucial step. This process firms up the butter and allows the flavors to meld together, making the dough easier to handle and enhancing the final cookie’s taste and shape.
Step-by-Step Guide to Chilling the Dough
- Shape the Dough into a Disc
After mixing, turn the dough onto a clean surface and shape it into a flat disc about 1 to 1.5 inches thick. This shape helps it chill evenly and roll out smoothly later.
- Wrap Tightly
Wrap the dough disc tightly in plastic wrap. Ensuring a snug wrap prevents the dough from drying out and absorbing any odors from the fridge.
- Refrigerate for Optimal Time
Place the wrapped dough in the refrigerator for at least 2 hours, but ideally 4 hours or overnight. This extended chill time enhances the spice infusion and yields a sturdier dough perfect for cutting intricate Disney shapes.
- Avoid Over-Chilling
While chilling is essential, avoid leaving the dough in the fridge for more than 24 hours. Over-chilled dough can become too firm, making rolling difficult.
Why Chilling Matters
- Flavor Development: Chilling allows the ginger, cinnamon, and other spices to blend deeply with the butter and molasses, enriching the flavor profile.
- Texture Control: Cold dough is less sticky and rolls out evenly, preventing spreading during baking and preserving sharp cookie edges.
- Ease of Handling: Firm dough is easier to cut into detailed Disney-themed shapes without losing form.
Chilling Time Recommendations
| Chilling Time | Result |
|---|---|
| 2 hours minimum | Dough firms up and flavors begin to meld |
| 4 to 12 hours | Full flavor development with ideal texture |
| Overnight (8–24 hrs) | Best for convenience and robust flavor |
| Over 24 hours | Dough may become too stiff to roll easily |
“Patience pays off when chilling cookie dough. Do not rush this step if you want our Disney Gingerbread Cookies to shine with their trademark flavor and impeccable shape.”
Once chilled, we can confidently move to rolling and cutting, knowing our dough is primed for magic.
Rolling and Cutting Cookies
Rolling and cutting the dough are crucial steps to achieve perfectly shaped Disney Gingerbread Cookies that bake evenly and hold their delightful details. Let’s explore the best rolling techniques and how to use Disney-themed cookie cutters to make our cookies magical.
Rolling Techniques
To roll our gingerbread dough evenly and smoothly, follow these precise steps:
- Chill the dough until firm but pliable, ideally for at least 4 hours or overnight. This prevents sticking and spreading during baking.
- Lightly dust your work surface and rolling pin with flour to avoid excess flour, which can dry out the dough.
- Place the dough disc on the floured surface and roll from the center outward using even pressure.
- Rotate the dough a quarter turn every few rolls to maintain an even thickness and circular shape.
- Roll the dough to a uniform thickness of 1/4 inch (6 mm). This ensures cookies bake evenly and maintain shape.
| Rolling Step | Detail |
|---|---|
| Dough temperature | Firm and chilled |
| Surface prep | Light flouring only |
| Rolling direction | Center outward |
| Rotation frequency | Every quarter turn |
| Thickness goal | 1/4 inch (6 mm) |
If the dough becomes too soft, pop it back in the fridge for 10–15 minutes before continuing. Consistency in thickness is key to balanced baking—thin cookies crisp up nicely while thicker ones remain delightfully soft.
Using Disney-Themed Cookie Cutters
Cutting the dough with our Disney-themed cookie cutters adds that signature charm that brings these gingerbread cookies to life. Here’s how to get the best results:
- Press firmly and evenly: Press the cookie cutter straight down and wiggle slightly to ensure a clean cut through the dough.
- Avoid twisting, which can distort cookie shapes and tear edges.
- Use a thin metal or sturdy plastic cutter with clean edges for precise details.
- Arrange cut cookies on a heavy-duty baking sheet lined with parchment paper, leaving about 1 inch (2.5 cm) between each to allow for slight expansion.
- Gather leftover dough scraps, lightly knead, chill briefly, and reroll for additional cookies to minimize waste.
“For that authentic Disney feel, gentle handling and precise cutting make all the difference in showcasing the iconic shapes beautifully.”
By mastering the art of rolling and cutting, we ensure every bite of our Disney Gingerbread Cookies enchants with perfect shape, texture, and festive magic.
Baking Instructions
Baking our Disney Gingerbread Cookie Recipe requires careful attention to oven settings and timing to achieve that perfect delicate texture and warm spice aroma. Let’s dive into the precise steps that turn our rolled and cut dough into magical holiday treats.
Oven Temperature and Timing
Preheat your oven to 350°F (175°C) for optimal baking results. This temperature ensures the cookies cook evenly without burning or drying out.
- Place the baking sheet with the shaped cookies on the middle rack to promote uniform heat circulation.
- Bake the cookies for 8 to 10 minutes, depending on their size and thickness.
- Watch carefully starting at 8 minutes; cookies should appear set and slightly firm to the touch but not browned along the edges.
- For thicker cookies or larger shapes, add an extra 1-2 minutes of baking time but avoid over-baking to keep the desired soft texture.
| Oven Temperature | Baking Time | Cookie Texture |
|---|---|---|
| 350°F (175°C) | 8–10 minutes | Soft edges, set center |
| 350°F (175°C) | 10–12 minutes | Slightly firmer, chewy |
Remember: every oven varies slightly, so using visual cues and feel is as important as timing exactly.
Tips for Even Baking
Even baking is key to our Disney Gingerbread Cookies looking picture-perfect and tasting delightful. Follow these tips for best results:
- Use Heavy-Duty Baking Sheets: They distribute heat evenly preventing burnt spots.
- Line Sheets with Parchment Paper or Silicone Mats: This avoids sticking and promotes uniform baking.
- Space Cookies Adequately: Leave at least 1 inch between cookies to allow heat flow and prevent merging.
- Rotate Baking Sheets Midway: Turn the pans 180 degrees halfway through baking for consistent browning.
- Avoid Overcrowding the Oven: Bake in batches if needed for steady heat circulation.
- Cool on a Wire Rack Immediately: This stops cooking from residual heat and keeps edges crisp yet interior soft.
“Perfect baking requires technique and patience — with these simple steps our Disney Gingerbread Cookies will come out flawless every time.”
By mastering oven temperature, proper timing, and these baking tips, we guarantee our gingerbread cookies will charm every Disney fan with their soft bite and enchanting shape.
Cooling and Decorating
After baking our Disney Gingerbread Cookies to golden perfection, it’s essential to cool them properly before decorating. This step ensures the cookies firm up nicely and hold their iconic shapes during decoration.
Cooling Cookies Properly
We start by transferring the cookies from the hot baking sheet to a wire cooling rack immediately after removing them from the oven. This prevents overbaking from residual heat and allows air to circulate evenly around each cookie.
Key cooling tips:
- Use a thin metal spatula to gently lift cookies without breaking.
- Arrange cookies with space between them on the rack for optimal airflow.
- Let cookies cool completely for at least 20-30 minutes before decorating.
- Avoid stacking cookies while warm to preserve their crisp edges and shapes.
| Cooling Step | Purpose | Time Required |
|---|---|---|
| Transfer to cooling rack | Stop baking and prevent sogginess | Immediately |
| Cool completely | Firm texture for decorating | 20-30 minutes |
| Avoid stacking | Maintain shape and crispness | Until fully cool |
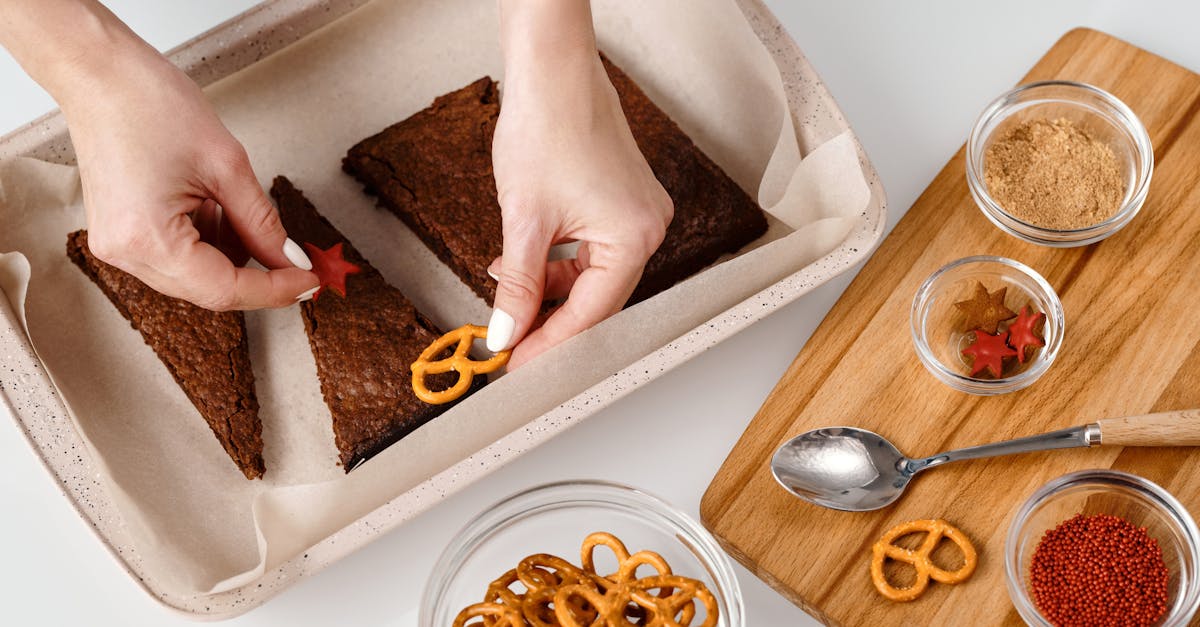
Decorating Ideas and Techniques
Once our cookies are cool and ready, we can bring them to life with creative and festive decorations inspired by the magic of Disney.
- Outline and flood: Use a piping bag with a small round tip to outline the cookie edges with royal icing. Then flood the interior with a thinner consistency icing for a smooth finish.
- Add dimension with layers of icing and small candy accents like mini gumdrops, edible glitter, or colored sugar.
- Use food coloring to customize the iconic Disney gingerbread figures with classic hues or fun holiday palettes.
- Freehand details such as eyes, smiles, or patterns enhance the character of each cookie.
- Allow each layer of icing to dry before adding additional decoration for clean, crisp results.
Recommended Icing and Decorations
For our Disney Gingerbread Cookie Recipe, royal icing is the best choice because it dries hard and is perfect for detailed decorations. Here’s a simple royal icing recipe we love:
| Ingredient | Measurement |
|---|---|
| Powdered sugar | 4 cups (480g) |
| Meringue powder | 3 tablespoons |
| Warm water | 5 – 6 tablespoons |
| Vanilla extract | 1 teaspoon (optional) |
Mixing instructions:
- Combine powdered sugar and meringue powder in a large bowl.
- Add warm water gradually while mixing on low speed.
- Beat on high for 5-7 minutes until stiff peaks form.
- Adjust water or powdered sugar to reach desired consistency.
For decorating, we recommend:
- Piping bags with fine tips for intricate detail work.
- Food coloring gels for vibrant hues.
- Small brushes to add edible shimmer or color blends.
- Candy pearls, sprinkles, and holiday-themed sugar shapes to add texture and festive charm.
Storage Tips
Proper storage is essential to keep our Disney Gingerbread Cookies fresh, flavorful, and beautifully decorated. Here are our top tips to ensure their quality lasts as long as possible:
1. Cool Completely Before Storing
Allow the cookies to cool completely on a wire rack for at least 30 minutes before storage. This prevents condensation inside the container, which could make the cookies soggy or ruin the icing details.
2. Use an Airtight Container
Place the cookies in an airtight container to maintain their soft texture and lock in their warm spice aroma. Avoid containers that let in air as this will cause the cookies to dry out quickly.
3. Layer with Parchment Paper
When stacking cookies, separate layers with parchment paper to protect the delicate royal icing decorations from sticking or smudging.
4. Store at Room Temperature
Keep the container in a cool, dry place at room temperature. Gingerbread cookies store best between 60°F and 70°F (15°C to 21°C). Avoid direct sunlight or humid areas to prevent icings from melting or cookies from softening excessively.
5. Long-Term Freezing Option
For extended storage beyond one week, freeze your gingerbread cookies. Follow these steps carefully:
| Step | Details |
|---|---|
| Cool | Ensure cookies are completely cooled before freezing. |
| Wrap Individually | Wrap each cookie in plastic wrap to protect from freezer burn. |
| Use Airtight Freezer Bag | Place wrapped cookies in an airtight freezer bag or container. |
| Label and Date | Mark the container with the date to keep track of storage time. |
| Freeze Duration | Store up to 3 months for best quality and flavor retention. |
| Thawing | Thaw at room temperature in airtight container before serving. |
“Freezing preserves the enchanting flavors and magic of our Disney Gingerbread Cookies, ready to bring joy whenever you desire.”
6. Avoid Refrigeration
Refrigerating gingerbread cookies is not recommended as the moisture in the fridge can soften them too much and may cause the decorations to degrade.
By following these Storage Tips, our Disney Gingerbread Cookies will remain moist, flavorful, and visually stunning, perfect for gifting or enjoying throughout the holiday season.
Conclusion
Baking Disney Gingerbread Cookies brings a special kind of joy that combines festive flavors with a touch of magic. With the right ingredients, tools, and techniques, we can create cookies that are not only delicious but also beautifully shaped and decorated.
Taking the time to chill, roll, and bake these cookies carefully ensures every bite has the perfect texture and warmth. Decorating them adds a personal touch that makes the experience even more memorable.
By following these steps and storage tips, we can enjoy our Disney Gingerbread Cookies throughout the holiday season or share them as thoughtful gifts. It’s a delightful way to celebrate and create lasting memories together.
Frequently Asked Questions
What makes Disney Gingerbread Cookies special during the holidays?
Disney Gingerbread Cookies combine festive holiday spirit with classic Disney charm, featuring soft texture and a perfectly balanced spice mix. Their unique shapes and warm flavors make them a beloved seasonal treat.
What ingredients are needed for Disney Gingerbread Cookies?
You need all-purpose flour, baking soda, brown and granulated sugars, butter, molasses, vanilla extract, and a signature Spice Mix of ginger, cinnamon, cloves, nutmeg, and allspice.
What equipment is essential for baking these cookies?
Key tools include mixing bowls, an electric mixer, measuring cups and spoons, a rubber spatula, rolling pin, Disney cookie cutters, heavy-duty baking sheets, a cooling rack, and a pastry brush.
Why is chilling the dough important?
Chilling firms the butter, melds flavors, improves texture, and makes dough easier to handle. Ideally, chill for 4 hours or overnight for best results without over-chilling.
How thick should I roll the dough?
Roll the dough evenly to about 1/4 inch (6 mm) thickness for balanced baking and cookie texture.
How do I use Disney cookie cutters properly?
Press cutters firmly and evenly without twisting to keep the cookie shapes intact. Handle dough gently for clean, detailed Disney designs.
What is the ideal baking temperature and time?
Bake cookies at 350°F (175°C) for 8 to 10 minutes. Watch closely to bake until set but not browned.
How should I cool and decorate the cookies?
Cool on a wire rack immediately after baking. Use royal icing for outlining and flooding, add candy accents, and let each icing layer dry before applying the next for polished decoration.
How can I store Disney Gingerbread Cookies?
Store completely cooled cookies in an airtight container at room temperature, layering with parchment paper. For long-term storage, freeze individually wrapped cookies in airtight bags. Avoid refrigeration to prevent moisture damage.