
If you’re a fan of wild game, deer pepperoni is a must-try. It’s the perfect way to transform venison into a flavorful, smoky snack that’s great for charcuterie boards, pizzas, or just enjoying on its own. Making it at home lets us control the spice level and ensure every bite is packed with bold, savory goodness.
Venison is leaner than traditional meats used for pepperoni, giving it a unique texture and taste. This recipe blends the natural richness of deer with a mix of spices that bring out its best flavors. Whether you’re a seasoned hunter or just looking to try something new, this homemade deer pepperoni will quickly become a favorite in your kitchen.
Ingredients
To craft the perfect deer pepperoni, we need a mix of fresh venison and flavorful spices. Below, we’ve outlined both the essential ingredients and optional additions to help you customize your recipe.
Essential Ingredients
- 2 pounds venison, ground (lean, trimmed of all sinew and silver skin)
- 1 pound pork fat, ground (adds moisture and binds the meat)
- 2 teaspoons curing salt (necessary for preservation and color)
- 2 tablespoons kosher salt
- 1 tablespoon sugar (balances flavors)
- 2 teaspoons freshly cracked black pepper
- 1 tablespoon red pepper flakes (adjust for heat level)
- 1 tablespoon paprika, smoked for depth
- 1 teaspoon garlic powder
- 1 teaspoon onion powder
- 1 teaspoon mustard seeds
- 1 tablespoon fennel seeds, lightly toasted
- 1 teaspoon liquid smoke (imparts smoky flavor)
- ½ cup ice water (aids in meat blending)
Optional Additions
- 1 teaspoon cayenne pepper (for extra heat)
- 1 teaspoon dried oregano (to infuse a herby undertone)
- 1 teaspoon ground coriander (adds an earthy note)
- 2 tablespoons honey or maple syrup (for slight sweetness and balance)
- 1 tablespoon Worcestershire sauce (enhances umami aspect)
- Natural or collagen casings for stuffing (optional but recommended for traditional pepperoni texture)
Tools And Equipment
Crafting deer pepperoni at home requires the right tools to ensure a smooth and professional process. Below, we’ve listed the essentials and helpful optional equipment to get started.
Necessary Tools
To achieve the perfect texture and flavor for our deer pepperoni, these tools are non-negotiable:
- Meat Grinder: For finely grinding venison and pork fat into a smooth, consistent mixture. A grinder with multiple blade sizes works best.
- Mixing Bowls: Large, food-safe bowls for mixing meat and spices thoroughly.
- Kitchen Scale: Essential for precise measurement of ingredients like spices, curing salt, and pork fat.
- Sausage Stuffer: A specialized tool to fill the natural or collagen casings evenly without air pockets.
- Sharp Knife: For trimming venison or cutting pork fat into manageable pieces.
- Cutting Board: To prep meat and keep your workspace safe and clean.
- Refrigerator: To chill the meat during different stages of the preparation for optimal safety and texture.
Optional Equipment
While not required, the following tools can elevate the process, making deer pepperoni preparation faster and easier:
- Smoker: To infuse a rich, smoky flavor into the pepperoni for a more complex taste.
- Meat Thermometer: To ensure the internal temperature of the pepperoni is food-safe during cooking or smoking.
- Vacuum Sealer: Perfect for long-term storage, keeping homemade deer pepperoni fresh for months.
- Casings Funnel: If you’re not using a sausage stuffer, a funnel can aid in filling casings by hand.
- Cleaning Brushes: To maintain and clean tools like the meat grinder and stuffer efficiently.
These tools ensure your homemade deer pepperoni emerges with high-quality flavor and texture, ideal for snacking or sharing.
Directions
Creating homemade deer pepperoni is a rewarding process that brings out the best in venison’s flavor. Follow these step-by-step instructions to achieve perfectly spiced, smoky pepperoni every time.
Prep The Meat
- Start by grinding 2 pounds of venison using a fine grinding plate for a smooth texture.
- Add 1 pound of pork fat to the ground venison to ensure the mixture has adequate fat content, preventing dryness.
- Chill the ground meat in the refrigerator for 30 minutes. Cold meat is easier to work with and ensures better results during mixing.
Mix The Seasonings
- Measure the following spices and curing agents into a mixing bowl:
- 3 teaspoons curing salt (Prague Powder #1)
- 2 teaspoons smoked paprika
- 2 teaspoons black pepper
- 1 teaspoon garlic powder
- 1 teaspoon onion powder
- 1 teaspoon crushed red pepper flakes
- Optional for extra heat: ½ teaspoon cayenne pepper.
- Pro Tip: Mix dry seasonings thoroughly to ensure even distribution of flavors.
Combine And Cure
- Using your hands or a stand mixer, mix the chilled ground venison and pork fat with the prepared seasonings for at least 5 minutes. The mixture should feel sticky, indicating proper protein binding.
- Shape the mixture into a large bowl, cover it tightly with plastic wrap, and refrigerate it for at least 24 hours. This curing period allows the meat to absorb the spices fully and develop flavor.
Curing Note: Ensure the mixture is kept below 40°F during the curing process to prevent bacterial growth.
Prepping For Smoking
- Soak natural or collagen casings in warm water for 30 minutes before using. This step makes them pliable and easy to stuff.
- Load the cured meat mixture into a sausage stuffer and carefully fill the casings. Avoid overpacking to prevent air pockets.
- Twist the casings into 6-inch links or your desired length, ensuring uniform size for even cooking.
Pro Tip: Use a sharp pin to prick small holes in the casings. This will help release trapped air and prevent splitting during smoking.
Cooking Instructions
Turning our carefully prepared venison mixture into flavorful deer pepperoni involves precise smoking and meticulous temperature management. Let’s dive into the steps to elevate your homemade pepperoni to perfection.
Smoking The Pepperoni
Smoking is key to developing the distinct smoky flavor in deer pepperoni. Here’s what we’ll do:
- Preheat the smoker: Set the temperature of your smoker to 130°F. Let it preheat for about 30 minutes.
- Prepare the casings: Place the filled and tied sausage casings evenly on the smoker grates. Space them out to allow proper airflow.
- Start low and slow: Smoke at 130°F for 1 hour without smoke to dry the casings.
- Introduce the smoke: Gradually increase the smoker temperature to 150°F, then add hardwood chips like hickory, apple, or mesquite for an aromatic flavor. Continue smoking at this temperature for 2 hours.
- Finish cooking: Raise the smoker temperature to 170°F and smoke the sausages until they reach an internal temperature of 152°F.
Pro Tip: Keep a reliable meat thermometer handy and avoid exceeding 170°F to prevent the fat from rendering out.
Checking For Doneness
It’s essential to check that our deer pepperoni is fully cooked and safe to eat while maintaining its signature texture.
- Internal temperature check: Insert a meat thermometer into the center of the thickest sausage. The target temperature is 152°F.
- Visual inspection: The sausages should have a consistent reddish-brown color with no raw spots inside.
- Firm texture: When cooked, the pepperoni should be firm to the touch but not dried out.
- Quick water bath: After reaching the desired temperature, place the sausages in an ice water bath to stop the cooking process and preserve their moist texture.
| Smoking Stage | Temperature | Duration |
|---|---|---|
| Preheat & drying | 130°F | 1 hour (no smoke) |
| Smoking introduction | 150°F | 2 hours |
| Final smoking to finish | 170°F | Until 152°F internal |
Now that our smoked deer pepperoni is ready, it’s time to let it cool and rest before slicing. Proper handling ensures every bite delivers both flavor and texture perfection.
Storing And Serving
Once we’ve crafted our flavorful deer pepperoni, proper storage and serving are key to preserving its taste and texture. Here’s how to keep it fresh and make the most out of serving it.
How To Store
To maintain the quality of our homemade deer pepperoni, follow these steps:
- Refrigeration: Wrap the pepperoni tightly in plastic wrap or place it in an airtight container. Store it in the refrigerator for up to 2 weeks.
- Freezing: For longer storage, vacuum seal the pepperoni or double-wrap it in freezer-safe bags. Label with the date and freeze for up to 6 months. Thaw in the refrigerator before consuming.
- Vacuum Sealing: Vacuum sealing protects the pepperoni’s smoky flavor and ensures an extended shelf life.
- Dry Storage: If made traditionally and properly cured, deer pepperoni may hang in a cool, dry place for weeks. Always check for signs of spoilage before eating.
| Storage Method | Timeframe |
|---|---|
| Refrigeration | Up to 2 weeks |
| Freezing (vacuum sealed) | Up to 6 months |
| Dry (cured properly) | Several weeks (cool, dry) |
Serving Suggestions
Our deer pepperoni is a versatile delight. Serve it up in style with these ideas:
- Slicing for Snacks: Slice thin rounds for a quick protein-packed snack. Pair with crackers, cheese, and pickles for a gourmet touch.
- Charcuterie Board: Add to a charcuterie board alongside smoked cheeses, olives, nuts, and dried fruits for a rustic, elegant setup.
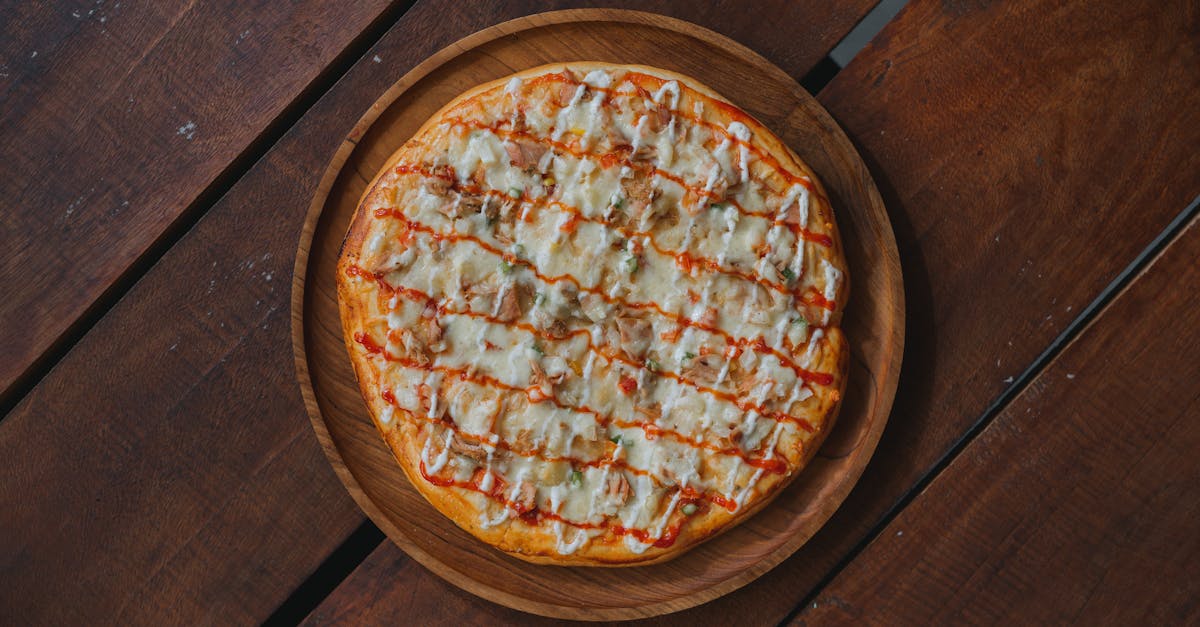
- Pizza Topping: Dice or slice and use as a delectable topping for homemade pizza. Its rich smoky flavor adds a unique touch to every bite.
- Pepperoni Pasta: Cut into pieces and mix into cooked pasta with marinara sauce for a spicy, smoky twist.
- Outdoor Adventures: Ideal for hikes or camping trips, this shelf-stable snack can be enjoyed on-the-go without refrigeration.
Make-Ahead Instructions
Planning ahead when making deer pepperoni can save us time while ensuring consistently great results. Proper preparation will allow the flavors to develop even further, making our deer pepperoni even more flavorful. Here are the detailed make-ahead instructions:
1. Prepare the Meat Mixture in Advance
We can mix the ground venison, pork fat, and spices up to 24 hours ahead of time. This step not only simplifies the process on the day we plan to stuff and cook but also allows the flavors to meld together beautifully. To do this:
- Combine all the required spices with the ground meat following the recipe guidelines.
- Knead the mixture thoroughly to evenly distribute the curing agent and seasonings.
- Place the prepared meat mixture in an airtight container or wrap it tightly with plastic wrap.
- Refrigerate the mix at 38°F to 40°F until we’re ready to proceed.
This method ensures the meat remains fresh and safe, while the curing salt works effectively.
2. Soak the Casings
For those using natural or collagen casings, soaking them ahead of time is crucial for easy handling later.
- Submerge the casings in clean, lukewarm water for 30 minutes to 1 hour.
- If using natural casings, rinse the inside by running water through them after soaking.
- Store the soaked casings in a shallow dish of water in the refrigerator if prepping several hours in advance.
Soaking softens the casings, ensuring they don’t tear while stuffing the pepperoni.
3. Pre-Stuff and Refrigerate
For added convenience, we can stuff the casings ahead of time. This step is perfect if we plan to smoke or bake the pepperoni the following day.
- After stuffing the meat mixture into the casings, twist them into even links.
- Arrange the links on a parchment-lined baking tray, ensuring they don’t touch to prevent sticking.
- Cover the tray with plastic wrap or place it in an airtight container.
- Refrigerate the stuffed links for up to 24 hours.
Letting the stuffed casings rest and chill not only saves us time but also improves texture and curing.
4. Freeze Uncooked Pepperoni for Later Use
If we want to stretch our preparation over several weeks, freezing is an excellent option. Here’s how:
- Once the pepperoni links are stuffed, arrange them in a single layer on a flat surface or tray.
- Freeze for about 2 hours, or until firm.
- Transfer the links to a freezer-safe bag or vacuum seal them to prevent freezer burn.
| Storage Method | Storage Duration |
|---|---|
| Refrigerated Mixture | Up to 24 hours |
| Soaked Casings | Up to 12 hours |
| Pre-Stuffed Pepperoni | Up to 24 hours |
| Frozen (Uncooked) | Up to 6 months |
Freezing uncooked pepperoni allows us to pull a batch out and cook it fresh whenever needed.
5. Smoke or Bake in Batches
If smoking or baking multiple batches, we can stagger the preparation process by making and refrigerating the meat mixture or stuffed pepperoni in advance. This helps streamline finishing steps without compromising freshness or quality.
Assembling and preparing our deer pepperoni ahead ensures smooth execution on cooking day, delivering a perfect, flavorful result every time.
Conclusion
Homemade deer pepperoni is more than just a recipe—it’s a rewarding way to transform venison into something truly special. With the right tools, spices, and a little patience, we can create a savory snack that’s both versatile and packed with flavor. Whether we’re sharing it with friends or enjoying it ourselves, this recipe delivers a unique culinary experience that’s worth the effort. Let’s embrace the art of crafting our own deer pepperoni and elevate the way we enjoy venison.
Frequently Asked Questions
What is deer pepperoni made of?
Deer pepperoni is typically made from ground venison mixed with pork fat, curing salt, and spices like black pepper, red pepper flakes, and smoked paprika. Optional ingredients include cayenne pepper, oregano, and honey, allowing for flavor customization.
Do I need special equipment to make deer pepperoni at home?
Yes, essential tools include a meat grinder, sausage stuffer, mixing bowls, a kitchen scale, and a smoker (optional). Additional tools like casings, a meat thermometer, and vacuum sealers can enhance the process.
Can I make deer pepperoni without a smoker?
Yes, while a smoker gives deer pepperoni its signature smoky flavor, you can bake it in an oven at low temperatures as an alternative. Adding liquid smoke can help replicate the smoky taste.
How long does homemade deer pepperoni last?
If stored properly, deer pepperoni lasts up to 2 weeks in the refrigerator, 6 months vacuum-sealed in the freezer, or several weeks as dry-cured pepperoni in a cool, dry place.
Can I freeze the pepperoni before cooking?
Yes, you can freeze the uncooked pepperoni for up to 6 months. Ensure it’s wrapped or vacuum-sealed to maintain quality.
How can I customize the flavor of deer pepperoni?
You can adjust spice levels, add herbs like oregano or thyme, incorporate sweeteners like honey, or experiment with different types of smoked woods for a unique flavor.
What is the ideal internal temperature for cooked deer pepperoni?
The internal temperature should reach 160°F to ensure doneness and food safety.
What are some serving ideas for deer pepperoni?
Deer pepperoni can be sliced for snacking, used on pizza, included in charcuterie boards, stirred into pasta, or packed for hikes and road trips.
How do I store deer pepperoni after smoking?
Let it cool completely, then refrigerate it in an airtight container for up to 2 weeks or vacuum seal and freeze for long-term storage.
Can I prepare the recipe ahead of time?
Yes, you can prepare the meat mixture and soak the casings up to 24 hours in advance. Pre-stuffed pepperoni can also be refrigerated for up to a day before cooking.