
Daisy Ham is a classic comfort food that brings warmth and flavor to any meal. Known for its tender, juicy texture and a subtle sweetness, this ham recipe has been a family favorite for generations. Whether you’re preparing for a holiday feast or a simple Sunday dinner, Daisy Ham never fails to impress.
Ingredients
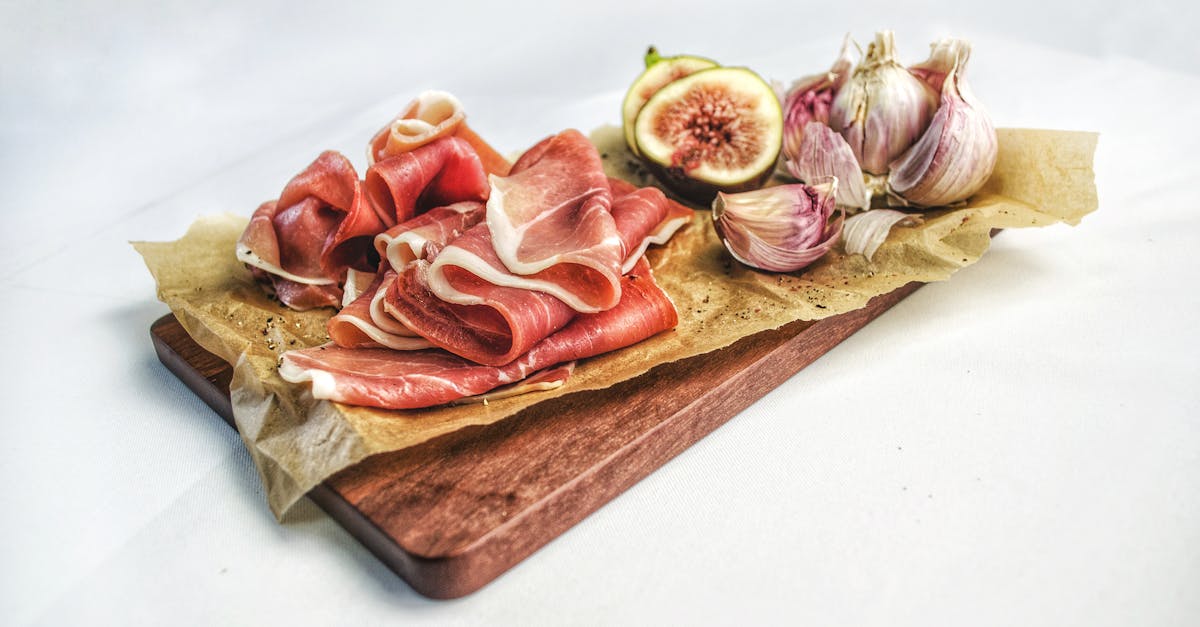
To create the perfect Daisy Ham, we carefully select ingredients that bring out the ham’s tender texture and subtle sweetness. Below are the essential components for the ham itself, the flavorful glaze, and optional garnishes to elevate your presentation.
Main Ingredients
- 1 whole Daisy Ham (about 8-10 pounds), fully cooked and bone-in
- 1/2 cup brown sugar, packed
- 1/4 cup Dijon mustard
- 1/4 cup apple cider vinegar
- Whole cloves (optional, for studding the ham)
Glaze Ingredients
To achieve the signature sweet and tangy glaze that complements the Daisy Ham’s flavor, gather:
| Ingredient | Quantity | Purpose |
|---|---|---|
| Brown sugar | 1 cup, packed | Sweetness and caramelization |
| Honey | 1/4 cup | Adds natural sweetness |
| Dijon mustard | 2 tablespoons | Adds depth and tang |
| Apple cider vinegar | 2 tablespoons | Balances sweetness with acidity |
| Ground cinnamon | 1 teaspoon | Adds warm spice note |
| Pineapple juice | 1/2 cup | Moisture and tropical sweetness |
Optional Garnishes
To enhance both the flavor and presentation of our Daisy Ham, consider these garnishes:
- Pineapple rings, for a classic look and extra sweetness
- Maraschino cherries, to add vibrant color and a hint of tartness
- Fresh rosemary sprigs, for an aromatic touch and visual appeal
Using these ingredients, we ensure every bite of Daisy Ham delivers exceptional flavor and a memorable experience.
Equipment Needed
To prepare our Daisy Ham Recipe flawlessly, having the right equipment on hand is essential. This ensures even cooking, effortless glazing, and a beautiful presentation that lives up to its reputation as a family favorite.
Essential Tools for Cooking
- Roasting pan with rack: This allows heat to circulate around the ham, promoting even roasting and preventing sogginess.
- Sharp carving knife: For cleanly slicing the ham to maintain its tender texture.
- Basting brush: Perfect for applying the rich glaze evenly over the surface during cooking.
- Meat thermometer: Ensures the ham is cooked to the safe internal temperature of 140°F while staying moist.
- Mixing bowls: To combine the brown sugar, Dijon mustard, apple cider vinegar, honey, and spices into the perfect glaze.
Additional Tools for Presentation and Serving
- Serving platter: To display the ham attractively with optional garnishes like pineapple rings and maraschino cherries.
- Tongs or carving fork: For securely handling the ham when transferring to the platter.
- Small saucepan: To gently warm the glaze before applying if needed.
Equipment Checklist Table
| Equipment | Purpose |
|---|---|
| Roasting pan with rack | Even roasting and heat circulation |
| Sharp carving knife | Clean slicing of the ham |
| Basting brush | Glaze application |
| Meat thermometer | Safe internal temperature check |
| Mixing bowls | Preparing glaze |
| Serving platter | Attractive presentation |
| Tongs/Carving fork | Secure handling |
| Small saucepan | Warming glaze |
Equipping ourselves with these tools will elevate the preparation of our Daisy Ham, guaranteeing a juicy texture, caramelized glaze, and stunning presentation every time.
Prep Work
To ensure our Daisy Ham turns out perfectly tender and flavorful, the prep work is crucial. Let’s get started by properly preparing the ham and the glaze for the best results.
Preparing the Ham
- Remove the whole ham from its packaging and pat it dry with paper towels to help the glaze adhere better.
- Score the surface of the ham in a diamond pattern, cutting about ¼ inch deep. This allows the glaze to penetrate deeply, enhancing flavor and creating a beautiful caramelized crust.
- Place the ham on the roasting rack inside the roasting pan to promote even cooking and allow the fat to drip away.
- Insert a meat thermometer into the thickest part, avoiding the bone, to monitor the internal temperature as it cooks.
Preparing the Glaze
- In a medium-sized mixing bowl, combine the following ingredients according to the quantities listed in the table below:
| Ingredient | Quantity | Purpose |
|---|---|---|
| Brown sugar | ½ cup | Adds sweetness and caramel |
| Honey | ¼ cup | Adds richness and shine |
| Dijon mustard | 2 tablespoons | Provides tang and depth |
| Apple cider vinegar | 1 tablespoon | Adds acidity balance |
| Ground cinnamon | ½ teaspoon | Adds warmth and spice |
- Whisk all ingredients together until the mixture is smooth and slightly thickened.
- Set the glaze aside for easy access during roasting and basting.
Our foundation for a perfectly glazed and flavorful Daisy Ham begins right here with these preps to ensure every bite is juicy and fragrant.
Cooking Instructions
Follow these precise steps to bake and glaze our Daisy Ham perfectly. Attention to detail ensures a juicy interior and a beautifully caramelized exterior that will impress everyone at the table.
Baking the Ham
- Preheat the oven to 325°F (163°C). This moderate temperature allows the Daisy Ham to cook evenly without drying out.
- Place the prepared ham on the roasting rack inside the roasting pan to ensure even heat circulation.
- Insert a meat thermometer into the thickest part of the ham without touching the bone.
- Bake uncovered until the internal temperature reaches 140°F (60°C). Depending on your ham’s weight, this typically takes about 15-18 minutes per pound.
- Check the temperature regularly after the first hour to avoid overcooking.
- Once at temperature, remove the ham from the oven and tent loosely with aluminum foil for 10-15 minutes. This resting period allows the juices to redistribute for optimal tenderness.
| Step | Action | Temperature/Time |
|---|---|---|
| Preheat oven | Set oven temperature | 325°F (163°C) |
| Bake ham | Place on rack in roasting pan | 15-18 min per pound |
| Internal temperature | Reach safe serving temperature | 140°F (60°C) |
| Rest ham | Tent with foil | 10-15 minutes |
Applying the Glaze
- When the ham has about 30 minutes remaining, begin applying the glaze for the perfect caramelized crust.
- Using a basting brush, generously coat the scored surface with the prepared glaze mixture.
- Return the ham to the oven and bake uncovered.
- Reapply the glaze every 10 minutes until the ham is done. This layering builds depth in flavor and creates that signature sweet-savory crust.
- Watch closely in the final minutes to prevent the glaze from burning.
- Remove the ham, let it rest again for a few minutes, then transfer to a serving platter.
- Garnish with optional pineapple rings, maraschino cherries, or fresh rosemary to elevate presentation and flavor.
“Glazing at intervals is key to building that irresistible finish on the Daisy Ham.”
Serving Suggestions
To showcase our Daisy Ham at its finest, thoughtful serving ideas elevate the meal, making it perfect for family dinners or special occasions. Here’s how we can complement the ham’s rich flavor and tender texture with matching sides, garnishes, and presentation tips.
Pairing Side Dishes
For the best harmony on the plate, choose sides that balance the sweet and savory notes of the Daisy Ham. Consider these:
- Roasted root vegetables (carrots, parsnips, and sweet potatoes) for earthy sweetness and a caramelized finish.
- Creamy mashed potatoes to add a smooth, comforting texture contrast.
- Green bean almondine or sautéed garlic spinach for freshness and a mild crunch.
- Cranberry sauce or an apple chutney to enhance the ham’s subtly sweet glaze.
Suggested Beverage Pairings
Well matched drinks can heighten our dining experience. We recommend:
| Beverage | Notes |
|---|---|
| Dry Riesling | Bright acidity to cut through richness |
| Sparkling Cider | Light and crisp complement to sweet glaze |
| Pinot Noir | Soft tannins and fruity notes match ham flavors |
Presentation Tips
To make the Daisy Ham visually inviting and ready for serving:
- Arrange slices on a large platter, slightly overlapping for easy picking.
- Garnish with fresh rosemary sprigs and pineapple rings topped with maraschino cherries.
- Drizzle any remaining warm glaze over the slices just before serving.
- Provide sharp carving knives and tongs nearby for neat plating.
Serving Temperature
We suggest serving the Daisy Ham at warm but not hot temperature between 130°F and 140°F to bring out the full spectrum of flavors without masking the delicate sweetness.
“The right combination of sides and presentation can turn our Daisy Ham recipe from everyday comfort food into a memorable centerpiece.”
By thoughtfully selecting accompaniments and focusing on appealing presentation, we ensure each serving delivers exceptional taste and lasting impressions.
Make-Ahead Tips
Preparing the Daisy Ham in advance allows us to save time and enhance flavors. Here are our top tips to make your ham preparation smooth and stress-free:
1. Choose the Right Ham and Storage
- Select a fully cooked, bone-in ham for the best results.
- Keep the ham refrigerated until the moment you start prep.
- Store wrapped tightly in plastic wrap or foil to maintain moisture.
2. Prep the Ham Ahead of Time
- Score the ham’s surface with a sharp knife into diamond shapes at least 1/8 inch deep.
- Place the scored ham on the roasting rack, cover with foil, and refrigerate for up to 24 hours.
- This resting time allows the glaze to penetrate and intensify the flavors.
3. Make the Glaze in Advance
- Prepare the glaze using brown sugar, honey, Dijon mustard, and spices.
- Store the glaze in an airtight container in the fridge for up to 3 days.
- Rewarm gently before applying during the final baking phase.
4. Partial Cooking Before Serving
- Preheat oven to 325°F.
- Place the prepped ham on the rack inside the roasting pan and cover loosely with foil.
- Bake until the internal temperature reaches 130°F if you plan to finish later.
5. Cooling and Refrigeration
- Let the ham cool completely if you don’t plan to serve immediately.
- Wrap tightly and refrigerate for up to 24 hours before finishing the glaze and final bake.
Make-Ahead Timeline Summary
| Step | Timeframe | Storage Method | Notes |
|---|---|---|---|
| Ham scoring & prep | Up to 24 hours before | Wrapped with foil | Enhances flavor absorption |
| Glaze preparation | Up to 3 days before | Airtight container in fridge | Ready for use on baking day |
| Partial baking | Same day or day before | Covered loosely with foil | Cook to 130°F internal temp |
| Cooling and refrigeration | Up to 24 hours after bake | Wrapped tightly in fridge | Keeps ham fresh prior to final glaze |
“Planning ahead not only reduces stress but allows the rich flavors of Daisy Ham to develop beautifully.“
By following these make-ahead strategies, we ensure the juiciness and taste of our Daisy Ham remain unmatched while making our holiday or family meal prep a breeze.
Storage and Leftovers
Proper storage of our Daisy Ham ensures we retain its tender texture and rich flavor for future meals. Here are the essential steps to keep our ham fresh and safe:
- Cool the Ham Completely: After serving, allow the Daisy Ham to cool to room temperature—no more than two hours out. This prevents bacterial growth while preserving moisture.
- Wrap Tightly: Use plastic wrap or aluminum foil to wrap the ham securely. Alternatively, place it in an airtight container to avoid exposure to air that can dry out the meat.
- Refrigeration: Store wrapped ham in the refrigerator at or below 40°F (4°C). The ham will stay good for up to 4 to 5 days when refrigerated properly.
- Freezing for Longer Storage: For extended storage, freeze leftover ham. Wrap it tightly in heavy-duty aluminum foil or freezer-safe bags to prevent freezer burn.
| Storage Method | Temperature | Storage Duration |
|---|---|---|
| Refrigeration | ≤ 40°F (4°C) | 4 to 5 days |
| Freezing | 0°F (-18°C) or below | Up to 2 months |
Tip: Label your packages with the date so we can track freshness easily.
Reheating Leftover Daisy Ham
To enjoy our Daisy Ham leftovers with the same delicious flavor and moist texture, follow these reheating guidelines:
- Thaw Frozen Ham: Place frozen ham in the refrigerator overnight to thaw safely.
- Slow Oven Reheat: Preheat the oven to 275°F (135°C). Place ham slices or whole portions in a baking dish with a splash of water or broth. Cover tightly with foil.
- Heat Evenly: Warm ham for 10 to 15 minutes for slices, or 20 to 30 minutes for larger pieces, until internal temperature reaches 140°F (60°C).
- Glaze Refresh: During reheating, brush our signature Daisy Ham glaze over the surface for a caramelized finish.
Utilizing Leftover Daisy Ham
We can get creative with leftover ham by integrating it into various dishes:
- Ham and Cheese Omelets: Dice ham for a savory breakfast boost.
- Ham Salad: Mix chopped ham with mayo, mustard, and herbs.
- Soups and Stews: Add ham chunks to enrich flavor.
- Casseroles and Pasta: Use ham as a protein addition.
By following these storage and reheating steps, we keep our Daisy Ham leftovers juicy and flavorful, making each bite as enjoyable as the first.
Conclusion
Daisy Ham offers a perfect blend of sweet and savory flavors that can elevate any meal. With the right ingredients, tools, and techniques, we can create a tender, flavorful ham that impresses every time. Planning ahead and following simple storage tips help us enjoy this delicious dish even beyond the initial meal.
Whether served at a family gathering or a special occasion, Daisy Ham brings warmth and satisfaction to the table. By pairing it with complementary sides and beverages, we make the experience truly memorable. Let’s embrace the joy of preparing and sharing this classic recipe with those we care about.
Frequently Asked Questions
What ingredients are essential for making the perfect Daisy Ham?
The key ingredients include a whole ham, brown sugar, Dijon mustard, apple cider vinegar, and a glaze made from brown sugar, honey, and spices. Optional garnishes like pineapple rings, maraschino cherries, and fresh rosemary can enhance flavor and presentation.
What equipment do I need to prepare Daisy Ham properly?
You’ll need a roasting pan with a rack, a sharp carving knife, a basting brush, and a meat thermometer to ensure the ham is cooked evenly and the glaze caramelizes perfectly.
How should I prep and cook Daisy Ham?
Dry the ham, score its surface, place it on a rack, preheat the oven to 325°F, and bake until it reaches 140°F internally. Glaze during the last stages and let the ham rest after baking for juicy results.
What sides pair well with Daisy Ham?
Roasted root vegetables, creamy mashed potatoes, fresh green beans, cranberry sauce, and apple chutney complement the sweet and savory notes of Daisy Ham beautifully.
What beverages go best with Daisy Ham?
Dry Riesling, sparkling cider, and Pinot Noir are excellent drink choices that enhance the flavors of Daisy Ham and its side dishes.
How can I make Daisy Ham preparation easier with make-ahead tips?
Choose a fully cooked, bone-in ham; score it early, prepare the glaze in advance, and consider partial cooking ahead. Planning reduces stress and improves the flavor development.
What is the best way to store leftover Daisy Ham?
Cool the ham completely, wrap it tightly, and store it in the refrigerator for up to four days or freeze for longer storage following the recommended guidelines.
How should I reheat leftover Daisy Ham without drying it out?
Reheat slowly in a low oven and refresh the glaze during reheating to maintain moisture and enhance flavor.
What are some creative ways to use leftover Daisy Ham?
Use leftover ham in omelets, salads, soups, or casseroles for tasty meals that prevent waste and keep the flavors enjoyable.