
There’s something special about combining function with sentiment in the kitchen. Cutting boards with personalized recipes do just that. They bring your favorite dishes to life while serving as a practical tool for meal prep.
These unique boards make cooking more meaningful by keeping cherished recipes right at your fingertips. Whether it’s a family heirloom or your signature dish, having it engraved on a cutting board adds a personal touch that inspires creativity every time you cook.
Perfect for gifting or elevating your own kitchen, personalized recipe cutting boards blend style and utility seamlessly. Let’s explore how these custom pieces can transform your cooking experience and celebrate the flavors that matter most to us.
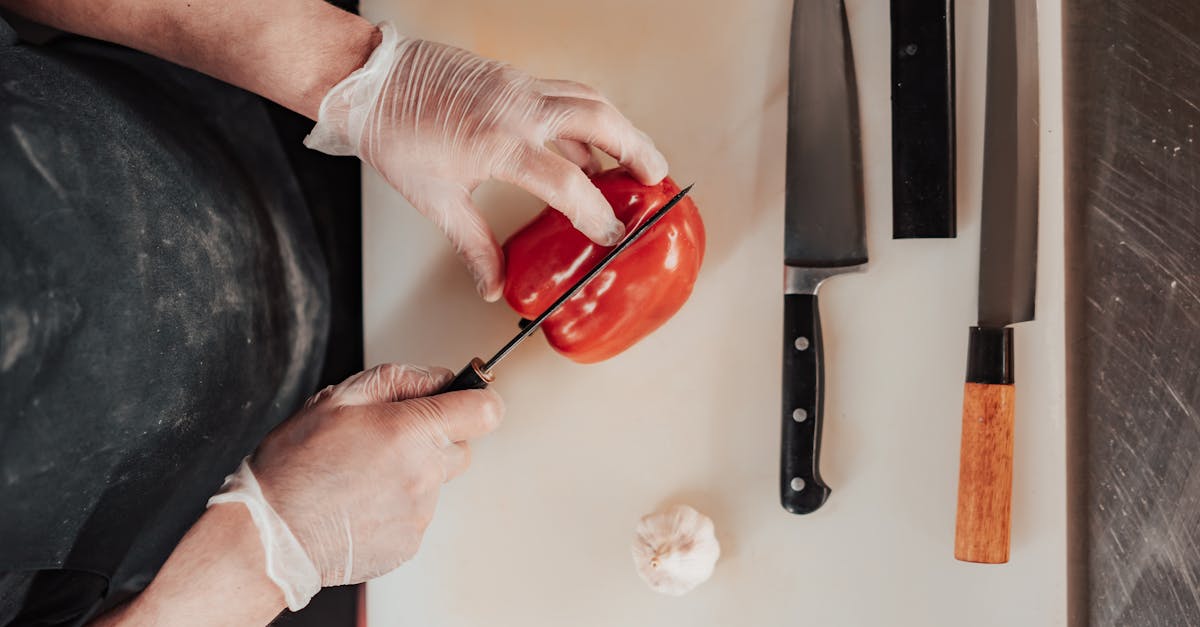
Materials and Tools Needed
To create cutting boards with personalized recipes, selecting the right materials and tools is essential. This ensures durability, aesthetic appeal, and precise engraving for a truly unique kitchen keepsake.
Choosing the Right Wood for Cutting Boards
Selecting the perfect wood sets the foundation for both function and beauty. We recommend hardwoods because they are dense and resist knife marks, preserving the engraved recipe details.
| Wood Type | Characteristics | Best For |
|---|---|---|
| Maple | Light color, smooth grain, durable | Classic look, fine engraving |
| Walnut | Dark rich tone, slightly softer | Contrast engraving designs |
| Cherry | Warm reddish hue, hard and resilient | Elegant appearance |
When choosing wood, look for:
- Food-safe finishes like mineral oil or beeswax
- Proper seasoning to avoid warping or cracking
- A smooth surface for precise, clean engraving
Tools for Engraving Personalized Recipes
Engraving tools directly impact the clarity and detail of your personalized recipe. Depending on preferences, cost, and project complexity, here are our top options:
| Engraving Tool | Description | Best Use Case |
|---|---|---|
| Laser Engraver | High precision, permanent marks | Intricate, detailed recipes |
| Router or Dremel | Versatile handheld tools with engraving bits | Custom hand-carved effects |
| Wood Burning Tool | Manual control with heat for engraving | Rustic, personal touch |
Tip: Test your chosen tool on a scrap piece of the same wood to perfect pressure and speed before engraving the final piece.
Additional Supplies
To complete the project with professional results, gather the following complementary supplies:
- Fine-grit sandpaper (220-400 grit) for smoothing the board surface before engraving
- Painter’s tape or masking tape to mark boundaries for engraving precision
- Food-safe wood finish like mineral oil or a beeswax blend for post-engraving sealing
- Soft cloths or brushes for applying finishes evenly
- Design templates or stencils of the recipe for transferring text and images accurately
Designing Your Personalized Recipe
Creating a personalized recipe cutting board begins with thoughtful design choices that elevate both its beauty and functionality. Let’s delve into how we can transform a cherished recipe into a stunning kitchen keepsake.
Selecting a Recipe to Engrave
Choosing the right recipe is crucial for a meaningful and visually appealing cutting board. We recommend picking a signature dish that reflects your family’s heritage or personal favorites. Consider these points:
- Simplicity and length: Opt for recipes concise enough to fit legibly on the board.
- Sentimental value: Select recipes tied to special memories or traditions.
- Readability: Recipes with short ingredient lists and clear instructions work best.
| Criteria | Recommendation |
|---|---|
| Recipe Length | Maximum 10–15 lines |
| Ingredients | Simple, easy-to-engrave terms |
| Emotional Attachment | High sentimental or nostalgic value |
Formatting the Recipe Text
The way we format the recipe text directly affects readability and aesthetic appeal. Follow these guidelines:
- Use clear and legible fonts that suit engraving styles (e.g., serif for elegance, sans-serif for modern look).
- Break the text into sections: Title, Ingredients, Instructions to maintain clarity.
- Apply bold or italics to highlight important parts such as ingredient names or cooking times.
- Limit the number of font sizes to two or three for visual harmony.
“A well-formatted recipe is a joy not only to read but also to display.”
Here is a suggested font size layout:
| Text Section | Font Style | Font Size (pt) |
|---|---|---|
| Recipe Title | Bold | 24 |
| Ingredients | Regular | 14 |
| Instructions | Italic or Regular | 12 |
Incorporating Decorative Elements
Adding decorative touches enhances the cutting board’s personality while framing the recipe nicely. Consider:
- Custom borders or flourishes around the recipe text for an elegant finish.
- Small icons or silhouettes of cooking utensils, herbs, or foods matching your recipe theme.
- A family name or date engraved beneath the recipe to personalize further.
- Use of natural wood grain patterns to complement your design.
We suggest balancing decorations so they don’t overpower the recipe text but enrich the overall layout. Placement options include:
- Around the perimeter as a border.
- Between recipe sections for subtle separation.
- At the corners for accentuation.
Preparing the Cutting Board
Before engraving our personalized recipe cutting boards, it’s essential we prepare the wood surface properly to ensure a crisp and lasting design. Proper preparation preserves the board’s durability and highlights the beautiful details of the recipe engraving.
Sanding and Smoothing the Surface
We begin by sanding the cutting board to create a smooth, even surface perfect for engraving. Follow these steps for optimal results:
- Start with coarse grit sandpaper (80-100 grit) to remove any rough patches, scratches, or uneven spots.
- Progressively switch to medium grit sandpaper (150-180 grit) to soften the surface.
- Finish with fine grit sandpaper (220-320 grit) for a silky smooth finish.
- Sand in the direction of the wood grain to avoid scratches crossing the pattern.
- Use a sanding block or an orbital sander to maintain even pressure and consistent sanding.
- After sanding, run your hand over the surface to check for any rough spots; repeat sanding if necessary.
| Sandpaper Grit | Purpose |
|---|---|
| 80-100 | Remove rough patches and marks |
| 150-180 | Smooth surface |
| 220-320 | Fine, silky finish |
Sanding not only enhances the visual clarity of the engraving but also extends the cutting board’s lifespan by eliminating splinters.
Cleaning the Wood Before Engraving
Once sanding is complete, we must thoroughly clean the cutting board to remove dust and debris that can interfere with engraving accuracy:
- Wipe the board with a damp microfiber cloth to lift off fine dust particles.
- Avoid soaking the wood; use only a slightly damp cloth.
- Let the board dry completely in a well-ventilated area.
- For stubborn dust, gently use a tack cloth to capture remaining particles.
- Ensure no moisture remains before beginning the engraving process; even slight dampness can distort the engraving tool’s precision.
“A clean and smooth surface is the foundation for a stunning personalized recipe cutting board that will delight in everyday use.”
By carefully sanding and cleaning the cutting board, we set the perfect stage to etch our cherished recipe with sharp detail and lasting beauty.
Engraving the Recipe on the Cutting Board
Engraving transforms our personalized recipe cutting board from a simple kitchen tool into a cherished keepsake. Let’s walk through how to set up our equipment, follow precise engraving steps, and maintain safety throughout the process.
Setting Up Your Engraving Equipment
Before we begin engraving, preparing our workspace and tools is critical for achieving crisp and lasting recipe designs. Here’s what we need to set up:
- Clean workspace: Ensure our area is dust-free and well-lit for maximum precision.
- Engraving machine or tool: Whether using a laser engraver, router, or wood burning tool, verify all components are securely connected and calibrated.
- Design upload: Transfer our finalized recipe design file to the engraving machine software. Confirm dimensions match our cutting board size.
- Masking tape: Use to secure the cutting board firmly on the engraving bed preventing any shift during the process.
- Ventilation: Set up proper ventilation or a smoke extractor, especially when using laser or burning tools, to handle wood fumes.
| Equipment Item | Preparation Step |
|---|---|
| Workspace | Clean, well-lit, dust-free |
| Engraving tool | Calibrated, tested, and secured |
| Recipe design file | Uploaded and size-checked |
| Cutting board | Firmly taped to engraving bed |
| Ventilation system | Installed and operating |
Step-by-Step Engraving Instructions
Following these steps methodically ensures our recipe is engraved flawlessly:
- Position the Cutting Board: Secure it with masking tape on the engraving machine bed aligning it with the design grid.
- Focus the Engraving Tool: Adjust the focus height based on the thickness of the cutting board — this enhances precision.
- Run a Test Engraving: Use a scrap piece of wood similar to your cutting board to test settings such as depth and speed.
- Begin the Engraving Process: Start the machine following the recommended speed and power settings for hardwoods like maple or walnut.
- Monitor the Progress: Watch for any signs of misalignment or excessive burning. Pause if adjustments are needed.
- Complete the Engraving: Once finished, carefully remove the cutting board and inspect the engraving for clarity and completeness.
- Clean the Board: Wipe away any residual soot or dust with a soft cloth.
“Patience and precision in the engraving phase define the beauty and longevity of our personalized cutting board.”
Safety Tips During Engraving
Maintaining safety protects us and preserves the working environment. Keep these points in mind:
- Wear protective eyewear to guard against wood chips and laser light.
- Use a dust mask or respirator to avoid inhaling fine wood particles or fumes.
- Avoid loose clothing and tie back long hair to prevent accidents with moving parts.
- Keep a fire extinguisher nearby especially when using laser engravers or wood burning tools.
- Operate machines in a well-ventilated area or under a proper extraction system.
- Turn off equipment and unplug between adjustments to prevent accidental startups.
- Follow manufacturer guidelines strictly for each engraving tool used.
By carefully following these setup, engraving, and safety protocols, we ensure our personalized recipe cutting board is engraved to perfection, creating a stunning and lasting kitchen treasure.
Finishing the Cutting Board
To complete our personalized recipe cutting board, the final step involves applying a protective finish that enhances durability and preserves the engraved design. This stage ensures the board remains both functional and visually stunning for years to come.
Applying Food-Safe Finishes
We start by selecting a food-safe finish that guards the wood against moisture and wear while keeping it safe for food preparation. Popular options include:
- Mineral oil: A natural, non-toxic oil that penetrates the wood, enriching its color and grain.
- Beeswax: Often combined with mineral oil to create a smooth, water-resistant surface.
- Tung oil (pure): A durable, penetrating oil that dries hard and is safe once fully cured.
- Walnut oil: Food-safe and drying, but requires caution for those with nut allergies.
Application steps:
- Using a clean, lint-free cloth, apply the chosen finish generously to the entire surface, including edges.
- Rub the finish into the wood following the grain to ensure deep absorption.
- Allow the oil or wax to soak in for 15 to 20 minutes.
- Wipe off any excess finish with a dry cloth to avoid sticky residue.
- For a richer finish, repeat the process 2 to 3 times, allowing each layer to absorb fully.
“Applying a high-quality food-safe finish not only protects but breathes life back into the personalized recipe cutting board’s wood, highlighting its natural beauty and engraving details.”
Drying and Curing Time
Proper drying and curing are critical to maximize the finish’s protective qualities and ensure food safety. Here’s an overview of typical drying times:
| Finish Type | Initial Drying Time | Full Cure Time | Notes |
|---|---|---|---|
| Mineral Oil | 4 to 6 hours | No full cure, reapplication recommended | Oil may need reapplication after use |
| Beeswax Blend | 2 to 4 hours | 24 hours | Creates a soft, buffable sheen |
| Pure Tung Oil | 24 hours | 7 days | Requires multiple coats for best protection |
| Walnut Oil | 4 to 6 hours | 7 days | Requires caution for nut allergies |
Tips for optimal curing:
- Place the board in a well-ventilated area away from direct sunlight.
- Avoid using the board during the full curing period.
- Turn the board occasionally to allow even air exposure.
“Patience during the drying phase guarantees our custom recipe cutting board is perfectly sealed and ready to withstand daily kitchen use.”
With these finishing and curing steps, our personalized cutting board combines lasting function with heartfelt personalization, making it a treasured kitchen centerpiece.
Care and Maintenance of Personalized Cutting Boards
Proper care and maintenance are essential to preserve the beauty and functionality of our personalized cutting boards. By following simple cleaning and reconditioning routines, we can ensure our boards remain durable and the engraved recipes stay vibrant.
Cleaning Tips
To maintain the integrity of the personalized recipe cutting board, we recommend these cleaning best practices:
- Hand wash only: Use warm water and a mild dish soap. Avoid soaking the board as prolonged water exposure can cause warping or cracking.
- Gentle scrubbing: Use a soft sponge or cloth to clean the surface. Avoid abrasive scrubbers that may damage the engraving.
- Rinse and dry immediately: Thoroughly rinse off soap residue and pat dry with a clean towel. Stand the board upright to allow complete air drying.
- Disinfect carefully: For occasional sanitizing, lightly rub the surface with a mixture of white vinegar and water or a diluted solution of hydrogen peroxide. Avoid harsh chemical cleaners.
- Avoid dishwasher use: High heat and moisture in dishwashers can destroy the wood and the engraved details.
“Regular gentle cleaning is key to keeping the personalized engraved recipe vivid and the cutting surface hygienic.”
Reconditioning and Refinishing
After extended use, our personalized cutting boards benefit from reconditioning to restore moisture and protect the wood fibers, ensuring longevity.
Frequency and indicators to recondition:
| Indicator | Action Needed |
|---|---|
| Dry, dull-looking surface | Apply food-safe oil |
| Small scratches or dull engraving | Light sanding and refinishing |
| Faint odor or stains | Deep clean with lemon and salt |
Steps to recondition and refinish:
- Lightly sand the board with a very fine grit sandpaper (320+ grit) to smooth any rough areas and refresh the engraved design.
- Clean the dust thoroughly with a damp cloth and let the board dry completely.
- Apply a food-safe finish such as mineral oil, pure tung oil, or a beeswax-oil blend. Use a clean cloth to rub the oil evenly across the surface.
- Let the finish absorb for at least 20-30 minutes; repeat for better penetration if needed.
- Wipe off any excess oil and allow the board to dry overnight before use.
“Consistent reconditioning preserves the board’s durability and ensures the custom recipe engraving remains the centerpiece of your kitchen tool.“
By incorporating these cleaning and refinishing habits,we protect our investment, keep the wood healthy, and maintain the charm of our treasured personalized recipe cutting boards for years to come.
Ideas for Gifting and Display
Personalized cutting boards with cherished recipes make perfect gifts and stunning kitchen decor. We explore thoughtful packaging and creative presentation ideas to showcase these unique culinary treasures beautifully.
Packaging Personalized Cutting Boards
When packaging personalized recipe cutting boards, presentation is key to enhance the emotional value of the gift. Here are essential tips for packaging that balances protection and style:
- Use eco-friendly wrapping materials such as kraft paper or reusable fabric wraps to reflect a rustic, handmade feel.
- Include a customized gift tag or card featuring a note about the recipe’s significance or the story behind the personalization.
- Protect the board during transit by padding it with natural fibers like shredded paper or linen cloth to avoid scratches and damages.
- For a premium touch, place the cutting board in a wooden crate or decorative box sized to fit perfectly.
| Packaging Element | Purpose | Tips |
|---|---|---|
| Kraft Paper Wrap | Eco-conscious aesthetic | Tie with jute twine for a rustic look |
| Reusable Fabric Wrap | Sustainable option | Choose a fabric matching kitchen colors or theme |
| Custom Gift Tag/Note | Personal connection | Handwrite for a heartfelt touch |
| Protective Padding | Ensures safety | Use biodegradable materials |
| Wooden Crate or Box | Premium presentation | Brand or emboss with recipient’s initials |
By carefully selecting packaging components, we ensure the personalized cutting board arrives safely and feels special from the moment it’s received.
Creative Presentation Ideas
Displaying cutting boards with personalized recipes creatively not only honors the sentimental value but also invites interaction and admiration. Consider these engaging presentation ideas:
- Kitchen Wall Display:
Mount the cutting board with a sturdy hook or a decorative stand at eye level. This keeps the recipe visible and accessible during cooking while doubling as charming wall art.
- Table Centerpiece:
Use the board as a centerpiece during gatherings by placing small bowls of ingredients or utensils around it. This highlights the recipe and sparks conversation.
- Recipe & Board Combo Gift Set:
Pair the cutting board with matching kitchen linens, spice jars, or a handcrafted apron featuring the same recipe or theme. This curated gift set creates a cohesive culinary experience.
- Seasonal Ribbon Accents:
Adorn the board with ribbons or seasonal decorations to celebrate holidays or special occasions, adding visual appeal and festive cheer.
“A personalized cutting board transforms a kitchen from ordinary to extraordinary by blending functionality with heartfelt storytelling. Showing it off creatively keeps its story alive.”
We recommend selecting display methods that encourage frequent use and appreciation of the recipe while adding to the kitchen’s aesthetic charm. These techniques make the cutting board a treasured heirloom, celebrated visually and practically.
By combining careful packaging with inventive displays, we maximize the impact of personalized recipe cutting boards as gifts and kitchen decor.
Conclusion
Personalized recipe cutting boards bring a unique blend of function and sentiment to any kitchen. They transform everyday cooking into a meaningful experience by keeping treasured recipes close and visible. Whether for ourselves or as thoughtful gifts, these boards celebrate the joy of home-cooked meals and family traditions.
By choosing quality materials, carefully designing the layout, and applying proper finishing techniques, we ensure these cutting boards last for years. With the right care, they remain beautiful keepsakes that inspire creativity and connection every time we cook. Embracing personalized recipe cutting boards means adding a heartfelt touch that truly makes the kitchen our own.
Frequently Asked Questions
What are personalized recipe cutting boards?
Personalized recipe cutting boards are custom kitchen boards engraved with meaningful recipes. They serve as practical tools and sentimental keepsakes, combining functionality with personal touch.
What types of wood are best for recipe cutting boards?
Hardwoods like maple, walnut, and cherry are ideal due to their durability, food safety, and attractive grain, making them perfect for lasting, beautiful cutting boards.
Which engraving tools are recommended for customization?
Laser engravers, routers, and wood burning tools are commonly used. Each offers different engraving styles, so choose based on the desired detail and finish.
How should I select a recipe for engraving on the board?
Choose a concise recipe with sentimental value and clear instructions. Ensure the text is easy to read and fits the board’s layout.
What is the proper way to prepare the cutting board before engraving?
Sand the board progressively from coarse to fine grit to create a smooth surface. Clean off all dust to ensure a crisp, clear engraving.
How can I ensure a safe and precise engraving process?
Set up a clean workspace, securely clamp the board, calibrate your tool, and monitor the engraving carefully. Follow all safety guidelines for your equipment.
What food-safe finishes are recommended for cutting boards?
Mineral oil, beeswax, pure tung oil, and walnut oil are popular choices. They protect the wood, enhance durability, and keep the board safe for food use.
How do I care for and maintain a personalized cutting board?
Hand wash with mild soap, dry immediately, and avoid soaking. Periodically recondition with oil or wax to keep the wood hydrated and the engraving vibrant.
Are personalized recipe cutting boards good gifts?
Yes, they make thoughtful gifts that combine practicality with emotional value, perfect for special occasions or anyone who loves cooking.
How can I creatively display or gift a personalized cutting board?
Use eco-friendly packaging with custom tags. Display on kitchen walls, as table centerpieces, or include in themed gift sets to enhance their sentimental impact.