
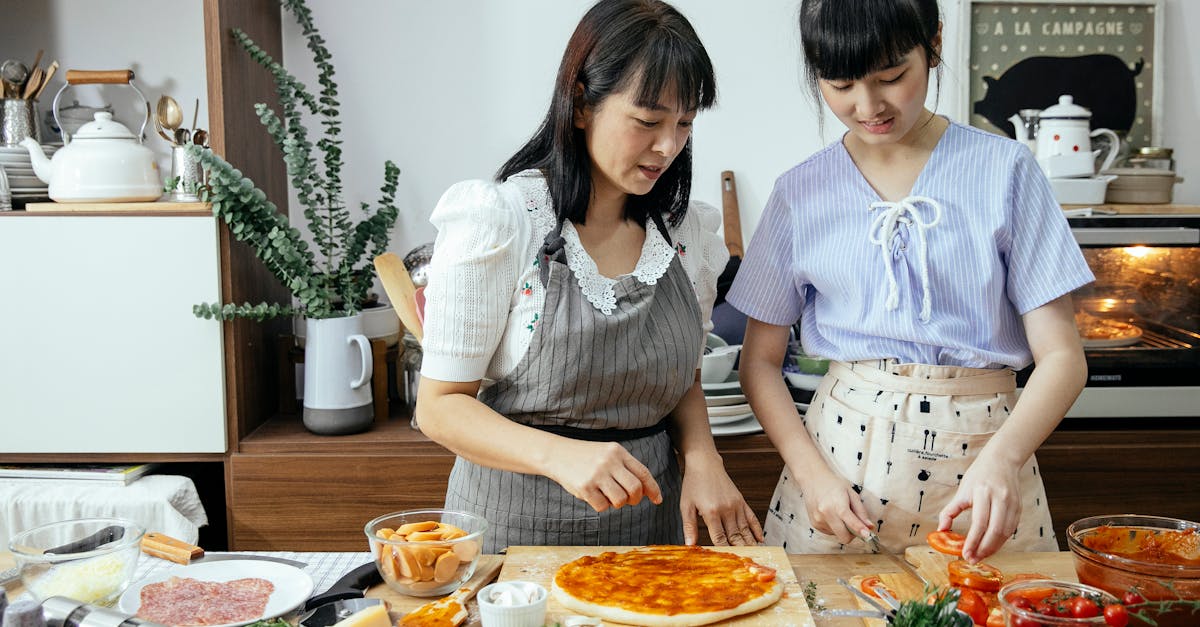
A cutting board with a recipe on it combines practicality with creativity in the kitchen. It’s a clever way to keep your favorite recipes close at hand while prepping meals, making cooking more efficient and enjoyable. Whether you’re a seasoned chef or just starting out, having the recipe right on your cutting board means no more flipping through cookbooks or scrolling on your phone.
This innovative kitchen tool often features engraved or printed recipes that withstand daily use, blending functionality with style. It’s perfect for gifting or adding a personalized touch to your cooking space. Let’s explore how this unique cutting board can transform your culinary routine and inspire delicious creations every day.
Materials Needed for Cutting Board With Recipe On It
To create a functional and attractive cutting board with recipe on it, selecting the right materials is essential. We will cover the best options for the cutting board base and the ideal method to display the recipe clearly and durably.
Selecting the Cutting Board Material
Choosing the correct cutting board material impacts durability, safety, and presentation. We recommend these top materials:
| Material | Benefits | Considerations |
|---|---|---|
| Maple Wood | Dense, durable, resists bacteria | Requires regular oiling for upkeep |
| Bamboo | Eco-friendly, lightweight, strong | Can be less forgiving on knives |
| Plastic | Dishwasher-safe, affordable | May wear quickly and stain |
| Acacia Wood | Hard, beautiful grain, long-lasting | Maintenance similar to maple |
We prefer hardwood options like maple or acacia for their combination of beauty and resilience. These woods also provide a smooth surface perfect for engraving or printing the recipe directly on the board.
Choosing the Ink or Engraving Method
The recipe needs to stand out clearly and withstand frequent washing and usage. Here are our options with pros and cons:
| Method | Description | Durability |
|---|---|---|
| Laser Engraving | Permanently etches recipe into wood | Very durable; won’t fade or peel |
| UV Printing | Prints recipe using UV-cured inks | Vibrant colors; moderately durable |
| Hand-Painted | Recipe painted by artisans | Unique look; less durable |
“Laser engraving is our top choice for a cutting board with recipe on it because it offers a permanent, professional finish that endures daily kitchen wear.”
We recommend avoiding regular inks or stickers that can peel or fade with washing. Using food-safe, water-resistant methods ensures the recipe remains readable and the cutting board remains safe for food prep.
Preparing the Recipe Text
We need to prepare the recipe text carefully to ensure clarity and durability when applied to the cutting board. This step is crucial for creating a visually appealing and functional kitchen tool.
Selecting the Recipe to Display
Choosing the right recipe to feature is essential. We recommend selecting a recipe that is:
- Simple and concise to keep the text legible.
- A favorite or frequently used dish to maximize usefulness.
- Limited to key ingredients and essential steps for space efficiency.
- Tested and well-loved by family or friends for confidence in its quality.
Remember, the recipe should fit comfortably on the board without overcrowding. Consider classic recipes such as pancakes, guacamole, or a signature marinade that resonate with everyday cooking needs.
Formatting the Recipe for the Board
Proper formatting enhances readability and style. We focus on the following formatting principles:
| Formatting Aspect | Recommendation |
|---|---|
| Font style | Use a clean, sans-serif or simple serif font for legibility. |
| Font size | Ensure the font size is large enough to be read easily but fits the board area. |
| Text layout | Arrange text in clear sections: Ingredients followed by Steps. |
| Highlighting | Bold main headings and italics for ingredients or cooking terms. |
| Spacing | Use adequate line spacing to avoid crowding and improve readability. |
Example layout:
Ingredients:
1 cup flour, 2 eggs, 1/2 cup milkInstructions:
- Mix ingredients.
- Cook on medium heat until golden.
We suggest keeping the recipe text to under 15 lines to maintain clarity and aesthetic balance.
Using laser engraving or UV printing methods ensures the formatting stays crisp and resistant to wear, preserving the cutting board’s functionality and unique appeal.
Tools and Equipment Required
To create a cutting board with recipe on it that is both durable and visually appealing, we need the right tools and equipment. These ensure precision, longevity, and safety throughout the process. Below we detail the essential items for engraving and printing the recipe onto the board.
Engraving Tools
For a permanent and food-safe recipe display, laser engraving is our top choice. Here are the tools we recommend:
- Laser Engraver Machine: A high-precision laser engraver designed for wood cutting boards. Choose models with adjustable power and speed settings for fine control.
- Computer with Design Software: Software like Adobe Illustrator or CorelDRAW to create and format the recipe layout before engraving.
- Protective Gear: Safety goggles and masks to protect from debris and laser light exposure.
- Cleaning Materials: Soft brushes and lint-free cloths to remove wood dust after engraving.
| Tool | Purpose | Important Features |
|---|---|---|
| Laser Engraver | Permanent engraving of recipe text | Adjustable power, high precision |
| Design Software | Formatting and creating vector files | Supports fonts and layout design |
| Protective Gear | User safety | Eye and respiratory protection |
| Cleaning Materials | Post-engraving maintenance | Non-abrasive for wood surfaces |
“Laser engraving locks the recipe into the cutting board, ensuring it never fades or peels, maintaining readability and food safety.”
Printing or Transfer Supplies
If we opt for UV printing or transfer techniques, the following supplies become essential to achieve a crisp, water-resistant finish:
- UV Printer: Specialized printer that uses ultraviolet light to cure ink instantly on wood surfaces.
- Food-Safe UV Ink: Ink certified non-toxic and suitable for direct contact surfaces.
- Transfer Paper: When using heat or water transfer methods to apply printed recipes.
- Heat Press or Laminator: Equipment to apply heat and pressure for transfers, ensuring adhesion.
- Sealant Spray or Varnish: Food-safe transparent coat to protect printed recipes from moisture and wear.
| Supply | Purpose | Key Considerations |
|---|---|---|
| UV Printer | Direct printing on the cutting board | Needs food-safe ink compatibility |
| Food-Safe UV Ink | Durable, non-toxic coloration | Certification for kitchen use |
| Transfer Paper | Recipe transfer onto wood | High-resolution prints |
| Heat Press/Laminator | Secure transfer application | Consistent temperature control |
| Sealant Spray | Water and abrasion resistance | FDA-approved food-safe finish |
Using UV printing or transfers combined with a protective sealant helps us maintain the recipe’s legibility while preserving the board’s functionality.
With the appropriate Engraving Tools or printing supplies, we can confidently create a cutting board with recipe on it that enhances our kitchen routine and elevates meal preparation ease.
Step-by-Step Instructions
Creating a cutting board with a recipe on it involves precise and careful steps to ensure durability, readability, and aesthetic appeal. Below, we guide you through the essential phases to craft this innovative kitchen accessory.
Cleaning and Preparing the Cutting Board Surface
Before transferring the recipe, we must prepare the cutting board surface for optimal adhesion and engraving quality.
- Begin by washing the board with warm water and mild dish soap to remove dust, oils, and residues.
- Rinse thoroughly and dry completely with a clean towel to prevent moisture from affecting the engraving or printing.
- Lightly sand the surface using 220-grit sandpaper to smooth any imperfections and create an even texture.
- Wipe the board with a tack cloth or a lint-free cloth dampened with mineral spirits to remove all sanding dust.
- Ensure the surface is fully dry before proceeding.
This preparation step guarantees that the recipe engraving or printing will adhere properly and remain crisp.
Transferring the Recipe Onto the Board
We have several methods to transfer the recipe, each with specific requirements and benefits. Below is a quick comparison:
| Method | Description | Equipment Needed | Pros | Cons |
|---|---|---|---|---|
| Laser Engraving | Permanently etches text into wood | Laser engraver, design software | Durable, food-safe, detailed | Requires specialized equipment |
| UV Printing | Prints recipe with UV-curable ink | UV printer, food-safe UV ink | Vibrant colors, water-resistant | Ink may wear over time |
| Transfer Paper | Transfers printed design to board | Printer, transfer paper, sealant | Cost-effective, easy setup | Less durable, prone to peeling |
Laser Engraving Instructions:
- Design the recipe layout using design software ensuring text is concise and legible.
- Position the board securely in the laser engraver.
- Set engraving parameters according to wood type (e.g., power 20%, speed 300 mm/s for maple).
- Start engraving and monitor the process to avoid burns.
- Remove the board carefully after completion.
“Laser engraving offers the most permanent and food-safe method to keep your recipe legible and stylish.”
UV Printing Instructions:
- Prepare the recipe design file and load it into the UV printer.
- Place the cutting board on the printer bed ensuring alignment.
- Use food-safe UV ink and print the design directly onto the board.
- Cure the ink with the printer’s UV light for a durable finish.
Sealing and Finishing the Cutting Board
To protect both the recipe and the cutting board surface, sealing is vital. We recommend the following steps:
- Apply a food-safe mineral oil or cutting board conditioner over the entire surface using a clean cloth.
- Let the oil soak into the wood for 20-30 minutes.
- Wipe off excess oil with a dry cloth.
- For additional protection, apply a thin coat of food-safe beeswax finish, buffing until smooth.
- Allow the board to cure overnight before use.
This finishing process enhances water resistance and preserves the engraved or printed recipe, extending the life of your cutting board.
Care and Maintenance Tips for Your Cutting Board With Recipe On It
Proper care is essential to preserve the beauty and functionality of our cutting board with recipe on it. Following these maintenance tips will keep the recipe clear and the board safe for food preparation.
1. Regular Cleaning
- Always wash the board immediately after use with warm water and mild dish soap.
- Avoid soaking the board in water as it can cause warping or damage to the engraved or printed recipe.
- Use a soft sponge or cloth to gently clean the surface—do not use abrasive scrubbers that might erode the recipe area.
“Cleanliness preserves clarity and keeps your recipe legible for years.”
2. Drying the Board
- After washing, dry the board thoroughly with a clean towel.
- Stand the board upright or on a rack to air dry completely before storing to prevent moisture buildup.
3. Oiling and Conditioning
To maintain the wood’s natural beauty and protect the engraved or printed recipe:
- Apply food-safe mineral oil or a beeswax finish monthly, depending on use frequency.
- Use a clean cloth to rub the oil or wax evenly into the wood surface.
- Let it soak for 15-20 minutes, then wipe off any excess with a dry cloth.
- This process helps prevent cracking, drying, and dulling of the recipe text.
| Step | Action | Frequency |
|---|---|---|
| Cleaning | Mild soap+soft sponge | After each use |
| Drying | Towel dry + air dry | After each use |
| Oiling/Conditioning | Food-safe mineral oil/wax | Monthly |
4. Avoiding Extreme Conditions
- Keep your board away from direct sunlight or heat sources to prevent fading or warping of the recipe and wood.
- Do not expose it to extreme humidity or dryness as this can cause the wood to crack.
5. Handling Stains and Odors
- For stubborn stains or odors, sprinkle coarse salt or baking soda on the board and scrub gently with a halved lemon.
- Rinse and dry immediately after treatment. This natural method cleans without harming the recipe surface.
6. Cutting Etiquette
- Use sharp knives for cutting to reduce pressure and friction on the board surface and recipe.
- Avoid cutting directly over the engraved or printed recipe area whenever possible to preserve legibility.
Tip: Rotate your cutting board regularly to evenly distribute wear and prolong the visibility of the recipe.
By following these Care and Maintenance Tips for Your Cutting Board With Recipe On It, we ensure that our unique kitchen tool remains both a beautiful statement piece and a functional recipe guide for many meals to come.
Creative Ideas and Uses for a Cutting Board With Recipe On It
Using a cutting board with recipe on it offers more than just convenience during meal prep; it opens up creative possibilities that enhance both functionality and kitchen aesthetics. Here are some inspired ways to make the most of this unique kitchen tool.
1. Interactive Cooking Companion
We can transform the cutting board into an interactive cooking aide by:
- Keeping a favorite recipe always within sight while chopping and mixing.
- Using a board with a step-by-step recipe allowing us to multitask efficiently without flipping pages.
This approach streamlines cooking and keeps us engaged—no more scrambling for digital screens or cookbooks.
2. Personalized Gift Idea
A cutting board with a personalized recipe makes a thoughtful gift for food lovers. We can:
- Engrave a family heirloom recipe on a hardwood board.
- Choose special fonts or icons to add a personal touch.
This gift offers sentimental value combined with everyday functionality.
3. Kitchen Décor and Display
Beyond the cutting surface, the recipe-engraved side can function as a decorative element. We can:
- Display the board upright in a recipe stand.
- Use it as a serving platter, showcasing the recipe as a conversation starter.
This dual-purpose adds charm and personality to our kitchen space.
4. Educational Tool for Kids and Beginners
Introducing beginners or kids to cooking becomes more engaging with a cutting board with recipe. We can:
- Use boards featuring simple, kid-friendly recipes.
- Encourage hands-on learning while referring directly to the recipe for guidance.
This boosts confidence and fosters a love for cooking early on.
5. Menu Planning and Meal Prep Organizer
We can incorporate the recipe board into our meal prep routine by:
- Choosing recipes that match weekly menus and having the directions right on hand.
- Combining with prep bowls and ingredients to stay organized and efficient.
This keeps our kitchen workflow smooth and focused.
Table: Versatile Uses for a Cutting Board With Recipe On It
| Use Case | Description | Benefits |
|---|---|---|
| Interactive Cooking Companion | Recipe visible during cutting and prep | Hands-free, saves time, ensures accuracy |
| Personalized Gift | Custom engraved family or favorite recipes | Sentimental, practical, lasting |
| Kitchen Decor & Display | Food serving and recipe visibility | Enhances kitchen aesthetics, functional |
| Educational Tool | Guides for kids and cooking beginners | Learning aid, encourages involvement |
| Meal Prep Organizer | Recipe matched to menus for efficient prep | Streamlines cooking, reduces errors |
“The cutting board with recipe on it is more than a tool; it is a bridge between inspiration and performance in the kitchen.”
By creatively adapting the cutting board with recipe on it, we unlock new ways to cook with confidence and style every day.
Conclusion
A cutting board with a recipe on it transforms everyday cooking into a more enjoyable and efficient experience. It brings convenience right to your fingertips while adding a personal touch to your kitchen space. With the right materials and proper care, this unique tool can last for years, inspiring us to try new dishes and keep our favorite recipes close. Whether for ourselves or as a thoughtful gift, it’s a practical and creative addition that elevates how we cook and connect with food.
Frequently Asked Questions
What are the benefits of a cutting board with a recipe on it?
A cutting board with a recipe offers convenience by keeping your favorite recipe visible while cooking, reducing the need to search through books or devices. It adds style, serves as a creative kitchen tool, and can be a personalized gift.
What materials are best for making a cutting board with a recipe?
Hardwoods like maple and acacia are ideal due to their durability, aesthetic appeal, and suitability for engraving or printing. They also ensure food safety and long-lasting use.
How is the recipe typically displayed on the cutting board?
Laser engraving is the preferred method for its permanence and durability. UV printing and hand-painting are alternatives, but inks or stickers are discouraged due to fading and peeling.
What kind of recipe works best for engraving on a cutting board?
Choose a simple, concise recipe with under 15 lines that is frequently used or a favorite. It should be clear, easy to read, and formatted with good spacing and font size for quick reference.
What are the steps to prepare the cutting board for engraving or printing?
Start by washing and thoroughly drying the board. Sand the surface to ensure smoothness and optimal adhesion. This preparation ensures better engraving or printing quality and durability.
How should I care for and maintain my recipe cutting board?
Clean with mild soap and water, dry immediately, and oil the board monthly with food-safe mineral oil or beeswax. Avoid extreme temperatures and harsh chemicals to maintain its beauty and recipe legibility.
Can I use any type of ink or sticker for the recipe?
No, regular inks and stickers are not recommended because they can fade, peel, and aren’t usually food-safe. Use food-safe, water-resistant methods like laser engraving or UV printing.
Is the cutting board with a recipe safe for everyday use?
Yes, when made with food-safe materials and finishes, such as mineral oil and beeswax, it’s safe for daily cutting and meal preparation while preserving the recipe.
Can a recipe cutting board be a good gift?
Absolutely! It makes a thoughtful, personalized gift that combines practicality with style, perfect for cooking enthusiasts of all skill levels.
What creative uses does a cutting board with a recipe offer?
It can serve as an interactive cooking companion, kitchen decor, educational tool for beginners, or even aid in meal planning, enhancing overall cooking inspiration and confidence.