
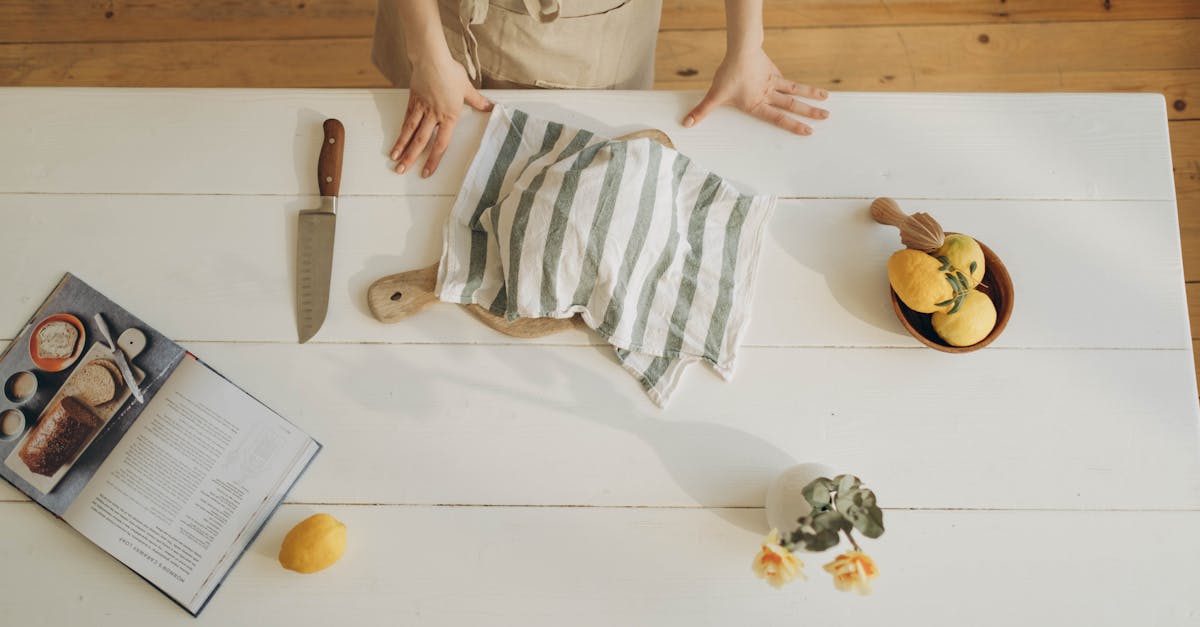
There’s something special about preserving our favorite recipes in a way that feels personal and timeless. A custom wooden recipe book offers just that—a beautiful, handcrafted keepsake where we can organize and cherish our culinary creations. Unlike ordinary notebooks, these wooden books bring warmth and character to our kitchen, making recipe sharing and meal planning even more enjoyable.
Crafted with care, each wooden recipe book can be personalized to reflect our style and taste. Whether it’s a gift for a loved one or a treat for ourselves, it’s a perfect blend of function and artistry. Let’s explore how creating a custom wooden recipe book can elevate our cooking experience and keep our treasured recipes safe for generations to come.
Materials Needed for Custom Wooden Recipe Book
To craft a custom wooden recipe book that is both durable and visually appealing, we must select high-quality materials. Each component plays a vital role in ensuring our recipe book stands the test of time while reflecting our personal style.
Types of Wood to Use
Choosing the right wood type is crucial for durability, aesthetics, and ease of customization. Here are some of the best woods we recommend for our custom wooden recipe books:
| Wood Type | Characteristics | Why Choose It |
|---|---|---|
| Cherry | Smooth texture, rich reddish hue, darkens beautifully with age | Elegant look, great for engraving |
| Maple | Hard, light-colored wood with subtle grain | Durable and clean aesthetic |
| Walnut | Dark brown wood with grain variability | Luxurious appearance, excellent contrast |
| Birch | Light color with a fine grain | Affordable and easy to work with |
| Oak | Strong and heavy with prominent grain patterns | Classic and sturdy |
By selecting the right wood grain and finish, we can personalize our recipe book’s cover to match any kitchen style or gift preference.
Additional Supplies and Tools
Alongside quality wood, we need specific tools and materials to assemble and customize our recipe book effectively:
- Binding Rings or Screw Posts – For securely holding recipe pages together while allowing easy page addition or rearrangement.
- Sandpaper (various grits) – To smooth edges and surfaces before finishing.
- Wood Finish (oil, varnish, or polyurethane) – To protect wood and enhance natural grain with a lasting sheen.
- Engraving Tool or Wood Burner – To carve names, designs, or personalized messages on the wood cover.
- Drill with Appropriate Bits – For creating clean holes to insert binding rings or screws.
- Clamps – To hold pieces steady during assembly or gluing.
- Adhesives (wood glue or super glue) – For securing smaller wood components or decorative elements.
- Page Protectors or Cardstock – To safeguard recipe pages from kitchen spills and wear.
This thoughtful selection of materials and tools ensures we create a custom wooden recipe book that is both functional and a treasured keepsake.
Designing Your Custom Wooden Recipe Book
Designing our custom wooden recipe book sets the foundation for a beautiful and practical keepsake. By making thoughtful choices in size, shape, layout, and sections, we ensure the book fits both our kitchen style and culinary needs perfectly.
Choosing the Size and Shape
Selecting the right size and shape is critical to usability and aesthetics. We want a book that is large enough to write legibly in but compact enough to store easily.
Below is a guide to common size options and their best uses:
| Size | Dimensions (inches) | Ideal For | Storage Considerations |
|---|---|---|---|
| Small | 6 x 8 | Quick recipes, gift books | Fits in drawers or shelves |
| Medium | 8.5 x 11 | Standard recipe book size | Typical kitchen storage |
| Large | 9 x 12 or bigger | Family heirloom, ample writing space | Requires dedicated space |
For the shape, traditional rectangular books provide the most writing space, but rounded edges or square formats add unique style. Consider the wood type’s grain direction and ease of handling when finalizing the shape to balance durability with comfort.
Planning the Layout and Sections
A well-planned layout helps organize our recipes efficiently and makes the book enjoyable to use.
Key layout components to define include:
- Title Page: Feature the book’s name or family crest, engraved or burned into the wood for a classy, personalized touch.
- Table of Contents: List all sections clearly for quick reference.
- Recipe Pages: Decide if pages will be lined, blank, or gridded for notes and measurements.
- Section Dividers: Create wooden or cardstock dividers labeled by categories like Appetizers, Main Dishes, Desserts, or even Ethnic Cuisine.
- Notes Section: Dedicate space for tips, substitutions, or personal touches.
We find that creating a section plan before assembly saves time and ensures smooth progression during customization.
Here is a sample layout plan to visualize the structure:
| Section | Content Description | Typical Page Count |
|---|---|---|
| Title Page | Personalized engraving with book title | 1 |
| Table of Contents | Indexed list of recipe categories | 1-2 |
| Appetizers | Starter recipes including dips and salads | 10-15 |
| Main Dishes | Entrée recipes categorized by protein or type | 20-30 |
| Desserts | Sweet dishes, baked goods, and treats | 10-15 |
| Special Sections | Holiday recipes, family specialties | 5-10 |
| Notes | Blank or lined pages for future entries | 5-10 |
By customizing our layout this way, we build a recipe book that is not only charming and personalized but also highly functional for the kitchen.
Preparing the Wood
To create a stunning custom wooden recipe book, preparing the wood properly is essential. This step ensures the surface is smooth, durable, and ready for any personalization.
Cutting and Sanding
We begin by cutting the selected wood to the desired dimensions for our recipe book covers and dividers. Precision at this stage guarantees a clean and professional look.
- Use a fine-toothed saw for smooth edges.
- Cut panels according to your planned size—small, medium, or large.
- After cutting, we sand the surfaces thoroughly.
Sanding removes roughness and splinters. Start with a coarse grit sandpaper (80-120 grit), then progress to a finer grit (220-320 grit) for a smooth finish.
| Sandpaper Grit | Purpose | Notes |
|---|---|---|
| 80 – 120 | Remove rough edges | Start with this grit |
| 220 – 320 | Smooth surface finish | Finish sanding with this grit |
We sand along the wood grain, applying even pressure to avoid unevenness. This creates the perfect canvas for staining or finishing.
Staining and Finishing Options
Applying the right stain or finish brings out the natural beauty of the wood and protects it from wear and moisture.
- Choose a stain that complements the wood type: cherry benefits from warm reddish tones, while walnut looks rich with dark stains.
- Apply stain evenly using a soft cloth or brush, wiping off excess to avoid blotches.
- Allow drying time as indicated on the product label, typically 4-6 hours.
For finishing, consider these top options to enhance durability and appearance:
| Finish Type | Characteristics | Ideal Use |
|---|---|---|
| Polyurethane | Durable, water-resistant, glossy or matte options | High use areas, protection |
| Danish Oil | Penetrates wood, enhances grain naturally | Natural look, easy application |
| Bee’s Wax | Adds soft sheen, easy to buff, less durable | Light use, natural finish |
We recommend applying at least two coats of your chosen finish, sanding lightly with ultra-fine grit (400+) between coats. This adds depth and resilience.
Creating the Recipe Pages
Designing the recipe pages is a crucial step in crafting our custom wooden recipe book. Thoughtfully selecting and preparing these pages ensures both functionality and a personal touch that will make our culinary keepsake truly special.
Selecting Paper and Printing Recipes
Choosing the right paper for our recipe pages impacts durability and ease of use. We recommend considering these key factors:
- Paper Weight: Opt for a heavier weight like 65-80 lb cardstock to withstand frequent handling and spills.
- Finish: A matte finish reduces glare and makes writing easier, while a semi-gloss finish offers some moisture resistance.
- Size: Match the paper size to the wooden book dimensions—for example, 5×7 inches or 8.5×11 inches.
- Acid-Free Paper: Use acid-free paper to prevent yellowing and preserve recipes for years.
For printing, high-quality inkjet or laser printers produce crisp text and vibrant images. Printing on heavyweight photo paper can add a professional touch if the pages include photos.
| Paper Attribute | Recommendation | Benefit |
|---|---|---|
| Weight | 65-80 lb (175-215 gsm) | Durability during frequent use |
| Finish | Matte or Semi-gloss | Reduced glare or moisture resistance |
| Size | 5×7 in or 8.5×11 in | Fits wooden recipe book dimensions |
| Acid Content | Acid-free | Long-term preservation |
Options for Handwritten vs. Printed Pages
Weighing the choice between handwritten and printed pages is essential when personalizing our recipe book:
- Handwritten Pages
Advantages: - Adds a warm, nostalgic feel connecting us to family traditions.
- Allows for custom notes and drawings beside recipes.
- Perfect for heirloom recipes passed down through generations.
Considerations:
- Requires neat handwriting or the aid of calligraphy pens for clarity.
- May need to be protected with page sleeves or laminated to prevent smudging.
- Printed Pages
Advantages: - Provides a clean, professional look with consistent fonts and formatting.
- Easy to edit, format, and include images or nutritional information.
- Facilitates bulk printing for extensive recipe collections.
Considerations:
- May feel less personal without handwritten notes.
- Requires access to a quality printer.
We can also choose to combine both methods—print standard recipe text and add personal handwritten notes, tips, or ingredient substitutions to create a dynamic and meaningful record.
Assembling the Custom Wooden Recipe Book
Now that we have prepared all the components it’s time to assemble our custom wooden recipe book. This stage brings together the wooden covers and recipe pages to create a functional and beautiful keepsake.
Binding Methods for Wood and Paper
Choosing the right binding method is essential to ensure durability and ease of use for our custom wooden recipe book. Here are some popular options optimized for combining wood and paper pages:
| Binding Method | Description | Pros | Cons |
|---|---|---|---|
| Binder Rings | Use metal rings to hold punched holes in wood and paper | Easy to open and add pages, flexible | Rings may deform if heavy use |
| Screw Posts | Metal posts with screws pass through holes | Strong hold, professional look | Requires precise hole alignment |
| Bolts and Nuts | Similar to screw posts but use bolts for extra security | Very durable, secure binding | Takes longer to assemble |
| Ribbon or Leather Lacing | Thread ribbon or leather strips through holes | Adds rustic charm, customizable | Less secure, ribbons can wear |
| Hinged Clips | Use clips attached to the wooden covers | Quick assembly, removable pages | Less sturdy, clips may loosen |
We recommend binding rings or screw posts for a perfect balance between durability and flexibility. To assemble:
- Use a drill bit sized to your chosen fastener to punch clean holes on the spine of the wood covers, spacing them evenly (we suggest 3 holes at 2-inch intervals).
- Align recipe pages and dividers, then carefully punch matching holes.
- Thread the binder rings or screw posts through all holes and secure tightly.
- Check that pages turn smoothly without catching on the wood edges.
Adding Decorative Elements
To personalize and enhance our custom wooden recipe book we can add carefully chosen decorative touches. This step transforms a practical item into a treasured heirloom.
Ideas for decoration include:
- Engraving or wood burning: Use engraving tools or a wood-burning pen to add family names, a special title, or intricate designs on the cover. For example:
“Grandma’s Kitchen Favorites”
in elegant script adds warmth and character.
- Wood staining and finishing: Apply a stain that complements the kitchen decor. Finish with a protective clear coat to highlight wood grain and prevent wear.
- Metal corner protectors: Attach brass or copper corner brackets to protect edges and add vintage charm.
- Inlaid accents: Embed small decorative tiles, mother-of-pearl, or resin elements into the wood for added texture and color.
- Ribbon bookmarks: Attach a ribbon attached inside the spine or top edge to mark frequently used recipes.
- Custom labels on dividers: Print or handwrite tab labels for sections such as Appetizers, Main Courses, Desserts, making organization clear and elegant.
By combining functional binding with thoughtful decorative elements we create a custom wooden recipe book that is as stunning as it is practical—ready to hold our treasured recipes for years to come.
Personalizing Your Recipe Book
Personalizing our custom wooden recipe book allows us to infuse unique character and meaning into a timeless kitchen keepsake. Thoughtful customization transforms it from a simple recipe holder into a cherished heirloom that reflects our culinary passion and style.
Engraving and Custom Artwork
Engraving and custom artwork create a striking visual impact on our wooden recipe book that highlights its handcrafted nature. We can choose from several techniques to leave a lasting impression:
- Laser Engraving: Precise and professional, laser engraving offers detailed designs, names, or meaningful quotes etched directly into the wood surface. It resists fading and adds depth.
- Wood Burning (Pyrography): Using heated tools, wood burning provides an artisanal feel with hand-drawn designs and lettering. Its rustic charm complements natural wood grains beautifully.
- Hand-Painted Artwork: For vibrant color and personal flair, applying hand-painted motifs or patterns with acrylic or wood-safe paints allows unlimited creativity.
“A custom engraved title or family name on the cover instantly elevates the recipe book’s sentiment and uniqueness.”
We recommend planning engravings and artwork during the early design phase to ensure alignment with the book size, wood type, and finish. Consider engraving important dates, beloved family recipes, or culinary mottos to enrich the story behind the book.
Adding a Cover Design
The cover design is the first element that sets the tone for our custom wooden recipe book. Here are practical ways to enhance the cover’s aesthetics and functionality:
| Cover Element | Description | Benefit |
|---|---|---|
| Wood Stain & Finish | Light, medium, or dark stains with a protective finish | Enhances natural grain, protects surface |
| Metal Corner Protectors | Decorative metal pieces fixed to corners | Prevents wear, adds vintage or modern style |
| Inlaid Accents | Inserts made from contrasting wood, resin, or metal | Adds texture, visual interest |
| Ribbon Bookmark | A tied or glued fabric ribbon | Keeps track of frequently used recipes |
| Custom Labels | Laser-cut or printed labels for sections or titles | Aids organization and personalization |
We suggest choosing cover design elements that complement the wood’s natural beauty and our kitchen decor. For example, a rich walnut cover paired with bronze corner protectors creates an elegant, rustic look ideal for classic farmhouse kitchens.
“A thoughtfully designed cover not only protects but invites us to explore the treasured recipes within.”
By combining engraving, artwork, and cover enhancements, we can craft a custom wooden recipe book that is both stunning and functionally tailored to our culinary journey.
Care and Maintenance of Your Custom Wooden Recipe Book
Proper care and maintenance of your custom wooden recipe book ensure its beauty and functionality last for generations. Follow these essential steps to protect and preserve your treasured keepsake.
Cleaning and Dusting
- Use a soft dry cloth or a microfiber duster to gently remove dust from the wooden covers.
- Avoid using water or liquid-based cleaners as moisture can damage the wood and the recipe pages inside.
- For stubborn spots, apply a small amount of wood polish or mineral oil on a cloth, then gently buff the surface.
“Regular dusting maintains the wood’s natural luster and prevents buildup that can dull its finish.“
Handling and Storage
- Always handle the recipe book with clean hands to prevent oils and dirt from transferring to the wood and paper.
- Store your book in a cool dry place, away from direct sunlight, heat sources, or humidity to avoid warping, discoloration, or mildew.
- Place the book upright or flat on a stable surface to maintain its shape and structural integrity.
| Storage Tips | Reason |
|---|---|
| Avoid direct sunlight | Prevents fading and drying cracks |
| Keep away from moisture | Stops warping and mildew development |
| Store flat or upright | Maintains wood and binding shape |
Protecting the Wood Finish
- Reapply wood finish or oil every 6–12 months depending on use and environmental exposure.
- Use finishes compatible with your book’s original treatment — such as tung oil, beeswax polish, or varnish.
- Test any product on a small less-visible area before full application to ensure no discoloration or damage.
Caring for the Recipe Pages
- Use acid-free sleeves or plastic sheet protectors to guard recipe pages from spills, stains, and wear.
- Avoid contact with food and liquids. If spills occur, blot immediately with a dry cloth to prevent damage.
- When adding new recipes, ensure paper type and size match existing pages to maintain a uniform look.
Repair and Restoration Tips
- For loose binding rings or hardware, tighten gently with appropriate tools to avoid stripping or damage.
- Address minor wood scratches with a matching wood stain pen or paste wax.
- For significant damage, consult a professional restorer experienced with wooden book covers.
“Our custom wooden recipe book is more than a storage solution — it’s an heirloom. Proper care guarantees its timeless charm and durability.“
By integrating these care practices into our routine, we help our custom wooden recipe books remain as stunning and functional as the day we crafted them.
Conclusion
Crafting a custom wooden recipe book is more than just a project—it’s a way to celebrate our culinary heritage while creating a lasting keepsake. With the right materials, thoughtful design, and personalized touches, we can build a recipe book that’s both beautiful and functional.
Taking care of this treasured item ensures it stays vibrant and ready to inspire future meals and memories. Whether for ourselves or as a meaningful gift, a custom wooden recipe book brings warmth and character to any kitchen, making every recipe a cherished story worth preserving.
Frequently Asked Questions
What are custom wooden recipe books?
Custom wooden recipe books are handcrafted keepsakes made from selected wood types, designed to organize and preserve favorite recipes uniquely and beautifully.
Why choose wood for a recipe book cover?
Wood adds warmth, durability, and character, making the recipe book a timeless keepsake that can be personalized and protected over generations.
Which woods are best for making a wooden recipe book?
Popular choices include cherry, maple, walnut, birch, and oak, each offering durability and distinctive aesthetic qualities.
What materials are needed to create a custom wooden recipe book?
Essential materials include wood panels, binding rings or screw posts, sandpaper, wood finish, adhesives, engraving tools, and acid-free cardstock for pages.
How do I prepare the wood for the recipe book?
Cut the wood with a fine-toothed saw, sand it using varying grit sandpaper for smoothness, then apply stains or finishes to protect and enhance its appearance.
What type of paper is best for the recipe pages?
Use 65-80 lb acid-free cardstock with matte or semi-gloss finishes for durability and to prevent yellowing over time.
Should I handwrite or print the recipes?
Handwriting adds a personal touch, while printing offers a clean, editable format. Combining both can create a dynamic and meaningful book.
How should I assemble the wooden recipe book?
Drill holes in the wooden covers, align the pages, and bind using binder rings or screw posts for durability with flexibility.
What decorative options are available for personalization?
Engraving, wood burning, stains, metal corner protectors, inlaid accents, ribbon bookmarks, and custom labels can enhance both the look and function.
How do I care for and maintain my wooden recipe book?
Dust regularly with a soft dry cloth, avoid moisture, store in a cool, dry place, and handle gently to preserve its condition for years to come.