
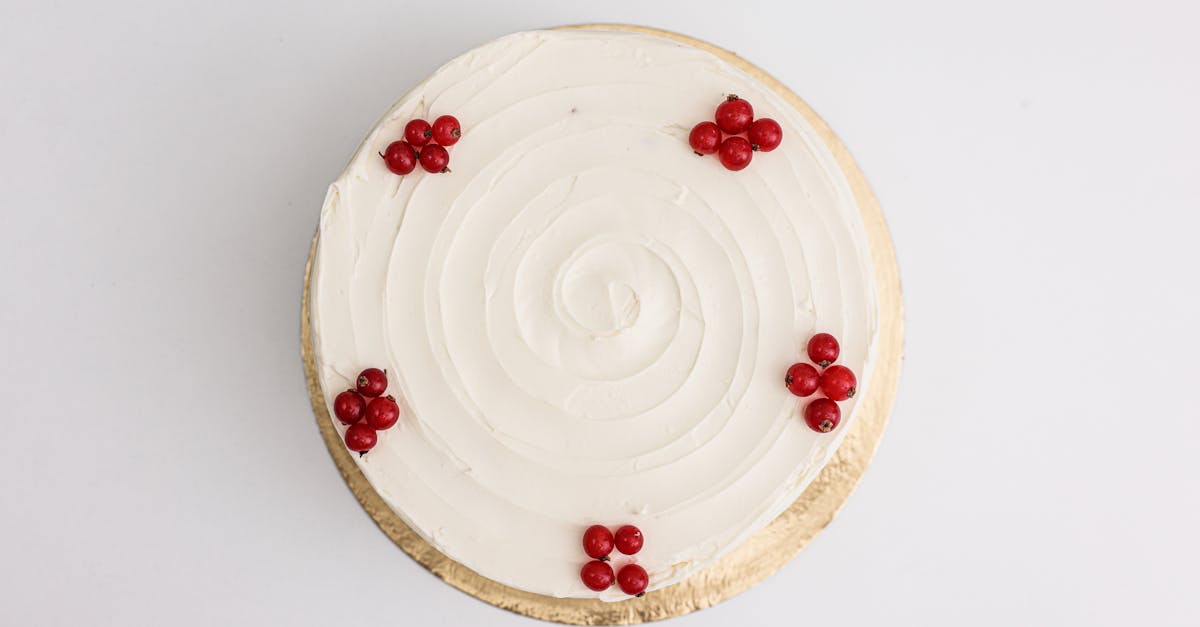
Currant cake is a timeless treat that brings a burst of fruity flavor to any occasion. This classic recipe combines tender cake with the natural sweetness and tang of currants, creating a delightful balance that’s hard to resist. Whether you’re baking for a cozy afternoon tea or a festive gathering, currant cake adds a touch of tradition and warmth to your table.
We love how simple ingredients come together to make something truly special. Currants not only add texture but also pack a punch of antioxidants, making this cake a slightly healthier indulgence. With easy-to-follow steps, this recipe is perfect for bakers of all levels who want to enjoy a homemade cake that’s both delicious and visually appealing. Let’s dive into crafting this delightful currant cake that’s sure to become a favorite in your recipe collection.
Ingredients
To create the perfect Currant Cake, using the right ingredients is essential. Below, we break down everything you’ll need into dry, wet, and additional categories for easy reference and preparation.
Dry Ingredients
We start with the core dry elements that form the cake’s structure and texture:
- 2 cups all-purpose flour, sifted for a light crumb
- 1 1/2 teaspoons baking powder, to help the cake rise evenly
- 1/2 teaspoon baking soda, for tender crumb development
- 1/4 teaspoon salt, to balance sweetness
- 1 cup granulated sugar, the foundation of sweetness
- 1 1/2 cups currants, fresh or dried (washed and dried if fresh)
Wet Ingredients
The wet ingredients bring moisture and richness to the cake’s delightful crumb:
- 1/2 cup unsalted butter, softened to room temperature
- 2 large eggs, at room temperature for better emulsification
- 1 cup buttermilk, adds tang and tenderness
- 1 teaspoon vanilla extract, enhances the flavor complexity
- 2 tablespoons lemon juice, brightens and complements currants
Additional Ingredients
For finishing touches and subtle enhancements:
- Zest of 1 lemon, to intensify citrus aroma
- Powdered sugar, for dusting after baking
- Butter or oil, for greasing the baking pan
- Optional: 1/2 teaspoon ground cinnamon, for warm spice notes
| Ingredient Category | Key Items |
|---|---|
| Dry Ingredients | Flour, baking powder, baking soda, salt, sugar, currants |
| Wet Ingredients | Butter, eggs, buttermilk, vanilla extract, lemon juice |
| Additional Ingredients | Lemon zest, powdered sugar, butter/oil, cinnamon (optional) |
Using quality ingredients and precise measurements ensures our Currant Cake achieves the perfect balance of moistness, flavor, and texture every time.
Equipment Needed
To bake our Currant Cake to perfection, having the right equipment is essential. Each tool plays a crucial role in ensuring consistent results, precise measurements, and achieving the ideal texture and flavor balance.
Essential Baking Tools
- Mixing Bowls
Use at least two: one for combining dry ingredients and another for wet ingredients. Opt for medium to large sizes to allow easy mixing without spilling.
- Measuring Cups and Spoons
Accurate measurement of ingredients is key. We recommend using a set of dry and liquid measuring cups alongside standard measuring spoons.
- Electric Mixer or Stand Mixer
For creaming butter and sugar thoroughly and beating eggs into the batter. If unavailable, a sturdy whisk and some elbow grease will suffice.
- Sifter or Fine Mesh Strainer
To sift the all-purpose flour, baking powder, and baking soda for an even, lump-free dry mixture ensuring a light cake crumb.
- Rubber or Silicone Spatula
Useful for folding in currants gently to preserve their structure and prevent crushing.
Baking and Preparation Equipment
| Equipment | Purpose |
|---|---|
| 8-inch (20 cm) round cake pan | Ideal size for even baking and optimal thickness |
| Parchment Paper | Prevents sticking and eases removal of the baked cake |
| Cooling Rack | Allows the cake to cool evenly, preventing sogginess |
Optional but Helpful Tools
- Zester or Microplane
To extract fresh lemon zest that brightens the cake’s flavor.
- Fine Mesh Sieve
For dusting powdered sugar evenly over the cake’s surface once cooled.
- Toothpick or Cake Tester
To check the cake’s doneness by ensuring the center comes out clean.
“Using the right equipment is just as important as fresh ingredients to achieve the ideal Currant Cake that is moist, flavorful, and beautifully textured.”
By assembling these tools before baking, we streamline the process and focus on creating the perfect currant cake every time.
Preparation
To create a moist and flavorful Currant Cake, careful preparation of the ingredients and equipment is essential. Let’s begin by focusing on how to get the currants and cake pan ready for baking.
Preparing the Currants
We start by properly preparing the fresh or dried currants, the star ingredient that gives our cake its signature fruity tang and texture.
- Rinse the currants under cold water to remove any dust or impurities.
- If using dried currants, soak them in warm water or buttermilk for about 10 minutes. This step plumps the currants and helps them stay juicy during baking.
- Drain the currants well using a fine mesh sieve to avoid excess moisture that could affect the cake texture.
- To prevent currants from sinking to the bottom of the cake batter, lightly toss them in a tablespoon of all-purpose flour. This coating creates a barrier that helps the currants distribute evenly.
“A well-prepared currant layer ensures every bite bursts with balanced sweetness and delightful texture.”
| Step | Action | Tip |
|---|---|---|
| Rinse currants | Cold water rinse | Remove impurities |
| Soak (for dried currants) | 10 minutes in buttermilk | Plumps currants for moist texture |
| Drain | Use fine mesh sieve | Avoid excess moisture |
| Coat currants | Toss in 1 tbsp flour | Prevent sinking in batter |
Prepping the Baking Pan
The right pan preparation guarantees even baking and easy cake removal, preserving the shape and moisture of our Currant Cake.
- Choose an 8-inch round cake pan for the ideal cake thickness and cooking time.
- Line the bottom with parchment paper to prevent sticking and promote easy release.
- Lightly grease the sides of the pan with unsalted butter or non-stick spray.
- Dust the greased sides with a tiny bit of flour, tapping out excess. This helps the cake rise evenly and prevents it from clinging to the pan.
- Place the prepared pan on a sturdy baking sheet or oven rack for stability during baking.
| Preparation Step | Details | Why It Matters |
|---|---|---|
| Choose pan | 8-inch round cake pan | Ensures proper cake thickness |
| Line bottom | Parchment paper | Prevents sticking |
| Grease sides | Butter or non-stick spray | Helps cake release easily |
| Flour dust sides | Light coating with flour | Promotes even rise and prevents sticking |
| Place pan | On baking sheet or rack | Adds stability in the oven |
Directions
Follow these steps carefully to create a moist and flavorful Currant Cake that highlights the sweet-tart essence of currants in every bite.
Mixing the Batter
- Preheat the oven to 350°F (175°C) and position an oven rack in the center for even baking.
- In a large mixing bowl, cream together the unsalted butter and granulated sugar using an electric mixer on medium speed. Beat for 3 to 5 minutes until the mixture is light, fluffy, and pale in color.
- Add the eggs one at a time, beating well after each addition to ensure full incorporation.
- Stir in the vanilla extract, lemon juice, and lemon zest to infuse brightness into the batter.
- In a separate bowl, whisk together the dry ingredients: all-purpose flour, baking powder, baking soda, salt, and optional ground cinnamon.
- Gradually add the dry ingredients to the wet mixture in three parts, alternating with the buttermilk in two parts. Begin and end with the dry mix, mixing on low speed. Scrape down the bowl sides frequently to ensure an even batter without overmixing.
Incorporating the Currants
- Toss the prepared currants (floured as detailed in previous sections) gently into the batter using a rubber spatula.
- Fold the currants carefully to distribute them evenly throughout the batter without breaking them.
- Avoid overmixing here to maintain the cake’s tender crumb and prevent currant sinking.
Baking the Cake
- Pour the batter into your prepared 8-inch round cake pan, smoothing the top gently with the spatula.
- Place the cake pan on a sturdy baking sheet in the preheated oven.
- Bake for 45 to 55 minutes, checking doneness by inserting a toothpick into the center. When it comes out clean or with a few moist crumbs, the cake is ready.
- Remove the cake from the oven and cool it in the pan for 10 minutes.
- Transfer the cake onto a cooling rack and let it cool completely before dusting with powdered sugar or serving.
| Step | Temperature | Time | Tools Needed |
|---|---|---|---|
| Preheat oven | 350°F (175°C) | – | Oven |
| Cream butter & sugar | Room temperature | 3-5 minutes | Electric mixer, bowl |
| Mix wet & dry | Room temperature | 5 min approx. | Mixing bowls, spatula |
| Fold in currants | Room temperature | 2 min | Spatula |
| Bake cake | 350°F (175°C) | 45-55 minutes | Oven, baking sheet, cake pan |
| Cool cake | Room temperature | 10+ min | Cooling rack |
By following these precise directions, we ensure our Currant Cake develops a perfect texture, balanced sweetness, and vibrant fruity flavor every time.
Cooling and Serving
Allowing our Currant Cake to cool properly is essential for preserving its moist texture and showcasing the burst of fruity flavor in every bite. Following these steps ensures the best experience when serving this delightful dessert.
Cooling Instructions
- Remove the cake from the oven immediately once a toothpick inserted in the center comes out clean.
- Set the cake pan on a wire cooling rack to allow air circulation underneath, preventing sogginess.
- Let the cake cool in the pan for 10 minutes; this helps it firm up slightly for easier handling.
- After 10 minutes, run a knife around the edges to loosen the cake.
- Invert the cake onto the wire rack and gently peel off the parchment paper.
- Allow it to cool completely, about 1 to 2 hours, before applying any toppings or slicing.
“Patience in cooling produces a Currant Cake with a perfect crumb and enhances the fruitiness that currants contribute.“
Serving Suggestions
Our Currant Cake shines both simply served and with accompaniments that complement its flavor profile:
| Serving Option | Description | Additional Tips |
|---|---|---|
| Dust with powdered sugar | Lightly sift over the cooled cake for a delicate finish. | Use a fine mesh sieve for even dusting. |
| Serve with lemon glaze | Mix powdered sugar with fresh lemon juice; drizzle on top. | Enhances tanginess to complement currants. |
| Top with whipped cream | Add a dollop of lightly sweetened whipped cream. | Optionally, add a sprinkle of ground cinnamon for warmth. |
| Accompany with fresh berries | Pair with raspberries or blueberries for added freshness. | Create a colorful and inviting presentation. |
| Warm with a scoop of vanilla ice cream | Serve slightly warmed slices for contrast with cold ice cream. | Ideal for festive or cozy gatherings. |
When slicing, use a serrated knife to prevent crumbling and serve slices alongside tea or coffee to enhance the experience.
Storage Tips
Proper storage is essential to maintain the moistness and flavor of our Currant Cake. Follow these guidelines to keep your cake fresh and delicious for days.
Short-Term Storage
- After the cake has completely cooled, wrap it tightly in plastic wrap or place it in an airtight container.
- Store the wrapped cake at room temperature in a cool, dry place away from direct sunlight.
- For best taste and texture, consume within 2 to 3 days.
Long-Term Storage
- To extend freshness, wrap the cake in plastic wrap and then in aluminum foil to prevent freezer burn.
- Place the wrapped cake in a freezer-safe container or heavy-duty freezer bag.
- Label the package with the baking date for reference.
- Freeze for up to 3 months without significant loss of quality.
Thawing Instructions
- Remove the cake from the freezer and keep it wrapped.
- Let it thaw overnight in the refrigerator or for a few hours at room temperature.
- Serve once fully thawed for optimal texture.
Storage Summary Table
| Storage Duration | Method | Temperature | Notes |
|---|---|---|---|
| 2–3 days | Wrapped/airtight container | Room temperature | Keep away from sunlight |
| Up to 3 months | Wrapped in plastic & foil, freezer-safe container | Freezer (-0°F / -18°C) | Prevent freezer burn, label date |
| Thawing | Wrapped, refrigerated or room temp thaw | Refrigerator or room temp | Avoid refreezing |
“Storing your Currant Cake correctly ensures every bite stays as delightful as the first slice.”
By adhering to these Storage Tips, we preserve the cake’s sweet tang and moist crumb, letting us enjoy this timeless treat whenever the craving strikes.
Conclusion
Currant cake is a wonderful way to bring a touch of classic charm and vibrant flavor to any occasion. With its balanced sweetness and subtle tang, it’s a treat that’s both satisfying and refreshing.
By following the right techniques and using quality ingredients, we can consistently bake a cake that’s moist, flavorful, and visually appealing. Whether for a cozy afternoon or a festive gathering, this recipe offers a reliable and delicious option to share with family and friends.
We hope this inspires you to bake your own currant cake and enjoy the delightful experience it brings to your kitchen and table.
Frequently Asked Questions
What makes currant cake unique compared to other fruit cakes?
Currant cake stands out due to its balance of sweet and tangy flavors from currants. It uses simple ingredients and highlights currants’ natural fruity taste and health benefits, like antioxidants. Its moist texture and subtle citrus notes make it a timeless favorite.
What are the key ingredients needed for making currant cake?
The main ingredients include all-purpose flour, baking powder, baking soda, salt, sugar, fresh or dried currants, unsalted butter, eggs, buttermilk, vanilla extract, and lemon juice. Optional additions include lemon zest, powdered sugar, and ground cinnamon for extra flavor.
What essential equipment is required to bake the perfect currant cake?
You’ll need mixing bowls, measuring cups and spoons, an electric or stand mixer, a sifter, a spatula, an 8-inch round cake pan lined with parchment paper, a cooling rack, and optionally a zester and toothpick for testing doneness.
How should I prepare the currants before adding them to the batter?
Rinse fresh or dried currants, soak if dried, then drain thoroughly. Toss them in a small amount of flour to prevent sinking in the batter during baking, ensuring even distribution throughout the cake.
What is the best way to prepare the cake pan?
Choose the right size pan, line it with parchment paper, grease the sides, and lightly dust with flour. Place the pan on a sturdy baking sheet to maintain stability and promote even baking.
How do I know when the currant cake is fully baked?
Bake until a toothpick inserted into the center comes out clean or with a few moist crumbs. The cake should be golden brown and spring back slightly when pressed gently.
What is the recommended method for cooling currant cake?
Let the cake cool in the pan for 10 minutes, run a knife around the edges, then invert it onto a wire rack to cool completely. Proper cooling helps preserve moistness and flavor.
What are some serving suggestions for currant cake?
Serve with a dusting of powdered sugar, lemon glaze, whipped cream, fresh berries, or vanilla ice cream. It pairs well with tea or coffee for a delightful treat.
How should I store currant cake to keep it fresh?
Wrap cooled cake tightly in plastic wrap or an airtight container at room temperature for 2 to 3 days. For longer storage, freeze wrapped in plastic and foil for up to 3 months. Thaw overnight in the fridge or at room temperature before serving.
Can beginners successfully make currant cake?
Yes! The recipe is straightforward with clear steps and basic ingredients, making it perfect for bakers of all levels looking for an easy yet delicious cake.