
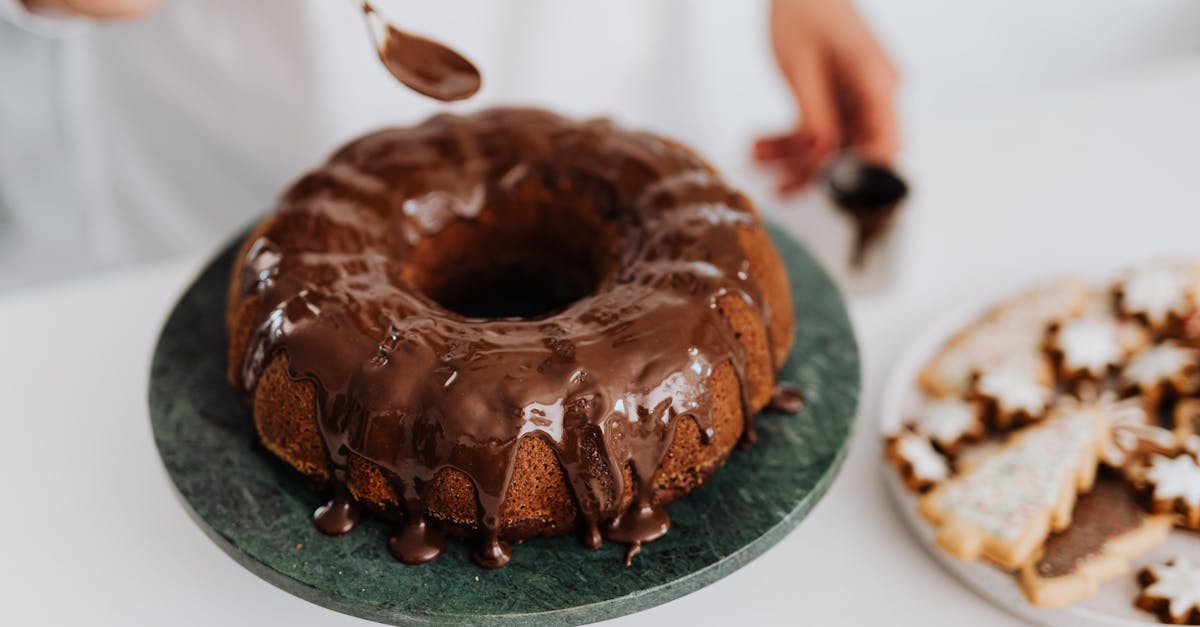
Cornwall Stone Glaze is a classic finish that brings a rustic charm to pottery with its unique texture and subtle earthy tones. Originating from the rich ceramic traditions of Cornwall, this glaze captures the natural beauty of stone surfaces, making each piece truly one of a kind.
We love how this glaze adds depth and character without overpowering the form of the pottery. It’s perfect for anyone looking to create handmade ceramics with an authentic, timeless appeal. Whether you’re a seasoned potter or just starting out, mastering this glaze will elevate your work and connect you to Cornwall’s artisanal heritage.
In this recipe, we’ll guide you through the essential ingredients and techniques to achieve that signature stone-like finish. Let’s dive in and bring a touch of Cornwall’s rugged coastline to your ceramics studio.
Ingredients
To create the authentic Cornwall Stone Glaze, we need a precise blend of dry and Wet Ingredients that work harmoniously to produce that signature rustic, earthy finish. Below, we detail each component essential for achieving this classic stone-like surface.
Dry Ingredients
The dry ingredients form the foundation of our Cornwall Stone Glaze recipe. Each mineral is selected to enhance texture, color depth, and surface qualities:
- Feldspar (Potash or Soda) – 50%: Provides fluxing properties for a smooth melt and translucent finish.
- Ball Clay – 20%: Adds plasticity and improves the glaze’s suspension.
- Silica (Flint) – 15%: Develops the glassy phase and durability.
- Whiting (Calcium Carbonate) – 10%: Promotes opacity and adds to the body of the glaze.
- Tin Oxide – 3%: Creates subtle opacity and enhances surface texture.
- Iron Oxide – 2%: Delivers the distinctive earthy tones characteristic of Cornwall stone glaze.
| Dry Ingredient | Percentage | Role |
|---|---|---|
| Feldspar | 50% | Flux, smooth melting |
| Ball Clay | 20% | Plasticity, suspension |
| Silica | 15% | Glass phase, durability |
| Whiting | 10% | Opacity, body |
| Tin Oxide | 3% | Opacity, texture |
| Iron Oxide | 2% | Earthy coloration |
Wet Ingredients
The wet ingredients are just as crucial for achieving the right consistency and chemical balance in the glaze slurry:
- Water – Approximately 35-40% by weight of the total dry mix: Controls viscosity and ensures smooth application.
- Veegum – 0.5%: Acts as a suspending agent to keep particles evenly dispersed.
- Darvan 821A – 0.3%: A deflocculant that reduces water volume and improves glaze fluidity.
We combine these wet ingredients gradually into the dry mix while stirring to create a creamy, well-blended glaze slurry that applies evenly and develops the beautiful Cornwall stone-like finish upon firing.
Equipment Needed
To achieve the perfect Cornwall Stone Glaze finish, having the right equipment is essential. Each tool helps us maintain precision and consistency during the process, ensuring the glaze develops its signature rustic and earthy tones.
Essential Tools for Preparing the Glaze
- Mixing Containers: Use large, non-reactive buckets or bowls (plastic or glazed ceramic) to combine dry and wet ingredients safely.
- Scale: A digital scale accurate to 0.1 gram ensures precise measurement of all dry components like Feldspar, Ball Clay, and Oxides.
- Measuring Cups and Spoons: For liquid ingredients like water, Veegum, and Darvan 821A, use calibrated measuring tools to maintain consistency.
- Mixing Tools: A sturdy stirrer or drill with a mixing paddle attachment helps us create a smooth and homogeneous glaze slurry.
Application and Testing Equipment
- Bisque-fired Ceramic Test Tiles: To test the glaze results before applying it to finished pottery.
- Glaze Brush or Sprayer: Depending on preference, use a soft-bristle brush or spray system to apply an even coat of the Cornwall Stone Glaze.
- Protective Gloves and Mask: To handle materials safely and avoid inhaling fine powders.
- Sieve (80-100 mesh): To strain the glaze mixture removes lumps ensuring a smooth texture.
Firing Equipment
- Electric or Gas Kiln: Capable of reaching the recommended firing temperature typically between 1200°C-1300°C (Cone 6 to Cone 10 range).
- Kiln Shelves and Stilts: For safe placement of glazed items preventing sticking or warping during the firing cycle.
| Equipment | Purpose | Precision Required |
|---|---|---|
| Digital Scale | Accurate dry ingredient weighing | 0.1 gram |
| Mixing Containers | Combine ingredients | Large capacity preferred |
| Stirrer/Mixing Paddle | Creates uniform glaze slurry | Variable speed recommended |
| Sieve (80-100 mesh) | Removes lumps from glaze slurry | Fine mesh for smoothness |
| Glaze Brush or Sprayer | Even application of glaze | Consistent coverage |
| Bisque-fired Test Tiles | Glaze test firing | Uniform surface |
| Kiln | Proper glaze maturation | Cone 6-10 temperature |
| Protective Gloves & Mask | Safety during mixing and glazing | High protection needed |
“Precision in equipment choice directly impacts the texture, color depth, and surface quality of the final Cornwall Stone Glaze finish.”
Using this specialized equipment set gives us control over each phase—from preparation to firing—ensuring that the unique stone-like appearance and feel of the glaze consistently shine through our pottery.
Prep Work
Before diving into the glazing process, meticulous preparation ensures our Cornwall Stone Glaze achieves its signature rustic and earthy finish. Let’s prepare the ingredients accurately and set up our workspace for a smooth workflow.
Preparing the Ingredients
Accurate measurement and thorough mixing of the dry and wet components are crucial. Here’s how we get started:
- Weigh each dry ingredient precisely using a digital scale to maintain the correct chemical balance. Precision determines the glaze’s texture and color.
- Sift all dry materials through a fine mesh sieve to remove lumps and ensure even consistency.
- Gradually add the wet ingredients (Water, Veegum, Darvan 821A) to the dry mix while stirring continuously to avoid clumps and achieve a creamy, smooth slurry.
- Mix thoroughly for at least 10 minutes using a mixing tool or electric mixer for uniform dispersion of materials.
| Ingredient | Preparation Step | Notes |
|---|---|---|
| Feldspar | Weigh and sift | Ensures flux distribution |
| Ball Clay | Weigh and sift | Adds plasticity and binding |
| Silica | Weigh and sift | Controls gloss and hardness |
| Whiting | Weigh and sift | Adds opacity and body |
| Tin Oxide | Weigh and sift | Promotes opacity and surface whiteness |
| Iron Oxide | Weigh and sift | Imparts subtle earthy tones |
| Water | Measure accurately | Adjust consistency |
| Veegum | Measure and dissolve in water | Acts as suspending agent |
| Darvan 821A | Measure and mix with Veegum-water | Dispersant for stable slurry |
Tip: Our slurry should flow smoothly off a mixing paddle without being runny or lumpy. Ideal viscosity ensures even glaze application.
Preheating the Oven/Setting Up the Workspace
- Check kiln settings to verify the firing range suits our Cornwall Stone Glaze recipe, typically between 1220°C – 1260°C (Cone 6).
- Preheat the kiln gradually to avoid thermal shock and ensure the glaze develops its full stone-like texture.
- Organize application tools like brushes, sprayers, and test tiles within easy reach to maintain efficiency and cleanliness.
- Prepare safety gear, including protective gloves and masks, to ensure safe handling of glaze materials.
- Set up a well-ventilated workspace free of dust and contaminants to prevent flaws in the glaze finish.
Making the Cornwall Stone Glaze
We begin the process of making the Cornwall Stone Glaze by carefully combining and preparing the ingredients. Precision and technique at this stage directly influence the glaze’s rustic charm and its signature earthy stone-like texture.
Mixing the Base Ingredients
First, we tackle the dry components, ensuring each is measured with accuracy using our digital scale. Here’s how we proceed:
- Weigh each dry ingredient separately: Feldspar, Ball Clay, Silica, Whiting, Tin Oxide, and Iron Oxide.
- Sift all dry ingredients together through a fine mesh sieve to remove any lumps or impurities.
- Transfer the sifted powder into a large mixing container.
- Gradually add water, the first of our wet ingredients, while stirring continuously to avoid clumps.
- Incorporate Veegum slowly to act as a suspending agent and binder for a smoother texture.
- Lastly, mix in Darvan 821A, which enhances dispersibility and ensures a consistent glaze slurry.
Tip: We keep stirring until the glaze exhibits a creamy uniform consistency with no visible sediment or dry spots.
| Ingredient | Role | Approximate % by Weight |
|---|---|---|
| Feldspar | Flux for melting and gloss | 40% |
| Ball Clay | Plasticity and suspension | 20% |
| Silica | Hardness and durability | 20% |
| Whiting | Opacifier and texture enhancer | 10% |
| Tin Oxide | Opacity and whiteness | 5% |
| Iron Oxide | Color depth and rustic tones | 5% |
| Water | Solvent and medium | As needed |
| Veegum | Suspender and binder | 1-2% |
| Darvan 821A | Dispersing agent | 0.5-1% |
Adjusting Consistency and Texture
Once the base is mixed, we focus on achieving the ideal glaze consistency that will produce the distinctive Cornwall stone effect. We use these steps:
- Check the glaze’s flow by dipping a clean finger or a small spatula. It should feel creamy yet fluid, flowing smoothly without running off completely.
- If the glaze is too thick, add small amounts of water incrementally and mix thoroughly.
- If too thin, sprinkle a small portion of Ball Clay or Whiting and stir vigorously to thicken.
- To enhance the stone texture and achieve the slight surface granularity, allow the mixture to rest for at least 30 minutes. This resting period helps any heavier particles settle while Veegum maintains a suspension that prevents clumping.
- Before application, pass the glaze through a fine sieve one more time to ensure smoothness combined with subtle texture.
“The key to the Cornwall Stone Glaze lies in balancing creamy flow with tiny unmelted granules, offering that unique rustic depth without masking the ceramic form.”
By consistently monitoring and adjusting, we ensure our glaze is perfectly poised to develop the earthy, textured finish Cornwall pottery is known for.
Applying the Glaze
Applying the Cornwall Stone Glaze requires careful attention to technique to ensure the characteristic rustic and earthy finish develops evenly across the ceramic surface. Precision in this stage is key to unlocking the glaze’s unique texture and depth.
Techniques for Even Application
To achieve a smooth and consistent layer of Cornwall Stone Glaze, follow these steps:
- Use clean, bisque-fired ceramics: Start with fully dried and properly fired bisque ware to ensure the glaze adheres evenly.
- Choose your application method based on the piece’s size and shape:
- Brushing: Apply in thin, even strokes with a wide, soft brush. Use multiple thin coats rather than one thick coat to avoid runs or blotches.
- Dipping: Submerge the piece fully or partially into the glaze slurry, holding it steady for about 10 seconds, then lift evenly.
- Spraying: Use a spray gun on low to medium pressure. Maintain consistent distance (about 6-8 inches) for an even coat.
- Apply multiple thin layers: Allow each layer to dry lightly before applying the next. This builds the glaze thickness uniformly without dripping.
- Maintain glaze consistency: The slurry should have a creamy, paint-like texture—not too watery or too thick. Strain through a fine sieve (80-100 mesh) to remove lumps.
- Control dripping and pooling: Hold pieces at an angle after application to let excess glaze drip off gently. Avoid spots where glaze pools heavily which can cause uneven texture.
| Application Method | Key Benefit | Ideal Use Case |
|---|---|---|
| Brushing | Precise control | Small or detailed pieces |
| Dipping | Even full coverage | Simple shapes or multiple pieces |
| Spraying | Smooth fine texture | Large or complex shapes |
Tips for Achieving the Stone Effect
The signature stone-like finish of Cornwall pottery emerges from both material composition and application subtleties. Here’s how to coax out that effect:
- Build texture through layering: Multiple thin coats encourage micro-variations on the surface that mimic natural stone.
- Avoid glossy overcoats: The Cornwall Stone Glaze achieves depth via matte to semi-matte finishes. If gloss develops, reduce firing temperature slightly or thin the glaze mix next time.
- Experiment with firing atmosphere: Slight variations in kiln atmosphere—such as oxidation or controlled reduction—can enhance earthy tones and surface texture.
- Use test tiles: Always test glaze on small tiles and note firing results before applying to your main pieces.
- Patience is crucial: Let the glazed pieces dry fully and fire carefully according to recommended schedules. Sudden temperature changes can disrupt the stone effect.
“With careful application and mindful firing, we reveal the charm of Cornwall’s coastal earth through every glazed ceramic.”
By mastering these application techniques and tips, we bring the Cornwall Stone Glaze to life, embracing its rustic depth without diminishing the handcrafted beauty of our pottery.
Baking or Setting Instructions
Mastering the baking or setting process is crucial to unlocking the full potential of the Cornwall Stone Glaze. This process transforms the applied glaze into the distinctive rustic stone finish that embodies Cornwall’s ceramic tradition.
Ideal Temperature and Timing
Achieving the perfect stone-like finish requires precise control of kiln temperature and firing duration. We recommend firing the glazed pieces within the following parameters:
| Parameter | Recommended Range | Notes |
|---|---|---|
| Kiln Temperature | 1260°F to 1300°F (685°C to 704°C) | Ideal for maturing the glaze texture without over-melting |
| Soak Time | 30 to 45 minutes | Allows even fusion and stone effect development |
| Ramp Rate | 100°F (38°C) per hour | Gradual heating prevents thermal shock |
| Total Firing Duration | 6 to 8 hours | Ensures uniform glaze setting and surface quality |
Note: Maintaining steady temperature during the soak is critical to prevent glaze defects like crawling or pinholing.
The slow temperature rise allows the glaze components to interact fully, developing the rich earthy tones and subtle surface texture characteristic of Cornwall stoneware. Overfiring may result in excessive gloss and loss of texture, while underfiring can leave the glaze raw and fragile.
Cooling and Finishing Touches
Allowing the kiln to cool gradually preserves the integrity of the glaze’s texture and avoids thermal stress that could cause cracking. We suggest the following cooling approach:
- Natural kiln cooldown to room temperature, approximately 12 hours or more depending on kiln size.
- Avoid opening the kiln prematurely to prevent surface crazing.
- For added surface interest, consider light sanding of any rough edges after firing.
- Inspect the glaze surface for uniformity and rustic depth; any imperfections can often be embraced as part of the glaze’s handmade charm.
Pro Tip: Using a bisque-fired test tile alongside your project pieces during firing helps track glaze development and informs firing adjustments for future batches.
By adhering to these baking and setting instructions with patience and precision, we can harness the true beauty of the Cornwall Stone Glaze, bringing the rugged coastal landscape into our ceramic artistry.
Storage and Serving Suggestions
To preserve the authentic texture and rustic charm of our Cornwall Stone Glaze creations, proper storage and thoughtful serving are crucial. Here are essential tips to maintain the glaze’s signature appeal and functional quality.
Storage Recommendations
- Avoid Stacking Direct Contact: Store glazed pieces individually or use soft padding between them to prevent scratches or chips that can disrupt the glaze’s natural stone-like finish.
- Control Humidity and Temperature: Keep ceramics in a dry environment with consistent temperature. Excess humidity may lead to moisture absorption causing surface dulling or potential crazing over time.
- Use Protective Covers: When not on display, cover the pieces loosely with a breathable cloth to shield from dust while allowing air circulation to protect glaze integrity.
- Position Away from Direct Sunlight: Prolonged exposure to sunlight can cause fading or uneven discoloration of the earthy tones that characterize the Cornwall Stone Glaze.
| Storage Condition | Recommended Practice | Purpose |
|---|---|---|
| Contact Between Pieces | Use soft padding or individual compartments | Prevent scratches and chips |
| Humidity Level | 40-60% relative humidity | Avoid moisture damage |
| Temperature Range | 60-75°F (15-24°C) | Preserve glaze stability |
| Light Exposure | Keep away from direct sunlight | Retain earthy glaze coloration |
Serving Suggestions
Our Cornwall Stone Glaze pieces not only impress visually but also enhance the experience of serving and presentation with their tactile and visual depth:
- Highlight Rustic Appeal: Use these ceramics to serve dishes that complement rustic aesthetics such as artisan breads, farmhouse cheeses, or hearty stews. The glaze’s earthy tones beautifully accentuate natural food colors.
- Layering in Table Setting: Pair with natural linen napkins, wooden boards, and muted flatware to harmonize with the glaze’s stone-like texture and color palette.
- Careful Washing: To maintain glaze vibrancy and texture, wash pieces by hand with mild detergent and avoid abrasive sponges or harsh chemicals.
- Showcase Texture: Position items in well-lit areas to enhance how the glaze catches the light, revealing subtle tonal shifts and texture nuances that evoke Cornwall’s rugged coastline.
“Serving from our Cornwall Stone Glaze wares invites an immersive sensory experience where the tactile richness of the pottery enhances each bite — fusing craftsmanship with culinary artistry.”
By adopting these storage and serving practices, we uphold the enduring beauty and functionality that make Cornwall Stone Glaze ceramics treasured both as art and utility.
Conclusion
Mastering the Cornwall Stone Glaze recipe opens up exciting possibilities to infuse your pottery with a timeless rustic elegance. By paying close attention to ingredient balance, application techniques, and firing precision, we can create pieces that truly capture the essence of Cornwall’s coastal charm.
With patience and practice, this glaze becomes more than just a finish—it transforms our ceramics into unique works of art that celebrate tradition and natural beauty. Let’s keep experimenting and refining to bring that signature stone-like depth into every creation.
Frequently Asked Questions
What is Cornwall Stone Glaze?
Cornwall Stone Glaze is a distinct pottery finish known for its rustic, earthy tones and stone-like texture, inspired by Cornwall’s ceramic traditions. It enhances ceramics by adding depth and character without overshadowing their form.
What ingredients are needed to make Cornwall Stone Glaze?
The dry ingredients include Feldspar, Ball Clay, Silica, Whiting, Tin Oxide, and Iron Oxide. The wet ingredients are Water, Veegum, and Darvan 821A. These combine to create the glaze’s signature texture and finish.
What equipment is necessary for applying Cornwall Stone Glaze?
You need mixing containers, a digital scale, measuring cups/spoons, glaze brushes or sprayers, bisque-fired ceramic test tiles, sieves, protective gloves, and an electric or gas kiln capable of firing at the recommended temperatures.
How do I prepare Cornwall Stone Glaze for application?
Measure and sift your dry ingredients precisely. Mix dry and wet components thoroughly to form a smooth, creamy slurry. Preheat your kiln and organize your workspace, including using protective gear and ensuring good ventilation.
What techniques are best for applying Cornwall Stone Glaze?
Use brushing, dipping, or spraying methods depending on your ceramic piece’s size and shape. Apply multiple thin layers carefully for even coverage and avoid runs or blotches. Test tiles help determine the best approach.
What firing settings should I use for Cornwall Stone Glaze?
Fire your ceramics at 1260°F to 1300°F, soak for 30 to 45 minutes, and maintain a ramp rate of 100°F per hour. The total firing time should be 6 to 8 hours, followed by gradual cooling to preserve the glaze’s finish.
How can I maintain and store ceramics with Cornwall Stone Glaze?
Avoid stacking glazed pieces to prevent scratches, keep them in controlled humidity and temperature conditions, and cover them to avoid dust. For use, wash gently to preserve the glaze’s rustic charm and vibrancy.
Can beginners use Cornwall Stone Glaze?
Yes. Cornwall Stone Glaze is suitable for both beginners and experienced potters because its recipe and application techniques are straightforward and forgiving with practice.
What makes Cornwall Stone Glaze unique compared to other glazes?
Its earthy tones and subtle texture mimic natural stone, reflecting Cornwall’s coastal scenery and ceramic heritage. It adds rustic beauty without masking the ceramics’ form or shape.
How do I adjust the glaze consistency if needed?
You can thin the glaze by adding water or thicken it by letting it rest or adding more Veegum. Consistency adjustments help achieve the creamy texture essential for the rustic finish.