
Creating the perfect white glaze for Cone 6 firing can transform our pottery with a smooth, glossy finish that highlights every curve and detail. Whether we’re crafting functional ware or decorative pieces, a reliable white glaze recipe is essential for achieving consistent results in our kiln.
This Cone 6 white glaze offers a balanced blend of durability and aesthetic appeal. It’s designed to mature beautifully at mid-range temperatures, giving our ceramics a clean, bright surface that complements any design. With this recipe, we can easily customize the glaze to suit various styles and textures, making it a versatile addition to our ceramic toolkit.
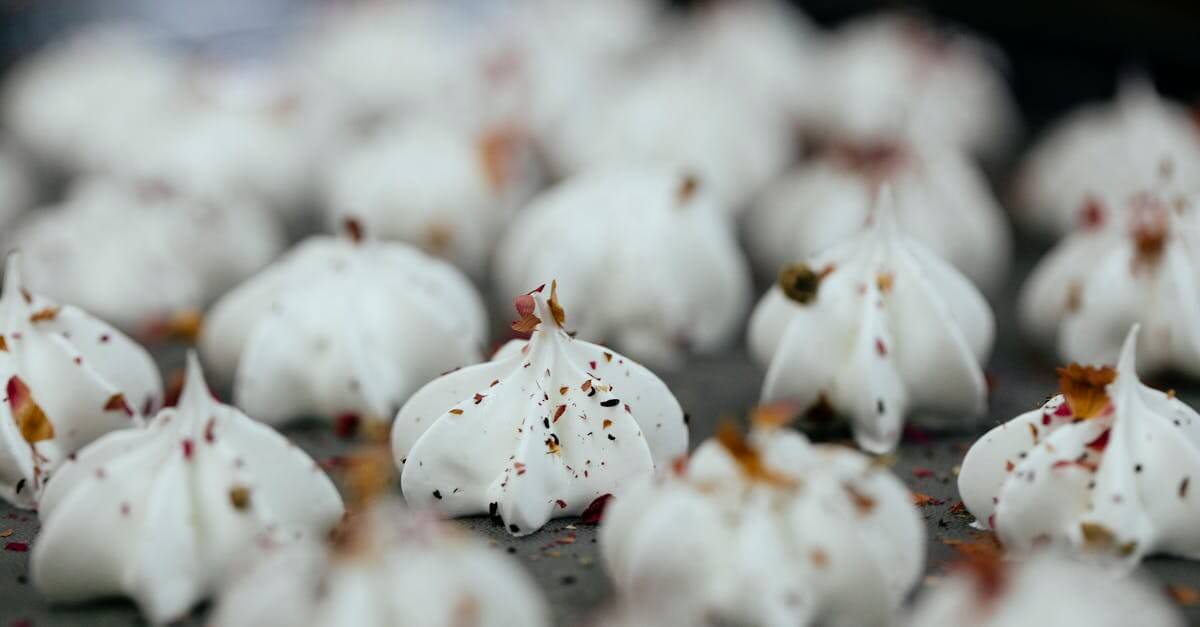
Ingredients for Cone 6 White Glaze Recipe
To create a smooth, durable, and bright white glaze that matures perfectly at Cone 6, we use a carefully balanced blend of key ingredients. Each component serves a distinct purpose in developing the glaze’s texture, gloss, and stability. Below is our optimized ingredient list with precise measurements and preparation notes.
| Ingredient | Amount (by weight) | Preparation Notes |
|---|---|---|
| Feldspar | 25% | Acts as a flux to help the glaze melt evenly |
| Silica (Quartz) | 20% | Provides structure and hardness to the glaze finish |
| Whiting (Calcium Carbonate) | 15% | Contributes to glaze durability and gloss |
| Kaolin (China Clay) | 20% | Adds suspension and opacity to the glaze |
| Zinc Oxide | 10% | Promotes gloss and opacity |
| Tin Oxide | 5% | Supplies the bright white opacity |
| Ball Clay | 5% | Improves glaze workability and smoothness |
Key Ingredients Breakdown
- Feldspar is the primary flux in our recipe. It lowers the melting point and helps create that desirable glass-like finish we want in a Cone 6 white glaze.
- Silica acts as the skeleton of the glaze, ensuring it is both hard and scratch-resistant after firing.
- Whiting enhances the glaze’s opacity and gloss, providing good coverage and brightness.
- Kaolin is essential for suspending the glaze ingredients evenly in water. It also aids in controlling glaze run during firing.
- Zinc Oxide boosts glossiness and enhances the overall smoothness of the glaze surface.
- Tin Oxide is the secret to achieving a clean, bright white finish. Use it sparingly to avoid discoloration or blistering.
- Ball Clay improves the glaze’s application properties, making it easier to brush or dip without running.
“Mastering the balance of these ingredients allows us to achieve a white glaze that is both aesthetically striking and functionally sound at mid-range firings.”
In our next section, we’ll dive into the precise mixing and application process to ensure you get consistent results with this Cone 6 White Glaze Recipe.
Equipment and Tools Needed
To successfully create the Cone 6 White Glaze, having the right equipment and tools is essential. Each item supports precise measurement, thorough mixing, and consistent application to achieve the perfect smooth and glossy finish. Below, we outline the critical tools and their purposes in our glaze preparation process.
| Equipment / Tool | Purpose |
|---|---|
| Digital Scale | Measures ingredients accurately to the nearest gram |
| Large Mixing Bucket | Holds all glaze materials for thorough blending |
| Electric Mixer or Whisk | Ensures uniform suspension of dry and wet ingredients |
| Sieve (80 – 100 mesh) | Filters out lumps for a smoother glaze application |
| Measuring Spoons | For precise addition of small quantities (e.g., Zinc Oxide) |
| Safety Gear (Gloves & Mask) | Protects skin and lungs from fine particles and chemical exposure |
| Spray Gun or Brush | Applies glaze evenly on pottery surfaces |
| Container with Lid | Stores mixed glaze for later use and prevents contamination |
We emphasize the use of a digital scale to maintain exact proportions of materials like feldspar, silica, and tin oxide. Even minor deviations can affect the glaze’s texture and final color at Cone 6 firing.
Step-by-Step: Tool Utilization for Optimal Glaze Preparation
- Measure with Precision
Use the digital scale to weigh each ingredient separately. Place the mixing bucket on the scale and zero it before adding each component to ensure accuracy.
- Combine and Mix
Add ingredients into the large bucket. Using the electric mixer or whisk, mix on a slow speed for 10 to 15 minutes to fully incorporate powders and liquids. This prevents clumping and promotes uniformity in the glaze suspension.
- Sift for Smoothness
Pour the mixed glaze through the sieve into a clean container to remove lumps or gritty particles. This step is critical for achieving a clean, glossy surface without imperfections.
- Apply Safely and Evenly
Equip safety gear before working with dry powders or spraying glaze. Whether using a spray gun or brush, apply an even coat on bisque-fired pottery ensuring no drips or bare spots.
By gathering and mastering these essential tools and equipment, we guarantee a smooth workflow and consistent results while crafting our Cone 6 White Glaze recipe.
Preparing the Glaze
To achieve the perfect Cone 6 White Glaze finish, precise preparation is essential. We focus on accurate measuring and careful mixing to ensure a smooth, consistent glaze that delivers a bright white, glossy surface.
Measuring and Mixing Ingredients
Accurate measurement of each component is critical for a balanced glaze. We use a digital scale to weigh ingredients to the nearest gram, ensuring consistency across batches. The standard recipe requires the following precise quantities:
| Ingredient | Weight (grams) | Purpose |
|---|---|---|
| Feldspar | 350 | Flux, helps to melt glaze smoothly |
| Silica | 150 | Provides durability and gloss |
| Whiting | 100 | Adds opacity and matting effects |
| Kaolin | 100 | Suspension agent, improves application |
| Zinc Oxide | 50 | Enhances gloss and brightness |
| Tin Oxide | 20 | Produces bright white opacity |
| Ball Clay | 30 | Improves glaze suspension |
We start by combining dry ingredients in a large mixing bucket. Using an electric mixer on low speed, we blend them thoroughly to distribute powders evenly. After initial mixing, we gradually add water—approximately 1.2 liters—to reach workable slurry consistency. Then, we continue mixing for at least 10 minutes to achieve full hydration and eliminate lumps.
Filtering the glaze through a 60-mesh sieve is critical. It removes any remaining coarse particles that could affect the glaze’s smoothness and final appearance.
Adjusting Consistency
Achieving the ideal glaze consistency is crucial for proper application and finish. Our target is a fluid that flows smoothly yet adheres well to pottery surfaces without dripping excessively.
We evaluate consistency by dipping a wooden stick into the glaze. The slurry should coat it evenly and drip off in a controlled, steady bead—not too thick nor too watery. If it’s too thick, we add small increments of water (10-20 mL), mixing thoroughly each time. Conversely, if too thin, we allow some water to evaporate or add a small pinch of dry clay to thicken.
Tip: Keep a record of added water volumes for each batch. This practice ensures repeatability and helps us adjust for varying ambient humidity or ingredient moisture content.
By maintaining precise measuring and iterating adjustments in mixing and consistency, we prepare a highly reliable Cone 6 White Glaze that delivers the beautiful bright white finish our pottery demands.
Applying the Cone 6 White Glaze
Applying the Cone 6 White Glaze correctly is essential to achieve its smooth, bright finish and lasting durability. Let’s walk through the crucial steps to prepare your pottery surface and apply the glaze evenly for optimum results.
Preparing the Pottery Surface
Before dipping or brushing on the Cone 6 White Glaze, we must ensure the pottery surface is clean and properly treated. A well-prepared surface guarantees better adhesion and prevents imperfections such as crawling or pinholes.
- Clean the bisque-fired pottery thoroughly. Remove dust, debris, and grease by wiping each piece with a damp sponge or soft cloth. Avoid any oily residue.
- Ensure the pottery is completely dry before application. Moisture can cause uneven glaze coverage.
- Smooth rough spots or sharp edges using fine sandpaper to prevent glaze buildup and dripping.
- If needed, lightly apply a wiping stain or liner compatible with Cone 6 temperatures to control glaze flow or enhance design details.
- Avoid touching the ceramics with bare hands after cleaning to prevent oil transfer.
“A clean, dry, and smooth surface provides the perfect canvas for our Cone 6 White Glaze to develop its signature bright, glossy finish.”
Techniques for Even Application
Uniform application is key to showcasing the white glaze’s full potential. Whether you prefer dipping, brushing, or spraying, meticulous technique ensures consistent thickness and a flawless final look.
| Application Method | Procedure | Tips for Best Results |
|---|---|---|
| Dipping | Submerge pottery fully in the glaze slurry for 5-10 seconds. Remove smoothly and allow excess glaze to drip off. | Maintain consistent dipping time. Shake off drips gently to avoid uneven areas. |
| Brushing | Use a soft, natural bristle brush. Apply 2-3 even coats allowing 15-20 minutes drying between coats. | Brush in one direction. Avoid over-brushing which causes streaks and bubbles. |
| Spraying | Thin the glaze to spraying consistency (milk-like). Use a spray gun at 20-30 psi spraying from 6-8″ away in even layers. | Keep the spray gun moving steadily to prevent pooling. Apply multiple light coats rather than one thick coat. |
Key points to remember during glaze application:
- Test glaze thickness with a wet finger swipe; it should feel slightly viscous but not too thick.
- Record water ratios for each batch to replicate ideal application consistency.
- Avoid applying glaze over unsupported areas to prevent dripping during firing.
- Let the glaze dry completely in a dust-free environment before firing.
“Mastering the application techniques gives us control over the glaze’s texture and clarity, ensuring each piece reaches its full aesthetic potential after firing.”
Using these preparation and application steps lets us create even, durable, and beautiful surfaces with the Cone 6 White Glaze Recipe, setting the stage for a stunning mid-range fired finish.
Firing Process
Proper firing is crucial to achieve the ideal texture and finish of our Cone 6 White Glaze. Understanding kiln settings and controlled cooling ensures a durable, glossy, and bright white surface that enhances our pottery’s beauty.
Kiln Settings for Cone 6
To mature the Cone 6 White Glaze correctly, precise kiln settings are essential. We recommend the following firing schedule for consistent results:
| Stage | Temperature (°F) | Temperature (°C) | Ramp Rate (°F/hr) | Notes |
|---|---|---|---|---|
| Initial Drying | 200 | 93 | 100 | Hold 30 minutes to remove moisture |
| Mid Ramp | 1400 | 760 | 150 | Continuous ramp without holds |
| Final Ramp | 2232 (Cone 6) | 1222 | 150 | Soak for 10 minutes at peak temperature |
| Cooling Start | 2232 | 1222 | — | Begin controlled cooling phase |
- We ramp the kiln temperature slowly between stages to allow glaze components to melt uniformly, avoiding defects such as crazing or pinholing.
- Holding at peak temperature (soaking) ensures full maturation of the glaze and glaze-body interface.
- Using a kiln sitter or reliable cone packs helps monitor the firing progress accurately.
Cooling and Handling Glazed Pieces
Cooling is as critical as the firing itself to preserve the glaze finish and structural integrity:
- We follow a controlled cooling process, lowering the kiln temperature gradually to avoid thermal shock.
- Avoid opening the kiln early; premature exposure to cooler air risks cracking or crazing the glaze.
- Ideal cooling rate: about 100°F (56°C) per hour until below 1000°F (538°C), then faster cooldown is safe.
- Once cooled to room temperature, handle pieces carefully using gloves or padded materials to prevent chipping.
“Allowing our fired pieces to cool steadily enhances the glaze’s smoothness and durability, locking in that brilliant white shine we strive to achieve.”
By following these kiln settings and cooling protocols precisely, we ensure our Cone 6 White Glaze develops a flawless glossy surface with optimum strength and visual appeal.
Tips for Best Results
To achieve the perfect finish with our Cone 6 White Glaze recipe, we need to focus on several key factors throughout preparation, application, and firing. Here are our essential tips for optimal results:
1. Precise Measurement and Mixing
Accuracy in measuring and mixing ingredients is crucial. Use a digital scale for all dry components to maintain the glaze formula’s integrity. Always:
- Measure ingredients by weight not volume.
- Mix thoroughly with an electric mixer to create a smooth, lump-free slurry.
- Let the glaze rest overnight to allow particles to hydrate fully and settle evenly.
2. Adjusting Consistency for Application
Consistency directly affects the glaze’s coverage and final appearance. Test and record the water content carefully:
| Consistency | Water % by Weight | Application Method | Notes |
|---|---|---|---|
| Thin | 65% – 70% | Spraying, dipping | Covers evenly, ideal for smooth surfaces |
| Medium | 55% – 60% | Brushing | For controlled layers, use multiple coats |
| Thick | 45% – 50% | Brushing thick textures | Allows texture development, can crack if too thick |
Tip: Keep a glaze journal to track water-to-glaze ratios for consistent repeatability.
3. Surface Preparation
A clean and properly prepared surface enhances glaze adhesion and smoothness. Before applying the glaze:
- Ensure pots are free of dust, oils, or previous glaze residues.
- Bisque firing must be fully completed and unglazed surface dry.
- Sand any rough spots lightly for an even base.
4. Application Techniques
Choosing the right application method impacts the glaze texture and clarity:
- Dipping: Immerse quickly and evenly, withdraw at a steady pace to avoid drips.
- Brushing: Use soft brushes, apply even coats, and allow drying between layers.
- Spraying: Maintain consistent nozzle distance (6–8 inches) and multiple light passes for a uniform surface.
“The key to a flawless glaze coat is evenness over multiple thin layers rather than one thick application.”
5. Controlled Drying and Firing
Allow glaze layers to fully dry before firing to prevent defects like crawling or pinholes. Use the recommended firing schedule:
| Firing Stage | Temperature (°F / °C) | Ramp Rate (°F / °C per hour) | Hold Time |
|---|---|---|---|
| Initial Drying | Room Temp to 200°F / 93°C | 300°F / 150°C per hour | 30 minutes |
| Mid Ramp | 200°F to 1200°F / 649°C | 400°F / 200°C per hour | None |
| Final Ramp | 1200°F to Cone 6 (2232°F / 1222°C) | 100°F / 55°C per hour | Hold at peak 10 minutes |
| Controlled Cool | Peak to Room Temp | Slow descent 150°F / 83°C/hr | Avoid rapid cooling to prevent thermal shock |
Note: Slower cooling preserves glaze gloss and reduces cracking risks.
6. Testing and Troubleshooting
Always test the glazed pieces in your kiln before large batches. Keep notes on:
- Application thickness
- Water adjustments
- Firing schedule variations
- Final results (color, texture, defects)
Use these insights to refine your process for consistent bright white finishes.
By applying these tips with care and precision, we guarantee our Cone 6 White Glaze achieves the smooth glossy surface, durability, and pristine white tone that enhance every pottery piece beautifully.
Troubleshooting Common Issues
When working with our Cone 6 White Glaze recipe, some common challenges may arise. Here’s how we can identify and fix these issues efficiently to maintain a smooth, bright finish on our pottery pieces.
Issue: Dull or Matte Finish Instead of Glossy
- Cause: Overfiring or underfiring can cause the glaze to lose its intended glossy surface.
- Solution:
- Verify kiln temperature accuracy using a reliable cone or digital pyrometer.
- Stick to the recommended firing schedule designed for Cone 6 maturing temperature.
- Ensure controlled cooldown to prevent thermal shock that can dull the glaze.
- Double-check glaze thickness; too thick application can affect gloss.
Issue: Crazing (Fine Cracks in the Glaze)
- Cause: Mismatch of thermal expansion between clay body and glaze or improper firing schedule.
- Solution:
- Adjust firing ramp to allow slow cooling for better compatibility.
- Consider modifying the glaze with additives such as boron or zinc oxide to reduce tension.
- Test different clay bodies compatible with this white glaze if crazing persists.
Issue: Pinholes or Bubbling on the Surface
- Cause: Trapped air or gases escaping during firing; glaze too thick or poorly sieved.
- Solution:
- Thoroughly sieve the glaze to remove lumps and coarse particles before application.
- Apply thinner glaze coats evenly, avoiding pooling.
- Increase glaze drying time before firing to allow moisture evaporation.
- Ensure bisque ware is fired properly to eliminate internal moisture.
Issue: Blotchy or Uneven Color
- Cause: Uneven application or inconsistent mixing.
- Solution:
- Use a spray gun for even coverage or ensure consistent brush or dip strokes.
- Stir glaze thoroughly before and during application.
- Maintain consistent water ratios for repeatable results.
Issue: Glaze Running or Dripping During Firing
- Cause: Glaze applied too thickly or glaze formulation too fluid.
- Solution:
- Apply glaze coats evenly and not too thick—~0.2 to 0.3 mm thickness is ideal.
- Check and adjust the glaze slurry viscosity, adding dry materials to thicken if necessary.
| Common Issues | Possible Causes | Recommended Solutions |
|---|---|---|
| Dull or Matte Finish | Over/underfiring, thick glaze, rapid cooling | Verify kiln temp, control firing schedule, adjust glaze thickness |
| Crazing | Thermal expansion mismatch, fast cooling | Modify firing ramp, adjust glaze ingredients, test clay body |
| Pinholes/Bubbling | Trapped air, thick glaze, poor sieving | Sieve glaze, thin coats, extend drying, proper bisque firing |
| Uneven Color | Uneven application, poor mixing | Use spray gun, consistent mixing, control water ratios |
| Running/Dripping | Thick glaze, fluid formulation | Apply thin coats, adjust slurry viscosity |
Bonus Tip: Keep Detailed Notes
We recommend maintaining a glaze logbook capturing:
- Exact ingredient measurements
- Water additions
- Application methods and thickness
- Kiln firing schedules and cone readings
- Visual results and problem notes
This practice helps us troubleshoot faster and achieve consistent Cone 6 White Glaze perfection with every firing.
Conclusion
Mastering the Cone 6 white glaze recipe opens up a world of creative possibilities for our pottery. With careful attention to ingredient accuracy, surface preparation, and firing schedules, we can achieve that perfect bright white finish every time.
By staying consistent and documenting our processes, we build confidence in producing durable and visually stunning pieces. This reliable glaze not only enhances our work but also adapts well to our unique styles and techniques.
Let’s keep experimenting and refining to make the most of this versatile glaze, ensuring our pottery stands out with a smooth glossy surface and timeless appeal.
Frequently Asked Questions
What is Cone 6 white glaze and why is it important?
Cone 6 white glaze is a mid-range temperature glaze for pottery that creates a smooth, glossy, and bright white finish. It enhances the details of ceramic pieces while offering durability and aesthetic appeal.
What are the main ingredients in the Cone 6 white glaze recipe?
The key ingredients include feldspar, silica, whiting, kaolin, zinc oxide, tin oxide, and ball clay. Each contributes to the glaze’s texture, gloss, opacity, and durability.
What tools do I need to prepare the Cone 6 white glaze?
Essential tools include a digital scale for precise measurement, a large mixing bucket, electric mixer, sieve, measuring spoons, safety gear, and application tools like brushes or a spray gun.
How do I prepare the Cone 6 white glaze mixture?
Measure all dry ingredients accurately, mix thoroughly, add water gradually to reach a smooth slurry, and sieve the mixture to remove coarse particles for a consistent glaze texture.
How can I adjust the glaze consistency for application?
Add small amounts of water or dry materials to achieve the right fluidity. Keep notes on proportions for repeatability, ensuring smooth application and a flawless finish.
What are the best methods to apply Cone 6 white glaze?
You can dip, brush, or spray the glaze. Each method requires an even coat, proper thickness, and allowing the glaze to dry fully before firing to avoid imperfections.
What firing schedule is recommended for Cone 6 white glaze?
Use a controlled firing with gradual ramps and cooling stages. Follow specific temperature targets for drying, mid ramp, final ramp, and slow cooling to prevent defects and maintain the glaze’s quality.
What common issues occur with Cone 6 white glaze and how can I fix them?
Issues like dullness, crazing, pinholes, uneven color, or running can result from incorrect firing, poor application, or glaze thickness. Adjust firing schedules, verify kiln temperatures, and ensure proper glazing techniques to resolve these.
Why is a glaze logbook important?
Keeping a logbook helps you track measurements, water ratios, application methods, and firing schedules. This documentation supports troubleshooting and consistent glaze results over multiple firings.
Can I customize the Cone 6 white glaze recipe?
Yes, the recipe allows customization to create different textures and surface effects, accommodating various pottery styles and personal preferences without compromising the bright white finish.