
Exploring color mixing recipes opens up a world of creativity and fun. Whether you’re working with food coloring for baking or crafting vibrant drinks and desserts, understanding how colors blend can transform ordinary treats into eye-catching masterpieces. We’ll guide you through simple yet effective recipes that show how primary colors combine to form stunning hues.
Color mixing isn’t just about aesthetics—it’s about enhancing the appeal and experience of your culinary creations. By mastering these recipes, we can elevate everything from cupcakes to cocktails, making them as delightful to look at as they are to taste. Let’s dive into the colorful journey and discover how easy it is to mix, match, and create vibrant dishes that impress every time.
Ingredients
To master color mixing recipes for our culinary and crafting delights, we start by gathering the essential ingredients. These include the foundational color dyes and tools that ensure precision and vibrant results every time.
Primary Colors Needed
The foundation of all color mixing lies in the primary colors. These pure hues serve as the building blocks for creating a broad spectrum of colors:
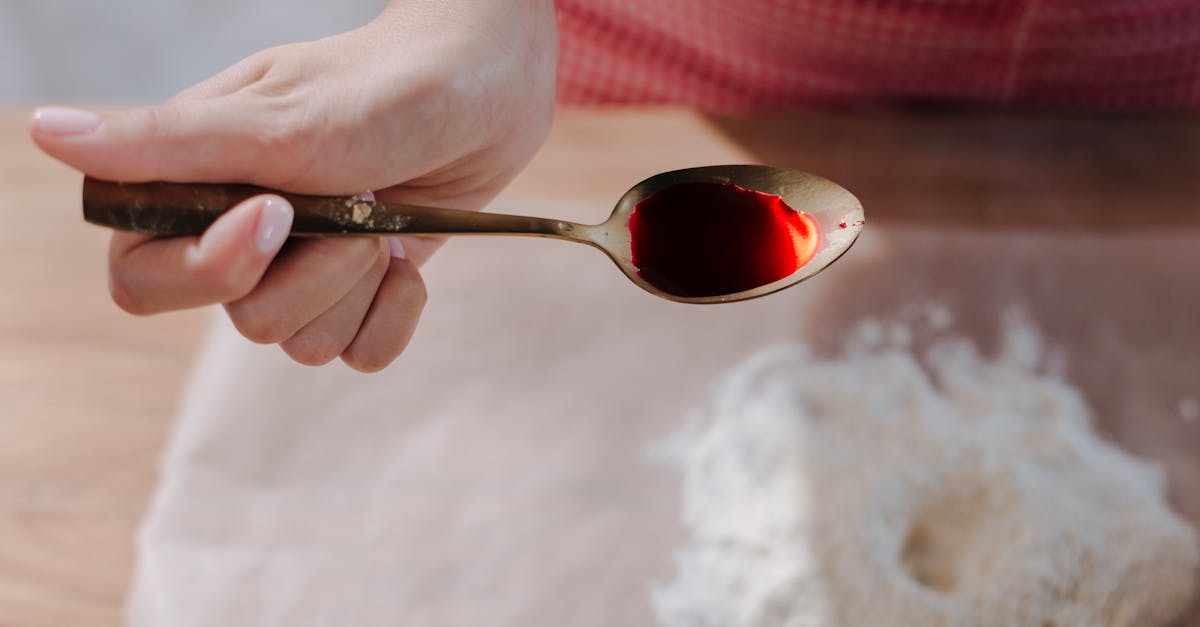
- Red food coloring – liquid or gel form for intense pigment
- Blue food coloring – opt for gel for richer saturation
- Yellow food coloring – bright and vivid for clear mixing results
These primary colors allow us to blend and achieve countless shades through simple combinations.
Secondary Colors and Additives
Once we have the primary colors, we can create beautiful secondary colors and unique hues by mixing them and adding specific enhancers:
| Color Type | Ingredients | Notes |
|---|---|---|
| Orange | Equal parts red and yellow food coloring | Adjust for warmer or cooler tone |
| Green | Equal parts blue and yellow food coloring | Use gel for depth |
| Purple | Equal parts red and blue food coloring | Add more red for richer purple |
| White | White food coloring or edible white powder | Lightens colors without dilution |
| Black | Black food coloring or activated charcoal powder | For deepening or dark accents |
Additives like white* or* black help us lighten or darken any hue, giving us control over saturation and shade depth.
Tools for Mixing Colors
To achieve precise and consistent color mixes, the right tools are essential:
- Small measuring spoons or droppers – for controlled dosing of color
- Mixing bowls or palettes – ceramic or plastic for easy cleaning and mixing
- Whisks or small spatulas – for thorough blending without diluting colors
- Pipettes – to add colors drop by drop for fine adjustments
- Clear containers or cups – to observe the true color without distortion
Using these tools lets us replicate our favorite colors reliably and create stunning visual appeal in our desserts, drinks, and crafts.
Instructions
Follow these precise steps to master color mixing recipes that elevate your culinary and crafting creations. Let’s dive into the techniques that deliver consistent and vibrant results every time.
Preparing Your Workspace
- Clean and clear a flat surface to avoid cross-contamination of colors.
- Arrange all primary colors (red, blue, yellow) and extras like white and black food coloring within easy reach.
- Lay out tools: measuring spoons, mixing bowls, pipettes, and stirring sticks.
- Keep paper towels handy to quickly wipe spills and maintain a neat work area.
- Use disposable gloves to prevent staining your hands.
Basic Color Mixing Techniques
- Always start with small amounts of each color for better control.
- Use pipettes or spoons to transfer food coloring precisely to avoid over-mixing.
- Stir gently but thoroughly, aiming for a uniform shade without streaks.
- Test colors on a white plate or parchment to see the true result before applying.
- Record your color ratios for easy replication in future recipes.
Mixing Primary Colors
To create the foundation for your palette:
| Color 1 | Color 2 | Resulting Color |
|---|---|---|
| Red | Yellow | Orange |
| Yellow | Blue | Green |
| Blue | Red | Purple |
- Measure equal parts from each primary color to achieve pure secondary colors.
- Adjust ratio slightly to create warmer or cooler tones within the secondary colors.
- Example: More red + yellow = deeper orange; more blue + yellow = cooler green.
Creating Secondary and Tertiary Colors
- Combine secondary colors with primary colors for vibrant tertiary hues.
- Use increments of one-third or one-half the secondary color to primary color to control intensity.
- Example mixes:
- Orange + Blue = Brownish or muted tones for earthy decoration.
- Green + Yellow = Lighter green shades perfect for fresh looks.
- Purple + Red = Rich magenta tones ideal for bold designs.
Adjusting Shades and Tints
- To create shades (darker versions), add small amounts of black food coloring gradually.
- To create tints (lighter versions), blend in white food coloring carefully to avoid washing out the color.
- Incrementally add additives in drops and stir thoroughly before deciding to add more.
- Record all adjustments to replicate the perfect tone consistently.
Directions
Follow these precise instructions to master color mixing recipes and achieve vibrant, visually stunning results every time.
Step-by-Step Color Mixing Recipes
- Prepare your workspace by cleaning all tools and selecting small, clear mixing bowls.
- Measure primary colors using measuring spoons. Start with 1/4 teaspoon of red, blue, or yellow food coloring as the base.
- Mix primary colors to form secondary colors:
- Red + Yellow = Orange
- Yellow + Blue = Green
- Blue + Red = Purple
- Use a clean stirrer to blend colors thoroughly for even tones.
- Adjust tint or shade by adding small amounts of white or black food coloring to lighten or darken the mixtures respectively.
- Test your color by applying a drop on a white surface such as a plate or paper towel to observe the true hue.
- If the color is not quite right, add color incrementally and stir after each addition to avoid over-saturating.
Tips for Consistent Color Results
- Always start with small quantities and add dye slowly for better control.
- Use pipettes or droppers to precisely measure liquids when mixing.
- Maintain a clean workspace to avoid contamination between colors.
- Record your color ratios in a notebook to reproduce exact hues.
- Mix colors in a well-lit area to assess shades accurately.
- When adding black or white for shading, use just a tiny amount since these colors can overpower quickly.
| Color Mix | Ratio Example | Resulting Color |
|---|---|---|
| Red + Yellow | 1:1 | Orange |
| Yellow + Blue | 1:1 | Green |
| Blue + Red | 1:1 | Purple |
| Orange + Blue | 2:1 (Orange:Blue) | Brownish Tone |
| Add White | Few drops | Pastel Shade |
| Add Black | Few drops | Deeper Shade |
Troubleshooting Common Color Mixing Issues
- Colors too dull: Increase the concentration of primary colors gradually. Use fresher food coloring if needed.
- Color too dark: Lighten with incremental additions of white food coloring, mixing well after each drop.
- Uneven color: Stir thoroughly and ensure ingredients are well combined. Avoid skipping the testing step on a white surface.
- Muddy or brownish colors: This happens when too many colors mix. Simplify your blend using just two colors or adjust ratios.
- Color fading after baking: Add slightly more food coloring than usual, as heat can dull colors.
Tools and Equipment
To achieve vibrant and consistent results in our color mixing recipes, having the right tools and equipment is essential. These tools not only ensure precision but also make the process smooth and enjoyable.
Essential Tools for Color Mixing
We rely on a few key tools to create perfect color blends every time:
- Measuring Spoons
Use tiny increments to add food coloring drops accurately. Precision here is crucial to maintain consistent hues.
- Pipettes or Droppers
These allow us to transfer small amounts of liquid color with control, helping us mix colors drop by drop.
- Mixing Bowls
Small clear or white bowls work best. The neutral color lets us see true color results as we blend.
- White Palette or Plate
Testing colors on a clean, white surface helps us gauge the exact shade and adjust as needed.
- Whisks or Mini Spatulas
For thorough mixing ensuring every drop of color integrates evenly without streaks.
| Tool | Purpose | Benefit |
|---|---|---|
| Measuring Spoons | Accurate measurement of food color | Precise control over color intensity |
| Pipettes/Droppers | Transfer small liquid amounts | Incremental additions for consistency |
| Mixing Bowls | Holding and combining colors | Clear view of resulting hues |
| White Palette/Plate | Color testing surface | Visual accuracy in shade creation |
| Whisks/Spatulas | Even blending of colors | Smooth and uniform mixture |
Optional Tools for Advanced Techniques
For those of us looking to push the boundaries of color mixing and perfect more complex shades, these additional tools enhance our capabilities:
- Digital Scale
Enables measurement by weight for highly accurate color ratios, perfect for repeatable recipes.
- Color Wheel Chart
A visual guide that helps us understand color relationships and predict mixing outcomes.
- Silicone Brushes or Fine-Tip Paintbrushes
Ideal for precise application of color especially in plating or detailed decorating.
- Airbrush Kit
For professional-level gradient effects and smooth color transitions in frosting or cocktails.
- Storage Containers with Lids
To keep mixed colors fresh and prevent drying or contamination, extending usability.
Incorporating these tools upgrades our color mixing process from basic blending to artful and precise creations, helping us turn ordinary culinary projects into stunning masterpieces.
Make-Ahead Instructions
To save time and ensure smooth workflows, preparing color mixtures in advance is essential. Proper storage and palette preparation keep our colors vibrant and ready for use in baking and crafting.
Storing Mixed Colors
When storing mixed food colorings, follow these key steps to maintain color integrity and freshness:
- Use airtight containers or small glass jars to prevent air exposure.
- Label containers with the date and color ratio for easy identification.
- Store in a cool dark place or refrigerator to slow down color fading.
- Shake or stir gently before reuse to recombine any settled pigments.
- Avoid storing for more than 1 to 2 weeks to ensure optimal vibrancy.
| Storage Tip | Details |
|---|---|
| Container type | Airtight glass or food-safe plastic |
| Label information | Date mixed, color ratios |
| Storage location | Cool dark place or refrigerator |
| Maximum storage duration | 1 to 2 weeks |
“Proper storage is the backbone of successful make-ahead color mixing. Keep containers sealed tightly to lock in vibrancy.”
Preparing Color Palettes in Advance
Preparing a palette of ready-to-use colors streamlines the coloring process and helps us maintain consistency across multiple projects. Here’s how to set up an effective color palette:
- Divide a white mixing palette or tray into sections for each color and shade.
- Mix small batches following your recorded ratios from our previous technique steps.
- Place mixed colors in each section, covering them immediately with plastic wrap or a damp cloth to prevent drying.
- Label the palette with the color name and date prepared.
- Use palette colors within the same day for best results, especially for delicate or pastel shades.
| Step | Action | Purpose |
|---|---|---|
| 1 | Use white mixing palette | True visibility of colors |
| 2 | Mix small batches by measured ratios | Consistency and accuracy |
| 3 | Cover with plastic wrap or damp cloth | Prevent drying out |
| 4 | Label each section | Easy color recognition |
| 5 | Use promptly | Maintain vibrancy and true tones |
“A well-prepared color palette saves time and ensures every creation bursts with the exact hue we want.“
By mastering these make-ahead steps, we guarantee that each color mixture remains bright and consistent, allowing us to focus on crafting stunning desserts and beverages without last-minute delays.
Conclusion
Mastering color mixing opens up endless opportunities to elevate our culinary and crafting projects. With the right techniques and tools, we can confidently create vibrant hues that bring our creations to life.
By practicing precision and experimenting with combinations, we ensure every dessert or drink is not only delicious but visually stunning. Keeping colors consistent and well-prepared saves time and enhances our creative flow.
Let’s keep exploring and refining our color mixing skills to make every project a true work of art.
Frequently Asked Questions
What are the primary colors used in food coloring mixing?
The primary colors for food coloring are red, blue, and yellow. They serve as the base for creating a wide range of other colors.
How can I create secondary colors with food coloring?
Mix equal parts of two primary colors: red + yellow = orange, blue + yellow = green, red + blue = purple.
What tools do I need for precise color mixing?
Essential tools include measuring spoons, mixing bowls, pipettes, and a white surface to test colors accurately.
How do I adjust the shade or tint of a color?
Add white food coloring to lighten (tint) and black food coloring to darken (shade) your colors.
Can I prepare food coloring mixtures ahead of time?
Yes, mix small batches, store them in airtight containers, label with dates and ratios, and keep them in a cool, dark place.
How do I avoid dull or uneven colors?
Use precise measurements, mix thoroughly, and test on a white surface before applying to your dish.
What is the benefit of using pipettes in color mixing?
Pipettes allow precise control over color amounts, ensuring consistent and repeatable color results.
How do I keep mixed colors vibrant after baking?
Store colors properly before use and apply colors gently; avoid overbaking and excessive moisture exposure to reduce fading.
Are there advanced tools to improve color mixing?
Yes, digital scales, color wheel charts, silicone brushes, and airbrush kits can enhance accuracy and creativity.
Why is organizing my workspace important for color mixing?
A clean, organized workspace helps avoid contamination, improves mixing accuracy, and speeds up the creative process.