
Collagen protein bars have quickly become a favorite snack for those looking to boost their health and energy on the go. Packed with collagen peptides these bars support skin elasticity joint health and muscle recovery while satisfying hunger with delicious flavors and textures.
Making our own collagen protein bars lets us control the ingredients ensuring a clean and nutritious treat without any unnecessary additives or preservatives. Plus they’re incredibly easy to customize to suit our taste preferences and dietary needs.
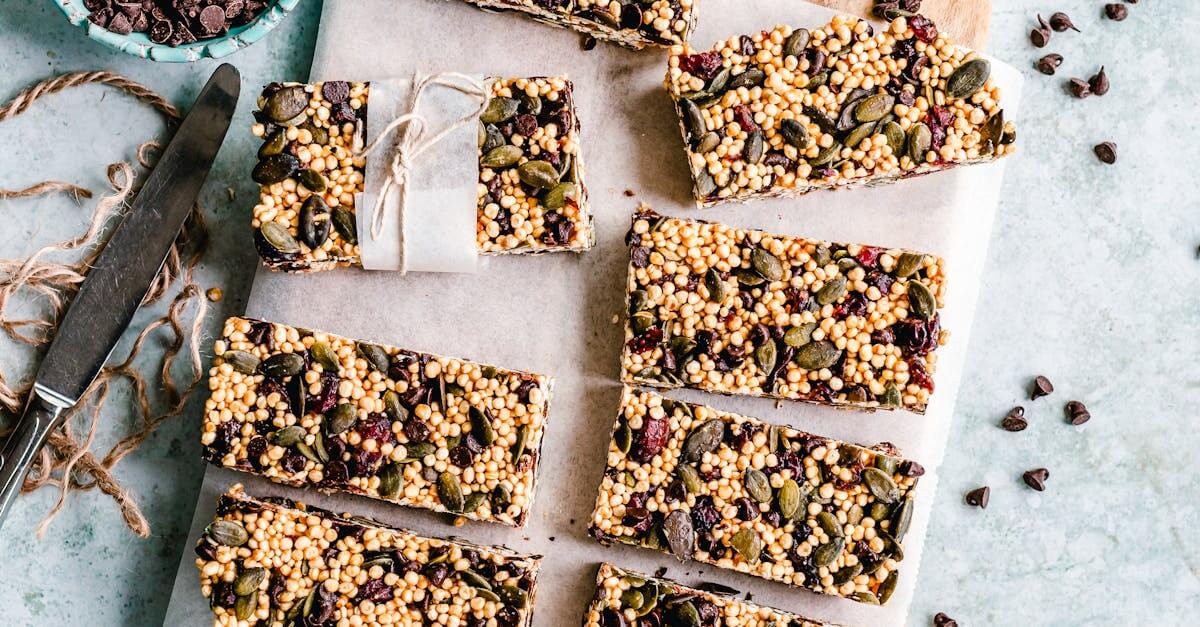
In this recipe we’ll show you how to whip up a batch of tasty collagen protein bars that are perfect for pre or post-workout fuel or a wholesome snack anytime. Let’s dive into creating a snack that’s as nourishing as it is delicious.
Ingredients
To craft the perfect Collagen Protein Bar, we need to gather high-quality, wholesome ingredients that blend together for optimal taste and nutritional value. Below we break down the components into dry, wet, and optional add-ins to customize your bars.
Dry Ingredients
These ingredients form the base and structure of our bars, providing texture, flavor, and the essential protein boost from collagen.
- 1 cup collagen protein powder (hydrolyzed for easy absorption)
- 1 ½ cups rolled oats (gluten-free if preferred)
- ½ cup almond flour (for a moist, tender bite)
- ¼ cup chia seeds (adds fiber and healthy fats)
- ⅓ cup flaxseed meal (boosts omega-3 content)
- ⅓ cup natural sweetener like coconut sugar or erythritol (adjust to taste)
- ¼ tsp salt (to balance flavors)
- 1 tsp ground cinnamon (for warm spice)
Wet Ingredients
The wet ingredients bind the dry components together and add natural sweetness and moisture.
- ½ cup almond butter (unsweetened, creamy texture)
- ⅓ cup pure honey or maple syrup (natural sweetener and binder)
- 1 tsp vanilla extract (enhances aroma and depth)
- 3 tbsp unsweetened almond milk (adjust for desired consistency)
Optional Add-Ins
Personalize your collagen protein bars with these nutritious boosters to elevate flavor and texture:
| Add-In | Quantity | Benefits |
|---|---|---|
| Dark chocolate chips | ¼ cup | Antioxidants, rich flavor |
| Chopped nuts (walnuts, almonds, pecans) | ¼ cup | Healthy fats, crunchiness |
| Dried cranberries | ⅓ cup | Natural sweetness, chewy texture |
| Shredded coconut | ¼ cup | Adds tropical flavor, texture |
| Protein-packed seeds (pumpkin, sunflower) | 2 tbsp | Extra nutrients, crunch |
Equipment Needed
To create the perfect Collagen Protein Bars at home, having the right equipment makes the process smooth and efficient. Below is a detailed list of tools essential for preparation, mixing, shaping, and storing our bars:
- Mixing Bowls
Use large, sturdy mixing bowls to combine dry and wet ingredients separately before blending them together.
- Measuring Cups and Spoons
Accurate measurements are key. Employ dry and liquid measuring cups along with spoons to ensure precise ingredient amounts.
- Spatula or Wooden Spoon
A flexible silicone spatula makes folding ingredients effortless, while a wooden spoon can handle thicker mixes.
- Food Processor or Blender (Optional)
For finely chopping nuts or blending ingredients to achieve a uniform texture, we recommend a food processor. This step is optional but enhances bar consistency.
- 8×8 Inch Baking Pan or Loaf Pan
To shape the bars evenly, line the pan with parchment paper for easy removal and cleaner edges.
- Parchment Paper
Prevents sticking and simplifies cleanup when pressing the mixture into the pan.
- Knife or Bench Scraper
Once set, cut the bars cleanly and evenly using a sharp knife or bench scraper.
- Cooling Rack (Optional)
Allow the bars to cool fully and firm up uniformly.
| Equipment | Purpose |
|---|---|
| Mixing Bowls | Combine ingredients |
| Measuring Cups & Spoons | Ensure accurate ingredient quantities |
| Spatula/Wooden Spoon | Mix and fold ingredients |
| Food Processor/Blender | Optional, for chopping and blending |
| 8×8 Inch Baking or Loaf Pan | Shape and set bars |
| Parchment Paper | Non-stick lining |
| Knife/Bench Scraper | Cut bars into portions |
| Cooling Rack | Optional, cool bars evenly |
Pro Tip: For the best texture in our collagen protein bars avoid overcrowding the pan when pressing the mixture. Use parchment paper edges to lift the bars out cleanly after chilling.
This collection of equipment simplifies every step of our homemade Collagen Protein Bar Recipe and helps us achieve consistent results every time.
Prep Work
Before we start mixing our collagen protein bar recipe, prepping the ingredients and equipment is essential. This ensures a smooth, efficient process and a perfect bar texture.
Preparing Ingredients
We begin by measuring and preparing all dry and wet ingredients precisely. Using accurate measurements prevents texture and flavor issues in our collagen protein bars.
| Ingredient Type | Ingredient | Preparation Details |
|---|---|---|
| Dry Ingredients | Collagen protein powder | Measure exact scoops or grams |
| Rolled oats | Use whole or lightly crushed | |
| Almond flour | Lightly sifted if clumpy | |
| Chia seeds | No special prep | |
| Flaxseed meal | Freshly ground if possible | |
| Natural sweetener | Measure granular or liquid as needed | |
| Salt | Use fine salt for even distribution | |
| Cinnamon | Measure as per recipe | |
| Wet Ingredients | Almond butter | Stir well if separated |
| Honey or maple syrup | Use at room temperature for easier mixing | |
| Vanilla extract | Measure precisely | |
| Almond milk | Use unsweetened and room temperature | |
| Optional Add-Ins | Dark chocolate chips, nuts, dried cranberries, shredded coconut, seeds | Chop or prepare as needed |
We suggest arranging all ingredients in separate bowls before mixing. This mise en place approach prevents missed steps and supports consistent bar quality.
Lining the Pan
To achieve easy removal and clean edges for our collagen protein bars, lining the baking pan properly is a key step.
- Take an 8×8 inch baking pan and cut a piece of parchment paper slightly larger than the pan dimensions.
- Place the parchment inside the pan, ensuring the paper covers the bottom and extends up the sides.
- Allow the parchment to overhang on two opposite sides. This will serve as handles to lift the bars out after setting.
- Lightly grease the parchment with a small amount of oil or cooking spray. This minor step helps prevent sticking if the parchment shifts.
This simple prep guarantees our bars come out cleanly and maintain their shape, making cutting and storing much easier.
Pro Tip: Use a bench scraper or offset spatula to press down the mixture evenly within the lined pan. Avoid overcrowding to keep the texture from becoming too dense or crumbly.
Instructions
Follow these steps carefully to create perfectly textured collagen protein bars that deliver both flavor and nutrition. Each phase ensures the bars hold together well and taste delicious.
Mixing the Ingredients
- Combine dry ingredients: In a large mixing bowl, whisk together the collagen protein powder, rolled oats, almond flour, chia seeds, flaxseed meal, natural sweetener, salt, and cinnamon. Make sure all elements are fully integrated for an even flavor and texture.
- Blend wet ingredients separately: In another bowl, mix almond butter, honey or maple syrup, vanilla extract, and almond milk until smooth and creamy.
- Incorporate wet into dry: Pour the wet mixture into the dry mix gradually, stirring with a spatula or wooden spoon. Aim for a consistent, sticky dough that holds together without being too wet or crumbly.
- Optional add-ins: Fold in any desired extras — like dark chocolate chips, chopped nuts, dried cranberries, shredded coconut, or seeds — evenly throughout the mixture.
Forming the Bars
- Prepare your pan: Line an 8×8 inch baking pan with parchment paper. Lightly grease the paper to prevent sticking.
- Transfer the mixture: Scrape the mixture into the lined pan. Use the back of a spatula or your hands (clean and slightly damp) to press it firmly and evenly.
- Avoid overcrowding: Press the mixture firmly but don’t overpack—this will keep the bars from becoming too dense or hard.
- Create an even surface: Smooth the top of the mixture carefully to ensure bars will cut evenly after setting.
Refrigerating or Baking
Choose your preferred setting method based on texture:
| Method | Temperature | Time | Resulting Texture | Notes |
|---|---|---|---|---|
| Refrigeration | 35-40°F (2-4°C) | 2-4 hours | Chewy, firm but soft | Best for bars with raw ingredients or no baking |
| Baking | 325°F (163°C) | 15-20 minutes | Slightly crisp exterior | Use parchment-lined pan; monitor closely to avoid drying out |
- If refrigerating, cover the pan with plastic wrap after pressing mixture and chill until bars firm up.
- If baking, preheat the oven and place the pan in the middle rack. Once baked, allow bars to cool completely before cutting.
Pro tip: For clean, neat bars, refrigerate or bake until firm, then cut using a sharp knife or bench scraper. Wipe the knife between cuts for smooth edges.
Storage Tips
Proper storage is crucial to maintain the fresh taste, texture, and nutritional benefits of our collagen protein bars. Follow these guidelines to keep your bars delicious and ready whenever you need a quick snack.
Refrigeration
- Place the bars in an airtight container to prevent moisture absorption and odors from other foods.
- Store in the refrigerator for up to 1 week.
- For firmer bars, refrigeration helps preserve shape and prevents them from becoming too soft or sticky.
- Before serving, let the bars sit at room temperature for 5–10 minutes for the best texture.
Freezing
- Wrap individual bars tightly in plastic wrap or parchment paper to avoid freezer burn.
- Place wrapped bars in a freezer-safe ziplock bag or container.
- Freeze for up to 3 months to retain maximum freshness and protein integrity.
- Thaw frozen bars naturally in the refrigerator overnight or at room temperature for 1–2 hours before enjoying.
| Storage Method | Container Type | Duration | Thawing Instructions |
|---|---|---|---|
| Refrigerator | Airtight container | Up to 1 week | Let sit at room temp for 5–10 mins |
| Freezer | Wrapped + freezer bag | Up to 3 months | Thaw overnight in fridge or 1–2 hrs at room temp |
Avoiding Common Storage Mistakes
- Do not store bars uncovered as they will dry out and lose moisture.
- Avoid stacking bars without separation; use parchment paper between layers to prevent sticking.
- Keep bars away from direct sunlight or heat sources to avoid melting or softening, especially if they contain chocolate or nut butters.
Variations and Flavor Ideas
To keep our collagen protein bars exciting and tailored to different tastes, we can easily experiment with variations and flavor combinations. Here are some creative and delicious ideas that complement the base recipe while adding unique textures and nutritional boosts.
Nut Butter and Seed Combinations
Swap or mix the almond butter with other nut butters like:
- Peanut butter for a richer, classic flavor
- Cashew butter for a creamy, slightly sweet taste
- Sunflower seed butter for a nut-free option
Enhance seeds choices by adding:
- Pumpkin seeds for crunch and zinc
- Hemp seeds for omega-3 fatty acids
- Sesame seeds for a subtle nutty touch
Sweetener Variations
Adjust natural sweeteners to tweak sweetness and flavor profiles:
| Sweetener | Flavor Impact | Best For |
|---|---|---|
| Honey | Floral, mildly sweet | A warm tone, pairs well with cinnamon and nuts |
| Maple syrup | Earthy, richer sweetness | Nutty bars and chocolate additions |
| Agave nectar | Neutral, light sweetness | Vegan-friendly and subtle flavors |
| Coconut sugar | Caramel-like, deep sweetness | Enhancing chocolate or coconut flavor profiles |
Flavor Boosters and Add-Ins
We can customize our bars by folding in ingredients to create new flavor dimensions:
- Dark chocolate chips (70% or higher) for bittersweet richness
- Dried fruits like cranberries, cherries, or apricots for chewy bursts of sweetness
- Shredded coconut for tropical notes and texture
- Espresso powder to bring out a mocha undertone
- Cinnamon or pumpkin spice for warmth and seasonal flair
Superfood Enhancements
Add nutrient-dense ingredients to elevate health benefits:
- Maca powder for energy and hormone balance
- Matcha powder for antioxidants and mild caffeine boost
- Spirulina flakes for a powerful green nutrition punch
Texture Variations
Adjust bar firmness and chewiness by choosing between baking or refrigeration methods:
| Texture Type | Method | Result Description |
|---|---|---|
| Chewy and moist | Refrigerate mixture only | Soft and tender bars with a fudgy bite |
| Firm and crunchy | Bake at 325°F for 12-15 minutes | Slightly crisp edges with a chewy center |
By experimenting with these variations and flavor ideas, we maintain the core benefits of our collagen protein bars while satisfying different palates and nutritional goals. Every batch can become our signature creation by mixing and matching these elements.
Conclusion
Making collagen protein bars at home gives us the freedom to craft a snack that perfectly fits our health goals and taste preferences. With simple ingredients and easy steps, we can enjoy a nutritious boost anytime without relying on store-bought options. By experimenting with flavors and textures, we keep our snack routine exciting and satisfying.
Storing the bars properly ensures they stay fresh and ready whenever we need them. Whether for a quick energy lift or muscle recovery, these bars offer a wholesome, customizable solution that supports our well-being every day. Let’s keep exploring and perfecting our recipes to make the most of collagen’s benefits in a delicious, convenient form.
Frequently Asked Questions
What are collagen protein bars, and why are they popular?
Collagen protein bars are nutritious snacks that support skin, joint, and muscle health. They’ve gained popularity for being convenient, tasty, and beneficial for overall wellness.
Why should I make collagen protein bars at home?
Homemade bars allow you to control ingredients, avoid additives, customize flavors, and cater to dietary needs, ensuring a healthier and personalized snack.
What are the main dry ingredients used?
The dry ingredients typically include collagen protein powder, rolled oats, almond flour, chia seeds, flaxseed meal, a natural sweetener, salt, and cinnamon.
Which wet ingredients are needed for the bars?
Wet ingredients generally include almond butter, honey or maple syrup, vanilla extract, and almond milk to bind and add flavor to the bars.
Can I add extras to customize the flavor?
Yes, you can add dark chocolate chips, chopped nuts, dried cranberries, shredded coconut, or protein-packed seeds to enhance texture and taste.
What essential equipment is required to make collagen bars?
You’ll need mixing bowls, measuring cups, spoons, a spatula or wooden spoon, an 8×8 inch baking pan lined with parchment paper, and optionally a food processor or blender.
How do I prepare ingredients to ensure the bars turn out well?
Measure ingredients precisely and organize them (mise en place) before mixing to maintain correct texture and flavor throughout the process.
Should I bake or refrigerate collagen protein bars?
Refrigerate bars for a chewy texture or bake them for a firmer, more bar-like consistency depending on your preference.
How should I store homemade collagen protein bars?
Store in an airtight container in the fridge for up to one week or freeze wrapped tightly for up to three months to maintain freshness.
What common storage mistakes should I avoid?
Don’t store bars uncovered or stack them without separation, as this can cause them to dry out or stick together.
Are there ways to vary the recipe?
Yes, swap nut butters, change seed types, adjust natural sweeteners, or add superfood boosters to create unique flavors and textures.
Can these bars serve as workout snacks?
Absolutely, collagen protein bars make excellent pre or post-workout snacks due to their protein content and energy-supporting ingredients.