
Cocoons are a delightful treat that combines crispy textures with rich, sweet flavors. Originating from traditional Asian desserts, these bite-sized delights have won hearts worldwide for their unique shape and satisfying crunch. They’re perfect for sharing at gatherings or enjoying as a special snack anytime.
Ingredients
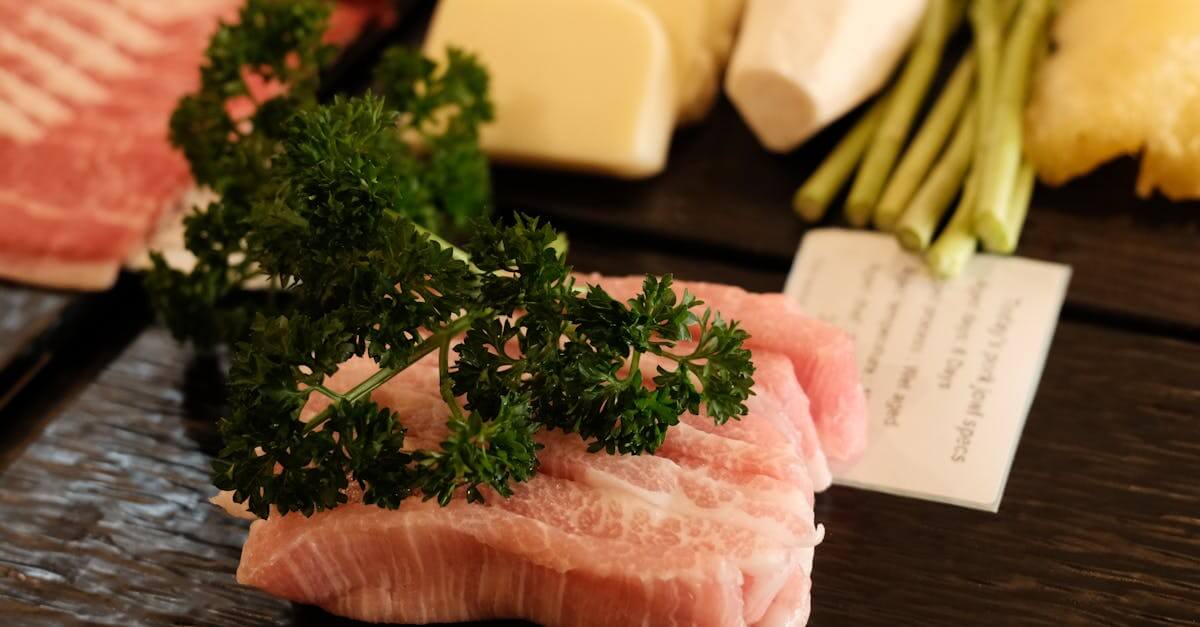
To craft the perfect Cocoons Recipe, we start with a blend of simple yet carefully chosen ingredients. These components come together to create the iconic crispy texture and rich sweet flavor we all love.
Main Ingredients
- Rice flour – 1 cup, provides the crisp base texture
- Tapioca starch – 1/2 cup, adds chewiness and elasticity
- Sugar – 3/4 cup, for the ideal sweetness level
- Water – 1 cup, to form the batter
- Coconut milk – 1/2 cup, enhances richness and tropical flavor
- Salt – 1/4 teaspoon, balances sweetness
Optional Add-Ins
- Sesame seeds – 2 tablespoons, for subtle nuttiness and crunch
- Vanilla extract – 1 teaspoon, introduces warm aromatic notes
- Grated coconut – 1/4 cup, adds texture and extra coconut essence
- Pandan juice – 2 tablespoons, for natural color and fragrance
| Ingredient | Quantity | Purpose |
|---|---|---|
| Rice flour | 1 cup | Crisp base |
| Tapioca starch | 1/2 cup | Chewiness and elasticity |
| Sugar | 3/4 cup | Sweetness |
| Water | 1 cup | Batter consistency |
| Coconut milk | 1/2 cup | Flavor richness |
| Salt | 1/4 teaspoon | Balance flavor |
| Sesame seeds | 2 tablespoons* | Optional nuttiness and crunch |
| Vanilla extract | 1 teaspoon* | Optional aroma |
| Grated coconut | 1/4 cup* | Optional texture and flavor |
| Pandan juice | 2 tablespoons* | Optional color and fragrance |
*Optional ingredients elevate the overall flavor profile and texture, allowing us to customize our cocoons to suit any taste preference.
Equipment Needed
To create the perfect Cocoons, having the right equipment is essential for achieving the signature crispy texture and consistent shape. Let’s break down the key tools we need:
- Mixing Bowls
We use medium and large mixing bowls to combine ingredients thoroughly and adjust batter consistency with ease.
- Whisk
A sturdy whisk helps us blend the rice flour, tapioca starch, coconut milk, and water into a smooth batter without lumps.
- Measuring Cups and Spoons
Precise measurements guarantee the balanced texture and flavor of our Cocoons.
- Spoon or Ladle
For portioning the batter consistently, we rely on a tablespoon or small ladle to help form even shapes.
- Non-stick Pan or Waffle Iron with Honeycomb Pattern
To create the iconic shape and crispiness, a specialized pan with indentations resembling a honeycomb is ideal. If unavailable, a non-stick pan combined with skillful shaping works as well.
- Spatula
We use a heat-resistant spatula to carefully flip or remove the cocoons without breaking them.
- Cooling Rack
Once cooked, placing cocoons on a cooling rack allows air circulation that keeps them crispy.
| Equipment | Purpose |
|---|---|
| Mixing Bowls | Combining ingredients and adjusting batter |
| Whisk | Blending batter smoothly |
| Measuring Cups/Spoons | Accurate ingredient measurement |
| Spoon/Ladle | Portioning batter evenly |
| Non-stick Pan/Waffle Iron | Shaping and cooking cocoons crisply |
| Spatula | Flipping and handling delicately |
| Cooling Rack | Maintaining crisp texture after cooking |
Prep Work
Before we dive into making the crispy and flavorful cocoons, proper preparation is essential. This step ensures smooth execution and helps achieve the perfect texture and shape every time.
Preparing the Ingredients
To craft our cocoons, we begin by measuring and prepping each ingredient with precision:
- Rice flour: 1 cup, sifted to remove lumps for a smooth batter.
- Tapioca starch: ¼ cup, this adds chewiness.
- Sugar: ½ cup, granulated for sweetness.
- Water: 1 cup, room temperature to blend easily.
- Coconut milk: ½ cup, full-fat for richness.
- Salt: ¼ teaspoon, to balance the flavors.
Optional flavor enhancers:
- Sesame seeds: 1 tablespoon, toasted to boost aroma.
- Vanilla extract: 1 teaspoon, for subtle warmth.
- Grated coconut: 2 tablespoons, fresh or dried for texture.
- Pandan juice: 2 tablespoons, for a fresh herbal note and vibrant color.
| Ingredient | Quantity | Preparation Notes |
|---|---|---|
| Rice flour | 1 cup | Sifted |
| Tapioca starch | ¼ cup | No special prep |
| Sugar | ½ cup | Granulated |
| Water | 1 cup | Room temperature |
| Coconut milk | ½ cup | Full-fat |
| Salt | ¼ teaspoon | To balance flavor |
| Sesame seeds (opt.) | 1 tablespoon | Toasted |
| Vanilla extract(opt.) | 1 teaspoon | Ready to add |
| Grated coconut(opt.) | 2 tablespoons | Fresh or dried |
| Pandan juice(opt.) | 2 tablespoons | Freshly squeezed |
Preheating and Setup
To guarantee our cocoons develop that signature golden crispiness and honeycomb texture, proper heating and station setup are key:
- Preheat your non-stick pan or waffle iron with a honeycomb pattern on medium heat for about 5 minutes. A steady moderate heat allows even cooking without burning.
- Arrange our tools within reach: whisk, ladle or spoon, heat-resistant spatula, mixing bowls, and cooling rack.
- Lightly grease the pan or iron with a thin layer of oil to prevent sticking yet maintain crisp edges.
- Prepare the cooling rack nearby to transfer cooked cocoons immediately and preserve their crunch.
- Keep a clean cloth or paper towels at hand for quick wipe-downs between batches.
Instructions
Follow these precise steps to create crispy and flavorful Cocoons that deliver the perfect blend of crunch and richness with every bite.
Step 1: Making the Base Mixture
- In a large mixing bowl, combine 1 cup rice flour and 1/4 cup tapioca starch for a balanced crisp and chewiness.
- Add 1/3 cup sugar and a pinch of salt to enhance flavor.
- Gradually pour in 3/4 cup water while whisking to avoid lumps.
- Stir in 1/2 cup coconut milk for a creamy richness that defines the taste.
- Optionally include 1 teaspoon vanilla extract, 1 tablespoon grated coconut, or 1 tablespoon pandan juice for enhanced aroma and flavor.
Tip: Whisk the mixture until smooth and slightly thick but still pourable for even cooking.
Step 2: Shaping the Cocoons
- Preheat your non-stick pan or waffle iron with a honeycomb pattern on medium heat.
- Lightly grease the surface with a small amount of oil to prevent sticking.
- Using a spoon or ladle, pour a small portion of batter evenly into each honeycomb indentation.
- Use the back of the spoon to gently spread and shape the batter to form thin, even layers.
Note: The batter amount per section should be just enough to fill the indentations without overflowing.
Step 3: Cooking or Baking
- Cook the cocoons for 2-3 minutes until the edges turn golden brown and crisp.
- Carefully flip each cocoon using a heat-resistant spatula.
- Cook for an additional 1-2 minutes on the other side to achieve uniform crispiness.
- If using a waffle iron, close the lid gently and cook for about 3 minutes before opening.
Step 4: Cooling and Setting
- Transfer the cooked cocoons immediately to a cooling rack.
- Allow them to cool for 5-10 minutes; this helps maintain crisp texture.
- Avoid stacking to prevent steam buildup which softens the cocoons.
| Step | Key Actions | Time | Temperature |
|---|---|---|---|
| Making Mixture | Combine ingredients, whisk smooth | 5 minutes | Room temperature |
| Shaping | Pour batter in honeycomb indentations | 3 minutes | Medium heat |
| Cooking | Cook both sides until golden and crisp | 4-5 minutes | Medium heat |
| Cooling | Transfer to rack, cool completely | 5-10 minutes | Room temperature |
Remember consistent heat and accurate timing are crucial for authentic Cocoons with the ideal crunch and flavor.
Serving Suggestions
To elevate our Cocoons Recipe experience, we recommend serving these crispy delights in ways that highlight their texture and flavor while complementing their natural sweetness.
1. Classic Presentation
Serve cocoons simply on a decorative platter. Their golden honeycomb shapes create visual appeal that invites guests to enjoy their delicate crunch right away.
2. Accompanied with Dips
Pair cocoons with dips that contrast or amplify their flavor:
- Coconut cream sauce for added richness
- Mango chutney to introduce a sweet and tangy note
- Spiced chocolate sauce for a touch of indulgence
3. Garnished with Toppings
Add texture and flavor with:
- Toasted sesame seeds sprinkled on top
- A dusting of powdered sugar or cinnamon
- A drizzle of honey or maple syrup
4. With Hot Beverages
Serve alongside:
- Freshly brewed green tea to balance sweetness
- Coffee for a satisfying combination of flavors
- Aromatic herbal teas like lemongrass or pandan for subtle complements
| Pairing Type | Suggested Accompaniments | Flavor Profile |
|---|---|---|
| Dips | Coconut cream, mango chutney, chocolate | Creamy, sweet, tangy, indulgent |
| Toppings | Toasted sesame seeds, powdered sugar, honey | Nutty, sweet, warm |
| Beverages | Green tea, coffee, herbal teas | Refreshing, bold, aromatic |
5. As Part of a Dessert Platter
Incorporate cocoons alongside tropical fruits such as sliced mango, pineapple, or lychee, and a scoop of coconut ice cream to create a vibrant and refreshing dessert spread.
“Serving cocoons fresh and crisp enhances their delightful crunch and allows their rich, sweet flavors to shine,” ensuring an unforgettable treat for any occasion.
By experimenting with these serving methods, we turn each bite of our Cocoons Recipe into an exciting sensory experience, perfect for gatherings or a special personal indulgence.
Storage and Make-Ahead Tips
To maintain the signature crispy texture and rich flavor of our Cocoons recipe, proper storage and make-ahead strategies are essential. Here are our best tips to keep your cocoons fresh and delicious:
Storing Cocoons
- Allow the cocoons to cool completely on a cooling rack before storing; this prevents moisture buildup that can cause sogginess.
- Place the cocoons in an airtight container to preserve their crispiness.
- Store the container at room temperature in a cool, dry place away from direct sunlight.
- For optimal freshness, consume stored cocoons within 2 to 3 days.
Freezing Cocoons
- If you want to keep cocoons longer, freeze them for up to 1 month.
- Arrange cocoons in a single layer on a baking sheet and freeze until solid to prevent sticking.
- Transfer frozen cocoons to a freezer-safe ziplock bag or container with minimal air.
- To reheat, bake them in a preheated oven at 350°F (175°C) for 5-7 minutes until crisp.
Make-Ahead Preparation
- Prepare the batter in advance and store it in the refrigerator for up to 24 hours. Stir well before use.
- Cooked cocoons can be made a day ahead and reheated gently in the oven to regain their crunch.
- If adding garnishes or dips, prepare them fresh to accompany the cocoons at serving time for maximum flavor impact.
| Storage Method | Duration | Storage Condition | Reheating Instructions |
|---|---|---|---|
| Room Temperature | 2-3 days | Airtight container | Serve at room temp or briefly warm |
| Refrigeration | Not recommended | Can cause sogginess | N/A |
| Freezing | Up to 1 month | Freeze solid in single layer | Bake at 350°F (175°C) for 5-7 min |
| Batter Storage | Up to 24 hours | Refrigerated, covered | Stir well before cooking |
Pro Tip: Always cool your cocoons fully before storing to lock in the delicate crunch and lightly crisped edges that define this treat. Moisture is the enemy of crispiness!
By following these Storage and Make-Ahead Tips, we ensure every bite of our crispy cocoons stays fresh and flavorful, ready whenever you want to enjoy this delightful snack.
Conclusion
Mastering the art of making cocoons opens up a world of delightful textures and flavors that are sure to impress. With the right ingredients, tools, and techniques, we can create these crispy, sweet treats that bring a touch of tradition and fun to any occasion.
By experimenting with flavors and serving ideas, we make each batch uniquely our own, perfect for sharing or savoring solo. Whether for a casual snack or a festive gathering, cocoons offer a satisfying crunch and rich taste that never disappoint.
Frequently Asked Questions
What are cocoons, and where do they originate from?
Cocoons are crispy, bite-sized snacks with rich, sweet flavors, originating from traditional Asian desserts. They are known for their unique shape and satisfying crunch.
What are the main ingredients needed to make cocoons?
The key ingredients are rice flour, tapioca starch, sugar, water, coconut milk, and salt. Optional additions include sesame seeds, vanilla extract, grated coconut, and pandan juice.
What equipment is essential for making cocoons?
You’ll need mixing bowls, a whisk, measuring cups and spoons, a spoon or ladle, a non-stick pan or waffle iron with honeycomb pattern, a heat-resistant spatula, and a cooling rack.
How do you achieve the perfect crispy texture in cocoons?
Consistent heat during cooking, precise ingredient measurements, a non-stick honeycomb pan, and cooling the cocoons on a rack help maintain their crispiness.
Can I customize the flavor of my cocoons?
Yes. Adding ingredients like sesame seeds, vanilla extract, grated coconut, or pandan juice can enhance and customize the taste to your preference.
How should I store cocoons to keep them fresh?
Store completely cooled cocoons in an airtight container at room temperature for 2-3 days. For longer storage, freeze them for up to a month following proper reheating instructions.
Can the batter be prepared in advance?
Yes. The batter can be made ahead of time and stored in the refrigerator. Make sure to stir well before using.
What are some popular ways to serve cocoons?
Serve cocoons on a decorative platter with dips like coconut cream or mango chutney. They pair well with hot drinks and can be part of a dessert platter with tropical fruits and coconut ice cream.