
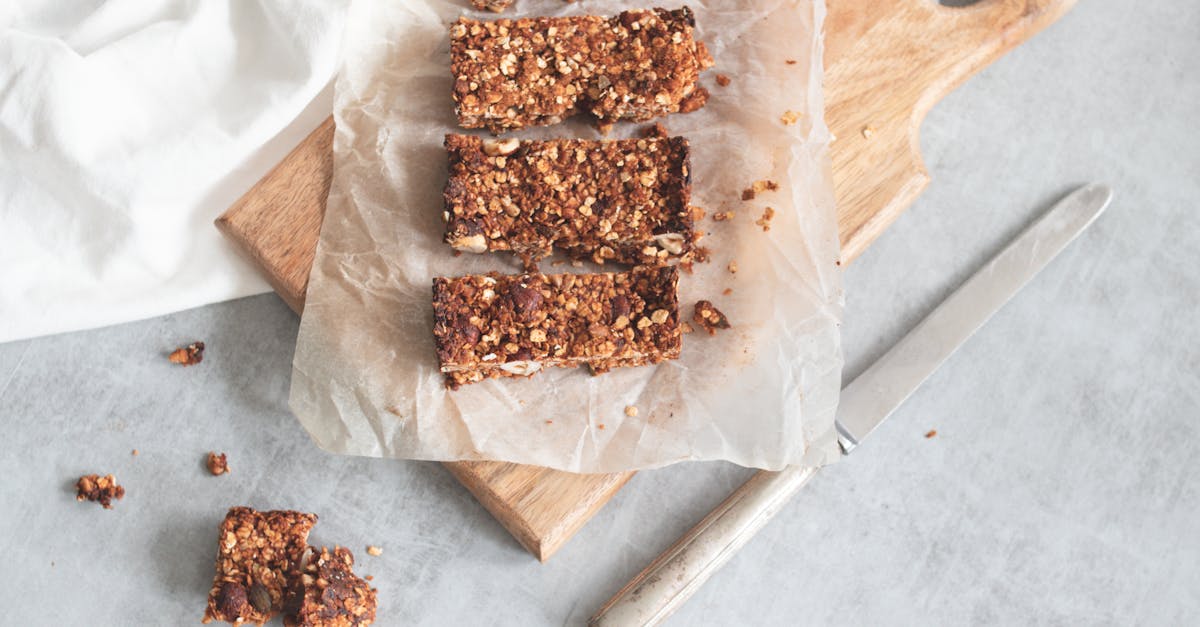
Coconut oil gummies are a delicious and healthy treat that’s easy to make at home. Combining the natural benefits of coconut oil with a chewy, flavorful texture, these gummies offer a fun way to enjoy a guilt-free snack. Whether you’re looking for a vegan alternative or a simple homemade candy, this recipe fits the bill perfectly.
We love how versatile coconut oil is, lending a subtle tropical flavor and smooth consistency to these gummies. Plus, making them yourself means you control the ingredients, avoiding artificial additives and excess sugars found in store-bought options. Let’s dive into this simple recipe that turns wholesome ingredients into a tasty, chewy delight everyone will enjoy.
Ingredients
To create our delicious and healthy Coconut Oil Gummy Recipe, we need a combination of core ingredients and optional additions to customize flavor and texture. Below, we break down these essentials and exciting extras for our homemade gummies.
Main Ingredients
These main ingredients form the base of our coconut oil gummies, ensuring a perfect chewy texture and wholesome feel:
- 1/2 cup coconut oil, melted (use virgin for the best flavor and health benefits)
- 1/2 cup fruit juice (choose natural, no sugar added, like orange, apple, or berry)
- 2 tablespoons gelatin (or agar agar for a vegan option)
- 2-3 tablespoons honey or maple syrup (for natural sweetness)
- 1 teaspoon vanilla extract (for depth of flavor)
| Ingredient | Quantity | Notes |
|---|---|---|
| Coconut oil | 1/2 cup | Melted, virgin preferred |
| Fruit juice | 1/2 cup | Natural, no sugar added |
| Gelatin or agar agar | 2 tablespoons | Agar agar for vegan variation |
| Honey or maple syrup | 2-3 tablespoons | Adjust sweetness to taste |
| Vanilla extract | 1 teaspoon | Pure, for flavor enhancement |
Optional Flavorings and Add-ins
We love experimenting with optional flavorings and add-ins to personalize our gummies. Consider these for exciting taste and nutrition boosts:
- 1 tablespoon lemon or lime juice for a citrus zing
- 1/2 teaspoon ground turmeric to add anti-inflammatory benefits and a warm color
- 1/4 cup finely chopped fresh or dried fruit for texture and bursts of flavor
- 1 tablespoon chia seeds or hemp seeds for extra nutrients and crunch
- A few drops of natural food coloring if you want vibrant, eye-catching gummies
Incorporating these ingredients makes our coconut oil gummies uniquely flavorful and packed with added health benefits, while maintaining that chewy homemade candy charm.
Equipment Needed
To make Coconut Oil Gummies with ease and precision, having the right equipment is essential. Here’s what we need to prepare our homemade treats perfectly:
- Silicone Gummy Molds
Flexible molds ensure easy removal of the gummies without sticking or breaking. Choose molds of various shapes for a fun presentation.
- Mixing Bowls
Use heatproof bowls for mixing ingredients, especially since we’ll be melting the virgin coconut oil and dissolving gelatin or agar agar.
- Whisk or Spoon
A whisk helps blend the ingredients smoothly, ensuring even distribution of gelatin or agar agar for the ideal chewy texture.
- Measuring Spoons and Cups
Precise measurements are a must for the right consistency and flavor balance. Have a set ready for dry and liquid ingredients.
- Small Saucepan
We’ll melt the coconut oil and heat the fruit juice with gelatin or agar agar in a saucepan over low to medium heat.
- Dropper or Pipette (Optional)
For filling small molds accurately and minimizing mess, a dropper is very helpful.
- Refrigerator or Freezer Space
After pouring the mixture into molds, we need a cool environment to set the gummies firm and chewy.
Equipment Summary Table
| Equipment | Purpose | Notes |
|---|---|---|
| Silicone gummy molds | Shape and easy removal of gummies | Flexible, non-stick |
| Mixing bowls | Combine and heat ingredients | Heatproof |
| Whisk or spoon | Blend ingredients smoothly | Choose sturdy utensil |
| Measuring spoons/cups | Accurate ingredient measurement | Both dry and liquid sets needed |
| Small saucepan | Melt coconut oil and dissolve gelatin/agar | Use low to medium heat |
| Dropper or pipette | Precise filling of gummy molds (optional) | Useful for small molds or shapes |
| Refrigerator/freezer | Chill gummies quickly to set texture | Standard kitchen appliance |
Using this equipment ensures our coconut oil gummy recipe comes together without hassle resulting in perfectly shaped, delicious, and healthy snacks every time.
Preparation
To create the perfect Coconut Oil Gummies, precise preparation is key. We will carefully measure ingredients and prepare the molds to ensure flawless results each time.
Measuring Ingredients
Accurate measurement guarantees the ideal texture and flavor balance for our coconut oil gummy recipe. We recommend using digital scales and standardized measuring tools for consistency.
| Ingredient | Quantity | Preparation Notes |
|---|---|---|
| Virgin coconut oil | 1/4 cup (60 ml) | Melted gently over low heat |
| Natural fruit juice | 1/2 cup (120 ml) | Choose fresh or 100% juice, no sugar |
| Gelatin or agar agar | 2 tablespoons | Powder form, sifted to avoid lumps |
| Honey or maple syrup | 2 tablespoons | Adjust to taste, for natural sweetness |
| Vanilla extract | 1 teaspoon | Pure extract enhances flavor |
- Use a heatproof mixing bowl to combine ingredients after measuring.
- Melt the virgin coconut oil slowly to maintain its natural benefits.
- Pre-sift gelatin or agar agar to ensure smooth blending without clumps.
- Sweeteners like honey or maple syrup must be measured precisely to avoid altering texture.
Preparing the Mold
Proper mold preparation is essential for clean, easy removal and beautifully shaped gummies.
- Select silicone gummy molds for their flexibility and non-stick qualities.
- Ensure molds are clean and dry before use to prevent sticky gummies.
- Place molds on a flat, stable surface to avoid spills and uneven gummies.
- Optionally, use a small brush to apply a thin layer of melted coconut oil inside each cavity to further prevent sticking.
- Keep molds within reach and prepare a dropper or small spoon for filling to achieve precise, mess-free portions.
By carefully measuring every ingredient and preparing the molds in advance, we set the stage for a smooth, enjoyable gummy-making process that yields consistent, delicious, and healthy results.
Instructions
Follow these step-by-step instructions to craft your own Coconut Oil Gummies with ease and precision. Each phase ensures the perfect chewy texture and rich flavor that define our healthy homemade snack.
Melting the Coconut Oil
- Measure the required amount of virgin coconut oil using a digital scale for accuracy.
- Place the coconut oil into a small saucepan over low heat.
- Gently melt the oil, stirring occasionally until fully liquefied. Avoid high heat to preserve the oil’s nutrients and aroma.
- Once melted, remove from heat and set aside briefly to avoid overheating when mixing with other ingredients.
Mixing Ingredients
- In a heatproof mixing bowl, combine the natural fruit juice and your sweetener choice (honey or maple syrup) using a whisk.
- Slowly sprinkle the gelatin or agar agar over the liquid mixture to prevent lumps. Whisk continuously to incorporate.
- Add the melted coconut oil and vanilla extract to the mix.
- For enhanced flavor and nutrition, optionally add:
- Citrus juice or zest
- Ground turmeric
- Chia or hemp seeds
- Natural food coloring
- Whisk thoroughly to create a smooth, evenly blended mixture ready for molding.
Pouring Into Molds
- Prepare your silicone gummy molds by lightly brushing them with melted coconut oil to ensure easy release.
- Using a dropper or spoon, carefully pour the mixture into each cavity of the molds.
- Fill each cavity evenly to maintain consistent gummy size and thickness.
- Tap the mold tray gently on the countertop to release trapped air bubbles for a smooth gummy surface.
Setting and Cooling
- Place the filled molds into the refrigerator or freezer.
- Refrigerate for at least 1 hour or freeze for 30 minutes until the gummies firm up completely.
- Once set, gently pop the gummies out of the silicone molds.
- Store your Coconut Oil Gummies in an airtight container in the fridge to maintain freshness and texture.
| Step | Time Required | Temperature | Key Tip |
|---|---|---|---|
| Melting Coconut Oil | 2-3 minutes | Low heat | Avoid overheating |
| Mixing Ingredients | 5 minutes | Room temperature | Whisk continuously to prevent lumps |
| Pouring Into Molds | 5-10 minutes | Room temperature | Lightly grease molds with coconut oil |
| Setting and Cooling | 30-60 minutes | Refrigerate/freezer | Tap molds to release air bubbles |
Storage Tips
Proper storage is essential to maintain the freshness, texture, and flavor of our coconut oil gummies. Here are the steps and best practices to keep them perfect for longer:
Refrigeration
- Place the gummies in an airtight container to prevent exposure to moisture and odors.
- Store the container in the refrigerator for up to 2 weeks.
- The cool temperature keeps the gummies firm without hardening them excessively, preserving their signature chewy texture.
Freezing for Longer Storage
- To extend shelf life, arrange the gummies in a single layer on a parchment-lined tray and freeze for 1 hour.
- Transfer frozen gummies into a sealed freezer bag or container with minimal air.
- Properly frozen gummies last up to 3 months and thaw quickly for a fresh texture.
Room Temperature (Short-Term)
- If consuming within a day or two, keep gummies in an airtight container at room temperature away from direct sunlight and heat sources.
- Avoid warm areas as coconut oil melts above 76°F (24°C), which can affect gummy shape and consistency.
Tips to Prevent Stickiness and Clumping
- Dusting the gummies lightly with cornstarch or arrowroot powder before storage can minimize sticking.
- Using silicone molds with a light coating of coconut oil before making gummies also aids in easy release and prevents clumping.
Storage Guidelines Table
| Storage Method | Container Type | Temperature | Shelf Life | Texture Notes |
|---|---|---|---|---|
| Refrigeration | Airtight container | 36-40°F (2-4°C) | Up to 2 weeks | Firm but chewy |
| Freezing | Airtight container | 0°F (-18°C) | Up to 3 months | Maintains texture after thaw |
| Room Temperature | Airtight container | 68-72°F (20-22°C) | 1-2 days | May soften or melt in heat |
Pro Tip: Always bring frozen gummies to room temperature before eating to enjoy their full flavor and texture profile.
By following these Storage Tips, we keep our homemade coconut oil gummies fresh, flavorful, and ready for whenever we crave a tasty and healthy treat.
Variations and Flavor Ideas
To customize our Coconut Oil Gummy Recipe, we can experiment with various flavors and textures. These variations allow us to tailor the gummies to our preferences while maintaining their chewy, healthy charm.
Fruit and Juice Combinations
We can replace or combine different natural fruit juices to diversify the flavor profile. Here are some popular options:
| Fruit Juice | Flavor Profile | Notes |
|---|---|---|
| Pineapple | Sweet and tropical | Adds natural sweetness |
| Pomegranate | Tart and rich | Deep color and antioxidants |
| Orange | Citrusy and bright | Boosts vitamin C content |
| Cherry | Sweet and tangy | Vivid red color |
| Blueberry | Mildly sweet, earthy | Adds antioxidants |
Using fresh-squeezed juice enhances freshness, but 100% pure juice packets work as well.
Herbal and Spice Infusions
We can infuse our gummies with subtle herbal or spice notes to add complexity:
- Ground Turmeric: Adds warmth and a golden hue, plus anti-inflammatory benefits.
- Ginger Powder: Provides a spicy kick and digestive benefits.
- Lavender or Chamomile: Infuse the melted coconut oil with dried flowers for calming flavors.
- Cinnamon: Offers a warming, sweet aroma that pairs well with fruit flavors.
Add 1/4 to 1/2 teaspoon of these per batch to avoid overpowering the base flavor.
Sweetener Alternatives
Instead of honey or maple syrup, consider:
- Agave Syrup: Vegan-friendly and mild.
- Date Syrup: Adds richness and fiber.
- Stevia or Monk Fruit: For lower-calorie options—adjust quantities carefully.
Texture Enhancements
Adding seeds or fruit pieces can enhance texture and nutrition:
- Chia Seeds: Add a slight crunch and boost omega-3 fatty acids. Use 1 tablespoon per batch.
- Hemp Seeds: Nutty flavor and protein boost.
- Finely Chopped Fresh Fruit: Small bits of strawberry or kiwi work well.
Natural Food Coloring
Sometimes we want more vibrant gummies. Use natural sources like:
- Beetroot powder for a red hue.
- Spirulina powder for green coloring.
- Turmeric for yellow shades.
Mix 1/4 teaspoon into the liquid mixture before setting.
Flavor and Add-In Summary Table
| Variation Type | Examples | Amount / Notes |
|---|---|---|
| Fruit Juices | Pineapple, Pomegranate, Orange | Replace base juice 1:1 |
| Herbs and Spices | Turmeric, Ginger, Cinnamon | 1/4 – 1/2 tsp per batch |
| Sweeteners | Agave, Date Syrup, Stevia | Adjust sweetness level to taste |
| Texture Add-Ins | Chia seeds, Hemp seeds, Chopped fruit | 1 tbsp seeds, small fruit pieces |
| Natural Food Coloring | Beetroot, Spirulina, Turmeric | 1/4 tsp mixed in liquid |
By exploring these variations and flavor ideas, we keep our coconut oil gummies exciting and aligned with our personal health goals.
Conclusion
Making coconut oil gummies at home opens up a world of delicious and healthy snacking options. With full control over ingredients and flavors, we can create treats that perfectly suit our tastes and dietary needs.
The process is straightforward, and having the right tools ensures consistent, high-quality results every time. Plus, proper storage keeps our gummies fresh and enjoyable for days.
By experimenting with different flavor combinations and add-ins, we can keep these gummies exciting and nutritious. Let’s embrace this simple recipe to enjoy guilt-free, homemade snacks anytime.
Frequently Asked Questions
What are coconut oil gummies?
Coconut oil gummies are chewy, homemade treats made with virgin coconut oil, natural fruit juice, and gelatin or agar agar. They offer a healthy, vegan-friendly snack option without artificial additives or excessive sugar.
What ingredients do I need to make coconut oil gummies?
You’ll need melted virgin coconut oil, natural fruit juice, gelatin or agar agar (for vegans), a sweetener like honey or maple syrup, and vanilla extract. Optional add-ins include citrus juice, turmeric, chia seeds, and natural food coloring.
Can I make coconut oil gummies vegan?
Yes! Use agar agar instead of gelatin to make vegan coconut oil gummies that are just as tasty and have a great chewy texture.
What equipment is necessary for making these gummies?
Essential tools include silicone gummy molds, heatproof mixing bowls, a whisk or spoon, measuring cups and spoons, a small saucepan, and optional droppers for precise filling. You’ll also need fridge or freezer space for setting.
How do I prevent the gummies from sticking to the molds?
Lightly grease silicone molds with melted coconut oil before pouring your gummy mixture to ensure easy removal. Also, make sure molds are clean and dry before use.
How should I store coconut oil gummies?
Store gummies in airtight containers. Refrigerate for up to 2 weeks or freeze for longer storage. For short-term storage, keep them in a cool, dry place and dust with cornstarch to avoid stickiness.
How long does it take for the gummies to set?
Typically, gummies set in the refrigerator within 1 to 2 hours. Freezing can speed up this process to about 30 minutes. Proper setting ensures the perfect chewy texture.
Can I customize the flavor of the gummies?
Absolutely! Use different fruit juices, spices, herbs, or sweeteners to tailor the flavor. Adding ingredients like turmeric or seeds can boost nutrition and create unique taste combinations.
Are coconut oil gummies healthy?
Yes, homemade coconut oil gummies use natural ingredients without artificial additives. They provide healthy fats from coconut oil and can be customized to include nutrient-rich add-ins, making them a guilt-free snack.
Why is precise measurement important when making gummies?
Accurate measuring ensures the right texture and flavor balance. Using digital scales and measuring tools helps avoid lumps and guarantees consistent results with every batch.