
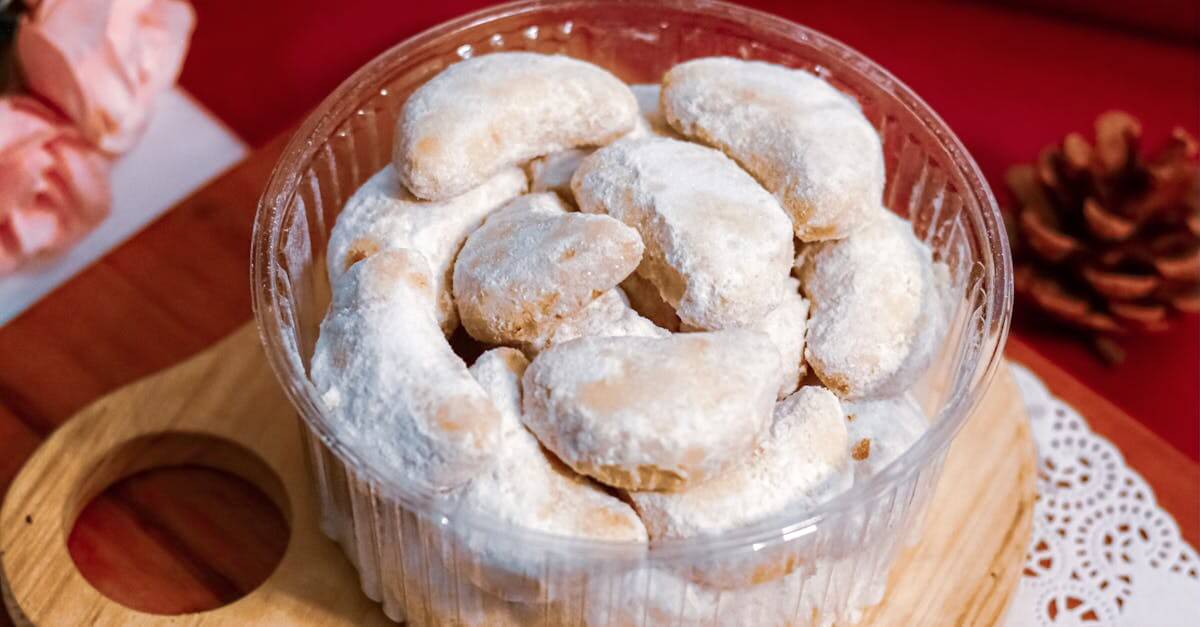
A clear glaze is a versatile finishing touch that elevates both sweet and savory dishes with a glossy, professional look. Whether we’re glazing fruit tarts, pastries, or even roasted vegetables, this simple recipe adds that perfect sheen without altering the flavors. It’s an essential technique for anyone looking to enhance presentation effortlessly.
We love how quick and easy it is to whip up a clear glaze using just a few basic ingredients. Once you master this recipe, you’ll find yourself reaching for it to add shine and moisture to a variety of dishes. Let’s dive into making a clear glaze that’s both beautiful and functional in the kitchen.
Ingredients
To create our Clear Glaze Recipe, we focus on a few simple yet essential ingredients that ensure a transparent finish and a glossy sheen without altering the flavor profile of our dish. Here’s what we need:
- Water: 1 cup, to dissolve and blend the ingredients smoothly.
- Granulated Sugar: ½ cup, to add subtle sweetness and aid in achieving a clear, shiny surface.
- Cornstarch: 1 tablespoon, for thickening the glaze without cloudiness.
- Lemon Juice: 1 teaspoon, to add a hint of acidity that balances the sweetness and enhances the glaze’s clarity.
- Light Corn Syrup: 2 tablespoons, to prevent crystallization and maintain a smooth texture.
| Ingredient | Quantity | Purpose |
|---|---|---|
| Water | 1 cup | Base liquid for dissolving |
| Granulated Sugar | ½ cup | Sweetness and shine |
| Cornstarch | 1 tablespoon | Thickening agent |
| Lemon Juice | 1 teaspoon | Balances sweetness and clarity |
| Light Corn Syrup | 2 tablespoons | Prevents crystallization |
These ingredients combine to achieve a glaze that is crystal clear and versatile, perfect for enhancing the presentation of fruit tarts, pastries, and even savory dishes like roasted meats and vegetables. Our choice of cornstarch over flour ensures the glaze remains transparent rather than cloudy, maintaining that desirable gloss. Similarly, using light corn syrup helps us preserve a smooth finish by inhibiting sugar crystals from forming.
Equipment Needed
To achieve the perfect clear glaze texture and shine, having the right equipment at hand is essential. We recommend gathering the following tools before beginning the recipe:
- Medium Saucepan: For gently heating and thickening the glaze mixture. Choose a heavy-bottomed pan to ensure even heat distribution.
- Whisk: To thoroughly blend the cornstarch and sugar into the water, preventing lumps and promoting smoothness.
- Measuring Cups and Spoons: Accuracy is key for the proportions—use precise measuring tools for water, sugar, cornstarch, lemon juice, and corn syrup.
- Heatproof Bowl: For mixing ingredients if preferring to combine elements before heating.
- Fine Mesh Strainer (optional): To strain the glaze after cooking for an ultra-smooth finish, removing any residual bits.
- Pastry Brush: Ideal for applying the glaze evenly over fruits, pastries, or meats without disturbing their arrangement.
- Wooden Spoon or Silicone Spatula: For stirring the glaze gently to avoid breaking down its clarity.
| Equipment | Purpose |
|---|---|
| Medium Saucepan | Even heating and cooking the glaze |
| Whisk | Blending ingredients smoothly |
| Measuring Cups/Spoons | Precise ingredient measurement |
| Heatproof Bowl | Pre-mixing glaze components |
| Fine Mesh Strainer | Straining for smooth texture |
| Pastry Brush | Applying glaze evenly |
| Wooden Spoon/Spatula | Gentle stirring during cooking |
Prep Work
Before we start making our clear glaze, proper Prep Work is essential to achieve a flawless and glossy finish. This step ensures all ingredients and tools are ready for smooth, efficient cooking.
Preparing the Ingredients
We begin by gathering the five key ingredients needed for the clear glaze recipe. Each plays a vital role:
- Water (1 cup) – serves as the base for dissolving all ingredients evenly.
- Granulated sugar (½ cup) – provides a subtle sweetness and natural brilliance.
- Cornstarch (1 tablespoon) – thickens the glaze without cloudiness, maintaining clarity.
- Lemon juice (1 teaspoon) – balances sweetness and enhances the shine and clarity.
- Light corn syrup (2 tablespoons) – prevents crystallization and ensures a smooth, glossy texture.
For the best results:
- Use fresh lemon juice rather than bottled for a brighter finish.
- Sift cornstarch to eliminate lumps, ensuring a seamless texture.
- Choose light corn syrup over dark for a purely clear glaze without tint.
Measuring and Organizing
Accurate measurements are critical in obtaining the perfect clear glaze texture and finish. To stay organized:
| Ingredient | Measurement | Preparation Notes |
|---|---|---|
| Water | 1 cup | Room temperature |
| Granulated sugar | ½ cup | Use fine sugar if possible |
| Cornstarch | 1 tablespoon | Sifted to remove lumps |
| Lemon juice | 1 teaspoon | Freshly squeezed preferred |
| Light corn syrup | 2 tablespoons | Use light, not dark |
Before we begin cooking:
- Measure each ingredient precisely using measuring cups and spoons.
- Place each in small bowls or a heatproof bowl to streamline the mixing process.
- Have your medium saucepan, whisk, wooden spoon or silicone spatula, and fine mesh strainer within reach.
Instructions
Follow these clear, precise steps to craft the perfect clear glaze. Mastering this process guarantees a glossy finish that enhances any dish.
Making the Clear Glaze
- Prepare Ingredients: Measure all ingredients precisely before starting to ensure consistency.
- Combine Dry Ingredients: In a heatproof bowl, sift 1 tablespoon of cornstarch to avoid lumps. Add ½ cup granulated sugar and whisk together.
- Dissolve Cornstarch: Pour 1 cup of water into a medium saucepan. Slowly whisk in the dry mix until cornstarch and sugar dissolve. This ensures a smooth base with no residue.
- Add Sweeteners & Acid: Stir in 2 tablespoons of light corn syrup and 1 teaspoon fresh lemon juice. The corn syrup prevents crystallization while lemon juice brightens and maintains a clear finish.
- Cook the Mixture: Place the saucepan over medium heat. Stir constantly with a wooden spoon or silicone spatula. As the mixture heats, it will thicken and become translucent—this takes about 5 to 7 minutes. Avoid boiling vigorously to keep clarity.
- Strain for Smoothness: Once thickened, remove from heat. Pour the glaze through a fine mesh strainer into a clean bowl to remove any lumps or impurities.
- Cool Slightly: Let the glaze cool just until warm. If it cools too much, it will be difficult to apply evenly.
Adjusting Consistency
The clear glaze consistency depends on the final use. Here’s how to adjust:
| Desired Consistency | Adjustment Method | Notes |
|---|---|---|
| Thicker glaze | Cook 1-2 minutes longer | Use for dripping over tarts or pastries. |
| Thinner glaze | Add a tablespoon of warm water | Ideal for brushing over delicate fruit. |
| Medium consistency | Follow base recipe exactly | Perfect for glazing vegetables or meats. |
Tip: If the glaze thickens too much after cooling, gently rewarm and whisk in small amounts of water until you reach the desired shine and texture.
By following these steps, we achieve a crystal-clear, glossy glaze that enhances presentation without altering flavor or texture.
Tips for Using Clear Glaze
Using a clear glaze effectively can elevate the presentation and texture of our dishes. Here are essential tips to apply it perfectly every time:
1. Apply While Warm for Best Adhesion
Brush the clear glaze onto fruit tarts, pastries, or savory dishes while still warm. This helps the glaze adhere smoothly and evenly, creating a glossy, moisture-locking layer.
2. Use a Soft Pastry Brush
A soft pastry brush ensures gentle, even application without disturbing delicate toppings or crusts. Avoid stiff brushes which may tear or disrupt the surface.
3. Adjust Thickness Based on Use
For different applications, tweak the glaze thickness by varying the cooking time or adding a bit more water:
| Application | Consistency | Glaze Adjustment |
|---|---|---|
| Fruit tarts | Thick and shiny | Cook slightly longer |
| Delicate fruit | Thin and light | Add water, cook less |
| Roasted vegetables | Medium coating | Standard recipe |
4. Work Quickly but Gently
The glaze sets fast as it cools. Work with confidence but gentle strokes to achieve an even layer before the glaze solidifies.
5. Store Leftover Glaze Properly
Keep any unused glaze in an airtight container in the refrigerator for up to 3 days. Reheat gently on low heat before reuse, whisking to restore smoothness.
6. Avoid Over-Heating
Overcooking the glaze can cause it to darken or lose clarity. Maintain a gentle simmer and remove from heat immediately once it thickens and becomes clear.
7. Strain for Crystal-Clear Finish
Always strain the glaze through a fine mesh sieve to remove lumps or undissolved particles. This step guarantees a perfectly smooth and transparent coating.
8. Apply Multiple Thin Layers for Extra Shine
For a more intense glossy look, apply 2-3 thin coats of the glaze, allowing each layer to set slightly before the next application.
9. Pair with Complementary Ingredients
To maximize flavor harmony, use the clear glaze on fruits and vegetables that benefit from a subtle sweet sheen, such as berries, apples, or roasted carrots.
“A perfect clear glaze is the secret ingredient that subtly transforms our dishes into visually stunning and delectable creations.“
Employing these tips ensures the clear glaze enhances presentation and texture without overpowering the natural flavors.
Storage and Shelf Life
Proper storage is essential to maintain the clarity and shine of our clear glaze while preserving its freshness and texture. After preparing the glaze, allow it to cool to room temperature before storing. We recommend transferring it into an airtight container to prevent moisture and odors from affecting its quality.
Refrigeration Guidelines
- Store the glaze in the refrigerator at a consistent temperature of 35°F to 40°F (2°C to 4°C).
- Seal the container tightly to avoid any contamination.
- Before using, gently warm the glaze to return it to a spreadable consistency. Avoid overheating to preserve its smooth texture and gloss.
Shelf Life Overview
| Storage Method | Duration | Notes |
|---|---|---|
| Refrigerated | Up to 1 week | Keep covered tightly to maintain freshness |
| Room Temperature | Not recommended | Risk of microbial growth and texture loss |
| Frozen | Up to 3 months | Use airtight, freezer-safe containers; thaw slowly in fridge |
Tip: To prevent texture separation or crystallization, stir gently after warming the glaze before applying it.
Signs of Spoilage
We should always check for the following indicators before use:
- Cloudiness or discoloration in the glaze
- Off or sour smell
- Thickened or grainy texture
- Mold growth on the surface or container walls
If any of these occur, it is best to discard the glaze and prepare a fresh batch to ensure the best results in appearance and flavor.
By following these storage and shelf life recommendations, we maximize the effectiveness of our clear glaze recipe and keep it ready for enhancing both sweet and savory dishes whenever needed.
Variations of Clear Glaze
Exploring variations of clear glaze allows us to customize its application for different culinary needs while maintaining that signature glossy, transparent finish. Here are some popular adaptations and how to make each one:
1. Fruit-Infused Clear Glaze
To highlight fresh fruit presentations, we can add a subtle fruity essence without sacrificing clarity:
- Use ½ cup fruit juice (apple, grape, or white cranberry) instead of water.
- Keep the original sugar and cornstarch quantities.
- Add a pinch of citric acid or a squeeze of lemon juice to preserve brightness and prevent browning.
- Cook gently to avoid caramelization that can darken the glaze.
This fruit-infused clear glaze enhances both shine and flavor, perfect for fruit tarts and cakes.
2. Savory Herb-Infused Glaze
For savory dishes like roasted vegetables or meats, a herb-infused glaze adds a nuanced finish while preserving transparency:
- Substitute water with a light vegetable stock or diluted white wine (½ cup).
- Add finely chopped fresh herbs such as thyme or rosemary during the cooking process.
- Strain the glaze thoroughly to remove herb particles.
- Omit sugar or reduce it to 1 tablespoon to keep a balanced savory note.
This adaptation gives a subtle herbal aroma and enhances the dish’s natural juices without overshadowing flavors.
3. Vegan Gelatin-Free Glaze
Some recipes call for a clear glaze without corn syrup or gelatin to suit vegan diets:
- Use 3 tablespoons of agar-agar powder as a natural thickener instead of cornstarch.
- Dissolve agar-agar in the water and bring to a boil to activate its gelling properties.
- Replace corn syrup with maple syrup or agave nectar in equal quantity.
- Add lemon juice as usual for clarity.
This method produces a vegetarian-friendly, glossy glaze ideal for a broad range of dishes.
4. Extra-Thick Glaze for Pastries
When a thicker coating is desired for pastries or layered desserts:
- Increase cornstarch to 2 tablespoons.
- Reduce water to ¾ cup for a denser solution.
- Cook the mixture slightly longer, stirring continuously, until it thickens visibly.
- Apply in multiple thin layers for extra shine and durability.
This thicker glaze provides a protective seal and a more pronounced sheen.
Ingredient Variation Overview
| Variation | Liquid Base | Thickener | Sweetener | Additional Notes |
|---|---|---|---|---|
| Fruit-Infused Glaze | Fruit juice (½ cup) | Cornstarch (1 Tbsp) | Granulated sugar (½ cup) | Add lemon juice; avoid caramelization |
| Savory Herb-Infused Glaze | Vegetable stock or white wine (½ cup) | Cornstarch (1 Tbsp) | Reduced sugar (1 Tbsp) | Add herbs, strain well |
| Vegan Gelatin-Free Glaze | Water (1 cup) | Agar-agar powder (3 Tbsp) | Maple syrup or agave nectar (2 Tbsp) | Boil agar-agar; substitute sweetener |
| Extra-Thick Glaze | Water (¾ cup) | Cornstarch (2 Tbsp) | Granulated sugar (½ cup) | Cook longer; apply multiple layers |
“When experimenting with clear glaze variations, the key is to maintain balance between shine, clarity, and subtle flavor enhancement.”
By mastering these versions, we can expand the versatility of our glaze to suit sweet or savory dishes, dietary preferences, and finishing textures seamlessly.
Conclusion
Mastering a clear glaze opens up endless possibilities for elevating our dishes with a professional touch. Its transparency and shine enhance presentation while keeping flavors intact, making it a versatile tool in any kitchen.
By following the recipe and tips we’ve shared, we can confidently create a flawless glaze every time. Whether for sweet or savory creations, this simple technique adds that perfect finishing touch that impresses both visually and gastronomically.
Frequently Asked Questions
What is a clear glaze and why is it used in cooking?
A clear glaze is a transparent, glossy finish applied to dishes to enhance their appearance and add moisture without altering flavor. It’s commonly used on both sweet and savory foods like fruit tarts and roasted meats.
What ingredients are needed to make a clear glaze?
Key ingredients include water, granulated sugar, cornstarch, lemon juice, and light corn syrup. These combine to create a shiny, smooth, and crystal-clear glaze.
Why is cornstarch preferred over flour for clear glaze?
Cornstarch thickens the glaze without making it cloudy, maintaining its transparent and polished look, while flour can cause cloudiness.
How do I apply the clear glaze evenly?
Use a soft pastry brush to gently coat dishes with the glaze while it’s still warm, ensuring smooth, even coverage before it sets.
Can I store leftover clear glaze and for how long?
Yes, store cooled glaze in an airtight container in the refrigerator for up to one week. It can be frozen for up to three months.
What equipment do I need to make the perfect clear glaze?
You’ll need a medium saucepan, whisk, measuring cups and spoons, a heatproof bowl, fine mesh strainer, pastry brush, and a wooden spoon or silicone spatula.
How can I adjust the thickness of the clear glaze?
Modify the amount of cornstarch used: more cornstarch for thicker glaze (good for tarts) and less for a thinner glaze (ideal for delicate fruits).
Are there variations of clear glaze for different recipes?
Yes, clear glaze can be customized with fruit juices, herbs, or vegan thickeners like agar-agar to suit sweet, savory, or dietary-specific needs.
What are signs that stored clear glaze has gone bad?
Look for cloudiness, off smells, or mold growth. If any of these appear, discard the glaze immediately.
Why is lemon juice important in clear glaze?
Lemon juice balances sweetness, enhances the glaze’s clarity, and helps achieve a bright, shiny finish.
This post felt like it was written just for me. Thank you for addressing a topic that I didn’t even realize I needed to explore.