
Clam balls are a beloved coastal treat that bring the taste of the sea right to our plates. These golden, crispy bites are packed with tender clams and a perfect blend of seasonings, making them an irresistible appetizer or snack. Whether you’re craving a taste of New England or looking to impress guests with something unique, clam balls deliver every time.
We love how simple ingredients come together to create a dish that’s bursting with flavor and texture. Plus, they’re great for sharing at parties or enjoying with a dipping sauce on a casual night in. With this easy clam ball recipe, we’ll guide you through making these savory delights from scratch so you can savor the authentic flavors of the ocean anytime.
Ingredients
To create the perfect clam balls with a crispy golden crust and rich clam flavor, we need to gather fresh, high-quality ingredients. Below we break down everything required for the recipe.
Fresh Clams
The star ingredient in our clam ball recipe is Fresh Clams. We recommend:
- 1 pound of fresh littleneck or cherrystone clams
- Thoroughly cleaned and shucked
- Finely chopped for the filling
Using fresh clams is crucial to achieve the authentic briny taste that defines this dish.
Breadcrumbs
Breadcrumbs help bind the mixture and provide texture. Choose:
- 1 cup of plain or Italian-style breadcrumbs
- For a lighter texture, use panko crumbs
- Optionally, toast them slightly for extra crispiness
Onion and Garlic
For aromatic depth and flavor balance, include:
- 1 small onion, finely diced
- 2 cloves garlic, minced
These ingredients add a savory base and enhance the clam’s natural sweetness.
Eggs
Eggs serve as a binder to hold all components together. Use:
- 2 large eggs, beaten
This helps achieve a firm yet tender bite in our clam balls.
Seasonings and Herbs
To elevate the flavor profile, we incorporate essential seasoning:
| Ingredient | Quantity | Purpose |
|---|---|---|
| Salt | 1 teaspoon | Enhances overall flavor |
| Black pepper | ½ teaspoon | Adds mild heat and balance |
| Fresh parsley | 2 tablespoons, finely chopped | Brightens taste and appearance |
| Optional: Old Bay seasoning | 1 teaspoon | Adds classic coastal spice |
Oil for Frying
To create the crispy golden exterior characteristic of clam balls, choose the right oil:
- 2 to 3 cups of vegetable oil or canola oil
- Heat to 350°F for optimal frying temperature
This oil provides a neutral flavor and high smoke point perfect for deep-frying our clam balls to perfection.
Equipment Needed
To make clam balls with perfect flavor and texture, having the right equipment on hand is essential. Here is a detailed list of tools we recommend for a smooth and enjoyable cooking process:
- Mixing Bowls
We use medium and large bowls to combine clams, breadcrumbs, eggs, and seasonings efficiently.
- Cutting Board and Knife
For finely chopping fresh littleneck or cherrystone clams, onions, and parsley precisely.
- Measuring Cups and Spoons
Accurate measuring is key, especially for breadcrumbs, eggs, and seasonings like salt and Old Bay.
- Frying Pan or Deep Fryer
A heavy-bottomed skillet or deep fryer that can maintain a consistent oil temperature of 350°F is crucial to achieve golden, crispy clam balls.
- Candy or Deep-Fry Thermometer
Monitoring oil temperature ensures clam balls cook evenly and stay crispy without absorbing excess oil.
- Slotted Spoon or Spider Strainer
For safely lowering clam balls into hot oil and removing them once cooked.
- Paper Towels or Wire Rack
To drain excess oil and maintain crispness after frying.
- Mixing Spoon or Spatula
For combining ingredients thoroughly without overmixing.
Below is a table summarizing the essential equipment and their roles:
| Equipment | Purpose |
|---|---|
| Mixing Bowls | Mixing clam ball ingredients |
| Cutting Board & Knife | Chopping clams, onion, parsley |
| Measuring Cups & Spoons | Measuring ingredients precisely |
| Frying Pan / Deep Fryer | Cooking clam balls at a controlled temperature |
| Candy/Deep-Fry Thermometer | Maintaining oil temperature at 350°F |
| Slotted Spoon / Spider | Safely handling clam balls in hot oil |
| Paper Towels / Wire Rack | Draining excess oil to keep clam balls crisp |
| Mixing Spoon / Spatula | Blending ingredients gently yet thoroughly |
Prep Work
Preparing our clam balls properly is key to achieving the perfect balance of flavor and texture. Let’s break down the essential steps to get started with confidence.
Cleaning and Preparing Clams
We begin by thoroughly cleaning the fresh littleneck or cherrystone clams to remove any sand or grit that could affect the texture of our clam balls.
- Rinse the clams under cold running water.
- Place them in a bowl of cold salted water (about 1 tablespoon salt per quart of water) and let them soak for 20 minutes to purge any remaining sand.
- Discard any clams that remain open after tapping—they are not fresh.
- After soaking, scrub the shells gently with a brush, then rinse again.
- Shuck the clams carefully or steam them until just opened to extract the meat.
- Chop the clam meat finely on a cutting board, ensuring bits are uniform for even flavor distribution.
Chopping Vegetables
Next, we prepare the vegetables which bring essential aroma and depth to our clam balls.
- Dice 1 small onion into fine pieces for a subtle sweetness.
- Mince 2 cloves of garlic finely to infuse a mild pungency.
- Chop fresh parsley to add brightness and a fresh herbal note.
Keep these pieces small. The balance of flavors comes from their delicate presence rather than overwhelming chunks.
Preparing Batter
The batter binds our ingredients together and creates the crispy coating that defines clam balls.
- In a large mixing bowl, crack and beat 2 large eggs until uniform.
- Add 1 cup of breadcrumbs—choose plain or panko for extra crunch.
- Stir in the chopped clams, onion, garlic, and parsley.
- Season the mixture with salt, black pepper, and optional Old Bay seasoning to taste.
- Mix gently with a spatula or spoon until all ingredients are just combined, avoiding overmixing which can make the batter dense.
| Ingredient | Measurement | Purpose |
|---|---|---|
| Clams | 1 pound, finely chopped | Main flavor and texture |
| Onion | 1 small, diced | Adds sweetness and aroma |
| Garlic | 2 cloves, minced | Adds subtle pungency |
| Parsley | 2 tbsp, chopped | Fresh herbal note |
| Eggs | 2 large, beaten | Binds ingredients |
| Breadcrumbs | 1 cup | Provides structure and crispness |
| Salt and Pepper | To taste | Enhances flavor |
| Old Bay Seasoning | Optional, 1 tsp | Adds classic seafood seasoning |
Following these prep steps ensures our clam balls will have the signature golden crunch and savory flavor we’re aiming for.
Cooking Directions
Follow these precise steps to create crispy, flavorful clam balls that capture the essence of the seaside. We’ll guide you through mixing, shaping, and frying to perfection.
Making the Clam Mixture
- Combine the clams and aromatics
In a large mixing bowl, add 1 pound of finely chopped fresh clams, 1 small diced onion, and 2 cloves of minced garlic. Stir gently to mix the flavors evenly.
- Add breadcrumbs and seasonings
Fold in 1 cup of plain or panko breadcrumbs to the clam mixture. Sprinkle 1 teaspoon of salt, 1/2 teaspoon of black pepper, and 1 teaspoon of chopped fresh parsley. For a classic coastal flavor boost, optionally add 1/2 teaspoon of Old Bay seasoning.
- Incorporate beaten eggs
Gradually blend in 2 large beaten eggs to bind the ingredients. Mix gently using a spatula or wooden spoon until the mixture holds together without becoming dense or stiff.
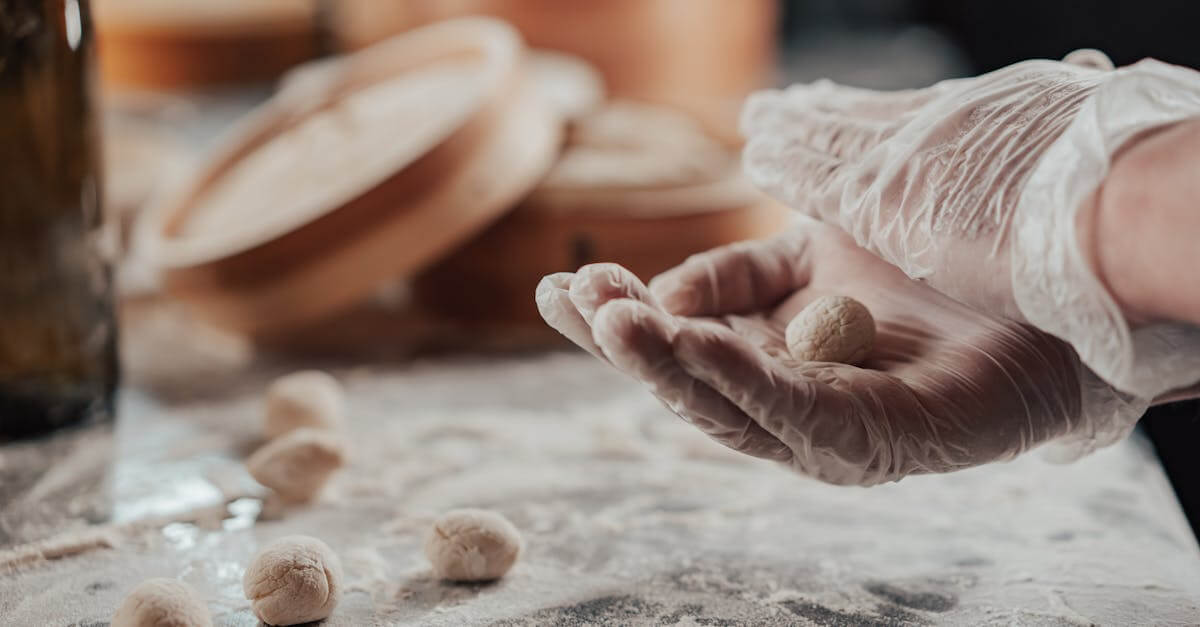
Forming the Clam Balls
- Prepare portions
Scoop out the clam mixture using a tablespoon or small ice cream scoop to ensure even size for uniform cooking.
- Shape into balls
With clean hands, roll each portion between your palms to form smooth, compact balls about 1 to 1.5 inches in diameter. Avoid packing too tightly; this helps maintain a light texture inside.
- Set aside
Place the formed clam balls on a parchment-lined tray or plate. Keep them chilled for 10 to 15 minutes to firm up before frying.
Frying the Clam Balls
- Heat the oil
Pour 2 to 3 cups of vegetable or canola oil into a deep fryer or heavy-bottomed pan. Heat the oil to a precise temperature of 350°F (175°C), monitoring with a candy or deep-fry thermometer for consistent results.
- Fry in batches
Carefully lower clam balls into the hot oil using a slotted spoon or spider strainer. Avoid overcrowding the pan to preserve oil temperature.
| Cooking Step | Key Tip | Time | Oil Temperature |
|---|---|---|---|
| Heat oil | Maintain steady 350°F | — | 350°F (175°C) |
| Fry clam balls | Avoid overcrowding | 3-4 minutes | Until golden brown |
| Drain excess oil | Use paper towels or wire rack | — | — |
- Cook until golden brown
Fry clam balls for 3 to 4 minutes or until they are evenly golden and crispy on all sides.
- Drain and serve
Remove fried clam balls with a slotted spoon and transfer them to a paper towel-lined plate or wire rack to drain excess oil. Serve hot to enjoy their crispy texture and tender, flavorful interior.
Serving Suggestions
To elevate our clam balls experience, consider these serving ideas that complement their crispy texture and savory flavor perfectly.
Classic Dipping Sauces
Offering a variety of dipping sauces enhances the clam balls’ appeal. Here are some tried-and-true options:
| Sauce | Ingredients | Flavor Profile |
|---|---|---|
| Cocktail Sauce | Ketchup, horseradish, lemon juice | Tangy, spicy |
| Tartar Sauce | Mayonnaise, pickles, lemon juice | Creamy, tangy |
| Garlic Aioli | Mayonnaise, garlic, lemon zest | Rich, fragrant |
| Spicy Remoulade | Mayonnaise, mustard, hot sauce | Bold, zesty |
Accompaniments for a Complete Plate
Pairing the clam balls with light sides balances their richness and adds textural contrast:
- Fresh garden salad with crisp greens, cherry tomatoes, and a lemon vinaigrette refreshes the palate.
- Crispy French fries or sweet potato fries add a satisfying crunch.
- Steamed vegetables like asparagus or green beans offer a healthy, colorful option.
Beverage Pairings
Choosing beverages that complement the seafood essence of the clam balls ensures a harmonious dining experience:
- A chilled Sauvignon Blanc or Pinot Grigio cuts through the richness with bright acidity.
- For beer lovers, a light lager or a wheat beer provides a crisp, refreshing contrast.
- Non-alcoholic options like sparkling water with a lemon wedge or iced tea complement the flavors cleanly.
Presentation Tips
Serving our clam balls in charming, bite-sized portions invites guests to indulge:
- Serve on a platter lined with wax paper or lettuce leaves to absorb excess oil.
- Garnish with fresh parsley or a sprinkle of Old Bay seasoning to highlight the coastal flavors.
- Pair with small ramekins or bowls containing the sauces to encourage dipping.
By integrating these serving suggestions, our clam balls become not only a delicious dish but also an experience — perfect for parties, family dinners, or casual snacking.
Storage and Make-Ahead Tips
To enjoy clam balls anytime with minimal effort, proper storage and make-ahead preparation are essential. Here’s how we ensure the best flavor and texture even after refrigeration or freezing.
Refrigeration
- After frying, let the clam balls cool to room temperature on a wire rack to prevent sogginess.
- Place them in an airtight container, separating layers with parchment paper.
- Store the container in the refrigerator for up to 2 days to maintain crispiness and freshness.
- To reheat, bake in a preheated oven at 375°F (190°C) for 8-10 minutes until crispy or use an air fryer for a few minutes.
Freezing
- For longer storage, freeze uncooked or cooked clam balls.
- To freeze uncooked:
- Form the balls and place them on a parchment-lined baking sheet.
- Freeze solid (about 2 hours).
- Transfer to a freezer bag or airtight container.
- To freeze cooked:
- Cool fully on a wire rack.
- Freeze in a single layer on a baking sheet.
- Transfer to freezer-safe packaging.
| Storage Method | Preparation | Maximum Storage Time | Reheating Instructions |
|---|---|---|---|
| Refrigeration | Fried and cooled | 2 days | Oven 375°F for 8-10 minutes or air fryer |
| Freezing (Raw) | Formed and frozen | Up to 3 months | Fry from frozen at 350°F for 5-6 minutes |
| Freezing (Cooked) | Fried and frozen | Up to 3 months | Oven 375°F for 10-12 minutes or air fryer |
Make-Ahead Tips
- Prepare the clam mixture up to 24 hours in advance. Keep it covered tightly in the refrigerator.
- Shape clam balls just before frying to ensure they stay tender and hold their form.
- For quick prep on the day of serving, fry directly from frozen uncooked balls without thawing. Just add 1-2 minutes to the frying time.
- Use fresh herbs and seasonings at the last moment to keep flavors vibrant.
“Storing and making ahead do not diminish the delicious crispiness and briny flavor of our clam balls if handled properly.“
By following these storage and make-ahead strategies, we guarantee you can always savor the delightful texture and savory taste of clam balls with ease and convenience.
Conclusion
Clam balls are a fantastic way to bring a taste of the coast right into our kitchens. With fresh ingredients and a little care in preparation, we can create a crispy, flavorful treat that’s perfect for any occasion. Whether served as an appetizer or snack, they’re sure to impress family and friends alike.
By mastering this recipe and following the tips for storage and serving, we can enjoy clam balls anytime without hassle. Let’s dive in and make this delicious coastal classic a regular part of our home cooking.
Frequently Asked Questions
What are clam balls?
Clam balls are a popular coastal appetizer made from minced clams mixed with seasonings and breadcrumbs, then formed into balls and deep-fried until golden and crispy. They offer a savory, crunchy snack perfect for gatherings or casual meals.
What ingredients are needed to make clam balls?
Key ingredients include fresh littleneck or cherrystone clams, breadcrumbs, diced onion, minced garlic, beaten eggs, salt, black pepper, fresh parsley, and optional Old Bay seasoning. Vegetable or canola oil is needed for frying.
What equipment is required to prepare clam balls?
You’ll need mixing bowls, a cutting board, knife, measuring cups and spoons, frying pan or deep fryer, a candy or deep-fry thermometer, a slotted spoon or spider strainer, paper towels or wire rack, and a mixing spoon or spatula.
How do you prepare clams for clam balls?
Rinse the clams thoroughly, soak them to remove sand, and shuck to get the meat. Chop clams finely and prepare other ingredients like onion, garlic, and parsley to ensure fresh flavor and aroma in the dish.
How are clam balls formed and fried?
Mix chopped clams with aromatics, breadcrumbs, seasonings, and beaten eggs. Scoop and roll into smooth, compact balls, chill to firm up, then fry in hot oil at 350°F for 3-4 minutes until golden brown. Drain excess oil before serving.
What sauces pair well with clam balls?
Classic dipping sauces like cocktail sauce, tartar sauce, garlic aioli, and spicy remoulade complement clam balls wonderfully, enhancing their savory flavor and crispy texture.
How should clam balls be stored?
Store fried clam balls in an airtight container in the refrigerator for up to 2 days. They can also be frozen raw or cooked for longer storage. Reheat in an oven or air fryer to maintain crispiness.
Can clam balls be made ahead of time?
Yes, you can prepare the clam mixture up to 24 hours in advance and form the balls just before frying. This helps preserve the best texture and flavor while saving preparation time.