
Ciabatta bread has become a favorite for many of us who love its crispy crust and soft, airy crumb. This Italian classic is perfect for sandwiches, dipping in olive oil, or simply enjoying with a bit of butter. Jamie Oliver’s take on ciabatta brings an easy-to-follow approach that guarantees great results even for home bakers.
We love how this recipe uses simple ingredients yet delivers that authentic rustic texture and flavor. With a little patience and the right technique, you’ll be able to bake ciabatta that rivals your favorite bakery. Let’s dive into Jamie Oliver’s method and bring a taste of Italy right to our kitchens.
Ingredients
To bake Jamie Oliver’s Ciabatta Bread perfectly, we start with a simple yet precise list of ingredients. Each component plays a vital role in crafting the iconic crispy crust and soft interior that define this classic Italian bread.
Dry Ingredients
- 4 cups (500g) all-purpose flour – Provides the structure and body of our ciabatta.
- 1 ½ teaspoons salt – Enhances flavor and helps regulate yeast activity.
- 1 teaspoon sugar – Feeds the yeast and promotes fermentation.
- 2 ¼ teaspoons (1 packet) active dry yeast – Essential for the rise and light texture.
Wet Ingredients
- 1 ¾ cups (420ml) warm water (about 110°F/43°C) – Hydrates the flour and activates the yeast.
- 2 tablespoons olive oil – Adds tenderness and flavor, contributing to the crust’s unique texture.
Optional Add-Ins
- 1 tablespoon chopped fresh rosemary – For an herby aroma and taste.
- 2 cloves garlic, minced – Adds savory depth.
- 1 tablespoon honey – For a subtle sweetness and enhanced crust color.
| Ingredient Type | Ingredient | Amount | Purpose |
|---|---|---|---|
| Dry Ingredients | All-purpose flour | 4 cups (500g) | Structure |
| Salt | 1 ½ teaspoons | Flavor and yeast regulation | |
| Sugar | 1 teaspoon | Yeast food | |
| Active dry yeast | 2 ¼ teaspoons (1 packet) | Leavening agent | |
| Wet Ingredients | Warm water | 1 ¾ cups (420ml) | Hydration and yeast activation |
| Olive oil | 2 tablespoons | Texture and flavor | |
| Optional Add-Ins | Fresh rosemary | 1 tablespoon | Herbaceous flavor |
| Garlic | 2 cloves, minced | Savory flavor | |
| Honey | 1 tablespoon | Sweetness and crust color |
Equipment Needed
To bake Jamie Oliver’s Ciabatta Bread successfully, having the right equipment on hand is crucial for achieving the perfect rustic crust and soft crumb. Below is a detailed list of the essential tools we recommend:
- Large Mixing Bowl: Use a spacious bowl to mix and allow the dough to rise. It needs to accommodate the sticky, wet dough without spilling.
- Kitchen Scale: For accuracy, weighing ingredients ensures consistent results every time. Flour and water ratios are particularly important for ciabatta dough.
- Measuring Spoons: Precise measurement of yeast, sugar, and salt is key for proper fermentation and flavor.
- Wooden Spoon or Dough Scraper: A sturdy wooden spoon or bench scraper helps in mixing and handling the sticky dough efficiently.
- Clean Kitchen Towel or Plastic Wrap: To cover the dough during resting and fermentation periods, keeping moisture in.
- Baking Sheet or Pizza Stone: For baking, a heavy-duty baking sheet or preferably a preheated pizza stone will help create that signature crispy crust.
- Parchment Paper: Prevents sticking and makes transferring the dough onto the baking surface easier.
- Oven Mitts: Essential for safely handling hot baking trays or stones when removing the bread from the oven.
- Cooling Rack: Allows the bread to cool evenly, preventing soggy bottoms and preserving the crust’s crunch.
Here is a quick reference table to organize the equipment and their specific uses:
| Equipment | Purpose |
|---|---|
| Large Mixing Bowl | Mixing and proofing the dough |
| Kitchen Scale | Measuring ingredients accurately |
| Measuring Spoons | Precise measurement of dry ingredients |
| Wooden Spoon/Dough Scraper | Mixing and handling sticky dough |
| Kitchen Towel/Plastic Wrap | Covering dough for fermentation |
| Baking Sheet/Pizza Stone | Baking the bread for a crisp crust |
| Parchment Paper | Preventing dough from sticking |
| Oven Mitts | Safe handling of hot baking equipment |
| Cooling Rack | Cooling the bread evenly post-baking |
Make-Ahead Instructions
Preparing Jamie Oliver’s Ciabatta Bread ahead of time enhances flavor and convenience. Here’s how we can plan our baking process to enjoy fresh, rustic bread with minimal effort on the day of serving.
1. First Rise (Bulk Fermentation) Preparation
- After mixing the dough, place it in a large, lightly oiled bowl.
- Cover tightly with plastic wrap or a damp kitchen towel to prevent drying.
- Let the dough rise at room temperature for 1 to 2 hours, or until it doubles in size.
- For extended fermentation, refrigerate the dough overnight (up to 24 hours). This slow rise develops deeper flavor and improves the bread’s texture.
2. Shaping and Second Proof
- When ready to bake, remove the dough from the fridge and let it warm for 30 minutes.
- Turn the dough onto a floured surface lightly dusted with flour. Handle gently to preserve the airy crumb.
- Shape the dough into a rough rectangle or oval according to your preference.
- Place the shaped dough on parchment-lined baking sheets.
- Cover again and proof for 45 minutes to 1 hour until slightly puffed.
3. Baking Day Steps
- Preheat the oven to 475°F (245°C) at least 30 minutes before baking.
- Score the dough lightly with a sharp knife to allow for oven spring.
- Bake on a preheated baking stone or steel, or a hot baking sheet, for 20 to 25 minutes until the crust is golden and crisp.
Storage & Reheating Tips
| Step | Method | Duration | Result |
|---|---|---|---|
| Refrigeration | Cover dough tightly | Up to 24 hours | Enhanced flavor, slow fermentation |
| Freezing | Freeze baked bread wrapped | Up to 1 month | Retains freshness when reheated |
| Reheating | Oven at 350°F (175°C) | 5-10 minutes | Restores crust crispness |
“Slow fermentation is key to the complex taste and crust texture in Jamie Oliver’s ciabatta.”
By following these Make-Ahead Instructions, we can enjoy the rewarding process of baking while accommodating busy schedules. This approach ensures the bread’s iconic crispy crust and soft crumb are ready when we want them.
Instructions
Let’s follow Jamie Oliver’s ciabatta bread recipe step by step to ensure we create that perfect crispy crust and soft crumb everyone loves. Each stage is crucial, so we’ll take our time to get it right.
Preparing the Starter Dough
- In a large mixing bowl, combine 1 ½ cups (360 ml) of warm water (about 110°F/43°C) with 1 teaspoon of sugar and 1 packet (2 ¼ teaspoons or 7 g) of active dry yeast.
- Stir gently to dissolve the yeast and sugar completely.
- Let this mixture sit for 5 to 10 minutes until it becomes frothy and bubbles appear on the surface.
- This starter is the foundation for our bread’s rise and light texture.
Mixing the Dough
- Add 3 ½ cups (440 g) all-purpose flour and 2 teaspoons salt to the starter.
- Drizzle in 2 tablespoons of olive oil.
- Using a wooden spoon or dough scraper, stir the ingredients together until a sticky, wet dough forms.
- Transfer the dough to a lightly floured surface and knead gently for about 8 to 10 minutes.
- The dough should be elastic but still slightly sticky.
- If too sticky, dust with a little more flour—but don’t add too much to keep the crumb open.
First Rise
- Lightly oil a large bowl to prevent sticking.
- Place the dough in the bowl and cover it snugly with a clean kitchen towel or plastic wrap.
- Leave it to rise at room temperature for about 1 to 2 hours, or until it doubles in size.
- Alternatively, refrigerate overnight for a slow fermentation which deepens the flavor.
- The dough should feel airy and puffy to the touch once ready.
Shaping the Dough
- Gently tip the dough onto a generously floured work surface.
- Handle the dough carefully to retain the bubbles and light structure.
- Fold the dough onto itself a couple of times to shape it into an elongated, somewhat rectangular form resembling a slipper (ciabatta means slipper in Italian).
- Transfer the shaped dough to a parchment-lined baking sheet or a well-floured couche cloth for support.
Second Rise
- Cover the shaped dough loosely with a towel or plastic wrap.
- Let it proof for 45 minutes to 1 hour at room temperature.
- It should visibly puff and expand but avoid over-proofing which can collapse the dough.
Baking the Ciabatta Bread
- Preheat the oven to 475°F (245°C) with a pizza stone or baking sheet inside to get it scorching hot.
- Just before baking, score the dough lightly with a sharp knife to guide the expansion.
- Slide the parchment with dough onto the hot surface carefully.
- Bake for 20 to 25 minutes until the crust is deep golden brown and crisp.
- Remove the ciabatta and let it cool on a wire rack for at least 30 minutes to allow the crumb to set.
| Step | Time / Temp | Notes |
|---|---|---|
| Starter Dough | 5 to 10 minutes at ~110°F (43°C) | Frothy, bubbly mixture |
| First Rise | 1-2 hours or overnight (refrigerate) | Dough doubles in size |
| Second Rise | 45 minutes to 1 hour at room temp | Dough puffs visibly |
| Baking | 20-25 minutes at 475°F (245°C) | Deep golden crust, crisp texture |
By following these precise steps carefully, we will achieve Jamie Oliver’s iconic ciabatta with a perfectly rustic texture and authentic Italian flavor.
Tips for Perfect Ciabatta Bread
Baking Jamie Oliver’s Ciabatta Bread to perfection requires attention to detail and mastery of key techniques. Here are our expert tips to help you achieve a crispy crust and airy crumb that capture the authentic Italian essence.
1. Use the Right Flour and Hydration Level
- Opt for bread flour or unbleached all-purpose flour with high protein content to develop strong gluten strands.
- Maintain a hydration level of around 75-80% (water-to-flour ratio) to create the classic open, bubbly crumb of ciabatta.
| Ingredient | Ideal Measurement | Role |
|---|---|---|
| Bread Flour | 500 grams | Structure and chewiness |
| Water | 375-400 ml (75-80%) | Hydration and crumb texture |
2. Master the Sticky Dough Handling
- Ciabatta dough is wetter and stickier than typical bread dough.
- Use a dough scraper to fold and handle it rather than flouring excessively.
- Avoid heavy kneading; instead, use stretch and fold techniques during the bulk fermentation to develop gluten without deflating the dough’s air pockets.
3. Patience During Fermentation
- Allow the dough to rise until it doubles in size, which may take 1-2 hours at room temperature; or refrigerate overnight for enhanced flavor complexity.
- Avoid rushing the fermentation to ensure a light and flavorful crumb.
“Good things come to those who wait.” — Let time work its magic for that airy texture and rich taste.
4. Gentle Shaping to Preserve Air Pockets
- When shaping the dough into the traditional slipper shape, handle it carefully and minimally.
- Avoid pressing out the gases formed during fermentation.
- Use a well-floured surface and your hands to lift and fold the dough gently.
5. Preheat Oven and Use a Baking Stone or Steel
- Preheat your oven to 450°F (230°C) at least 30 minutes before baking to ensure a hot baking environment.
- Place a pizza stone or steel inside the oven to mimic a traditional bakery hearth.
- Adding a pan of hot water or spraying steam into the oven during the first 10 minutes helps develop a crispy, glossy crust.
6. Score the Bread for Controlled Expansion
- Use a sharp blade or lame to make thin slashes across the dough’s surface.
- This directs how the bread expands in the oven and gives that signature rustic look.
7. Proper Cooling for Optimal Texture
- Let the bread cool completely on a wire rack before slicing.
- This prevents a gummy interior and allows the crumb to set fully.
| Common Mistake | Solution |
|---|---|
| Dough too dry | Increase hydration gradually, observe dough feel |
| Over-kneading | Use stretch and fold instead of pounding |
| Rushing fermentation | Extend rise time or refrigerate overnight |
| Underbaking | Ensure oven is fully preheated and bake until deep golden |
Following these tips will boost your confidence and skill with Jamie Oliver’s Ciabatta Bread Recipe, allowing us to enjoy that light yet crispy texture right from our home ovens.
Serving Suggestions
Our Jamie Oliver Ciabatta Bread offers a versatile foundation for numerous delicious meals. Here are some of the best ways to enjoy this crispy crust and airy crumb bread:
Classic Sandwich Base
Slice the ciabatta into generous pieces and layer your favorite deli meats, fresh vegetables, and cheeses. Because of its sturdy yet tender texture, it holds up well to hearty fillings like:
- Roasted chicken and pesto
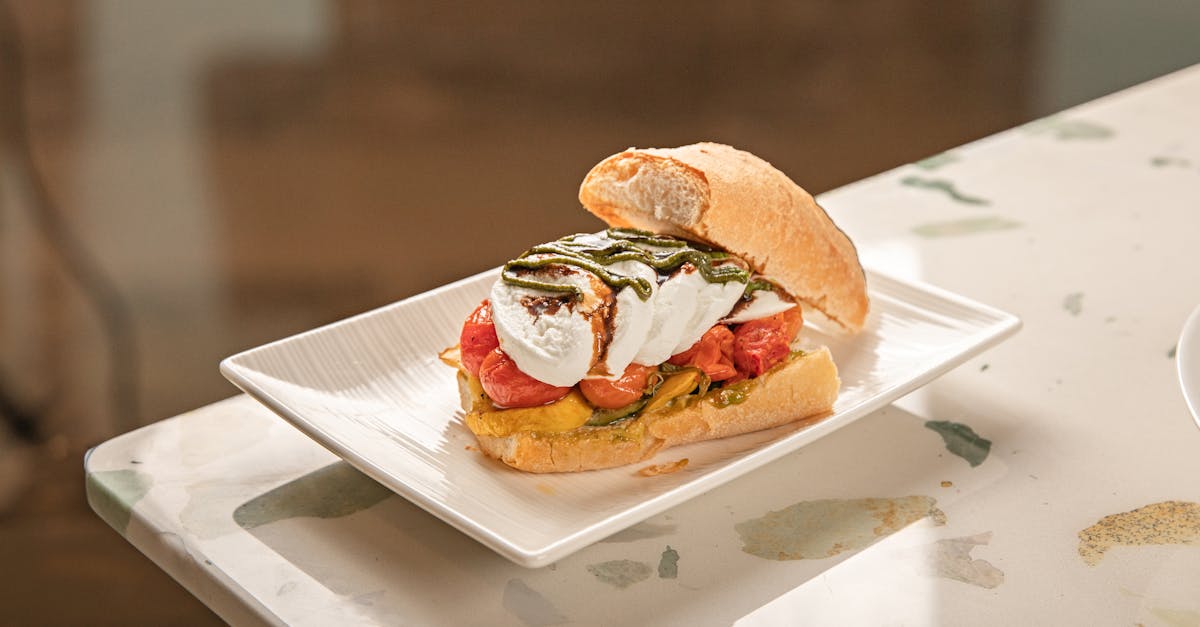
- Mozzarella, tomato, and basil
- Smoked turkey with cranberry sauce
Toasted and Drizzled
Lightly toast thick slices and brush them with high-quality extra virgin olive oil or spread with flavored butter. Sprinkle a pinch of sea salt and cracked pepper for a simple snack or appetizer.
Rustic Dipping Companion
Serve torn pieces alongside:
- Herbed olive oil dips
- Robust tomato or roasted red pepper sauces
- Creamy garlic aioli
This elevates any meal and enhances the bread’s natural flavor.
Soup and Stew Partner
Our homemade ciabatta soaks up brothy goodness without falling apart. Pair it with:
- Minestrone
- Tomato basil soup
- Beef stew
Breakfast Treat
Toast slices and top with smashed avocado, a squeeze of lemon, and chili flakes for a nutritious breakfast. Alternatively, spread with ricotta and a drizzle of honey for a sweet start to the day.
Serving Suggestions Summary Table
| Use | Preparation | Pairings/Extras |
|---|---|---|
| Sandwich Base | Sliced thick | Roasted meats, fresh veggies, cheeses |
| Toasted & Drizzled | Lightly toasted, brushed with oil | Sea salt, cracked pepper, butter |
| Dipping Companion | Torn into chunks | Olive oil, tomato sauce, garlic aioli |
| Soup & Stew Partner | Served alongside | Minestrone, tomato soup, beef stew |
| Breakfast Treat | Toasted, topped | Avocado, ricotta, honey, chili flakes |
“Ciabatta bread’s unique texture makes it incredibly versatile,” Jamie Oliver often notes. It absorbs flavors, holds fillings beautifully, and adds a rustic touch to any dish we pair it with.
Conclusion
Baking Jamie Oliver’s ciabatta bread at home brings a satisfying blend of rustic charm and authentic Italian flavor right to our kitchen. With the right ingredients, tools, and techniques, we can master the art of creating that perfect crispy crust and airy crumb. Taking the time to follow each step carefully rewards us with bread that elevates any meal.
This recipe not only fits into our busy lives with make-ahead options but also invites us to get creative with serving ideas. Whether for sandwiches, dipping, or breakfast, Jamie Oliver’s ciabatta is a versatile staple worth making again and again. Let’s embrace the process and enjoy the delicious results together.
Frequently Asked Questions
What makes Jamie Oliver’s ciabatta bread recipe special?
Jamie Oliver’s recipe is easy to follow, uses simple ingredients, and emphasizes proper technique and patience to achieve a crispy crust and soft, airy crumb, delivering authentic Italian flavor at home.
What are the key ingredients in Jamie Oliver’s ciabatta recipe?
The main ingredients are all-purpose flour, salt, sugar, active dry yeast, warm water, and olive oil. Optional add-ins like rosemary, garlic, and honey can enhance flavor and aroma.
What equipment is necessary for baking ciabatta bread?
Essential tools include a large mixing bowl, kitchen scale, measuring spoons, wooden spoon or dough scraper, baking sheet or pizza stone, parchment paper, a clean towel or plastic wrap, oven mitts, and a cooling rack.
Can I prepare the dough in advance?
Yes, the dough can be mixed, then allowed to rise either at room temperature or refrigerated overnight. This makes the process flexible and deepens the bread’s flavor.
What are the main steps to bake Jamie Oliver’s ciabatta?
Start by making a yeast starter, mix and knead the dough, allow the first rise, shape the dough carefully, let it proof again, score, and then bake until golden with a crispy crust.
How do I handle ciabatta’s sticky dough?
Handle the dough gently with a dough scraper or floured hands. Avoid deflating it to preserve air pockets, which create the bread’s light texture.
What tips help achieve the perfect ciabatta crumb?
Use the right flour, maintain proper dough hydration, give sufficient fermentation time, preheat the oven, use a baking stone if possible, score the bread, and cool it properly before slicing.
How should I store and reheat ciabatta bread?
Store ciabatta in a paper bag or bread box to retain the crust. Reheat in a preheated oven for a few minutes to refresh the crust and crumb before serving.
What are some serving ideas for ciabatta bread?
Use it as a sandwich base, toast with olive oil, serve with soups or stews, or enjoy it at breakfast topped with avocado or ricotta for a rustic meal.
Can homemade ciabatta compare to bakery bread?
Yes, following Jamie Oliver’s recipe and tips allows home bakers to produce ciabatta with a rustic texture and flavor that rivals bakery-made bread.