
The holiday season is the perfect time to fill our kitchens with the warmth of homemade goodness, and Christmas canning recipes are a delightful way to do just that. From vibrant jams to spiced pickles, these jars of joy not only capture the flavors of the season but also make heartfelt gifts for loved ones. There’s something magical about preserving the essence of Christmas in a way that can be savored long after the festivities.
Christmas Canning Recipes Overview
Christmas canning recipes bring the essence of the holiday season straight into our jars. These delightful recipes allow us to preserve the rich aromas, vibrant flavors, and warm traditions of Christmas. Whether it’s fruity jams, tangy chutneys, or aromatic spiced pickles, canning transforms simple ingredients into lasting memories. Homemade canned goods are perfect for holiday gifting or enhancing festive meals.
The Art of Christmas Canning: Step-by-Step Guide
- Gathering Ingredients
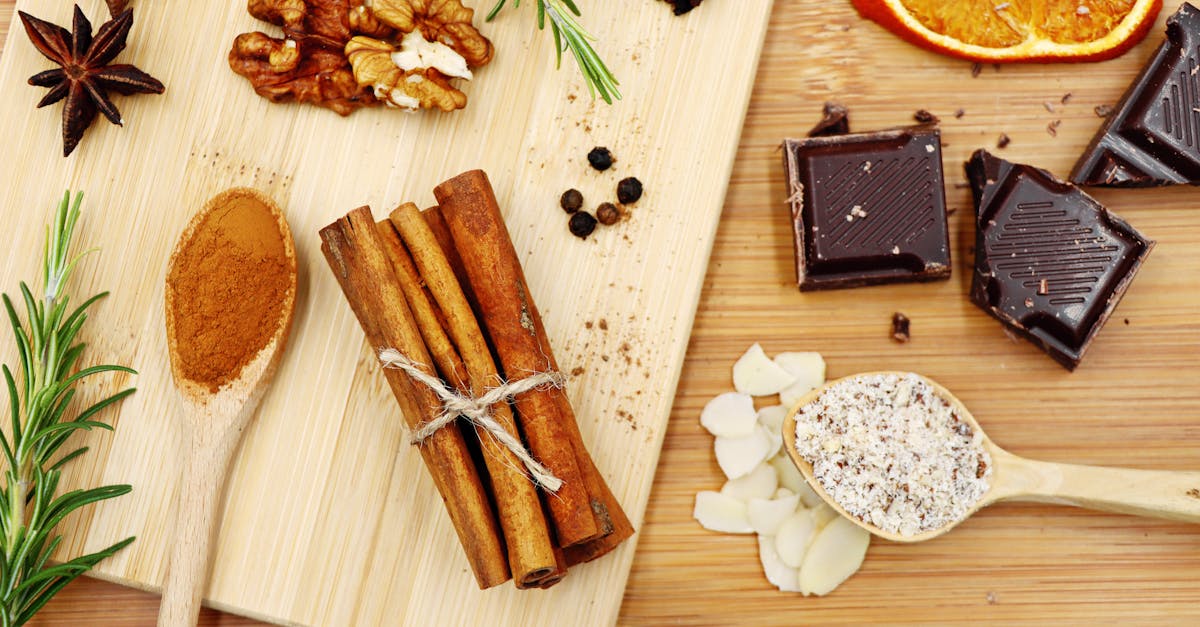
Start by sourcing fresh, high-quality ingredients. Choose seasonal fruits like cranberries, apples, or pears, and spices such as cinnamon, clove, and nutmeg to amplify the Christmas spirit. For savory items, consider using cucumbers, bell peppers, and onions.
- Preparing Tools
Sterilize canning jars, lids, and bands to ensure food safety. You’ll also need a large pot, a jar lifter, a funnel, and a ladle. Here’s a quick checklist:
| Tool | Purpose |
|---|---|
| Canning jars | To preserve foods and keep them sealed airtight. |
| Lid and bands | Ensure proper closure and prevent any contamination. |
| Large pot | For boiling jars, ensuring sterilization and proper canning. |
| Jar lifter | Safely remove hot jars from boiling water. |
| Funnel | Help pour jams, jellies, and pickles into jars without spills. |
- Cooking with Care
Combine your ingredients according to the recipe. For instance, if making cranberry jam, simmer cranberries, sugar, water, and citrus zest until thickened into a vibrant and glossy spread. Keep stirring to avoid scorching.
- Filling and Sealing Jars
Use the prepared funnel to fill jars, leaving about 1/4 inch of headspace at the top. Wipe jar rims with a damp towel to ensure a clean seal. Secure lids tightly but not overly so.
- Processing in a Water Bath
Place jars into the boiling water bath, ensuring they’re fully submerged. Process according to your recipe’s guidelines—typically 10 to 15 minutes for jams and jellies, but consult the recipe for precise timing.
- Cooling and Storing
Remove jars using the lifter and place them on a towel-lined countertop. Let them cool completely. Check seals by pressing down on the lid center; it shouldn’t pop back. Properly sealed jars are ready to store in a cool, dark place.
Tools And Equipment Needed
When it comes to Christmas canning recipes, having the right tools and equipment is absolutely essential for safe and successful food preservation. Here’s a detailed list of what we need, along with their purpose in the canning process. Proper preparation ensures our delicious holiday flavors are preserved perfectly and safely.
Essential Canning Tools
- Canning Jars with Lids and Bands
Opt for glass jars in various sizes. Make sure the lids are flat with rubber seals for airtight closures, and the bands are clean and rust-free.
- Water Bath Canner
A large pot with a rack that allows jars to sit submerged in boiling water. It’s crucial for processing high-acid recipes like jams, jellies, and pickles.
- Jar Lifter
Designed with rubber grips to safely remove hot jars from the boiling water.
- Wide-Mouth Funnel
Prevents spills and ensures even, mess-free filling of jars. This is especially useful for thick jams and sauces.
- Bubble Remover Tool (or Plastic Spatula)
Helps release trapped air inside jars after filling. Air pockets can compromise the seal and spoil the food.
- Magnetic Lid Wand
Secures hot lids for placement on jars without touching and contaminating them.
- Kitchen Towels or Paper Towels
Dry jars after sterilization and wipe jar rims free of residue before sealing.
- Ladles and Grabbing Spoons
Perfect for scooping hot preserves or syrups into jars cleanly and efficiently.
- Timer or Clock
Ensures precision when processing jars, as timing is critical for safety.
Optional But Helpful Equipment
- Digital or Candy Thermometer
Useful for monitoring temperatures while making certain preserves or syrups.
- Canning Racks
Keeps jars from sitting directly on the bottom of the pot and allows steam to circulate evenly.
- Labeling Supplies
Tags, markers, or adhesive labels for noting dates and flavors, lending a festive touch for gifts.
- Immersion Blenders or Food Mills
Smoothly puree fruits when making butter or sauces.
At-A-Glance Tool Essentials
| Tool/Equipment Name | Use |
|---|---|
| Canning Jars | Storage and preservation of canned goods. |
| Water Bath Canner | Ensures safe preservation via boiling. |
| Jar Lifter | Removes hot jars safely from the water. |
| Wide-Mouth Funnel | Allows easy and clean jar filling. |
| Bubble Remover Tool | Eliminates trapped air from the jar contents. |
| Magnetic Lid Wand | Picks up lids without contamination. |
| Kitchen Towels | Cleans and dries jars and lids. |
| Timer | Keeps track of processing time. |
Ingredients
For Christmas canning recipes, the quality of ingredients makes all the difference in crafting festive and flavorful preserves. Gather fresh, seasonal produce, aromatic spices, and essential supplies to ensure success. Below, we break down everything you’ll need.
Fresh Produce
Start with fresh and seasonal ingredients for the most vibrant flavors. Here’s what to include:
- Cranberries (3 cups) – Washed and sorted
- Apples (5 medium-sized) – Peeled, cored, and diced
- Oranges (2 large) – Zested and juiced
- Pears (4 ripe) – Peeled and chopped
- Strawberries (4 cups) – Hulled and roughly sliced
- Pumpkin puree (2 cups) – Fresh or canned, unsweetened
Note: Adjust produce based on your chosen recipe or available seasonal fruits.
Spices And Flavorings
Add warming aromas and festive touches with spices and flavorings. Essential ingredients include:
- Ground cinnamon (1 tablespoon) – Adds sweet warmth
- Cloves (1 teaspoon) – Whole or ground for a robust flavor
- Star anise (2 pieces) – Subtle licorice notes
- Vanilla extract (1 teaspoon) – Enhances sweetness
- Nutmeg (½ teaspoon) – Freshly grated if possible
- Lemon juice (3 tablespoons) – Balances sweetness
Pro Tip: Always use fresh, high-quality spices to maintain bold flavors in your jars.
Additional Supplies
For seamless and safe canning, gather these tools and materials alongside your recipe ingredients:
- Granulated sugar (4 cups) – For jams and jellies
- Apple cider vinegar (1 cup) – Used in pickling brine
- Pectin (1 packet) – A gelling agent for jams
- Pickling salt (2 tablespoons) – Preserves the color and texture of pickled items
| Item | Estimated Quantity | Purpose |
|---|---|---|
| Granulated sugar | 4 cups | Sweetens recipes |
| Apple cider vinegar | 1 cup | Adds tang to pickles |
| Pectin | 1 packet | Helps jams to set |
| Pickling salt | 2 tablespoons | Maintains texture and flavor |
Ensure all ingredients are measured precisely to maintain the ideal balance of taste and preservation.
Directions
Let’s embrace the art of Christmas canning with these step-by-step instructions. Follow the steps carefully to preserve the festive flavors and create heartwarming gifts for the season.
Prep
- Assemble Your Tools
Place all your canning tools within reach. Arrange canning jars with lids, a water bath canner, a jar lifter, a wide-mouth funnel, and other necessary equipment on a clean workspace. Ensure jars are sterilized by boiling them in hot water for 10 minutes.
- Prepare Ingredients
Wash and dry all fresh produce carefully to eliminate dirt or debris. For specific recipes:
- Fruits: Core, peel, and chop apples or pears. Remove seeds from cranberries if required.
- Spices: Measure ground cinnamon, cloves, star anise, and other essentials into small bowls for easy access.
- Liquids: Pre-measure lemon juice, apple cider vinegar, or other liquids for efficiency.
- Organize Supplies
Follow this checklist to ensure no detail is missed:
| Supplies | Quantity | Purpose |
|---|---|---|
| Granulated Sugar | 4 cups | Sweetening jams or marmalades. |
| Pectin | 1 packet | Ensures a proper set for jellies and jams. |
| Pickling Salt | 2-3 tbsp | Essential for pickled veggies like onions or beets. |
| Water & Vinegar | As required | Used for syrups, jams, or maintaining acidity for canned products. |
Double-check every item before starting the cooking process.
Next subheadings (e.g., Cook, Fill & Seal) should follow seamlessly, detailing the other steps in logical order, ensuring fluidity between stages.
Cook
Once our preparation is complete and all ingredients are ready, it’s time to bring the magic of Christmas canning to life. This stage involves the careful crafting of rich syrups, fragrant jams, and savory sauces that capture the festive season’s essence.
Making The Syrups, Jams, Or Sauces
- Prepare Your Saucepan: Start with a large, heavy-bottomed saucepan to prevent scorching. Place it over medium heat.
- Combine Key Ingredients: Add the fresh fruits, granulated sugar, and any liquid like lemon juice or apple cider vinegar, depending on the specific recipe. For example:
- Cranberry Sauce: Combine 4 cups of fresh cranberries, 1 cup of sugar, and ½ cup of orange juice.
- Spiced Apple Jam: Mix 6 cups of peeled apple chunks, 3 cups of sugar, 2 tablespoons of lemon juice, 1 teaspoon cinnamon, and a pinch of nutmeg.
- Stir in the Spices: Mix spices such as star anise, cloves, or cinnamon sticks into the sauce for that festive aroma. Allow the ingredients to meld while stirring occasionally.
- Simmer To Thicken: Bring the mixture to a gentle boil, then reduce the heat to low. Let it simmer until the texture thickens, becoming glossy. Use a wooden spoon to test the consistency—if the jam or syrup drips slowly, it is ready.
- Optional Testing: Use the cold-plate test to check the jam’s consistency. Place a dollop on a cold plate from the freezer. If it wrinkles when pushed, it has reached the ideal setting point.
| Recipe | Cooking Time | Special Ingredients |
|---|---|---|
| Cranberry Sauce | 10-15 minutes | Orange juice, cinnamon sticks |
| Spiced Apple Jam | 30-40 minutes | Nutmeg, lemon juice, pectin (optional) |
| Holiday Pear Chutney | 40-45 minutes | Star anise, apple cider vinegar, raisins |
Cooking And Preparing The Canned Mixture
- Sterilize And Organize: While the mixture is cooking, ensure that the sterilized jars are warm. Keep lids ready to seal, minimizing any chances of contamination.
- Final Step – Remove Additions: If whole spices like cinnamon sticks or star anise were used, fish them out of the cooked mixture with a slotted spoon.
- Filling The Jars: Carefully ladle the hot mixture into prepared jars using a wide-mouth funnel. Leave a ½-inch headspace to accommodate expansion during processing. Tip: Use a bubble remover tool to release any trapped air bubbles.
- Wipe And Seal: Wipe jar rims with a damp paper towel to remove residues and ensure a clean seal. Place the lids securely, avoiding overtightening.
- Water Bath Processing: Place the filled jars into the water bath canner. Ensure the jars are submerged in 1-2 inches of water and boil gently for the specified time:
- Jams/Syrups: 10-15 minutes.
- Chutneys (low-acid): 30 minutes or follow the recipe instructions.
- Cooling Process: Remove jars with a jar lifter and set on a towel-covered surface. Allow them to cool undisturbed for 12-24 hours. Listen for the delightful “ping” of successful sealing.
By following these steps, we create vibrant, flavorful concoctions that echo the spirit of Christmas, preserved perfectly for gifting or savoring throughout the season.
Assemble
After preparing our festive flavors and ensuring our tools are ready, it’s time to Assemble. This critical stage ensures our Christmas canning recipes are preserved safely and beautifully. Let’s carefully focus on filling the jars and sealing the lids properly to complete our creations.
Filling The Jars
- Prepare Workspace: Place the sterilized jars on a clean towel or heat-proof surface. Keep tools like a wide-mouth funnel, ladle, and jar lifter within reach for efficiency.
- Use A Funnel: Insert the wide-mouth funnel into each jar to avoid messes and ensure consistent filling.
- Fill Jars Carefully: Ladle the hot contents (syrups, jams, or pickles) into the jars, leaving the required headspace. Most recipes require about 1/4 inch to 1/2 inch of headspace, but always follow specific recipe guidelines. This space is essential for proper sealing.
- Remove Air Bubbles: Use a nonmetallic tool like a spatula or chopstick to gently stir the contents and release trapped air bubbles. This step helps prevent spoilage and achieves the perfect fill.
- Clean Rims: Wipe the rims of the jars with a clean, damp cloth to remove any residue or spills. This step ensures the lids seal properly during processing.
Headspace Guide
| Recipe Type | Recommended Headspace |
|---|---|
| Jams & Jellies | 1/4 inch |
| Sauces & Syrups | 1/4 inch |
| Pickles | 1/2 inch |
| Fruits with Liquid | 1/2 inch |
Sealing The Lids Properly
- Prepare Lids and Rings: Place the sterilized lids on the jars, ensuring the sealing gasket is in contact with the jar rim. Screw the bands on until they are fingertip-tight—not overly tight, as air needs to escape during processing.
- Process in Water Bath: Using a jar lifter, carefully place the jars into the simmering water of your water bath canner. Ensure the jars are fully submerged with at least 1-2 inches of water above them.
- Set Time Precisely: Cover the canner with a lid, bring water to a rolling boil, and process the jars according to your recipe’s timing. Processing time depends on jar size, recipe type, and altitude. Refer to guidelines for accuracy.
- Cool Properly: After processing, use the jar lifter to transfer the jars onto a clean towel or cooling rack. Leave them undisturbed for 12-24 hours.
- Check Seals: Once cooled, check that the lids have sealed by pressing the center. A properly sealed lid will not flex or pop. If a jar hasn’t sealed, refrigerate it and use it promptly.
Sealing and filling correctly ensures our Christmas canning recipes remain fresh, vibrant, and delicious for months to come, ready to share the warmth of the holiday season.
Processing And Storage
Proper Processing And Storage are crucial to ensure your Christmas preserves remain safe, flavorful, and ready to enjoy throughout the holiday season. Let’s dive into the essential guidelines for processing your jars and storing them effectively.
Water Bath Canning Basics
The water bath canning method is a classic, reliable technique for preserving high-acid foods such as jams, jellies, pickles, and fruit sauces. Here’s how we can expertly process our festive creations:
- Prepare the canner: Fill your water bath canner with enough water to cover the jars by at least 1 inch. Begin heating the water while you prepare your jars.
- Check jars and lids: Ensure jars are sterilized and free of cracks. Check lids for proper seals and cleanliness.
- Fill jars properly: After cooking your preserve, carefully pour it into the hot, sterilized jars using a wide-mouth funnel. Leave the correct headspace as recommended in your recipe—usually 1/4 inch for jams and jellies, 1/2 inch for pickles, and 1 inch for sauces.
- Remove air bubbles: Gently slide a non-metallic utensil, like a plastic spatula, along the inside of each jar to release trapped air.
- Seal the jars: Wipe rims with a damp cloth to ensure a proper seal. Place the lids on and secure them with rings until they’re fingertip-tight—do not over-tighten.
- Process in the water bath: Lower the jars into the boiling water using a jar lifter. Cover the canner and process for the time specified in your recipe, adjusting for altitude if necessary.
| Altitude (Feet) | Adjusted Processing Time (Minutes) |
|---|---|
| 0–1,000 | As recipe states |
| 1,001–3,000 | Add 5 minutes |
| 3,001–6,000 | Add 10 minutes |
| 6,001–8,000 | Add 15 minutes |
| 8,001–10,000 | Add 20 minutes |
- Remove and cool: Carefully remove the jars from the canner using the jar lifter. Place them on a towel or wooden board, ensuring they are not touching, and allow them to cool undisturbed for 12 to 24 hours.
Cool And Store Safely
After the jars have cooled, it’s time to check each seal and prepare the jars for storage:
- Verify the seals: Press the center of each lid. If it doesn’t flex and stays down, the jar has sealed properly. If a jar hasn’t sealed, refrigerate it and consume it within 1–2 weeks.
- Label your jars: Use a label or permanent marker to include the name of the recipe and the date it was canned. Clear labeling ensures we always know what’s inside and when it was made.
- Store properly: Place the sealed jars in a cool, dark, and dry space, such as a pantry. The ideal storage temperature is between 50°F and 70°F.
- Avoid stacking jars: To maintain seal integrity, avoid stacking jars directly on top of each other. If necessary, place a piece of cardboard between layers.
Stored properly, most canned goods retain their quality for up to 12 months. Keeping a delicious jar of festive preserves in ideal conditions allows the perfect Christmas flavors to shine every time we open one.
Make-Ahead Tips
When preparing Christmas canning recipes, planning ahead can save time and ensure smoother processing during the busy holiday season. Below are some essential make-ahead strategies:
1. Gather & Prep Ingredients in Advance
- Take inventory of your fresh fruits, spices, and essential supplies like sugar and vinegar a few days before starting.
- Prewash and chop fruits like apples, pears, and oranges. Store them in airtight containers in the fridge to keep them fresh.
- Measure dry ingredients (e.g., granulated sugar, spices) and store them in labeled zip-top bags or jars, so everything is ready to go.
2. Pre-Sterilize Your Tools
- Sterilizing jars and tools ahead of time ensures a clean and safe canning process. Boil canning jars and lids in water, then allow them to air-dry on a clean towel.
- Gather tools such as wide-mouth funnels, jar lifters, and ladles, placing them in one spot to avoid scrambling during the canning process.
3. Batch Recipes for Efficiency
Create multiple batches of canning recipes like jams, sauces, or pickles to maximize efficiency. Consider organizing based on the following table of common batch pairings:
| Recipe Type | Complementary Recipes |
|---|---|
| Cranberry Sauce | Spiced Apple Jam |
| Orange Marmalade | Strawberry Vanilla Preserves |
| Dill Pickled Veggies | Sweet & Spicy Pickled Beets |
4. Label & Date in Advance
- Prepare labels and date stickers beforehand using decorative tags to match the festive season. Include details such as recipe name and canning date for easy identification.
- Pro Tip: If giving jars as gifts, include a short ingredient list or serving suggestion to personalize them further.
5. Simmer Syrups & Spiced Mixes
For recipes with spiced syrups or bases, consider making them a day ahead. Cooling these overnight helps intensify their flavors, yielding even more vibrant jams and sauces during the cooking process. Store them in sealed containers in the fridge until ready to use.
By adopting these Make-Ahead Tips, we ensure that the Christmas canning process is seamless and enjoyable, leaving us more time to relish the holiday season.
Serving And Gift Ideas
When it comes to Christmas canning recipes, the joy isn’t just in crafting these delicious preserves but also in how we share and enjoy them. Canned goods are perfect for adding festive flavors to holiday meals and make delightful, heartfelt gifts. Here are some creative serving suggestions and charming gifting ideas to make the most of your holiday preserves.
Serving Ideas
- Festive Breakfast Spread: Use cranberry-orange marmalade or spiced pear butter to slather over freshly baked scones, pancakes, or waffles. These vibrant flavors will brighten any holiday morning.
- Cheese Pairings: Pair spiced cherry preserves or apple-cinnamon chutney with a selection of cheeses like brie, gouda, or sharp cheddar on a charcuterie board. The sweet and savory contrast elevates your appetizers.
- Glazes for Roasts: Brush cranberry sauce or spiced plum jam over ham, turkey, or pork roasts during baking for a glossy, flavor-packed glaze.
- Dessert Drizzles: Drizzle warm spiced caramel sauce over pound cakes, apple pies, or ice cream for an extra indulgent dessert.
- Cocktails and Mocktails: Stir syrups or infused preserves like vanilla cranberry or ginger syrup into holiday cocktails or sparkling water for unique, festive drinks.
Gift Wrapping Tips
Turn your holiday preserves into cherished gifts with creative wrapping ideas. A little extra effort goes a long way in spreading holiday cheer.
- Decorative Jar Labels: Use custom-designed labels or tags, complete with the preserve’s name, ingredients, and a cheerful holiday message.
- Fabric Covers: Cover jar lids with squares of festive fabric or burlap, securing them with twine, ribbon, or rubber bands.
- Gift Baskets: Arrange jars in a wicker basket with small accompaniments like crackers, tea bags, or a mini cheese knife. Add shredded paper or crinkled tissue for a polished look.
- Holiday-Themed Add-Ons: Attach small holiday trinkets like candy canes, pinecones, or an ornament to the jars for a personalized touch.
- Reusable Packaging: Nestle the jars in cozy, reusable items like tea towels or oven mitts for a practical and stylish presentation.
Gifting Pairing Ideas
Combine your preserves with thoughtful extras to create unforgettable gift sets. Below is a helpful table with pairing ideas:
| Preserve | Pairing Suggestions |
|---|---|
| Spiced Apple Butter | Mini loaf of cinnamon bread, wooden spreader |
| Cranberry Sauce | Bottle of sparkling cider, festive napkins |
| Vanilla Bean Caramel Sauce | Small jar of sea salt, gourmet coffee beans |
| Chutneys (Pear/Apple) | Cheese assortment, crackers |
| Berry Jams | Shortbread cookies, holiday tea sampler |
Special Notes for Holiday Gifting
- Include serving suggestions or small recipe cards with your jars to inspire the recipients. Handwritten notes add an extra cozy touch.
- Use sturdy, secure packaging to prevent breakage, especially if you’re shipping jars to friends and family far away.
- Ensure jars are labeled with a “best by” date and storage instructions to guide recipients on how to enjoy their treats.
Conclusion
Christmas canning brings a unique blend of tradition, creativity, and heartfelt giving to the holiday season. By preserving the rich flavors and aromas of festive ingredients, we create something truly special that can be shared and enjoyed long after the celebrations end.
Whether we’re crafting jams, sauces, or pickles, the time spent canning is as rewarding as the final product itself. These homemade treasures not only enhance our holiday meals but also serve as thoughtful gifts that capture the spirit of the season.
Let’s embrace the joy of Christmas canning and make this holiday even more memorable with the flavors we love and the care we pour into every jar.
Frequently Asked Questions
What are Christmas canning recipes?
Christmas canning recipes are homemade preserved goods, like jams, sauces, and pickles, that capture the festive flavors of the holiday season. These recipes often include seasonal fruits, spices, and syrups, which are stored in jars for later use or gifting, allowing holiday flavors to be enjoyed year-round.
What tools do I need for Christmas canning?
Essential tools for Christmas canning include canning jars with lids, a water bath canner, jar lifters, wide-mouth funnels, and a heavy-bottomed saucepan. Optional items like a digital thermometer, bubble remover, and decorative labels can enhance the process.
What ingredients are commonly used in Christmas canning?
Common ingredients include seasonal fruits (cranberries, apples, pears, oranges, etc.), festive spices (cinnamon, cloves, nutmeg), and essentials like sugar, apple cider vinegar, pectin, and pickling salt. These ingredients combine to create rich, flavorful preserves.
How is the canning process done?
The process involves sterilizing jars, cooking ingredients, filling jars while leaving proper headspace, sealing lids, and processing in a water bath. Once cooled, jars should be checked for proper sealing before storing.
How do I ensure my canned goods are safe to eat?
To ensure safety, sterilize jars and tools, follow recipes with precise measurements, remove air bubbles, and process jars for the recommended time in a water bath canner. Always verify the seals before storing.
Can I gift Christmas preserves to others?
Yes! Homemade preserves make excellent gifts. Add decorative jar labels, fabric covers, or include them in gift baskets with thoughtful pairings (e.g., cranberry sauce with sparkling cider or spiced jam with fresh bread).
How long do Christmas preserves last?
When properly canned and stored in a cool, dark place, Christmas preserves can last up to 12 months. Always check seals and appearance before consuming to ensure freshness.
What are some creative ways to serve canned Christmas goods?
Use holiday preserves as breakfast spreads, pair them with cheeses, glaze meats like ham or turkey, drizzle over desserts, or mix into festive beverages and cocktails for an elevated holiday experience.
Can I prepare for canning in advance?
Yes! You can pre-sterilize jars, gather and prep ingredients, and prepare decorative labels ahead of time. Syrups and spice mixtures can be made a day before to simplify the process and enhance flavors.
Why is headspace important in canning?
Headspace is the gap between the food and jar lid. It allows for proper sealing and expansion during processing. Incorrect headspace can lead to spoilage or improper sealing, so it’s vital to follow recipe guidelines.