
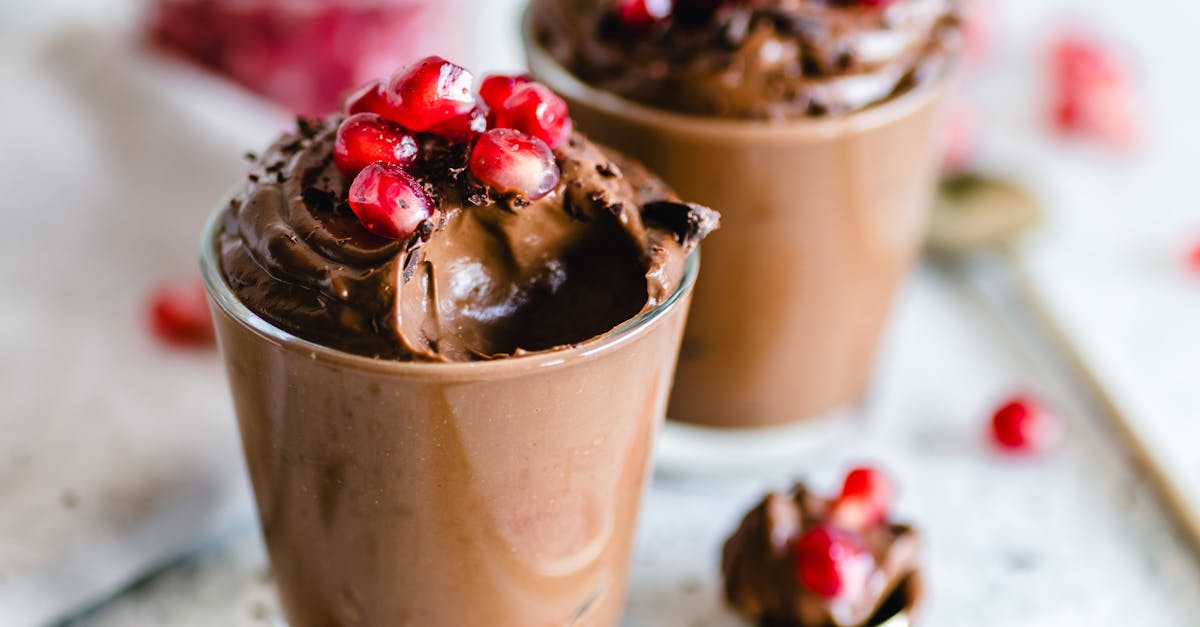
Chocolate Pixies are a delightful treat that combines rich chocolate with a crisp, buttery base. Originating from classic Southern baking traditions, these bars offer the perfect balance of gooey and crunchy textures that keep us coming back for more. They’re simple to make yet impressive enough to serve at any gathering.
We love how versatile Chocolate Pixies are — they can be enjoyed as a quick snack, a party dessert, or even a homemade gift. With just a handful of ingredients and easy steps, this recipe is perfect for both novice and experienced bakers looking to satisfy their chocolate cravings. Let’s dive into making these irresistible bars that bring a little magic to every bite.
Ingredients
To create the perfect Chocolate Pixies, we combine a balance of rich, buttery, and sweet ingredients. Here is a detailed breakdown of what we need to craft these irresistibly gooey and crunchy bars.
Dry Ingredients
We start with the foundation—dry components that provide structure and flavor contrast to our Chocolate Pixies:
- 1 cup all-purpose flour, sifted for a light texture
- 1 cup granulated sugar for sweetness
- 1/2 teaspoon baking powder to ensure a tender crumb
- 1/4 teaspoon salt to enhance all the flavors
- 1 cup semisweet chocolate chips for that signature rich chocolate burst
Wet Ingredients
Next, we add moisture and richness to bind the dry components and create gooey delight:
- 1/2 cup unsalted butter, melted and slightly cooled to blend smoothly
- 2 large eggs at room temperature to add structure and moisture
- 1 teaspoon pure vanilla extract for depth and aromatic warmth
Optional Add-ins
Customize your Chocolate Pixies with these tasty extras to elevate texture and taste:
| Add-in | Quantity | Purpose |
|---|---|---|
| Chopped pecans | 1/2 cup | Adds crunch and nutty flavor |
| Shredded coconut | 1/3 cup | Provides chewy, tropical notes |
| Mini marshmallows | 1/2 cup | Adds gooey, melty sweetness |
| Sea salt flakes | A pinch on top | Enhances chocolate and balances sweetness |
Tip: We recommend folding in optional add-ins gently to distribute evenly without deflating the batter’s texture.
With these ingredients assembled, we’re ready to dive into making our luscious Chocolate Pixies that promise gooey centers layered with crunchy golden edges.
Equipment Needed
To craft the perfect Chocolate Pixies, we need to have the right tools on hand. Having the proper equipment ensures a smooth baking process and a flawless final product. Here’s everything we’ll use to make these irresistible bars:
| Equipment | Purpose |
|---|---|
| 9×13-inch baking pan | For shaping the pixies evenly |
| Mixing bowls | Separate dry and wet ingredient mixing |
| Measuring cups & spoons | For precise ingredient measurement |
| Electric mixer or whisk | To blend our wet ingredients |
| Spatula | For folding chocolate chips and add-ins |
| Saucepan or microwave-safe bowl | To melt unsalted butter |
| Cooling rack | To cool the chocolate pixies after baking |
Detailed Equipment Tips
- Mixing Bowls: Use a large bowl for dry ingredients and another for wet ingredients. This keeps mixing clean and efficient.
- Measuring Tools: Accurate measurement is key for a consistent texture. Use level measurements to avoid soggy or dry results.
- Electric Mixer or Whisk: We prefer an electric mixer to ensure the eggs and melted butter incorporate smoothly, but a sturdy whisk will work perfectly as well.
- Spatula: A flexible spatula allows us to gently fold chocolate chips or optional add-ins without breaking them apart or releasing too much batter from the bowl.
- Baking Pan: Using a 9×13-inch pan guarantees even layers with crunchy edges and gooey centers. Line it with parchment paper for easy removal.
- Cooling Rack: Letting Chocolate Pixies cool completely on a rack preserves their texture and prevents sogginess from steam.
Armed with these essential tools, we’re ready to move confidently into mixing and baking.
Instructions
Let’s walk through the step-by-step process to make our delicious Chocolate Pixies. Following these detailed instructions will ensure perfectly gooey and crunchy bars every time.
Prep Work
- Preheat the oven to 350°F (175°C) to guarantee even baking.
- Lightly grease a 9×13-inch baking pan with butter or line it with parchment paper to prevent sticking.
- Gather and measure all ingredients precisely to streamline the mixing process.
- If using add-ins like chopped pecans, shredded coconut, or mini marshmallows, prep them now by chopping or measuring.
Making the Batter
- In a large bowl, whisk together the dry ingredients:
- 2 cups all-purpose flour
- 1 cup granulated sugar
- 1 teaspoon baking powder
- ½ teaspoon salt
- 1 ½ cups semisweet chocolate chips
- In a separate bowl, combine the wet ingredients:
- 1 cup unsalted butter, melted and slightly cooled
- 2 large eggs
- 1 teaspoon vanilla extract
- Slowly pour the wet ingredients into the dry mixture.
- Use a spatula or electric mixer on low speed to fold the ingredients until just combined. Avoid overmixing to keep the texture light.
- Gently fold in any optional add-ins such as pecans or shredded coconut.
Shaping the Pixies
- Transfer the batter into the prepared 9×13-inch pan.
- Use a spatula to spread the batter evenly, pressing lightly to smooth the surface.
- Ensure the thickness is uniform across the pan to promote even baking.
Baking
- Place the pan in the preheated oven on the middle rack.
- Bake for 25 to 30 minutes or until the edges are golden brown and a toothpick inserted in the center comes out with just a few moist crumbs.
- Avoid overbaking to maintain the gooey centers that define Chocolate Pixies.
| Baking Time | Temperature | Indication |
|---|---|---|
| 25 – 30 min | 350°F | Edges golden, moist center |
Cooling and Setting
- Remove the pan from the oven and let it cool on a wire rack for at least 1 hour.
- Cooling allows the bars to set properly, enhancing the crunchy and gooey texture balance.
- Once cooled, cut the dessert into squares using a sharp knife.
- Serve immediately or store in an airtight container at room temperature for up to 3 days.
By following these detailed instructions, our Chocolate Pixies will be rich, buttery, and irresistibly chocolatey with that perfect Southern charm.
Serving Suggestions
We want to make sure our Chocolate Pixies shine not only in flavor but also in presentation and pairing. Here are our top serving ideas to elevate these luscious bars for any occasion.
Classic Presentation
- Cut the bars into neat squares about 2 inches wide for perfect bite-sized treats.
- Arrange them on a decorative platter or tiered dessert stand to showcase their gooey texture and chocolate chips.
- Sprinkle a light dusting of powdered sugar or a few flakes of sea salt on top for added visual appeal and a delightful flavor contrast.
Warm and Gooey
- Serve Chocolate Pixies slightly warm. Reheat individual squares in the microwave for 10 to 15 seconds to revive the gooey center.
- Pair each warm piece with a scoop of creamy vanilla ice cream or whipped cream to enhance the rich chocolate experience.
Beverage Pairings
| Beverage | Flavor Complement | Serving Tip |
|---|---|---|
| Hot Coffee | Balances sweetness with a slightly bitter edge | Serve in small cups alongside bars |
| Milk (Cold) | Classic favorite that softens intense chocolate | Use chilled whole milk for richness |
| Red Wine (Port) | Offers fruity, deep flavors to contrast bars | Ideal for adult dessert gatherings |
| Hot Chocolate | Double chocolate indulgence | Add a hint of cinnamon or chili for warmth |
Party-Ready Ideas
- Cut into smaller bite-sized pieces and serve with toothpicks for easy finger food.
- Layer Chocolate Pixies with mini marshmallows and chopped pecans in a clear glass dish for a visually stunning dessert display.
- Include a variety of toppings on small plates like shredded coconut, crushed toffee, or caramel drizzle so guests can customize their bars.
Gift Giving
- Wrap individual squares in parchment paper tied with twine or festive ribbons.
- Package several bars in decorative boxes or tins with a label reading “Homemade Chocolate Pixies” for a thoughtful and delicious homemade gift.
“Serving Chocolate Pixies with simple yet elegant touches enhances their Southern charm and satisfies every chocolate lover’s cravings.”
By following these suggestions we can bring out the best in our fudge-like bars whether we’re entertaining guests or indulging ourselves.
Storage Tips
To keep our Chocolate Pixies fresh and delicious, proper storage is essential. Follow these steps to maintain their rich chocolate flavor and perfect texture:
Room Temperature Storage
- Allow the bars to cool completely on a wire rack before storing to prevent condensation.
- Place the Chocolate Pixies in an airtight container to avoid exposure to air and humidity.
- Store at room temperature for up to 3 days. This keeps the bars soft and gooey inside with a slight crunch on the edges.
Refrigeration
- If we want to extend freshness beyond a few days, refrigerate the bars in an airtight container.
- For best texture, separate layers with parchment or wax paper to avoid sticking.
- Consume within 7 days; chilling will firm up the buttery base, making the texture denser but still delicious.
Freezing for Long-Term Storage
- For storage beyond one week, freezing is optimal.
- Wrap individual squares tightly in plastic wrap or aluminum foil to preserve flavor and prevent freezer burn.
- Place wrapped squares in a freezer-safe container or heavy-duty freezer bag.
| Storage Method | Duration | Container Type | Notes |
|---|---|---|---|
| Room Temperature | Up to 3 days | Airtight container | Keeps bars soft and gooey |
| Refrigeration | Up to 7 days | Airtight container | Texture firms; separate layers |
| Freezing | Up to 3 months | Wrapped + airtight bag | Wrap each square individually |
Reheating Tips
- Warm Chocolate Pixies at room temperature for 30 minutes before serving.
- For a warm gooey treat, microwave individual squares for 10-15 seconds or briefly heat in a preheated 300°F oven for 5 minutes.
- Serve with ice cream or whipped cream to enhance the rich chocolate experience.
“Proper storage not only preserves flavor but also keeps the distinctive gooey and crunchy balance of our Chocolate Pixies intact.”
By following these storage tips, we can enjoy our homemade Chocolate Pixies at their best — whether immediately or days later.
Conclusion
Chocolate Pixies bring together rich chocolate and buttery goodness in a way that’s hard to resist. Whether you’re baking for a quick treat or a special occasion, this recipe delivers consistently delicious results with minimal effort.
With the right ingredients, equipment, and a few simple steps, we can create these delightful bars that offer the perfect balance of gooey and crunchy textures. Plus, the serving and storage tips ensure they stay fresh and enjoyable for days.
Let’s make our next baking session a little sweeter with these classic Southern-inspired Chocolate Pixies.
Frequently Asked Questions
What are Chocolate Pixies?
Chocolate Pixies are rich, buttery dessert bars rooted in Southern baking tradition. They feature a gooey, chocolatey center with a crunchy base, making them a favorite treat for various occasions.
What ingredients do I need to make Chocolate Pixies?
You need all-purpose flour, granulated sugar, baking powder, salt, semisweet chocolate chips, melted unsalted butter, eggs, and vanilla extract. Optional add-ins include pecans, shredded coconut, mini marshmallows, and sea salt flakes.
What equipment is essential for baking Chocolate Pixies?
A 9×13-inch baking pan, mixing bowls, measuring cups and spoons, an electric mixer or whisk, spatula, microwave-safe bowl or saucepan for melting butter, and a cooling rack are essential for best results.
How long do I bake Chocolate Pixies?
Bake at 350°F (175°C) for 25 to 30 minutes until edges are golden but the center stays moist. Cooling for at least an hour before cutting is recommended.
Can I customize the Chocolate Pixies recipe?
Yes! You can add pecans, shredded coconut, mini marshmallows, or sprinkle sea salt flakes to enhance flavor and texture according to your preference.
How should I store Chocolate Pixies?
Store cooled bars in an airtight container at room temperature for up to 3 days or refrigerate up to 7 days. For longer storage, freeze individually wrapped squares to maintain freshness.
What are the best serving suggestions for Chocolate Pixies?
Serve warm with ice cream or whipped cream for gooey indulgence. They pair well with hot coffee, cold milk, red wine, or hot chocolate and look great dusted with powdered sugar or sea salt.
Can Chocolate Pixies be made by beginners?
Absolutely! The recipe is simple and versatile, perfect for bakers of all skill levels with straightforward step-by-step instructions.