
Chocolate Pixie Cookies are a delightful treat that combines rich chocolate flavor with a soft, chewy texture. Originating from classic bakery favorites, these cookies have become a beloved snack for chocolate lovers everywhere. They’re simple to make yet impressively delicious, perfect for any occasion.
We love how these cookies balance sweetness with a hint of cocoa bitterness, making each bite irresistible. Whether you’re baking for a special event or just craving a homemade chocolate fix, this recipe delivers consistent results with minimal effort. Let’s dive into making these scrumptious Chocolate Pixie Cookies that will quickly become a staple in our cookie jar.
Ingredients
To craft the perfect Chocolate Pixie Cookies, we gather a combination of carefully selected dry and wet ingredients to achieve that signature rich chocolate flavor and soft, chewy texture. Here’s everything we need to create these irresistible treats.
Dry Ingredients
Our dry ingredients form the foundation of the cookie’s structure and deep cocoa taste. Precision in measuring each ensures consistent results.
- 2 cups all-purpose flour, sifted
- ¾ cup unsweetened cocoa powder, preferably Dutch-process for a smooth, intense flavor
- 1 teaspoon baking soda
- ½ teaspoon salt
- 1 cup granulated sugar
| Ingredient | Quantity | Purpose |
|---|---|---|
| All-purpose flour | 2 cups | Provides structure and texture |
| Unsweetened cocoa | ¾ cup | Adds rich chocolate flavor |
| Baking soda | 1 teaspoon | Leavens for a tender crumb |
| Salt | ½ teaspoon | Enhances and balances sweetness |
| Granulated sugar | 1 cup | Sweetens and adds crunch |
Wet Ingredients
The wet ingredients bring moisture and richness, ensuring the cookies remain tender and chewy after baking.
- ½ cup unsalted butter, softened to room temperature
- 1 cup packed light brown sugar, for a deeper caramel flavor
- 2 large eggs, at room temperature
- 1 teaspoon pure vanilla extract
Optional Add-Ins
To customize our Chocolate Pixie Cookies, these optional ingredients add texture and bursts of flavor. Feel free to mix and match according to preference.
- 1 cup semi-sweet chocolate chips or chunks, for melty pockets of chocolate
- ½ cup chopped nuts (walnuts or pecans), for crunch and nuttiness
- ¼ cup mini marshmallows, adding a gooey surprise inside
“The magic of Chocolate Pixie Cookies lies in the balance of rich cocoa and the deep caramel notes from brown sugar combined with the creamy butter.”
With these ingredients ready, we can confidently move forward to mixing our dough for cookie perfection.
Equipment Needed
To make our Chocolate Pixie Cookies perfectly, having the right equipment on hand is essential. Using appropriate tools helps us achieve consistent results and an ideal texture in every batch.
Essential Baking Tools
- Mixing Bowls: At least two medium-sized bowls for separating dry and wet ingredients.
- Electric Mixer or Stand Mixer: For creaming butter and sugar efficiently, ensuring a smooth dough.
- Measuring Cups and Spoons: Accurate measurement of ingredients like flour, cocoa powder, and vanilla extract is key.
- Sifter or Fine Mesh Strainer: To sift dry ingredients, preventing lumps and ensuring even mixing.
- Spatula or Wooden Spoon: For folding in chocolate chips or optional add-ins without overmixing.
- Cookie Scoop or Tablespoon: To portion dough uniformly, ensuring even baking and consistent cookie size.
- Baking Sheets: Preferably rimmed, to hold dough and prevent spills.
- Parchment Paper or Silicone Baking Mat: To line baking sheets, preventing sticking and simplifying cleanup.
- Cooling Rack: Allows cookies to cool evenly and maintain their chewy texture.
Additional Helpful Tools
- Digital Kitchen Scale: For those who prefer weighing ingredients for precision.
- Oven Thermometer: To verify oven temperature matches the recipe’s requirements.
- Timer: To monitor baking times precisely and avoid overbrowning.
| Equipment | Purpose |
|---|---|
| Mixing Bowls | Separate and combine dry and wet ingredients |
| Electric Mixer | Cream butter and sugar to achieve smooth dough |
| Measuring Cups/Spoons | Accurate ingredient measurement |
| Sifter/Strainer | Prevent lumps in dry ingredients |
| Spatula/Wooden Spoon | Fold in add-ins gently without overmixing |
| Cookie Scoop/Tablespoon | Portion cookie dough uniformly |
| Baking Sheets | Bake cookies safely and evenly |
| Parchment Paper/Silicone Mat | Prevent sticking and simplify cleanup |
| Cooling Rack | Cool cookies evenly maintaining texture |
By assembling these tools before we start mixing, we ensure the process is smooth and efficient. This preparation also helps us focus on the method and enjoy creating those irresistibly rich Chocolate Pixie Cookies.
Prep Work
Before diving into mixing the ingredients, we need to make sure our workspace and oven are perfectly prepared. Proper prep work guarantees that our Chocolate Pixie Cookies bake evenly and turn out irresistibly delicious every time.
Preheating the Oven
First, we preheat our oven to 350°F (175°C). This temperature is optimal for achieving the perfect balance between a soft, chewy center and slightly crisp edges.
“Always preheat the oven fully before baking. This helps the cookies bake evenly and develop that signature rich chocolate texture.”
Tips for Oven Preheating:
| Step | Detail |
|---|---|
| Temperature | 350°F (175°C) |
| Preheating Time | At least 15 minutes |
| Use Oven Thermometer | Recommended for accuracy |
| Rack Position | Middle rack ensures even baking |
Preparing the Baking Sheets
Next, we prepare our baking sheets to prevent sticking and promote even baking. We can use either parchment paper or silicone baking mats.
Steps to prepare:
- Line baking sheets with parchment paper or silicone mats.
- If unavailable, lightly grease the baking sheet with butter or nonstick spray.
- Use a cookie scoop to portion dough evenly, leaving about 2 inches between cookies for spreading.
“A well-prepared baking sheet is crucial for consistent cookie shape and texture.“
By following these prep steps, we set the foundation for perfectly baked Chocolate Pixie Cookies every time.
Directions
Follow these steps carefully to create Chocolate Pixie Cookies that are rich, soft, and delicious. Attention to detail during each phase will guarantee perfect texture and flavor every time.
Mixing the Dough
- Cream the Butter and Sugars
In a large mixing bowl, use an electric mixer to cream together 1 cup unsalted butter (softened), 3/4 cup granulated sugar, and 3/4 cup light brown sugar. Beat on medium speed for 3-4 minutes until the mixture is light and fluffy.
- Add Eggs and Vanilla
Beat in 2 large eggs one at a time, ensuring each is fully incorporated. Add 2 teaspoons vanilla extract and mix for another minute.
- Sift and Combine Dry Ingredients
In a separate bowl, sift together 1 3/4 cups all-purpose flour, 3/4 cup unsweetened cocoa powder, 1 teaspoon baking soda, and 1/2 teaspoon salt. Gradually add this dry mixture to the wet ingredients while mixing on low speed. Mix until just combined — avoid overmixing to keep cookies tender.
- Optional Add-ins
Fold in your choice of 1 cup chocolate chips, 1/2 cup chopped nuts, or 1/2 cup mini marshmallows for extra texture and flavor.
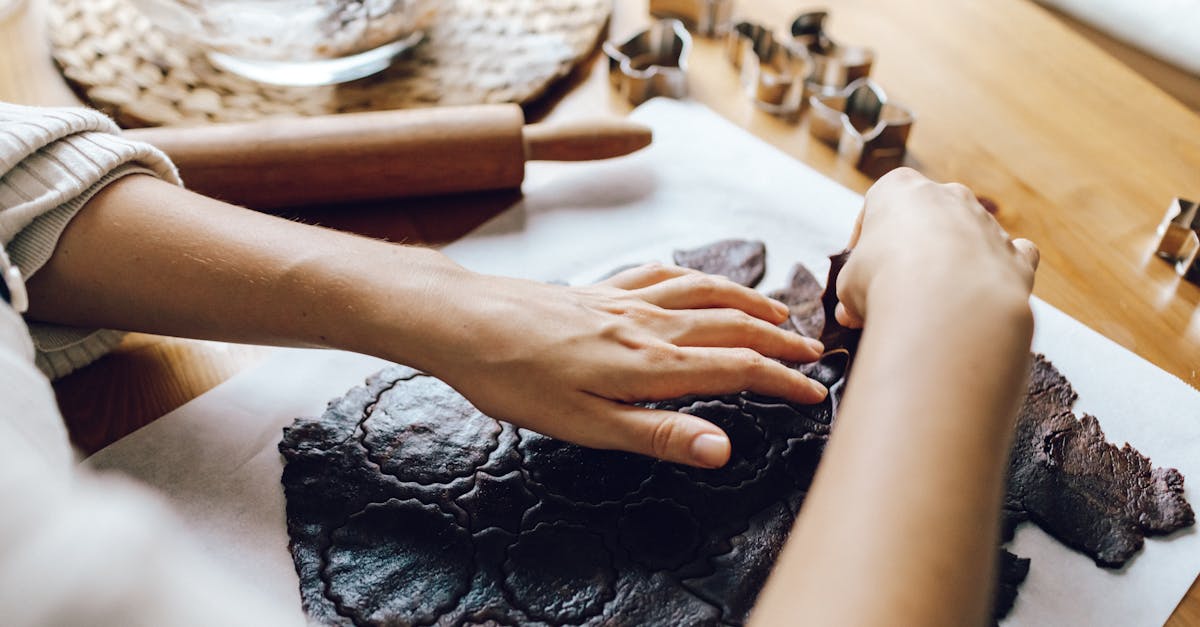
Shaping the Cookies
- Use a cookie scoop or a standard spoon to portion out dough balls about 1.5 tablespoons each.
- Place dough balls on prepared baking sheets lined with parchment paper or silicone mats.
- Space each ball 2 inches apart to allow for spreading.
- Lightly flatten each dough ball with your palm or the bottom of a glass for uniform thickness.
| Step | Measurement | Notes |
|---|---|---|
| Dough per cookie | 1.5 tablespoons | Use cookie scoop or spoon |
| Spacing on sheet | 2 inches | Prevent cookies from merging |
| Flattening | Lightly | Creates consistent shape |
Baking the Cookies
- Preheat oven to 350°F (175°C) as previously advised.
- Bake cookies for 10 to 12 minutes. Look for slightly crisp edges and a soft center.
- Avoid overbaking to maintain that signature chewy texture.
- Recommended: Rotate baking sheets halfway through baking for even cooking.
Cooling and Setting
- Remove cookies from oven and transfer the baking sheet to a cooling rack.
- Allow cookies to cool on the sheet for 5 minutes; this lets them firm up without breaking.
- Then, carefully transfer cookies onto the cooling rack to cool completely.
- Fully cooled cookies will have the perfect chewiness combined with a rich chocolate flavor.
Storage Instructions
To maintain the freshness and rich flavor of our Chocolate Pixie Cookies, proper storage is essential. Follow these guidelines to enjoy their soft, chewy texture for days after baking.
Room Temperature Storage
Store the cooled cookies in an airtight container at room temperature. This method keeps them soft and moist.
- Container type: Use a plastic or glass container with a tight-fitting lid.
- Layering: Place a sheet of parchment paper between layers to prevent sticking.
- Duration: Cookies stay fresh for up to 4 days this way.
Refrigeration
If we want to extend the shelf life without compromising texture:
- Place cookies in an airtight container.
- Refrigerate for up to 1 week.
- Bring cookies to room temperature before serving to soften.
Freezing
For long-term storage, freezing is ideal and keeps the cookies tasting fresh.
| Step | Instruction |
|---|---|
| 1. Cool completely | Ensure cookies have cooled fully to avoid condensation. |
| 2. Flash freeze | Arrange cookies in a single layer on a baking sheet and freeze for 1 hour. |
| 3. Package | Transfer cookies to a freezer-safe bag or airtight container. Include parchment between layers. |
| 4. Storage duration | Freeze for up to 3 months maintaining flavor and texture. |
| 5. Thawing | Thaw at room temperature for 1 to 2 hours or warm gently in an oven at 300°F (150°C) for 5 minutes. |
“Proper storage ensures our Chocolate Pixie Cookies retain their irresistible chewiness and deep chocolate flavor.”
Additional Tips
- Avoid refrigerating cookies without airtight containers to prevent drying out.
- Do not stack warm cookies in containers to avoid sogginess caused by steam.
- Label containers with storage dates for freshness tracking.
By following these Storage Instructions, we can enjoy our delightful Chocolate Pixie Cookies whenever a chocolate craving strikes.
Serving Suggestions
To elevate our Chocolate Pixie Cookies experience, here are some delicious serving ideas that complement their rich chocolate flavor and soft, chewy texture:
- Pair with Cold Milk: Serve the cookies with a tall glass of cold milk. The creamy freshness balances the deep cocoa taste perfectly.
- Warm with Ice Cream: Gently warm a cookie in the microwave for 10 seconds and sandwich it with vanilla or coffee ice cream. The contrast between warm cookie and cold ice cream creates a delightful treat.
- Coffee or Hot Chocolate Companion: Enjoy the cookies alongside a cup of freshly brewed coffee or rich hot chocolate. The bitterness of coffee and sweetness of hot chocolate intensify the complex chocolate notes in the cookies.
- Top with Whipped Cream: Add a dollop of lightly sweetened whipped cream or whipped coconut cream on the side for a light and airy contrast.
- Sprinkle with Sea Salt: For a gourmet touch, sprinkle a pinch of flaky sea salt over the cookies just before serving. This enhances the cocoa’s bitterness and brings out the sweetness.
- Create a Dessert Platter: Combine these cookies with other small desserts like brownies, chocolate truffles, and fresh berries for an impressive chocolate-themed dessert board.
| Serving Suggestion | Flavor/Texture Contrast | Ideal Occasion |
|---|---|---|
| Cold Milk | Creamy and refreshing | Everyday indulgence |
| Warm Cookie with Ice Cream | Warm-soft meets cold-creamy | Special treat or dessert |
| Coffee or Hot Chocolate | Bitter-sweet complexity | Morning or afternoon snack |
| Whipped Cream Topping | Light and airy contrast | Tea parties or gatherings |
| Sea Salt Sprinkle | Sweet meets savory | Gourmet touch or entertaining |
| Dessert Platter | Variety of textures and chocolate intensities | Celebrations and parties |
“There is nothing better than enjoying a batch of our Chocolate Pixie Cookies fresh off the cooling rack paired with your favorite drink or creative topping.”
Let’s experiment with these serving ideas to enhance every bite and share the joy of these irresistibly rich cookies.
Conclusion
Chocolate Pixie Cookies are a delightful way to satisfy any chocolate craving with ease. Their rich flavor and chewy texture make them perfect for sharing or enjoying solo. With simple ingredients and straightforward steps, these cookies fit seamlessly into any baking routine.
By following the recipe and tips we’ve shared, you’ll consistently create treats that impress every time. Whether you stick to the classic version or add your favorite mix-ins, these cookies offer endless delicious possibilities. Let’s bake, share, and savor every bite together.
Frequently Asked Questions
What makes Chocolate Pixie Cookies unique?
Chocolate Pixie Cookies are known for their rich chocolate flavor combined with a soft, chewy texture. They balance sweetness and cocoa bitterness perfectly, creating an irresistible taste loved by chocolate fans.
Are Chocolate Pixie Cookies difficult to make?
No, they are simple to prepare with minimal effort. The recipe uses common ingredients and straightforward steps, making it perfect for bakers of all skill levels.
What ingredients are needed for Chocolate Pixie Cookies?
The dry ingredients include all-purpose flour, cocoa powder, baking soda, salt, and granulated sugar. Wet ingredients are unsalted butter, light brown sugar, eggs, and vanilla extract. Optional add-ins like chocolate chips or nuts can be included.
What essential equipment do I need to bake these cookies?
You need mixing bowls, an electric mixer, measuring cups, spoons, a sifter, spatula, cookie scoop, baking sheets, parchment paper or silicone mats, and cooling racks. Additional tools like a digital scale and oven thermometer help improve accuracy.
How do I achieve the perfect chewy texture?
Preheat your oven to 350°F (175°C), follow the mixing and baking instructions carefully, and avoid overbaking. Proper shaping and timely removal from the oven help maintain the softness.
How should I store Chocolate Pixie Cookies?
Store them at room temperature in an airtight container for several days. For longer freshness, refrigerate up to a week or freeze them for extended storage. Use proper wrapping to avoid dryness or sogginess.
Can I customize Chocolate Pixie Cookies?
Yes, you can add chocolate chips, nuts, or mini marshmallows to customize flavors and textures according to your preference.
What are some good serving suggestions?
Serve these cookies with cold milk, ice cream, coffee, hot chocolate, or topped with whipped cream and sea salt. Creating a dessert platter with other treats also enhances the experience.