
If you’re craving a rich and creamy treat that combines two classic flavors, our Chocolate Peanut Butter Ninja Creami recipe is just what you need. This dessert blends the smooth, decadent taste of chocolate with the nutty, satisfying flavor of peanut butter, creating a perfect harmony in every bite. Using the Ninja Creami makes it easy to whip up a homemade frozen dessert that’s both delicious and customizable.
Ingredients
To create our Chocolate Peanut Butter Ninja Creami dessert, we gather a blend of rich chocolate base ingredients, creamy peanut butter mix-ins, and optional toppings to customize every bite. Let’s break down the essentials.
Chocolate Base Ingredients
We start by crafting the luscious chocolate foundation. Precise measurements ensure perfect texture and flavor.
| Ingredient | Quantity | Preparation Notes |
|---|---|---|
| Unsweetened cocoa powder | ¼ cup | Sifted for smoothness |
| Whole milk | 1 cup | Cold |
| Heavy cream | ½ cup | Cold |
| Granulated sugar | ⅓ cup | |
| Vanilla extract | 1 tsp | Pure, for depth |
| Salt | ⅛ tsp | Enhances chocolate taste |
Peanut Butter Mix-Ins
Next, we incorporate creamy peanut butter elements that meld perfectly with our chocolate base.
- ½ cup creamy peanut butter, room temperature for easier blending
- ¼ cup powdered sugar to balance natural peanut butter saltiness
- 1 tsp vanilla extract to enhance the nutty undertones
- Optional: 2 tbsp crushed peanuts to add crunch and texture
Optional Toppings
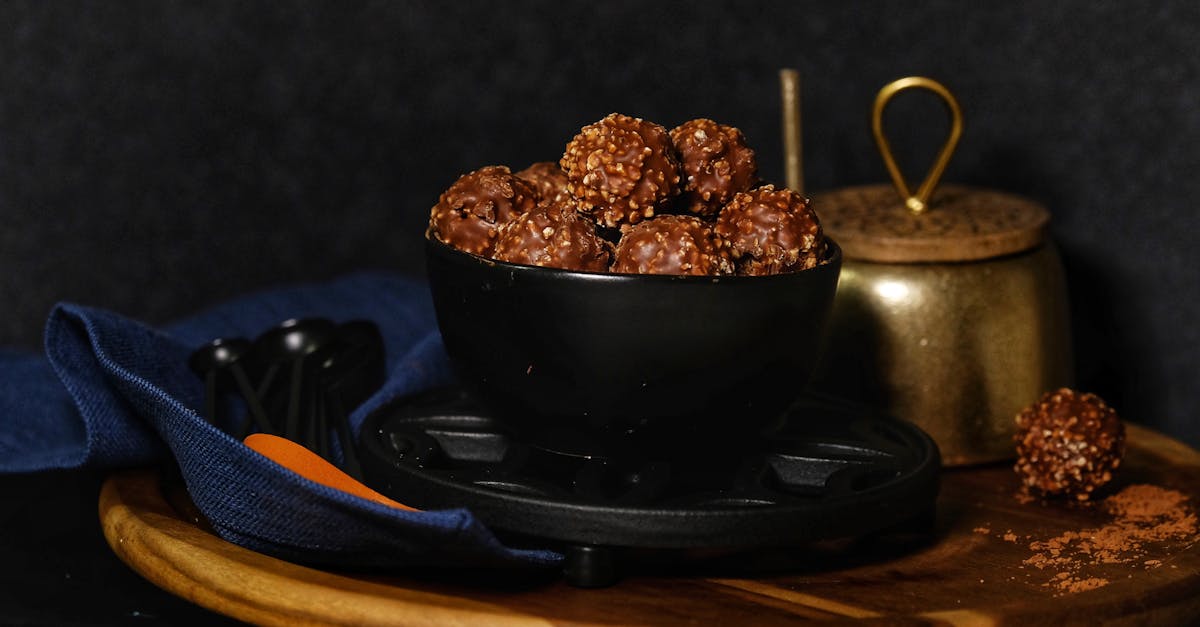
Customize your Chocolate Peanut Butter Ninja Creami with these delightful toppings for added flavor and presentation.
- Mini chocolate chips – 2 tbsp
- Chopped roasted peanuts – 2 tbsp
- Drizzle of melted peanut butter or chocolate syrup – 1 tbsp
- Sea salt flakes – a pinch for contrast
By having these ingredients ready, we set ourselves up for a smooth preparation process resulting in a rich and creamy frozen treat that highlights the perfect blend of chocolate and peanut butter.
Equipment Needed
To create our Chocolate Peanut Butter Ninja Creami dessert, gathering the right equipment ensures a smooth process and perfect results. Here is what we need to have ready before we start.
Ninja Creami Machine
The Ninja Creami Machine is essential for transforming our prepared mix into a rich, creamy frozen dessert. It uses a unique spinning process that converts the frozen base into a light and fluffy texture. Make sure your machine is clean and fully assembled. We recommend using the appropriate Ninja Creami pint container to fit the machine specifications perfectly.
Mixing Bowls
We need at least two mixing bowls:
- One for preparing the chocolate base mixture
- One for combining the peanut butter mix-ins
Using bowls made of glass or stainless steel is ideal because they are non-reactive and easy to clean. Medium-sized bowls (around 2-3 quarts) give us enough space to whisk ingredients thoroughly without spillage.
Measuring Cups and Spoons
Accurate measuring tools are crucial for balancing the flavors and texture of our dessert. We rely on:
| Tool | Use |
|---|---|
| Liquid measuring cup | For whole milk, heavy cream, and extracts |
| Dry measuring cups | For granulated sugar, cocoa powder |
| Measuring spoons | For vanilla extract, salt, powdered sugar |
Having a set of nested measuring cups and spoons helps speed up the process and keeps our workspace organized.
Freezer-Safe Container
Before using the Ninja Creami, our blended base needs to be properly frozen. For this, a freezer-safe pint container is required.
- Make sure the container has an airtight lid to prevent freezer burn
- Use a container compatible with the Ninja Creami machine for easy insertion and spinning
- Label the container with the date for freshness tracking
Our freezer-safe container keeps the mixture firm and ready for the unique creaming process that defines the Ninja Creami dessert.
By having this essential equipment on hand, we set ourselves up for a smooth preparation and a delicious final treat.
Prep Instructions
Before we transform our ingredients into a creamy delight, precise preparation is key. Follow these detailed steps to craft the perfect Chocolate Peanut Butter Ninja Creami base and mix-ins, setting the stage for an irresistible frozen treat.
Preparing the Chocolate Base
- Measure Ingredients Accurately
Using our measuring cups and spoons, combine the following in a large mixing bowl:
| Ingredient | Quantity | Notes |
|---|---|---|
| Unsweetened cocoa powder | ¾ cup | Sifted for smoothness |
| Granulated sugar | ½ cup | |
| Whole milk | 1 cup | Room temperature |
| Heavy cream | 1 cup | Chilled |
| Vanilla extract | 1 tsp | |
| Salt | ¼ tsp | Enhances chocolate flavor |
- Whisk Thoroughly
Whisk the cocoa powder and sugar first to break up lumps. Gradually add whole milk and heavy cream while whisking to create a smooth, rich chocolate base.
- Add Vanilla and Salt
Stir in vanilla extract and salt, which deepen the flavor profile. The mixture should be velvety and free of lumps for the best texture after freezing.
Incorporating the Peanut Butter
- Mix Peanut Butter and Powdered Sugar
In a second bowl, blend:
| Ingredient | Quantity | Notes |
|---|---|---|
| Creamy peanut butter | ½ cup | Room temperature for easy mixing |
| Powdered sugar | ¼ cup | For sweetness and smooth texture |
| Vanilla extract | ½ tsp | Adds aroma |
- Blend Until Smooth
Use a spatula or electric mixer to combine ingredients into a glossy, thick peanut butter mixture.
- Optionally Add Texture
If desired, gently fold in crushed roasted peanuts (2 tablespoons) for a nice crunch to incorporate later.
Freezing the Mixture
- Combine Chocolate Base and Peanut Butter
Gently swirl the peanut butter mixture into the chocolate base without fully mixing — this creates ribbon-like pockets of peanut butter throughout.
- Pour into Freezer-Safe Container
Transfer the mixture into a Ninja Creami-compatible pint container. Level the surface for even freezing.
- Freeze Thoroughly
Place container flat in the freezer. Freeze for at least 24 hours to ensure the mixture is completely solid, which is critical for achieving the perfect Ninja Creami texture.
Directions
Let’s walk through the steps to create our Chocolate Peanut Butter Ninja Creami dessert, ensuring every step is simple and precise for the perfect frozen treat.
Setting Up the Ninja Creami
- Place the Ninja Creami machine on a stable surface near a power outlet.
- Ensure all parts are clean and dry.
- Insert the outer bowl into the machine’s base securely.
- Connect the power cord and switch on the machine.
- Prepare your frozen mixture container by ensuring it’s firmly sealed and properly frozen for at least 24 hours.
Processing the Frozen Mixture
- Remove the frozen container from the freezer.
- Take off the lid and unlock the outer bowl from the container.
- Insert the bowl into the Ninja Creami machine.
- Select the “Ice Cream” setting on the machine.
- Start the process, allowing Ninja Creami to transform the frozen mixture into a creamy, smooth base.
- Once complete, remove the bowl from the machine carefully to add the peanut butter mix-ins.
Adding Peanut Butter Mix-Ins
- Spoon the prepared peanut butter mix-in evenly into the center of the creamy chocolate base.
- Add the optional crushed roasted peanuts if preferred for extra texture.
- Ensure the mix-ins are centered and somewhat embedded for even distribution during the next processing step.
Final Creami Processing
- Place the outer bowl with the mixture and mix-ins back into the Ninja Creami machine.
- Select the “Mix-Ins” function for gentle folding.
- Start the machine and allow it to blend the peanut butter mix-ins into the chocolate base until evenly combined.
- Once finished, remove the bowl and check the texture—if needed, repeat the “Mix-Ins” function for thicker consistency.
- Serve immediately or store covered in the freezer for a firmer texture.
| Step | Action | Setting / Detail | Duration |
|---|---|---|---|
| Setting Up | Power on and insert bowl | N/A | 1-2 minutes |
| Processing Frozen Mixture | Use “Ice Cream” setting | Smooth creamy base | ~4-5 minutes |
| Adding Mix-Ins | Spoon peanut butter mix-ins in center | Optional crushed peanuts | N/A |
| Final Processing | Use “Mix-Ins” function | Evenly combine ingredients | ~1-2 minutes |
By following these Directions meticulously, we ensure our Chocolate Peanut Butter Ninja Creami is irresistibly smooth and perfectly blended with rich peanut buttery goodness.
Serving Suggestions
To elevate our Chocolate Peanut Butter Ninja Creami dessert experience, we can explore exciting serving ideas that highlight its rich flavors and creamy texture. These suggestions help us create an irresistible frozen treat perfect for any occasion.
Topping Ideas
Adding the right toppings enhances both the flavor and texture of our dessert. Here are some delicious options to complement the chocolate and peanut butter combination:
- Mini chocolate chips: Add a satisfying crunch and extra burst of chocolate.
- Chopped roasted peanuts: Bring out the nutty flavor and provide a contrasting crunch.
- Drizzle of melted peanut butter: Intensify the peanut butter taste and add creaminess.
- Chocolate syrup: Enhance the chocolate richness with a glossy, sweet finish.
- Pinch of sea salt: Balance the sweetness and boost flavor complexity.
- Whipped cream: Lighten the dessert and add an airy texture.
- Crumbled cookies or brownies: Add indulgence and a chewy texture contrast.
- Fresh fruit slices (banana or strawberries): Introduce freshness and natural sweetness.
We can combine several of these for a layered taste experience or keep it simple with one bold topping for a clean flavor profile.
Presentation Tips
Presentation plays a key role in making the Chocolate Peanut Butter Ninja Creami visually inviting. Here are some tips to plate and serve like pros:
| Presentation Tip | Description |
|---|---|
| Use clear glass bowls or cups | Showcases the creamy chocolate and peanut butter swirls visibly. |
| Add toppings just before serving | Maintains crunch and visual appeal. |
| Serve with a small dessert spoon | Enhances the eating experience with ease and elegance. |
| Garnish with a mint leaf | Adds a pop of color and freshness. |
| Layer in parfait glasses | Create a layered look by alternating scoops & mix-ins. |
| Place a napkin or coaster below | Completes the serving setting with a polished touch. |
Following these Presentation Tips ensures our dessert not only tastes heavenly but looks stunning to delight both the eyes and palate.
Make-Ahead Tips
Preparing our Chocolate Peanut Butter Ninja Creami dessert ahead of time makes enjoying this rich and creamy treat effortlessly convenient. Here are the essential tips for storing and freezing to maintain maximum freshness and flavor.
Storing Leftovers
To keep our Chocolate Peanut Butter Ninja Creami dessert fresh after serving, follow these guidelines:
- Place leftovers in an airtight freezer-safe container.
- Store the container in the freezer immediately to preserve texture.
- Label the container with the date to track freshness.
- Consume leftovers within 3 to 5 days for the best taste and texture.
- When ready to serve, allow the dessert to soften at room temperature for 5 to 10 minutes before scooping.
We recommend avoiding storage at room temperature or in the fridge as the texture will become too soft or icy and lose the smooth creaminess we love.
Freezing for Future Use
For meal prepping or making larger batches of our Chocolate Peanut Butter Ninja Creami dessert, freezing properly is key. Follow these steps for optimal results:
| Step | Instruction |
|---|---|
| Use the Correct Container | Freeze mixture in a Ninja Creami-compatible pint container with a secure lid. |
| Freeze Duration | Freeze mixture for a minimum of 24 hours before processing in the Ninja Creami. |
| Label & Date | Always label with the preparation date to maintain quality tracking. |
| Avoid Over-Filling | Leave at least half an inch of space at the top of the container to allow expansion during freezing. |
| Thawing Before Processing | Remove from freezer just before processing—do not thaw beforehand to avoid icy texture. |
Storing the mix-ins separately ensures they remain fresh and maintain their texture. Add them during the final Ninja Creami “Mix-Ins” processing step. Keeping these mix-ins fresh adds delightful texture and balance to every bite.
Conclusion
Crafting our own Chocolate Peanut Butter Ninja Creami dessert lets us enjoy a rich and creamy treat tailored to our taste. With simple ingredients and the Ninja Creami’s precision, we can create a perfectly smooth and flavorful frozen delight anytime.
By following the steps carefully and experimenting with mix-ins and toppings, we unlock endless possibilities for customization. This recipe not only satisfies our sweet cravings but also offers a fun and rewarding experience in the kitchen.
Let’s keep this recipe handy for whenever we want a quick, homemade indulgence that’s both delicious and impressive.
Frequently Asked Questions
What ingredients are needed for the Chocolate Peanut Butter Ninja Creami dessert?
You need unsweetened cocoa powder, whole milk, heavy cream, granulated sugar, vanilla extract, salt for the chocolate base. For peanut butter mix-ins, use creamy peanut butter, powdered sugar, vanilla extract, and optional crushed peanuts. Toppings can include mini chocolate chips, chopped peanuts, melted peanut butter or chocolate syrup, and sea salt.
What equipment is required to make this dessert?
The key equipment is a Ninja Creami machine, two mixing bowls (glass or stainless steel preferred), accurate measuring cups and spoons, and a freezer-safe container compatible with the Ninja Creami for freezing the mixture.
How long do I need to freeze the mixture before using the Ninja Creami?
Freeze the mixture for at least 24 hours in a Ninja Creami-compatible container to achieve the perfect texture for processing.
How do I combine the chocolate base and peanut butter mix-ins?
Prepare the chocolate base and peanut butter mix-ins separately, then combine them in the container before freezing. After freezing, use the Ninja Creami machine’s “Mix-Ins” function to blend them smoothly.
Can I store leftovers and how long will they stay fresh?
Store leftovers in an airtight freezer-safe container, label with the date, and consume within 3 to 5 days for the best taste and freshness.
What are some recommended toppings for this dessert?
Toppings include mini chocolate chips, chopped roasted peanuts, melted peanut butter or chocolate syrup, and a sprinkle of sea salt to enhance flavor and texture.
Can I prepare this dessert in advance and how?
Yes, you can prepare it ahead by freezing the base in the Ninja Creami container for at least 24 hours. Store mix-ins separately and add them just before processing for best texture.
How do I use the Ninja Creami to make this dessert?
After freezing the mixture, place the container into the Ninja Creami, select the “Ice Cream” setting, and then use the “Mix-Ins” function to incorporate peanut butter mix-ins until smooth and fluffy.
What texture can I expect from this dessert?
Expect a rich, creamy, light, and fluffy frozen treat that blends the smoothness of chocolate and creamy peanut butter perfectly.
Is this dessert customizable to different flavor preferences?
Yes, you can customize by adjusting the amount of chocolate or peanut butter, trying different toppings, or adding extra ingredients like crushed nuts for added texture.