
Chocolate pavé is the ultimate treat for chocolate lovers who crave something rich and velvety. This classic French dessert is known for its smooth, dense texture that melts in your mouth with every bite. It’s surprisingly simple to make yet delivers an impressive, elegant finish perfect for any occasion.
We love how this recipe combines just a few high-quality ingredients to create a luxurious dessert that feels indulgent without being complicated. Whether you’re serving it at a dinner party or enjoying a quiet night in, chocolate pavé never fails to satisfy that deep chocolate craving. Let’s dive into crafting this decadent delight together.
Ingredients
To craft the perfect Chocolate Pavé with its signature rich and smooth texture, we rely on a selection of quality ingredients. Below, we break down the essentials for the Chocolate Pavé, the luscious Ganache, and the elegant Decoration that will elevate this classic dessert.
For the Chocolate Pavé
We combine key components that form the base of the pavé, ensuring a dense and velvety finish.
- 8 ounces (225g) bittersweet chocolate, chopped finely
- 1/2 cup (115g) unsalted butter, cut into cubes
- 1/4 cup (50g) granulated sugar
- 4 large eggs, at room temperature
- 1 teaspoon pure vanilla extract
- Pinch of salt
For the Ganache
The ganache adds an extra layer of creamy indulgence and smoothness to our pavé.
- 4 ounces (115g) bittersweet chocolate, chopped
- 1/2 cup (120ml) heavy cream
- 1 tablespoon unsalted butter, softened
For Decoration
Presentation is key for this elegant dessert. These finishing touches add texture and visual appeal.
- Cocoa powder, for dusting
- Chocolate shavings or curls
- Edible gold leaf (optional)
- Fresh berries such as raspberries or strawberries (optional)
| Ingredient | Amount | Purpose |
|---|---|---|
| Bittersweet Chocolate | 8 oz (pavé) + 4 oz (ganache) | Core flavor and texture |
| Unsalted Butter | 1/2 cup (pavé) + 1 tbsp (ganache) | Creaminess and richness |
| Granulated Sugar | 1/4 cup | Sweetness |
| Eggs | 4 large | Structure and smoothness |
| Vanilla Extract | 1 tsp | Flavor enhancement |
| Salt | Pinch | Balance sweetness |
| Heavy Cream | 1/2 cup | Smooth ganache texture |
| Cocoa Powder | For dusting | Final finishing touch |
| Chocolate Shavings | For decoration | Visual flair |
| Edible Gold Leaf | Optional | Elegance |
| Fresh Berries | Optional | Color and freshness |
Tip: Using high-quality bittersweet chocolate is crucial to achieve the authentic deep chocolate flavor and our smooth pavé texture.
Equipment Needed
To make a perfect Chocolate Pavé, having the right equipment at hand makes all the difference. Below, we’ve outlined the essential tools we use to ensure smooth preparation and flawless results.
- Mixing Bowls
Choose medium and large heatproof mixing bowls. We prefer glass or stainless steel for easy melting of chocolate over simmering water. Multiple bowls streamline the process.
- Double Boiler or Heatproof Bowl and Saucepan
A double boiler setup gently melts the bittersweet chocolate and butter. If you don’t have one, a heatproof bowl placed over a saucepan of simmering water works just as well.
- Electric Mixer or Whisk
For blending eggs and sugar into a silky, airy base, an electric hand mixer expedites the process. Alternatively, a sturdy whisk works if you enjoy manual mixing.
- Spatula
A silicone spatula helps us fold ingredients together gently, preserving the airy texture needed for that melt-in-the-mouth feel.
- Rectangular or Square Mold
To shape the pavé, we use a rectangular or square mold approximately 8×8 inches. Line it with parchment paper for easy removal and clean edges.
- Sieve or Fine Mesh Strainer
To achieve a refined finish, especially when dusting cocoa powder or sifting dry ingredients, a fine mesh strainer is indispensable.
- Measuring Cups and Spoons
Precise measurements are key in this recipe. Use accurate sets for both dry and liquid ingredients.
- Cooling Rack
Allow the pavé to cool evenly and prevent condensation on the bottom with a wire cooling rack.
| Equipment | Purpose | Suggested Material/Type |
|---|---|---|
| Mixing Bowls | Melting and mixing ingredients | Glass or stainless steel |
| Double Boiler | Gentle melting of chocolate | Metal or glass with saucepan |
| Electric Mixer or Whisk | Whipping eggs and sugar | Handheld electric or manual |
| Silicone Spatula | Folding and scraping batter | Heat resistant, flexible |
| Mold (8×8 inches) | Shaping the pavé | Metal or silicone lined with parchment |
| Fine Mesh Strainer | Sifting cocoa powder, dry ingredients | Stainless steel |
| Measuring Cups and Spoons | Precise ingredient measurement | Standardized sets |
| Cooling Rack | Cooling the pavé evenly | Wire rack |
We recommend organizing these tools before beginning. It keeps our process smooth and helps us focus on crafting that deeply satisfying chocolate pavé experience.
Preparation
To achieve the perfect Chocolate Pavé, we must carefully prepare each step with precision. This section guides us through preparing the mold and melting the chocolate — two crucial phases to ensure smooth texture and impeccable shape.
Preparing the Mold
Proper mold preparation guarantees a flawless finish and easy release of our rich Chocolate Pavé.
- Select a rectangular or square mold matching the desired pavé size.
- Line the mold with parchment paper extending at least 1 inch above edges to aid removal.
- Lightly grease the parchment with unsalted butter or a neutral oil like vegetable oil to prevent sticking without altering flavor.
- For sharper edges, use a small spatula or your fingers to press parchment tightly into corners.
- Place the prepared mold in the refrigerator while we begin melting the chocolate.
Melting the Chocolate
Melting chocolate correctly forms the foundation of our dessert’s silky consistency and deep flavor.
| Step | Details | Tips |
|---|---|---|
| 1. Chop the chocolate | Finely chop bittersweet chocolate into uniform pieces to ensure even melting. | Use a sharp knife to avoid chunks. |
| 2. Set up double boiler | Place chocolate in a heatproof bowl over simmering water. The bowl shouldn’t touch the water. | Maintain gentle steam heat; avoid boiling water. |
| 3. Stir constantly | Use a silicone spatula to stir the chocolate slowly and continuously until smooth. | Prevents burning and seizing. |
| 4. Remove from heat | Once fully melted, carefully lift bowl from saucepan to prevent residual heat affecting texture. | Avoid moisture entering chocolate. |
Pro Tip: If we don’t have a double boiler, microwave chocolate in 20-second bursts, stirring in between to prevent overheating.
Following these careful steps ensures our Chocolate Pavé achieves the signature luscious texture and rich chocolate essence every time.
Instructions
Follow these clear steps to create a decadent Chocolate Pavé with the perfect velvety texture and rich flavor. Precise technique and attention to detail ensure our dessert turns out flawless.
Making the Ganache
- Chop 8 ounces of bittersweet chocolate into uniform pieces to ensure even melting.
- In a small saucepan, combine 1 cup of heavy cream and 2 tablespoons of unsalted butter. Heat over medium heat until it just begins to simmer — do not boil.
- Pour the hot cream mixture over the chopped chocolate in a heatproof bowl. Let it sit for 2 minutes to soften the chocolate.
- Stir gently with a silicone spatula in slow circles until the ganache is smooth, glossy, and fully combined.
- Add 1 teaspoon of vanilla extract and a pinch of salt for depth. Stir to incorporate.
Pro tip: Use a double boiler or microwave at 20-second intervals to melt the chocolate gently for best consistency in the ganache.
Pouring the Chocolate
- Prepare the mold by lining it with parchment paper, leaving overhang for easy removal.
- Pour half of the warm chocolate mixture (from the preparation section) into the mold. Use a spatula to spread evenly.
- Pour the ganache on top gently to form a creamy layer.
- Cover the ganache with the remaining melted chocolate, smoothing the top with a spatula to ensure an even layer.
Setting the Pave
- Cover the mold with plastic wrap to prevent moisture absorption.
- Refrigerate the pavé for at least 4 hours or until firm. For best texture, allow to chill overnight.
- Once set, use the parchment paper overhang to lift the pavé carefully from the mold.
- Trim edges if needed for a clean presentation.
- Dust the top with cocoa powder or garnish with chocolate shavings and fresh berries as desired.
| Step | Duration | Temperature | Notes |
|---|---|---|---|
| Heating cream & butter | 3–5 minutes | Medium heat | Do not boil |
| Melting chocolate | 2 minutes sit | N/A | Before stirring |
| Pouring & layering | Immediate | Warm | Spread evenly |
| Refrigeration | Minimum 4 hours | 35–40°F (1.5-4°C) | Chill overnight for best results |
Directions for Serving
To serve our rich Chocolate Pavé with elegance and ensure the best flavor experience, follow these precise steps:
- Remove from Mold Carefully
Once the pavé is fully chilled and set, place the mold on a sturdy surface. Gently pull the parchment paper lining to release the dessert without damaging its smooth edges. If any resistance occurs, briefly warm the mold sides with your hands to loosen the pavé.
- Cutting the Chocolate Pavé
Use a sharp, warm knife for clean slices. Heat the blade by running it under hot water, then wipe it dry before each cut. This technique prevents cracking and keeps slices uniform. Ideal serving sizes are approximately 1-inch thick squares or rectangles.
- Serving Temperature
Serve the Chocolate Pavé slightly chilled or at room temperature. Let the pavé sit out for about 15 minutes before serving to allow its velvety texture and deep chocolate notes to fully develop on the palate.
- Plating and Garnishing
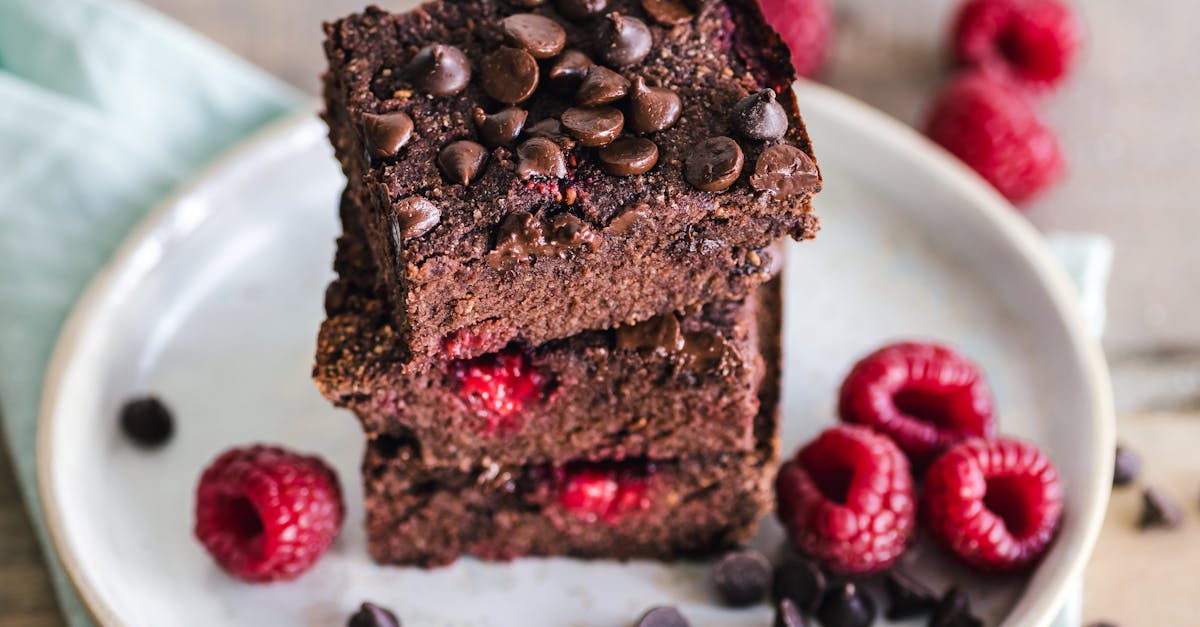
Present the slices on elegant dessert plates. Enhance visual appeal by lightly dusting the tops with unsweetened cocoa powder or arranging fresh berries alongside. For a touch of luxury, add a small edible gold leaf or a delicate chocolate shaving on each piece.
- Pairing Suggestions
For an ideal pairing, consider these accompaniments:
| Pairing | Description |
|---|---|
| Fresh Berries | Adds freshness and slight acidity |
| Whipped Cream | Provides light, airy contrast |
| Espresso or Black Coffee | Enhances the deep chocolate flavor |
| Red Wine (Port or Merlot) | Complements the richness with fruity undertones |
Pro Tip: Serve small portions alongside a dollop of lightly whipped cream or a scoop of vanilla bean ice cream for a balance of richness and creaminess.
By following these serving directions, we ensure that our Chocolate Pavé delights every sense and impresses guests with both texture and flavor.
Make-Ahead Tips
Preparing Chocolate Pavé in advance helps ensure a seamless dessert experience with maximum flavor and perfect texture. Here are our top make-ahead strategies:
Refrigeration Timing
For ideal texture, chill the pavé for at least 12 hours before serving. This allows the flavors to meld and the ganache to set fully. If time permits, refrigerate up to 48 hours without compromising taste or consistency.
| Time Refrigerated | Effect on Pavé |
|---|---|
| 12 hours | Optimal firmness and flavor development |
| 24-48 hours | Slightly richer flavor, maintained smooth texture |
| Over 48 hours | Risk of drying out; wrap tightly to preserve moisture |
“Refrigeration is key to a smooth, firm Chocolate Pavé that melts gently on the palate.”
Proper Storage
Wrap the pavé tightly in plastic wrap or store it in an airtight container to prevent absorption of odors and moisture loss. If preparing more than 48 hours ahead, consider storing in the coldest section of the fridge.
Freezing Option
We recommend freezing the pavé for up to 2 weeks if you need longer storage. Wrap it securely in parchment paper followed by foil or place in a sealed freezer container. Thaw in the refrigerator for 8-10 hours before serving to maintain its delicate texture.
Make-Ahead Garnishes
Prepare garnishes like chocolate shavings, cocoa powder dusting, or fresh berries a few hours ahead but add them just before serving for a fresh presentation.
Ahead-of-Time Serving Tips
- Use a warm, clean knife for slicing to achieve clean cuts even after refrigeration.
- Serve Chocolate Pavé slightly chilled or around room temperature for the best melting sensation.
By following these make-ahead tips we keep our Chocolate Pavé luscious, visually stunning, and indulgently smooth every time.
Storage Instructions
To maintain the luxurious texture and deep chocolate flavor of our Chocolate Pavé, proper storage is essential. Follow these precise steps to ensure our dessert stays fresh and indulgently smooth.
Refrigeration
- Wrap the pavé tightly in plastic wrap or place it in an airtight container to prevent drying out and absorbing odors.
- Store it in the refrigerator for up to 48 hours. This chilling period enhances the ganache’s texture and allows the flavors to meld perfectly.
- Before serving, bring the pavé to slightly chilled or room temperature to enjoy its signature melt-in-the-mouth sensation.
| Storage Method | Duration | Key Tips |
|---|---|---|
| Refrigeration | Up to 48 hours | Wrap tightly, serve slightly chilled or room temp |
| Make-Ahead Chill | Minimum 12 hours | Allows full flavor melding |
Freezing
For longer storage, freezing is an excellent option without compromising quality:
- Wrap the pavé securely in plastic wrap and then in aluminum foil to protect it from freezer burn.
- Freeze for up to 2 weeks.
- To thaw, transfer it directly to the refrigerator and let it thaw overnight.
- Bring it to room temperature or slightly chilled before serving for optimal texture.
| Freezing Method | Duration | Thawing Instructions |
|---|---|---|
| Double wrapped | Up to 2 weeks | Thaw overnight in refrigerator |
Garnishes and Serving Tips
- Prepare garnishes like chocolate shavings or edible gold leaf in advance, storing them in airtight containers.
- Add garnishes immediately before serving to preserve freshness and visual appeal.
“A warm knife will always give you clean, elegant slices—dip it in hot water and wipe dry between cuts.”
By following these Storage Instructions, we guarantee that our Chocolate Pavé stays as decadent and inviting as the moment it was first made.
Troubleshooting Tips
Chocolate Pavé Won’t Set Properly
If your chocolate pavé remains too soft or fails to firm up, check these key factors:
- Temperature of ingredients: Ensure butter and cream are at room temperature before mixing. Cold ingredients can prevent proper emulsification.
- Chilling time: Refrigerate the pavé for at least 12 hours, ideally up to 48 hours for best texture development.
- Proportion of ingredients: Too much cream or butter makes the pavé softer. Follow the recipe’s measurements precisely.
“Proper chilling locks in the pavé’s velvety texture, making it melt perfectly in the mouth.”
Chocolate Pavé is Grainy or Gritty
Grainy texture often stems from chocolate mishandling or sugar issues. To avoid this:
- Chop chocolate into uniform small pieces before melting.
- Use high-quality bittersweet chocolate with smooth cocoa mass.
- Heat chocolate gently using a double boiler or microwave at 20-second intervals, stirring continuously.
- Dissolve sugar entirely by mixing thoroughly, avoiding undissolved granules.
Pavé Sticks to the Mold
To safely release the pavé from the mold without damage:
- Line the mold with parchment paper and lightly grease with butter.
- After chilling, run a warm knife gently along edges to loosen the pavé.
- Invert the mold onto a plate, tap gently to release.
Cutting Issues: Pavé Crumbles or Smears
For clean precise slices:
- Use a warm, sharp knife, dipped in hot water and wiped dry before each cut.
- Cut slowly with a steady hand to prevent crumbling or smearing.
- Slice portions according to serving size to maintain presentation.
Pavé is Too Sweet or Overly Bitter
Balancing flavor is key:
| Issue | Possible Cause | Solution |
|---|---|---|
| Too sweet | Excess sugar in recipe | Reduce granulated sugar by 10-15% |
| Overly bitter | High percentage chocolate | Use bittersweet chocolate 60-70% cocoa |
| Incomplete melting or mixing | Stir thoroughly melting chocolate |
Ganache Separation or Curdling
Ganache should be smooth and glossy. If it separates:
- Heat cream just until simmering but do not boil.
- Pour hot cream slowly over chopped chocolate and let it sit for 1-2 minutes before stirring gently.
- Avoid over-stirring or rapid chilling.
“Gentle heat and patient stirring create a perfectly silky ganache—a signature of the chocolate pavé.”
Pavé Has an Unpleasant Aftertaste
This sometimes results from low-quality chocolate or improper storage:
- Always choose premium bittersweet chocolate with pure cocoa butter.
- Store pavé wrapped tightly in plastic wrap or in an airtight container refrigerated.
- Avoid exposure to strong odors during storage as chocolate absorbs smells easily.
By following these Troubleshooting Tips, we can ensure our chocolate pavé turns out as luscious and decadent as intended every single time.
Conclusion
Making chocolate pavé is a rewarding experience that brings a touch of French elegance to any dessert table. With just a handful of quality ingredients and a few simple steps, we can create a rich and velvety treat that impresses every time.
By paying attention to the details—from melting the chocolate gently to chilling the pavé properly—we ensure a flawless texture and deep chocolate flavor. Whether for a special occasion or a cozy night in, this dessert never fails to delight.
Let’s enjoy the process and savor each decadent slice together, knowing we’ve mastered a classic that’s as beautiful as it is delicious.
Frequently Asked Questions
What is chocolate pavé and why is it special?
Chocolate pavé is a classic French dessert known for its rich, velvety texture that melts in your mouth. It’s special because it uses few high-quality ingredients to create a simple yet indulgent treat perfect for any occasion.
What ingredients do I need to make chocolate pavé?
You need bittersweet chocolate, unsalted butter, granulated sugar, eggs, vanilla extract, salt, heavy cream, and butter for the ganache. Decorative options include cocoa powder, chocolate shavings, edible gold leaf, and fresh berries.
What equipment is essential for preparing chocolate pavé?
You’ll need mixing bowls, a double boiler (or microwave-safe bowl), an electric mixer, silicone spatula, mold for shaping, fine mesh strainer, precise measuring tools, and a wire cooling rack.
How do I properly melt chocolate for chocolate pavé?
Chop the chocolate evenly, melt it gently over a double boiler, and stir constantly for a silky texture. Alternatively, microwave in short bursts, stirring well between each to avoid burning.
How do I make and add ganache to chocolate pavé?
Chop bittersweet chocolate uniformly. Heat cream and butter without boiling, pour over chocolate, and stir until smooth. Pour ganache over the set chocolate layer in the mold before chilling.
How should chocolate pavé be served?
Remove from the mold carefully, slice with a warm knife for clean cuts, and serve slightly chilled or at room temperature. Garnish with cocoa powder, fresh berries, or whipped cream for an elegant presentation.
Can I prepare chocolate pavé in advance?
Yes, chill it for at least 12 hours for best flavor and texture. It can be refrigerated up to 48 hours or frozen for two weeks. Add fresh garnishes just before serving.
How do I store chocolate pavé to maintain freshness?
Wrap tightly in plastic wrap or store in an airtight container when refrigerated. For freezing, double-wrap and thaw in the fridge before serving. Prepare garnishes separately to keep them fresh.
What are common problems when making chocolate pavé?
Issues include pavé not setting, grainy texture, sticking to the mold, or crumbling. These often result from incorrect temperatures, poor ingredient quality, or improper technique.
How can I fix a chocolate pavé that is too bitter or too sweet?
Adjust the type or proportion of chocolate used. Incorporate a pinch of salt to balance flavors and consider adding a touch more sugar or cream if it’s too bitter. Taste as you go for balance.