
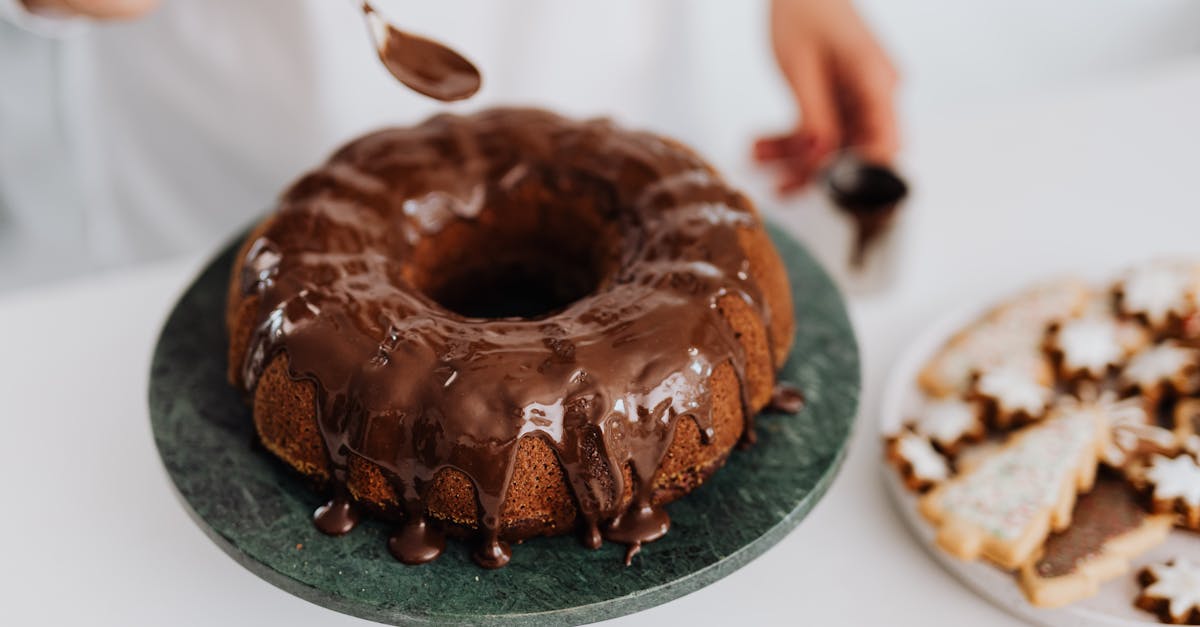
There’s something truly magical about a rich chocolate cake that melts in your mouth and leaves you craving more. Our Chocolate Heaven Cake Recipe captures that perfect balance of moist, fluffy layers and decadent chocolate flavor that every dessert lover dreams of. Whether you’re celebrating a special occasion or just treating yourself, this cake promises to satisfy your sweetest cravings.
Ingredients
To craft our Chocolate Heaven Cake, we gather premium ingredients that ensure each bite delivers moistness, fluffiness, and rich chocolate flavor. Below, we break down the essentials for the cake base, luscious frosting, and optional decoration.
For the Cake
- 2 cups all-purpose flour (sifted for lightness)
- 2 cups granulated sugar (adds perfect sweetness)
- ¾ cup unsweetened cocoa powder (for that deep chocolate taste)
- 2 teaspoons baking powder (helps the cake rise evenly)
- 1 ½ teaspoons baking soda (lightens texture)
- 1 teaspoon salt (balances flavors)
- 1 cup whole milk (room temperature for smooth batter)
- ½ cup vegetable oil (keeps the cake moist)
- 2 large eggs (bind ingredients firmly)
- 2 teaspoons pure vanilla extract (enhances chocolate aroma)
- 1 cup boiling water (intensifies cocoa flavor and softens batter)
For the Chocolate Frosting
- 1 cup unsalted butter (softened to room temperature)
- 3 ½ cups powdered sugar (for creamy sweetness)
- ½ cup unsweetened cocoa powder (rich chocolate depth)
- ½ teaspoon salt (balances frosting sweetness)
- 2 teaspoons pure vanilla extract (amplifies frosting flavor)
- ¼ cup heavy cream (adjust for desired frosting consistency)
For Decoration (Optional)
- Chocolate shavings or curls (adds texture and elegance)
- Fresh berries like raspberries or strawberries (for a pop of color and freshness)
- Edible gold leaf (for a luxurious touch)
- Toasted chopped nuts (enhances crunch and flavor)
- Sprinkles or mini chocolate chips (fun and festive accents)
| Ingredient Group | Key Ingredients |
|---|---|
| Cake | All-purpose flour, granulated sugar, cocoa powder, baking powder, baking soda, salt, milk, oil |
| Frosting | Butter, powdered sugar, cocoa powder, salt, vanilla extract, heavy cream |
| Decoration (Optional) | Chocolate shavings, fresh berries, edible gold leaf, toasted nuts, sprinkles |
Equipment Needed
To create our Chocolate Heaven Cake, we need the right equipment to ensure perfect texture and flavor every time. Using quality tools guarantees smooth preparation and flawless results.
Essential Baking Tools
- Mixing Bowls: At least two large bowls to combine wet and dry ingredients separately.
- Electric Mixer: A stand mixer or hand mixer for efficient and thoroughly mixed batter.
- Measuring Cups and Spoons: Precise measuring tools to maintain accuracy in ingredient quantities.
- Sifter: To sift flour and cocoa powder, ensuring a light and lump-free batter.
- Rubber Spatula: For scraping down bowl sides and folding ingredients evenly.
- 9-inch Round Cake Pans (two): Preferably non-stick or lined with parchment paper for easy cake release.
- Cooling Rack: To allow the cakes to cool evenly without moisture accumulation.
- Offset Spatula: For spreading the luscious chocolate frosting evenly and smoothly.
- Cake Turntable (optional): Helps with smooth frosting application and cake decoration.
- Kitchen Scale (optional): For precise ingredient measurement especially useful for cocoa and flour.
Oven and Preparation
Our oven needs to maintain a consistent temperature of 350°F (175°C). Use an oven thermometer if necessary to avoid temperature fluctuations that can affect cake rise and texture.
Summary of Equipment
| Equipment | Purpose | Notes |
|---|---|---|
| Mixing Bowls | Combine ingredients | Use at least two |
| Electric Mixer | Blend batter | Stand or hand mixer works |
| Measuring Cups/Spoons | Accurate ingredient measurement | Essential for baking accuracy |
| Sifter | Sift flour and cocoa | Prevents lumps |
| Rubber Spatula | Fold and scrape ingredients | Flexible for scraping |
| 9-inch Cake Pans | Bake cake layers | Non-stick or lined preferred |
| Cooling Rack | Cool cakes evenly | Avoids sogginess |
| Offset Spatula | Frost cake smoothly | For even frosting |
| Cake Turntable | Easy decoration | Optional but helpful |
| Kitchen Scale | Precise measurements | Recommended for accuracy |
With these essential tools ready, our process becomes seamless, allowing us to focus on crafting that moist and decadently rich Chocolate Heaven Cake.
Prep Work
Before we dive into mixing and baking our Chocolate Heaven Cake, organizing our prep work ensures smooth, efficient steps that result in a perfect, moist, and fluffy dessert.
Preparing the Cake Pans
To achieve even baking and easy removal of the cake layers, we start by properly preparing our 9-inch round cake pans:
- Grease each pan thoroughly with unsalted butter or non-stick spray, covering every inch evenly.
- Line the bottom of each pan with parchment paper circles cut precisely to fit. This creates a non-stick base and guarantees our cake layers come out cleanly without any damage.
- Lightly dust the greased sides and bottom with a thin layer of cocoa powder instead of flour to maintain the rich chocolate color and flavor.
- For extra assurance, place the prepared pans on a baking sheet before filling to catch any potential drips or overflow.
Measuring Ingredients
Accurate measurements are crucial for our Chocolate Heaven Cake to maintain its signature texture and flavor profile. Here’s how we make every measurement count:
| Ingredient | Measurement Tool | Tips for Precision |
|---|---|---|
| All-purpose flour | Dry measuring cup | Spoon flour into the cup then level off with a flat edge to avoid packing |
| Granulated sugar | Dry measuring cup | Level off to avoid excess sweetness |
| Cocoa powder | Dry measuring spoon/cup | Use a sifter before measuring to prevent lumps |
| Unsalted butter | Kitchen scale or measuring cup | If using sticks, check marked lines for exact amounts |
| Powdered sugar | Dry measuring cup | Sift before measuring for smooth frosting |
| Liquid ingredients | Liquid measuring cup | Measure at eye level on a flat surface |
Pro tip: We recommend using a kitchen scale for the dry ingredients to enhance accuracy, especially for flour and cocoa powder. Precision here directly impacts the cake’s rise, crumb, and moisture.
Following these preparation steps sets a solid foundation, enabling us to focus on mixing with confidence for our indulgent Chocolate Heaven Cake.
Directions
Follow these detailed steps to create our irresistibly Chocolate Heaven Cake with moist layers and rich chocolate flavor.
Making the Cake Batter
- Preheat the oven to 350°F (175°C) for consistent baking.
- In a large mixing bowl, sift together the following dry ingredients for a smooth, lump-free base:
- 2 ½ cups all-purpose flour
- 2 cups granulated sugar
- ¾ cup unsweetened cocoa powder
- 1 ½ tsp baking powder
- 1 ½ tsp baking soda
- 1 tsp salt
- In a separate bowl, combine the wet ingredients:
- 1 cup whole milk
- ½ cup vegetable oil
- 2 large eggs
- 2 tsp pure vanilla extract
- Gradually add the wet ingredients to the dry ingredients while mixing on medium speed using an electric mixer.
- Slowly pour in 1 cup boiling water, mixing at low speed. The batter will be thin—this is normal and contributes to the cake’s moist texture.
- Stir until the batter is smooth and well combined, scraping down the sides of the bowl as needed.
Baking the Cake
- Divide the batter evenly between the two prepared 9-inch round cake pans. Use a rubber spatula to smooth the top of each.
- Place pans in the oven on the middle rack.
- Bake for 30 to 35 minutes or until a toothpick inserted into the center comes out clean or with moist crumbs attached.
- Avoid opening the oven door during the first 25 minutes to maintain temperature stability.
- Once baked, remove pans from the oven carefully using oven mitts.
| Step | Temperature | Time | Notes |
|---|---|---|---|
| Baking the Cake | 350°F (175°C) | 30–35 minutes | Insert toothpick for doneness check |
| Cooling the Cake | Ambient | 15 minutes (in pans) | Ensures cake firms up for easy handling |
Cooling the Cake
- Allow the cakes to cool in the pans for 15 minutes on a wire cooling rack. This resting period helps the cakes set perfectly.
- Run a thin knife around the cake edges to loosen them from the pans.
- Carefully invert the cakes onto the cooling rack and peel off the parchment paper.
- Let the cakes cool completely, approximately 1 hour, before frosting to prevent melting or sliding of the luscious Chocolate Heaven Cake frosting layers.
By following these steps precisely, we ensure a flawless, moist, and richly flavored Chocolate Heaven Cake ready for frosting and decoration.
Making the Chocolate Frosting
Creating the perfect chocolate frosting is essential to complement our rich and moist cake layers. Let’s combine the ingredients carefully to achieve a luscious, creamy texture that enhances every bite of our Chocolate Heaven Cake.
Mixing the Frosting Ingredients
To start, gather the following ingredients:
- 1 cup unsalted butter, softened
- 3 ½ cups powdered sugar, sifted
- ¾ cup high-quality unsweetened cocoa powder, sifted
- ¼ teaspoon salt
- 2 teaspoons pure vanilla extract
- ¼ cup heavy cream (adjust consistency as needed)
We begin by creaming the softened butter in a large mixing bowl on medium speed for about 2 minutes, until it turns light and fluffy. This step is crucial for a smooth finish.
Next, gradually add the sifted cocoa powder and powdered sugar, alternating with heavy cream. Mix on low speed until incorporated, then increase to medium until smooth. Stir in the vanilla extract and salt to balance the richness and elevate the chocolate flavor.
If the frosting feels too thick, add more heavy cream one tablespoon at a time. Too thin? Add a little more powdered sugar for desired consistency.
| Ingredient | Quantity | Preparation |
|---|---|---|
| Unsalted butter | 1 cup | Softened |
| Powdered sugar | 3 ½ cups | Sifted |
| Unsweetened cocoa | ¾ cup | Sifted |
| Salt | ¼ teaspoon | |
| Vanilla extract | 2 teaspoons | |
| Heavy cream | ¼ cup (+ optional) | For consistency |
Tips for a Smooth Frosting
“The secret to perfect frosting lies in patience and attention to texture.”
- Use room temperature butter to avoid lumps and ensure easy mixing.
- Sift your powdered sugar and cocoa powder to eliminate clumps.
- Start mixing on low speed to prevent powdered sugar from flying out of the bowl.
- Gradually add liquids to avoid overly soft frosting.
- If frosting appears grainy, continue beating for an additional 2-3 minutes; this helps incorporate air and smooth the texture.
- Adjust thickness by carefully balancing powdered sugar and cream.
By following these steps, our frosting will be velvety smooth and rich, ready to crown our heavenly chocolate cake with decadent perfection.
Assembling the Cake
Now that our Chocolate Heaven Cake layers have cooled and our luscious frosting is ready, it’s time to bring everything together. Let’s carefully assemble the cake to ensure each bite delivers that perfect balance of moist cake and creamy frosting.
Layering the Cake
- Place one cake layer on a sturdy cake board or serving plate. Using a spatula or the back of a spoon, evenly spread a generous layer of frosting—about 1/3 cup—over the top.
- Gently place the second cake layer on top, aligning it carefully to maintain an even shape.
- Repeat the frosting application on top of the second layer using another 1/3 cup of frosting. This creates smooth, even layers, allowing the rich chocolate flavor to shine in every forkful.
Tip: To avoid crumbs mixing into the frosting, apply a thin crumb coat first then chill the cake for 15 minutes before adding the final thick frosting layer.
Applying the Frosting
- After layering, use an offset spatula to apply the remaining frosting evenly over the top and sides of the cake.
- Work in smooth, sweeping motions, starting from the top center and moving outward, then down the sides in vertical strokes.
- Scrape off excess frosting to create clean edges, rotating the cake as needed for a polished finish.
- For an ultra-smooth texture, dip the spatula in warm water, dry it off, and gently glide over the frosted surface.
Consistency and patience in frosting application are key to a beautifully finished Chocolate Heaven Cake that looks as indulgent as it tastes.
Decorating the Cake
Finish your Chocolate Heaven Cake by adding decorations that bring both elegance and extra flavor:
- Chocolate shavings: Scatter generously on top for a textured crunch.
- Fresh berries: Raspberries or strawberries add a bright contrast.
- Edible gold leaf: Place sparingly for a luxurious touch.
| Decoration | Quantity/Amount | Effect |
|---|---|---|
| Chocolate shavings | 1/2 cup | Adds crunch & visual appeal |
| Fresh berries | 1 cup (whole or halved) | Brightness & slight tartness |
| Edible gold leaf | A few small flakes | Luxurious, eye-catching detail |
We recommend chilling the cake for 30 minutes after decorating. This lets the frosting set properly creating the perfect Chocolate Heaven Cake experience.
Serving Suggestions
To elevate our Chocolate Heaven Cake experience, we recommend several serving ideas that enhance both presentation and flavor:
- Serve Slightly Chilled
Allow the cake to rest in the refrigerator for 15 to 20 minutes before slicing. This firms up the frosting making cleaner slices and allowing the rich chocolate layers to shine.
- Pair with Fresh Berries
Offer a side of fresh raspberries, strawberries, or blueberries to add a subtle tartness, balancing the intense chocolate flavor.
- Add a Dollop of Whipped Cream
A light hand-whipped cream adds airy contrast to the cake’s dense, moist crumb.
- Drizzle with Warm Chocolate Ganache or Caramel Sauce
Gently pour warm ganache or homemade caramel over each slice for an extra layer of decadence and sheen.
- Serve with Ice Cream
Vanilla bean or coffee ice cream pairs perfectly, creating a pleasing interplay of temperature and texture.
- Garnish with Edible Gold Leaf or Chocolate Shavings
Finalize the plate with luxurious edible gold leaf pieces or finely grated dark chocolate shavings for a visually stunning and sophisticated touch.
| Serving Suggestion | Flavor/Textural Impact | Presentation Benefit |
|---|---|---|
| Slightly Chilled | Firmer frosting, clean cutting | Neat, elegant slices |
| Fresh Berries | Tartness, fresh contrast | Colorful and inviting |
| Dollop of Whipped Cream | Light, airy texture | Classic and creamy appeal |
| Warm Ganache or Caramel Drizzle | Extra sweetness and smooth richness | Glossy, indulgent finish |
| Vanilla or Coffee Ice Cream | Temperature contrast, complementary flavor | Creamy side complement |
| Edible Gold Leaf or Chocolate Shavings | Luxurious feel, added texture | Beautiful and festive presentation |
Pro Tip: Serve Chocolate Heaven Cake on a chilled plate to maintain optimal texture and enhance the chocolate flavors during tasting.
By incorporating these serving suggestions, we make every bite of our Chocolate Heaven Cake a memorable celebration of rich, smooth, and balanced chocolate delight.
Storage Instructions
To maintain the rich flavor and moist texture of our Chocolate Heaven Cake, proper storage is essential. Follow these steps to keep your cake fresh and indulgent for as long as possible.
Short-Term Storage: Room Temperature
- After serving, cover the cake loosely with a cake dome or plastic wrap.
- Keep it in a cool, dry place away from direct sunlight or heat sources.
- Consume within 1 to 2 days for optimal moisture and taste.
Refrigeration for Longer Freshness
- Wrap the cake tightly in plastic wrap or place it in an airtight container to prevent it from drying out or absorbing odors.
- Refrigerate for up to 5 days.
- Before serving, allow the cake to come to room temperature for 30 minutes to restore its soft, fluffy texture.
Freezing Instructions for Extended Storage
- To freeze, first chill the frosted cake in the refrigerator for 30 minutes to set the frosting.
- Wrap the cake securely in plastic wrap followed by a layer of aluminum foil.
- Store the cake in the freezer for up to 3 months.
- For best results, thaw the cake in the refrigerator overnight before bringing it to room temperature.
Storage Duration Overview
| Storage Method | Duration | Key Tip |
|---|---|---|
| Room Temperature | 1 to 2 days | Use a cake dome or plastic wrap |
| Refrigeration | Up to 5 days | Airtight container or wrapping |
| Freezing | Up to 3 months | Double-wrap and thaw properly |
Pro Tip: Always avoid storing the cake in an overly humid environment to preserve the delicate crumb and smooth frosting of our Chocolate Heaven Cake.
Following these storage instructions will allow us to enjoy every bite of our rich and velvety masterpiece as if it were freshly baked.
Conclusion
Creating the Chocolate Heaven Cake is a rewarding experience that brings rich flavors and delightful textures to any occasion. With the right ingredients, tools, and techniques, we can achieve a perfectly moist and decadent cake that’s sure to impress.
Whether we’re celebrating a special event or simply indulging in a sweet treat, this recipe offers a reliable way to enjoy chocolate at its finest. Taking the time to follow each step carefully guarantees a stunning result that tastes as good as it looks.
Let’s keep experimenting with decorations and serving ideas to make every slice a memorable moment of chocolate bliss.
Frequently Asked Questions
What makes the Chocolate Heaven Cake moist and fluffy?
The cake’s moist and fluffy texture comes from the combination of boiling water added to the batter, precise ingredient measurements, and proper mixing techniques described in the recipe. These ensure the perfect balance of moisture and lightness.
What ingredients are essential for the frosting?
The frosting requires unsalted butter, powdered sugar, cocoa powder, salt, vanilla extract, and heavy cream. Using room temperature butter and sifting dry ingredients helps create a smooth, velvety texture.
What equipment do I need to bake this cake?
You’ll need mixing bowls, an electric mixer, measuring cups and spoons, a sifter, a rubber spatula, 9-inch round cake pans, a cooling rack, and an offset spatula. Optional tools include a cake turntable and kitchen scale for accuracy.
How should I prepare the cake pans?
Grease the pans thoroughly, line them with parchment paper, then dust with cocoa powder. This prevents sticking and preserves the cake’s rich chocolate color.
Can I decorate the cake differently?
Yes! Popular decoration options include chocolate shavings, fresh berries, and edible gold leaf. These add both flavor contrast and visual appeal.
How long should I bake the cake?
Bake the cake at 350°F (175°C) for 30 to 35 minutes. Avoid opening the oven door during the first 25 minutes to maintain even baking.
What is a crumb coat and why is it important?
A crumb coat is a thin layer of frosting applied to seal in crumbs. It ensures the final frosting layer looks smooth and clean without crumb imperfections.
How should I store the cake to keep it fresh?
Store at room temperature for 1-2 days, refrigerate for up to 5 days, or freeze for up to 3 months. Avoid humid environments to maintain texture and flavor.
What serving suggestions enhance the cake?
Serve slightly chilled for cleaner slices, pair with fresh berries, whipped cream, or ice cream. Drizzling warm ganache or caramel sauce adds decadence.
Can I use a kitchen scale for the ingredients?
Yes, using a kitchen scale improves accuracy in ingredient measurements, ensuring consistent cake texture and flavor every time.