
Chocolate Hazelnut Thumbprint Cookies bring together two beloved flavors in one irresistible bite. These cookies offer a perfect balance of buttery, tender dough and rich, nutty chocolate hazelnut filling that melts in your mouth. They’re a classic treat with a twist that’s sure to impress at any gathering or simply satisfy your sweet tooth.
Ingredients
To create our Chocolate Hazelnut Thumbprint Cookies we use a perfect blend of ingredients that ensure a tender buttery base paired with a luscious chocolate hazelnut center. Below are the essential components broken down for clarity and ease of preparation.
For the Cookie Dough
- 1 cup (2 sticks) unsalted butter, softened
- 2/3 cup granulated sugar
- 1 large egg yolk
- 1 teaspoon pure vanilla extract
- 2 cups all-purpose flour
- 1/4 teaspoon salt
For the Filling
- 3/4 cup chocolate hazelnut spread (such as Nutella)
- 1/4 cup finely chopped toasted hazelnuts (optional for texture)
Optional Toppings
To add an extra touch of flair and flavor choose from the following:
| Topping | Purpose |
|---|---|
| Powdered sugar | Light dusting for a delicate finish |
| Additional chopped hazelnuts | Adds crunch and nuttiness |
| Mini chocolate chips | Enhances the chocolate flavor |
These ingredients come together to form the classic Chocolate Hazelnut Thumbprint Cookies that are both visually appealing and rich in flavor.
Equipment Needed
To create Chocolate Hazelnut Thumbprint Cookies with perfect texture and flavor, we rely on a few essential tools. Each item plays a pivotal role in blending, shaping, and baking these delightful treats efficiently.
- Mixing Bowls: Use a medium and a large bowl for dry and wet ingredients. Stainless steel or glass bowls work best for combining the buttery dough.
- Electric Mixer or Stand Mixer: A hand mixer or stand mixer with a paddle attachment helps us cream the butter and sugar until light and fluffy, ensuring a tender cookie base.
- Measuring Cups and Spoons: Precise measurements are key; use dry measuring cups for flour and sugar, and liquid measuring cups for vanilla extract.
- Rubber Spatula: Perfect for scraping down the sides of the bowl to incorporate all ingredients evenly.
- Baking Sheet: A heavy-duty, rimmed baking sheet provides an even surface for baking and prevents spreading.
- Parchment Paper or Silicone Baking Mat: Lining the baking sheet with these prevents sticking and promotes uniform browning.
- Small Cookie Scoop or Tablespoon: To portion dough evenly and maintain consistent cookie size.
- Wooden Spoon or Your Clean Finger: To create the signature thumbprint indent in the cookie dough where the chocolate hazelnut filling will go.
- Cooling Rack: Allows cookies to cool properly, preserving their crisp edges and soft centers.
| Equipment | Purpose |
|---|---|
| Mixing Bowls | Combine dry and wet ingredients |
| Electric Mixer (Hand/Stand) | Cream butter and sugar |
| Measuring Cups & Spoons | Ensure accurate ingredient portioning |
| Rubber Spatula | Scrape bowl for thorough mixing |
| Baking Sheet | Bake cookies evenly |
| Parchment Paper/Silicone Mat | Prevent sticking and promote browning |
| Small Cookie Scoop/Tablespoon | Portion dough uniformly |
| Wooden Spoon or Finger | Create thumbprint indentation |
| Cooling Rack | Cool cookies properly |
By using these tools, we guarantee that our Chocolate Hazelnut Thumbprint Cookies turn out consistent in size, texture, and appearance, making the baking process smooth and enjoyable.
Make-Ahead Instructions
To ensure our Chocolate Hazelnut Thumbprint Cookies deliver the perfect texture and rich flavor, planning ahead is key. Here are the best make-ahead steps to streamline your baking process and maximize freshness.
Prepare and Chill the Dough
- After mixing the buttery dough, wrap it tightly in plastic wrap to prevent drying.
- Refrigerate the dough for at least 1 hour or up to 48 hours. Chilling firms the dough, making it easier to shape and helping the cookies hold their thumbprint shape during baking.
| Make-Ahead Step | Timeframe | Benefit |
|---|---|---|
| Refrigerate dough | 1–48 hours | Improves handling, solidifies fats |
| Freeze dough | Up to 3 months | Extends shelf life, ready for future baking |
- For longer storage, freeze the dough in portions. Form dough balls, place on a baking sheet lined with parchment, and freeze until solid. Transfer to an airtight container or freezer bag.
Shaping and Filling in Advance
- If you prefer, shape the dough into thumbprint cookies before freezing. Arrange on a parchment-lined tray, freeze solid, then transfer to a bag.
- Leave the thumbprints unfilled before freezing; this avoids the chocolate hazelnut spread drying out or becoming too hard.
- When ready to bake, thaw the frozen dough balls or thumbprint cookies in the fridge overnight.
- Fill cookie indentations with the chocolate hazelnut spread immediately before baking for the best gooey texture.
Bake and Store Properly
- Bake cookies fresh from the fridge or after thawing. This ensures crisp edges with a soft center.
- Once cooled completely on a cooling rack, transfer cookies to an airtight container.
- Store at room temperature for up to 5 days or freeze baked cookies for up to 2 months.
“The secret to perfect Chocolate Hazelnut Thumbprint Cookies is all in timing and temperature control when prepping and storing the dough.”
By following these make-ahead instructions we allow ourselves flexibility and convenience without compromising the delicious taste and signature texture of these cookies.
Instructions
Follow these step-by-step instructions to create our delicious Chocolate Hazelnut Thumbprint Cookies. Each stage ensures perfect texture and flavor for an irresistible treat.
Prep Work
- Preheat the oven to 350°F (175°C).
- Line a baking sheet with parchment paper or a silicone baking mat.
- Gather all ingredients and equipment: mixing bowls, electric mixer, measuring tools, rubber spatula, cookie scoop or tablespoon, and wooden spoon or finger for indentations.
- If using, chop hazelnuts finely for topping and texture.
Making the Cookie Dough
- In a large mixing bowl, cream together 1 cup unsalted butter (softened) and ½ cup granulated sugar using an electric mixer until light and fluffy, about 3-4 minutes.
- Add 1 large egg yolk and 1 teaspoon vanilla extract, mix until fully combined.
- In a separate bowl, whisk together 2 cups all-purpose flour and ½ teaspoon salt.
- Gradually add the dry ingredients to the wet mixture in two additions. Mix on low speed until just incorporated.
- Use a rubber spatula to scrape down the sides and ensure an even dough.
- Optional: Fold in ½ cup chopped hazelnuts if desired for added crunch.
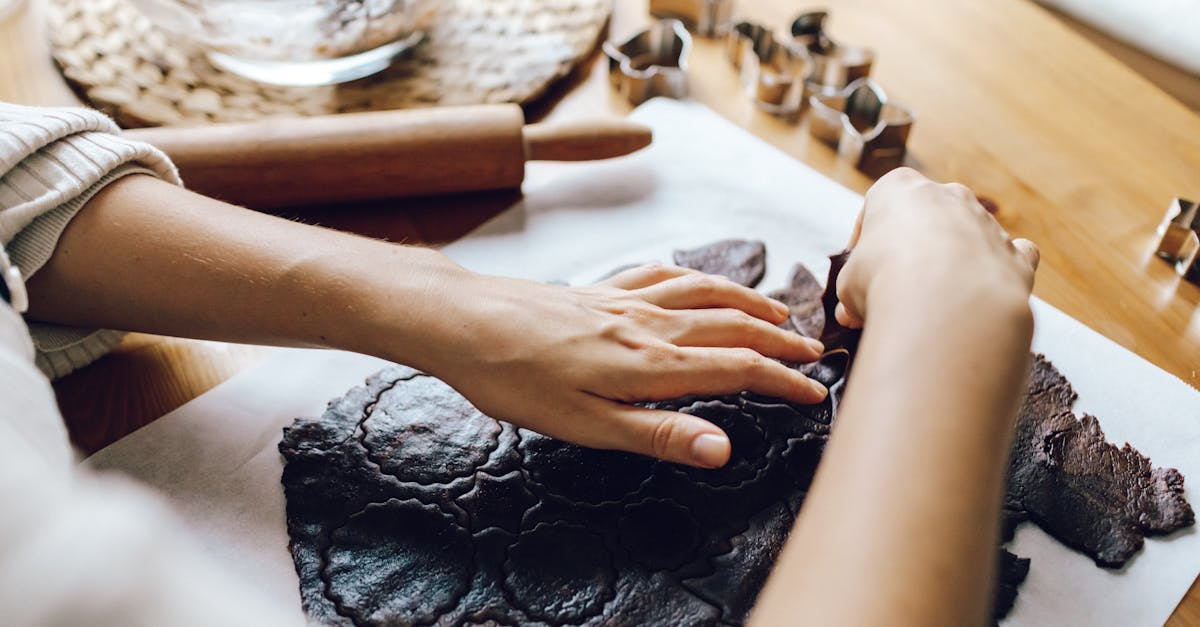
Shaping and Filling the Cookies
- Using a small cookie scoop (about 1 tablespoon) or tablespoon measure, portion the dough into uniform balls.
- Place dough balls on the prepared baking sheet, spacing them about 2 inches apart.
- Using your thumb or the back of a wooden spoon, press gently into the center of each dough ball to create a 1/2-inch deep indentation — the signature “thumbprint”.
- Fill each indentation with approximately 1 teaspoon of chocolate hazelnut spread (such as Nutella), avoiding overfilling as it may spill during baking.
Baking
- Bake in the preheated oven for 12-15 minutes, or until the edges are lightly golden but the centers remain soft.
- Watch closely after 10 minutes, as overbaking will dry out the cookies and cause spreading.
- Optional: In the last 2 minutes, sprinkle extra chopped hazelnuts or mini chocolate chips on top for enhanced texture and presentation.
Cooling and Serving
- Remove the baking sheet from the oven and allow the cookies to cool on the sheet for 5 minutes.
- Transfer cookies using a spatula to a cooling rack to cool completely. This preserves the crisp edges and soft centers.
- Serve at room temperature or store in an airtight container for up to 5 days.
- For an extra touch, dust with powdered sugar just before serving.
| Step | Temperature | Time | Notes |
|---|---|---|---|
| Preheat oven | 350°F (175°C) | — | |
| Cream butter and sugar | Room temp | 3-4 minutes | Use electric mixer |
| Bake cookies | 350°F (175°C) | 12-15 minutes | Watch closely to avoid overbaking |
| Cool on sheet | Room temp | 5 minutes | Prevents breakage |
| Cool on rack | Room temp | Until completely cool | Preserves texture |
Storage Tips
Proper storage is essential to keep our Chocolate Hazelnut Thumbprint Cookies fresh, flavorful, and with their signature texture intact. Here’s how we can store them for the best results:
- Cool Completely: Before storing, allow the cookies to cool completely on a rack. This prevents moisture buildup which can make the cookies soggy.
- Use an Airtight Container: Place the cookies in an airtight container. This locks in freshness and keeps out humidity.
- Layer with Parchment Paper: If stacking cookies, separate layers with parchment paper to avoid sticking or breaking.
Room Temperature Storage
We can keep the cookies fresh at room temperature for up to 4 days. Store them in a cool, dry place away from direct sunlight.
| Storage Condition | Duration | Notes |
|---|---|---|
| Room Temperature | Up to 4 days | Use airtight container, cool place |
Refrigeration
For longer storage, refrigerate the cookies for up to 2 weeks. Ensure they are sealed tightly to prevent absorption of refrigerator odors which could alter the taste.
| Storage Condition | Duration | Tips |
|---|---|---|
| Refrigerator | Up to 2 weeks | Bring to room temperature before serving for best texture |
Freezing
Freezing is ideal for maintaining quality if we want to store cookies for a longer period:
- Freeze Baked Cookies: Place cooled cookies in a single layer on a baking sheet. Freeze until solid, then transfer to a freezer-safe airtight container or zip-top bag.
- Freeze Dough Portions: Alternatively, freeze the shaped dough balls without filling. Wrap tightly in plastic wrap and place in a freezer-safe bag. Fill and bake directly from thawed dough.
| Freezing Option | Duration | Preparation Tips |
|---|---|---|
| Baked Cookies | Up to 3 months | Thaw at room temperature before eating |
| Dough Portions (unfilled) | Up to 3 months | Thaw in refrigerator overnight, fill, then bake |
Pro Tip: Always fill the thumbprints with chocolate hazelnut spread just before baking when using frozen dough to prevent the filling from drying out or cracking.
By following these storage tips, we can enjoy our Chocolate Hazelnut Thumbprint Cookies anytime without losing their delicious flavor and perfect texture.
Conclusion
These Chocolate Hazelnut Thumbprint Cookies bring together rich flavors and a satisfying texture that’s hard to resist. With simple ingredients and straightforward steps, they’re a perfect treat to share or enjoy anytime.
By following the tips for preparation, baking, and storage, we can ensure every batch turns out just right—deliciously fresh and beautifully presented. Whether for a special occasion or a cozy moment at home, these cookies are sure to impress and delight.
Frequently Asked Questions
What ingredients are needed to make Chocolate Hazelnut Thumbprint Cookies?
The key ingredients include unsalted butter, granulated sugar, egg yolk, vanilla extract, all-purpose flour, salt, chocolate hazelnut spread, and optional chopped hazelnuts. Optional toppings like powdered sugar and mini chocolate chips can enhance flavor and presentation.
What equipment do I need to bake these cookies?
You’ll need mixing bowls, an electric mixer, measuring cups and spoons, a rubber spatula, baking sheet, parchment paper or silicone mat, a cookie scoop or tablespoon, a wooden spoon or finger for indentations, and a cooling rack.
Can I prepare the dough ahead of time?
Yes, you can chill the dough wrapped in plastic wrap for 1 to 48 hours or freeze it up to 3 months. Shape the dough into cookies before freezing, leaving the thumbprints unfilled until baking.
How do I make the thumbprint indentation?
Use your finger or a wooden spoon to press a small indentation in the center of each dough ball before baking. This creates space to fill with chocolate hazelnut spread.
What temperature and time should I bake the cookies?
Preheat your oven to 350°F (175°C) and bake the cookies for 12–15 minutes. Avoid overbaking to keep the edges crisp and centers soft.
How should I store the cookies to keep them fresh?
Store completely cooled cookies in an airtight container at room temperature for up to 4 days or refrigerate for up to 2 weeks. Freeze baked cookies or unfilled dough portions for longer storage.
Can I freeze the baked cookies with filling?
It’s best to freeze unfilled dough or baked cookies without filling. Fill the thumbprints with chocolate hazelnut spread after thawing to prevent drying out.
Are there any tips to avoid cookie sticking during baking?
Use parchment paper or a silicone baking mat on your baking sheet to prevent cookies from sticking and ensure even baking.
What makes these thumbprint cookies unique?
They combine a buttery, tender dough with rich, creamy chocolate hazelnut filling, offering a classic cookie with a delicious twist and delightful texture.
Can I customize the cookies with toppings?
Yes, you can add toppings like powdered sugar, chopped hazelnuts, or mini chocolate chips to boost flavor and visual appeal.