
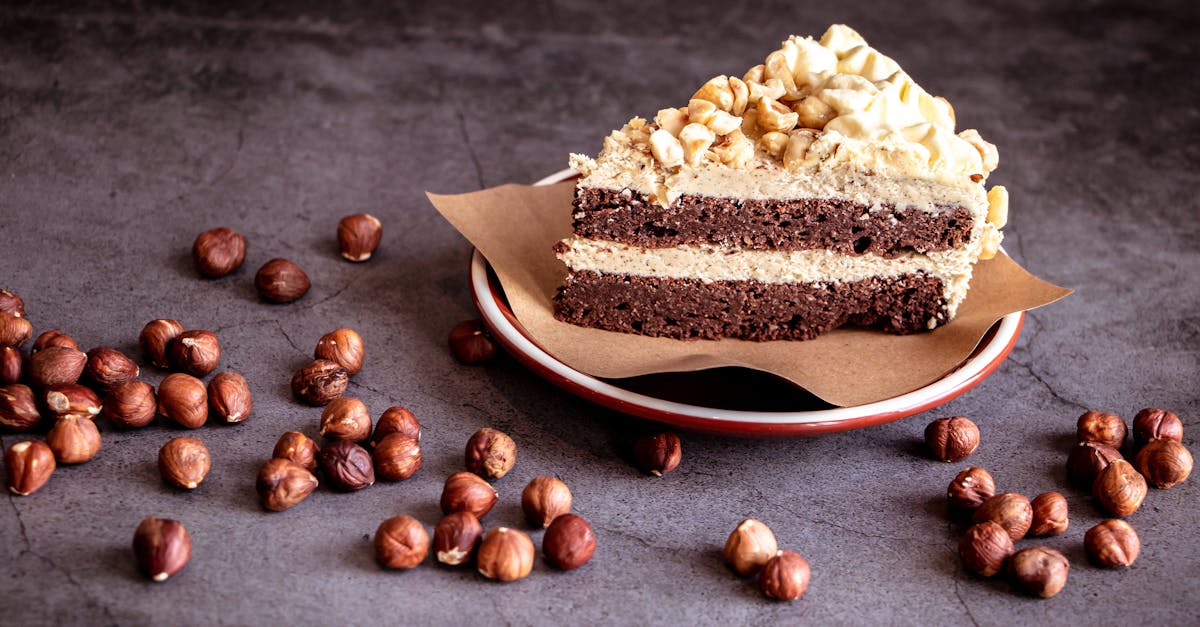
Is there anything better than biting into a soft, fluffy donut and discovering a rich, velvety chocolate filling inside? We think not. Chocolate-filled donuts are a match made in dessert heaven, combining the indulgence of creamy chocolate with the comforting sweetness of a perfectly fried donut.
Chocolate Filling Recipe For Donuts
Creating a rich and creamy chocolate filling for donuts at home is simpler than you might think. With just a few ingredients and clear steps, we can craft a luscious filling that complements the fluffy sweetness of the fried donuts perfectly. Let’s dive into the process.
Ingredients
Here’s what we need to prepare the perfect silky chocolate filling:
- 1 cup (240ml) heavy cream
- 8 ounces (225g) semi-sweet chocolate chips or chopped chocolate
- 2 tablespoons (30g) unsalted butter
- 1 teaspoon vanilla extract
- A pinch of salt
Step-by-Step Instructions
Follow these steps to achieve a decadent chocolate filling with a smooth, velvety texture:
- Heat the cream
Place the heavy cream in a small saucepan over medium heat. Warm it until it just begins to simmer but do not let it boil. Stir occasionally to keep it from scalding.
- Prepare the chocolate
Add the semi-sweet chocolate chips or finely chopped pieces of chocolate into a medium heatproof bowl.
- Combine cream and chocolate
Pour the hot cream evenly over the chocolate pieces. Let it sit untouched for 3-4 minutes. This step ensures the chocolate melts smoothly without clumping.
- Whisk until smooth
After letting it sit, take a whisk and gently begin mixing. Add the softened butter, one tablespoon at a time, while continuing to whisk. The mixture should turn silky and glossy.
- Incorporate additional flavors
Stir in the vanilla extract and a pinch of salt for balance. These subtle flavor enhancements intensify the chocolatey richness.
- Cool to thicken
Allow the mixture to cool at room temperature for about 15-20 minutes, stirring occasionally. The filling will thicken as it cools, creating the perfect consistency to pipe into the donuts.
Quick Reference Table
| Ingredient | Measurement | Purpose |
|---|---|---|
| Heavy cream | 1 cup (240ml) | Base for the filling to make it creamy |
| Semi-sweet chocolate | 8 ounces (225g) | Core ingredient for rich, chocolatey flavor |
| Unsalted butter | 2 tablespoons (30g) | Adds smoothness and glossiness to the filling |
| Vanilla extract | 1 teaspoon | Enhances and balances the overall sweetness |
| Salt | 1 pinch | Cuts sweetness and deepens chocolate flavor |
Notes and Tips
- For an extra-decadent finish, use high-quality chocolate with at least 60-70% cocoa content.
- If the mixture stiffens too much, gently rewarm it in a heatproof bowl over simmering water.
- This filling also doubles as an excellent dipping sauce or topping for other desserts!
Ingredients
Here’s everything we need to create a rich and velvety chocolate filling perfect for donuts. Measure and prepare these ingredients carefully for the best results:
- 1/2 cup (120 ml) heavy cream
Adds creaminess and a smooth texture to the filling. - 4 oz (113 g) semi-sweet chocolate, finely chopped
Provides deep, indulgent chocolate flavor. - 2 tbsp (28 g) unsalted butter, room temperature
Enhances silkiness and balances the richness of the chocolate. - 1/2 tsp vanilla extract
Lends a subtle sweetness and aromatic depth to the filling. - A pinch of salt
Elevates the chocolate’s natural flavor.
Quick Ingredient Reference Table
| Ingredient | Measurement | Role in Recipe |
|---|---|---|
| Heavy cream | 1/2 cup (120 ml) | Creates creamy, smooth texture. |
| Semi-sweet chocolate | 4 oz (113 g) | Delivers the rich, chocolatey flavor. |
| Unsalted butter | 2 tbsp (28 g) | Adds silkiness to the filling. |
| Vanilla extract | 1/2 tsp | Enhances the filling with aromatic sweetness. |
| Salt | A pinch | Complements and highlights the chocolate flavor. |
Tools And Equipment
Preparing the perfect chocolate filling for donuts requires the right tools and equipment to ensure a smooth and satisfying process. Here’s what we’ll need:
Essential Tools:
- Medium saucepan: For gently heating the heavy cream and melting the chocolate.
- Heatproof mixing bowl: To mix the ingredients; a glass or stainless steel bowl works best.
- Silicone or rubber spatula: Ideal for folding and scraping every bit of the filling.
- Whisk: For ensuring the filling is silky smooth and free of lumps.
- Fine-mesh sieve (optional): To strain the mixture if any lumps form, ensuring an ultra-smooth texture.
- Piping bag with a narrow tip: To fill the donuts neatly without messy spills.
- Kitchen scale or measuring cups: For precise ingredient measurements.
- Cooling rack: To cool the chocolate mixture to the correct consistency before piping.
Additional Items:
- Small knife or skewer: To create neat entry points in the donuts for filling.
- Pastry brush: Useful for cleaning off extra flour or adding a glaze, if desired.
Equipment Summary Table:
| Tool/Equipment | Purpose | Optional or Required |
|---|---|---|
| Medium saucepan | Heat the heavy cream and melt chocolate | Required |
| Heatproof mixing bowl | Combine all ingredients | Required |
| Silicone/rubber spatula | Scrape and fold for uniform mixing | Required |
| Whisk | Achieve a smooth filling texture | Required |
| Fine-mesh sieve | Remove lumps for ultra-smooth filling | Optional |
| Piping bag with narrow tip | Fill the donuts neatly | Required |
| Kitchen scale | Ensure exact ingredient measurements | Required |
| Small knife/skewer | Create entry points in the donut for filling | Required |
| Cooling rack | Cool the chocolate mixture to the perfect consistency | Required |
Tips for Tool Preparation:
- Ensure all tools are clean and dry before starting. Water residue can alter the consistency of the chocolate.
- Use a high-quality piping bag or reusable cloth piping bag for precision and ease.
- If you don’t own a fine-mesh sieve, a clean kitchen towel or cheesecloth can work in a pinch.
With these tools and equipment ready, we’re fully equipped to create a rich and velvety chocolate filling that pairs perfectly with our donuts.
Directions
Let’s walk through the step-by-step instructions to create the perfect chocolate filling for donuts. With some simple prep, a bit of heating, and time to cool, we’ll have a rich, velvety chocolate filling ready to delight your taste buds.
Prep
- Gather Ingredients and Tools: Ensure all ingredients—heavy cream, semi-sweet chocolate, unsalted butter, vanilla extract, and salt—are measured out precisely. Prepare the following tools:
- Medium saucepan
- Heatproof mixing bowl
- Silicone spatula
- Whisk
- Piping bag with a small round tip
- Chop Chocolate: Finely chop the semi-sweet chocolate into small, even pieces. This ensures the chocolate melts smoothly and combines perfectly with the heated cream.
- Prepare the Workspace: Clear your countertop and line it with parchment paper for easy cleanup.
Make The Chocolate Filling
- Heat the Cream: Pour 1 cup of heavy cream into a medium saucepan. Heat over medium heat until it starts to simmer gently. Avoid bringing it to a boil, as overheating can affect the texture.
- Combine with Chocolate: Place the chopped semi-sweet chocolate (8 ounces) in a heatproof mixing bowl. Slowly pour the hot cream over the chocolate, ensuring all the pieces are submerged. Let it sit for 2-3 minutes to allow the chocolate to begin melting.
- Whisk Until Smooth: Using a whisk, mix the chocolate and cream together in slow, circular motions. Add 2 tablespoons of unsalted butter, 1 teaspoon of vanilla extract, and a pinch of salt. Continue whisking until the mixture is smooth, glossy, and lump-free.
- Check Consistency: The filling should have a thick but pourable consistency. If needed, add 1-2 teaspoons of warm cream to adjust.
Cooling The Filling
- Cool to Pipeable Consistency: Let the chocolate filling cool at room temperature for about 30-40 minutes to thicken further. Stir occasionally to prevent a skin from forming on the surface.
- Transfer to Piping Bag: Once the filling is cool enough to handle and has reached a pipeable consistency, spoon it into a piping bag fitted with a small round tip.
- Store if Needed: If not using immediately, store the filling in the piping bag or a sealed container in the fridge for up to 3 days. Allow it to come to room temperature before using.
Key Tips Summary
| Step | Critical Tip |
|---|---|
| Heating the Cream | Do not boil; gently simmer only. |
| Whisking the Mixture | Whisk in slow circles for smooth texture. |
| Cooling the Filling | Stir occasionally to prevent skin forming. |
How To Fill Donuts
Filling your donuts with a rich, velvety chocolate filling takes them to an indulgent level. Let’s perfect the process with easy-to-follow steps and pro tips for flawless results.
Choosing The Right Donut
The choice of donut is crucial for ensuring the filling pairs seamlessly with its texture and flavor. Here’s what to consider:
- Soft & Fluffy Texture: Select donuts that are light and airy, as they hold the filling better and don’t overpower the chocolate flavor.
- Unfilled Varieties: Opt for plain or sugar-dusted donuts without pre-existing fillings. Glazed donuts can work too but ensure the glaze complements the chocolate.
- Shape: Round donuts are ideal since they provide even space to fill. Avoid donuts with large holes or uneven surfaces.
Pro Tip: If making your own donuts from scratch, ensure they cool completely to avoid melting the chocolate filling during the process.
Filling The Donuts With Chocolate
Once your donuts and filling are ready, it’s time to fill them with that irresistible chocolate. Follow these steps carefully:
- Prepare the Piping Bag: Fit a piping bag with a long, narrow pastry tip (e.g., Bismarck or round tip). Fill the bag with your cooled chocolate filling.
- Create the Filling Hole:
- Use a small paring knife to make a hole in the side of the donut. Be gentle to avoid tearing the dough.
- Widen the hole slightly with the knife tip, creating space for the filling.
- Pipe the Chocolate Filling:
- Insert the piping tip into the hole. Squeeze gently while steadying the donut with one hand.
- Fill until the chocolate slightly resists, indicating the donut is full. Avoid overfilling to prevent breakage.
- Check for Even Distribution: Give the donut a slight squeeze to ensure filling has spread evenly throughout. Repeat for all donuts.
| Step | Details/Tools Needed |
|---|---|
| Prepare piping bag | Piping bag with narrow pastry tip |
| Create a filling hole | Small paring knife |
| Pipe chocolate filling | Steady pressure on piping bag |
| Check filling distribution | Squeeze to ensure even spread |
Tip for Presentation: Lightly dust the donuts with powdered sugar or drizzle them with chocolate for a finished look.
With these detailed steps, even beginners can fill donuts effortlessly.
Make-Ahead Instructions
Preparing the chocolate filling ahead of time is a fantastic way to streamline the process of assembling and enjoying your chocolate-filled donuts. With proper storage techniques, we can ensure the filling maintains its rich, creamy texture and flavor. Here’s how to make and store the filling in advance:
Steps for Making Ahead:
- Prepare the Chocolate Filling: Follow the recipe instructions to create the chocolate filling. Ensure it is whisked to a smooth consistency and cooled to the proper thickness for piping.
- Cool the Filling Properly: Once the filling is prepared, allow it to cool completely to room temperature. This step ensures its texture and consistency remain intact when stored.
- Transfer to an Airtight Container: Place the cooled filling into a clean, airtight container. Make sure the lid is securely closed to prevent exposure to air, which could alter the texture or flavor over time.
- Refrigerate for Short-Term Storage: Store the container in the refrigerator. The chocolate filling stays fresh and smooth for up to 3 days in the fridge.
- Label and Date: For convenience, label the container with the preparation date to keep track of its freshness.
Reheating and Reusing:
- Thickened Filling: If the filling thickens excessively in the fridge, we can gently rewarm it. Place the container in a bowl of warm water for a few minutes or microwave it in short 10 to 15-second increments, stirring well after each.
- Avoid Overheating: Be cautious not to overheat. Excessive heat can alter the texture and cause the butter or chocolate to separate.
- Return to Pipeable Consistency: Whisk the reheated filling thoroughly until it’s smooth and ready for piping into donuts.
Freezing for Extended Storage
For longer storage, the chocolate filling can be frozen. When freezing, additional care is required to maintain its creamy texture.
- Freezing Instructions:
- Place the cooled filling into a freezer-safe, airtight container or a zip-top freezer bag.
- Remove as much air as possible to minimize freezer burn.
- Label the container or bag with the date.
- Freeze for up to 2 months.
- Thawing and Reuse:
- Transfer the container or bag to the refrigerator and allow it to thaw overnight.
- Gently rewarm, if needed, using the earlier reheating method.
- Whisk to restore its smooth, velvety consistency. Avoid vigorous mixing to preserve the creamy texture.
Storage Overview Table
| Storage Option | Duration | Key Notes |
|---|---|---|
| Refrigerator | Up to 3 days | Use an airtight container. Rewarm gently if thickened. |
| Freezer | Up to 2 months | Ensure no air exposure. Thaw in the refrigerator before reheating. |
By following these make-ahead and storage techniques, we can ensure the chocolate filling is always ready to create indulgent, homemade chocolate-filled donuts with minimal effort on the day of serving. Using these methods also grants maximum convenience and flexibility for planning ahead.
Tips For Perfect Donut Filling
Achieving the perfect chocolate-filled donut requires attention to detail and a few tried-and-true techniques. Here’s how to ensure your donuts are always delightfully filled with rich chocolate goodness.
1. Choose the Right Chocolate Filling Consistency
- The filling should be smooth, creamy, and pipeable. To achieve this, let the prepared chocolate filling cool until thickened but not solid.
- Avoid overly runny or stiff textures, as these can either seep out or make piping difficult.
2. Prep the Donuts for Filling
- Take unfilled round donuts or ring-shaped ones with enough dough to hold the filling.
- Use a skewer, chopstick, or piping nozzle to gently create a filling hole without damaging the donut’s structure. For uniformity, try marking the same spot on each donut.
3. Use the Proper Piping Bag Technique
- Always use a piping bag with a round tip or a filling injector for precise control.
- Avoid overfilling to prevent mess or busted donuts. Fill until you feel slight resistance as the donut plumps up slightly.
4. Maintain Temperature Control
- Ensure the chocolate filling is neither too warm nor too cold. Overheated filling may absorb into the dough, while refrigerated filling might be too dense to pipe.
- Let refrigerated filling sit at room temperature for 10–15 minutes before using.
5. Work in Batches
- If you’re making multiple donuts, work in batches of 3–4 to keep the process manageable. This reduces the chance of over-handling, which could cause the donuts to lose their fluffiness.
6. Clean Tools for Precision
- Always clean your tools, especially the piping tip and nozzle, after every 2–3 donuts. This prevents clogging and ensures seamless filling.
7. Enhance for Presentation
- After filling, dust the donuts lightly with powdered sugar, drizzle melted chocolate, or add a sprinkle of cocoa powder for visual appeal and extra flavor.
8. Storage Recommendations
- Filled donuts are best served immediately, but they can be stored for up to 24 hours in an airtight container. Avoid refrigeration as it can make the dough dense and the filling firm.
Pro Tip for Chocolate Lovers
Mix a small amount of espresso powder or orange zest into the filling for a subtle flavor boost.
| Key Tips Recap | Why It Matters |
|---|---|
| Smooth and pipeable filling | Prevents mess and ensures perfect consistency |
| Round donuts with adequate space | Holds the filling properly without messy overflow |
| Proper piping nozzle and technique | Offers even distribution and a clean process |
| Temperature control | Ensures smooth filling without texture issues |
| Work in batches | Maintains the donuts’ fluffiness and quality |
By following these tips, we can guarantee donuts filled with indulgent, creamy chocolate in every bite.
Storage Instructions
Proper storage of our chocolate filling ensures it maintains its rich, creamy texture and deep flavor, making it perfect for future use. Let’s go over the best practices and techniques for storing this indulgent filling efficiently.
Refrigeration Guidelines
- Allow the chocolate filling to cool completely at room temperature after preparation to avoid condensation when refrigerated.
- Transfer the cooled filling to an airtight container. Ensure no air pockets remain, as exposure to air may impact the texture and flavor.
- Store the container in the refrigerator for up to 3 days. Label it with the date to keep track of freshness.
- When ready to use, bring the filling to room temperature by letting it sit out for 20–30 minutes. If it thickens excessively, whisk gently or heat it for 10–15 seconds in the microwave, stirring consistently until smooth.
Freezing Instructions
The chocolate filling can also be frozen for longer storage. While freezing doesn’t compromise its taste, we must take extra care to preserve its texture.
- Once completely cooled, place the filling in a freezer-safe, airtight container or a heavy-duty freezer bag. Leave about one-inch space for expansion.
- If using a bag, press flat to expel excess air before sealing.
- Label the container or bag with the date, as the filling can be stored in the freezer for up to 2 months.
- When thawing, transfer the filling to the refrigerator and let it defrost overnight. Avoid defrosting at room temperature to prevent texture changes.
- Once thawed, restore the smooth consistency by whisking gently. If needed, reheat in short intervals using a microwave or stovetop to regain its velvety texture.
Quick Reference Table for Storage Options
| Storage Method | Conditions | Shelf Life | Tips for Best Results |
|---|---|---|---|
| Refrigeration | Airtight container, fridge at 37°F or colder | Up to 3 days | Cool before refrigerating; bring to room temp or gently reheat before use |
| Freezing | Freezer-safe container/bag, frozen at 0°F | Up to 2 months | Cool before freezing; thaw in fridge, whisk or reheat gently for the ideal consistency |
By following these Storage Instructions, we ensure that our chocolate filling stays fresh, rich, and ready for use whenever we want to satisfy cravings for chocolate-filled donuts or other decadent treats.
Conclusion
Creating a rich chocolate filling for donuts at home is simpler than it seems and adds an irresistible touch to any dessert spread. With the right ingredients, tools, and techniques, we can achieve a creamy, indulgent filling that elevates our homemade donuts to bakery-level perfection.
By mastering this versatile recipe, we’re not just limited to donuts; this chocolate filling can transform cakes, pastries, or even be enjoyed on its own. Whether we’re preparing it fresh or making it ahead, the possibilities are endless.
Let’s embrace the joy of crafting these decadent treats and savor every bite of that luscious chocolate goodness.
Frequently Asked Questions
What makes chocolate-filled donuts so special?
Chocolate-filled donuts combine a soft, fluffy exterior with a rich, velvety chocolate filling, creating a perfect balance of textures and flavors. They are an indulgent treat, satisfying cravings for both sweetness and creaminess.
Can I make the chocolate filling ahead of time?
Yes, you can prepare the chocolate filling up to three days in advance. Simply store it in an airtight container in the fridge. Reheat gently if it thickens before use.
What is the key to making the perfect chocolate filling?
The key is to use high-quality ingredients, such as semi-sweet chocolate and heavy cream, and pay close attention to each step, especially gentle heating and proper whisking.
What type of donut is best for filling with chocolate?
Unfilled, round-shaped, soft, and fluffy donuts are ideal for filling with chocolate. These types ensure even distribution and the best flavor experience.
How do I store leftover chocolate filling?
Store leftover chocolate filling in airtight containers in the fridge for up to three days. For longer storage, freeze it and thaw before use, ensuring you restore its creamy consistency.
Can I freeze the chocolate filling?
Yes, you can freeze the chocolate filling. Transfer it to an airtight container, label it, and store it in the freezer. Thaw it in the refrigerator and mix until smooth before use.
What tools do I need to make the chocolate filling?
You’ll need a medium saucepan, heatproof mixing bowl, silicone spatula, whisk, and a piping bag. These tools ensure precision and ease throughout the preparation process.
How long can I store chocolate-filled donuts?
Chocolate-filled donuts are best enjoyed fresh but can be stored in an airtight container at room temperature for up to 1 day or refrigerated for up to 2 days.
Do I need to refrigerate chocolate-filled donuts?
Yes, if not eaten immediately, refrigerate chocolate-filled donuts to maintain freshness and prevent spoilage. Allow them to return to room temperature before serving for the best flavor.
Can I customize the chocolate filling?
Absolutely! You can enhance the filling by adding flavorings like coffee, caramel, or liqueurs. Experiment with blends to create unique flavor combinations for your donuts.