
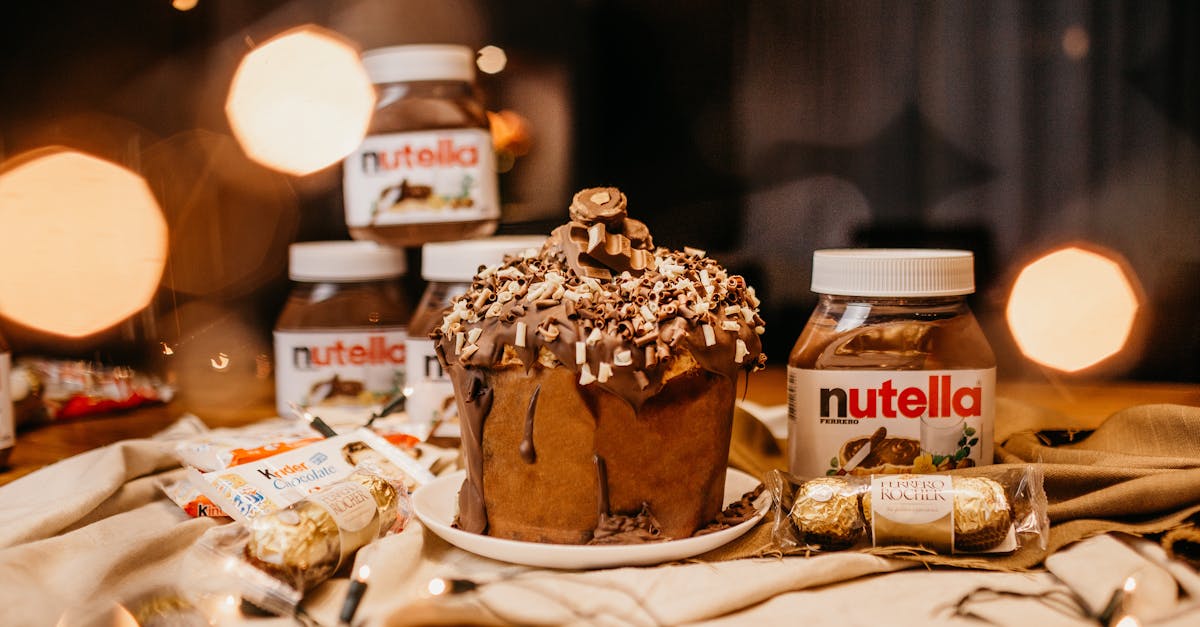
There’s something magical about homemade chocolates, especially when they’re filled with creamy Nutella. Using candy molds lets us create beautiful, professional-looking treats that are as fun to make as they are to eat. These chocolate candy mold recipes bring together the rich flavor of chocolate with the irresistible hazelnut spread we all love.
Whether we’re making gifts for friends or a special dessert for ourselves these filled chocolates add a touch of elegance and indulgence. Plus, crafting them at home means we can customize flavors and shapes to suit any occasion. Let’s dive into these simple yet impressive recipes that turn everyday ingredients into delightful chocolate creations.
Ingredients
To create delicious and visually stunning Chocolate Candy Mold Recipes Filled With Nutella, we need just a few quality ingredients. Gathering these essentials ensures smooth chocolate shells and rich, creamy fillings every time.
Chocolate Ingredients
Our choice of chocolate influences both the flavor and texture of the final candies. We recommend using either high-quality couverture chocolate or a blend of chocolate and cocoa butter for the best results.
| Ingredient | Quantity | Notes |
|---|---|---|
| Semi-sweet chocolate | 8 ounces (226 g) | Chopped or in chips |
| Cocoa butter (optional) | 1 tablespoon | For a smoother melt, optional |
| Vegetable oil (optional) | 1 teaspoon | Helps with glossy finish |
| Sea salt (optional) | A pinch | For enhanced flavor |
Nutella Filling Ingredients (if any additions)
The star of our recipe is the Nutella filling. While pure Nutella works wonderfully on its own, we can enhance the texture or flavor slightly depending on preferences.
| Ingredient | Quantity | Notes |
|---|---|---|
| Nutella hazelnut spread | 1 cup (320 g) | Room temperature for easy filling |
| Heavy cream (optional) | 1-2 teaspoons | To soften Nutella if desired |
| Chopped hazelnuts (optional) | 1 tablespoon | Adds crunch and texture |
By combining these ingredients thoughtfully, we ensure every bite is rich, creamy, and perfectly molded. Our hands-on steps will guide us through transforming these simple components into delightful chocolate treasures.
Equipment and Tools
To create perfectly molded Chocolate Candy Mold Recipes Filled With Nutella, having the right Equipment and Tools is essential. These tools ensure smooth chocolate handling, precise filling, and professional-looking results.
Chocolate Candy Molds
Using high-quality Chocolate Candy Molds is the foundation of shaping our treats. We recommend:
- Polycarbonate molds for their durability and glossy finish.
- Choose molds with smooth cavities to ensure chocolates release easily.
- Shapes can range from classic squares to fun seasonal designs.
| Type of Mold | Benefits | Material |
|---|---|---|
| Polycarbonate | Glossy finish, easy release | Plastic |
| Silicone | Flexible, easy to pop out | Silicone rubber |
| Metal | Durable, retains shape well | Aluminum/Steel |
Tip: Clean molds thoroughly and dry them completely before chocolate tempering to avoid spotting.
Double Boiler or Microwave-Safe Bowl
Melting chocolate requires careful control of temperature to avoid burning. We use:
- A double boiler to melt chocolate gently using steam heat.
- Alternatively, a microwave-safe bowl can work if microwaving in short bursts with stirring in between.
Double Boiler Setup Steps:
- Fill bottom pot with water (not touching the top bowl).
- Place chocolate into top bowl.
- Heat gently, stirring occasionally.
Microwave Instructions:
- Heat chocolate in 30-second intervals.
- Stir well after each interval until smooth.
Spatula and Spoon
These essential tools help us evenly coat molds and handle filling with control.
- A silicone spatula is perfect for stirring melted chocolate and scraping bowls.
- A small spoon is useful to carefully spread or level the chocolate inside the molds.
Piping Bag or Small Spoon for Filling
To fill the chocolate shells with Nutella neatly, we suggest:
- Using a piping bag fitted with a small round tip for precise filling without mess.
- Alternatively, a small spoon or even a toothpick works for placing controlled amounts into each cavity.
“Precise filling ensures every bite is rich with luscious Nutella, creating that signature creamy surprise we all love.”
With these tools in hand we are fully equipped to craft stunning and delicious homemade chocolates filled with Nutella every time.
Preparation
We begin by preparing each component carefully to ensure our chocolate candy molds filled with Nutella come out flawless and irresistible. Precision and attention to temperature are key for perfect results.
Preparing the Chocolate
- Chop the high-quality chocolate into uniform small pieces. This ensures even melting.
- Use a double boiler or microwave set to 50% power to melt the chocolate slowly.
- For the double boiler, place the bowl over gently simmering water. Stir continuously to prevent burning.
- In the microwave, heat in 30-second intervals, stirring well between each.
- Once melted, check the temperature. For tempering, cool the chocolate to 82°F (28°C), then slowly reheat to 88-90°F (31-32°C) for dark chocolate or 86-88°F (30-31°C) for milk and white chocolate.
- Optionally, add a teaspoon of cocoa butter or a teaspoon of vegetable oil to improve shine and workability. Stir thoroughly.
- Keep the melted chocolate warm using a heated bowl or warm water bath while working with molds.
| Step | Temperature (°F) | Chocolate Type |
|---|---|---|
| Initial melt | 104-113 | All |
| Cool down (tempering) | 82 | All |
| Reheat (dark chocolate) | 88-90 | Dark |
| Reheat (milk/white) | 86-88 | Milk/White |
Preparing the Nutella Filling
- Use room-temperature Nutella for easy handling and smooth filling.
- To enhance texture, optionally stir in finely chopped hazelnuts or a pinch of sea salt.
- If you prefer a creamier filling, mix Nutella with a tablespoon of softened butter or cream cheese until smooth.
- Transfer the Nutella filling into a piping bag or a resealable plastic bag with a small corner snipped for precision.
- Set aside until ready to fill the molds.
“Using a piping bag helps us control the amount of Nutella in each candy ensuring no overfilling and clean edges.“
Setting Up the Candy Molds
- Ensure molds are clean and completely dry before use.
- Warm molds slightly by placing them under warm running water or wiping with a warm cloth. This helps the chocolate release easier.
- Pour or spoon melted chocolate into each mold cavity about halfway.
- Tilt and rotate molds to coat the sides thoroughly forming a shell.
- Invert the mold over the bowl to pour out excess chocolate, leaving a thin chocolate shell.
- Allow the shell to set for 5-7 minutes at room temperature or chill briefly in the refrigerator (no longer than 5 minutes) to harden.
- Pipe the Nutella filling into the set chocolate shells leaving a small border on top.
- Seal with a final layer of melted chocolate to cover the filling completely.
- Tap the mold gently on the counter to release any air bubbles for a smooth finish.
- Chill the mold in the fridge for at least 20-30 minutes until fully set.
Directions
Let’s embark on creating our Chocolate Candy Mold Recipes Filled With Nutella by following these precise steps. Each part of the process ensures smooth, glossy chocolates with a rich, creamy Nutella center.
Melting the Chocolate
- Chop high-quality chocolate into uniform small pieces for even melting.
- Use a double boiler or microwave to melt the chocolate:
- Double boiler method: Place chopped chocolate in a heatproof bowl over simmering water. Stir constantly until fully melted and smooth.
- Microwave method: Heat chocolate in 30-second intervals, stirring in between until completely melted.
- Maintain the chocolate temperature between 110°F and 115°F for dark chocolate and 105°F to 110°F for milk or white chocolate to ensure proper melting without burning.
- For tempering, cool the chocolate to about 82°F, then gently reheat to 88°F–90°F for dark chocolate (slightly lower for milk/white).
| Step | Temperature Range | Purpose |
|---|---|---|
| Melting | 110°F–115°F (dark), 105°F–110°F (milk) | Even melting |
| Cooling (Tempering) | ~82°F | Preparing for tempering |
| Reheating (Tempering) | 88°F–90°F (dark) | Achieve glossy finish |
Filling the Molds with Chocolate
- Ensure molds are clean and dry.
- Using a spoon or a piping bag, pour the melted and tempered chocolate into each cavity.
- Tilt and tap the mold gently to coat the sides and remove air bubbles, creating a smooth chocolate shell.
- Invert the mold over the bowl to pour out excess chocolate, leaving a thin shell coating each cavity.
- Place the mold in the fridge for 5–10 minutes to allow the chocolate shells to firm up.
Adding the Nutella Filling
- Spoon or pipe a generous amount of creamy Nutella filling into each chocolate shell, leaving about 1/4 inch space at the top for sealing.
- Optional: Add chopped hazelnuts for extra crunch and textural contrast.
- Be careful to avoid getting Nutella on the shell edges to ensure a clean seal.
Sealing the Mold with Chocolate
- Re-melt leftover chocolate if needed and cool to the tempering range for sealing.
- Pour or pipe the chocolate over the Nutella filling to completely cover and seal each cavity.
- Smooth the surface with a spatula or scraper.
- Tap the mold gently on the counter to release trapped air bubbles and even out the chocolate layer.
Cooling and Setting the Candies
- Place the mold flat in the refrigerator or a cool room for 15–20 minutes to set completely.
- Once set, gently flex or tap the mold to release the filled chocolates.
- Store chocolates in an airtight container in a cool place to maintain texture and flavor.
By following these detailed directions, our chocolate candy mold recipes filled with Nutella will become a stunning, delicious treat every time.
Tips for Perfect Chocolate Candy Mold Recipes Filled With Nutella
Mastering homemade chocolates filled with Nutella requires attention to detail. Here, we share essential tips to ensure every piece is smooth, glossy, and delectably creamy.
How to Avoid Air Bubbles
Air bubbles can ruin the smooth surface of our chocolates. Follow these steps to keep bubbles at bay:
- Tap the mold gently on the countertop after pouring chocolate.
- Use a small spatula or toothpick to release trapped bubbles around edges.
- Pour melted chocolate slowly and steadily to minimize air incorporation.
- Avoid overfilling the molds; leaving a small gap helps prevent bubbles during sealing.
- Allow chocolate to set at room temperature briefly before refrigerating.
“Patience and gentle tapping are our best friends in achieving flawless chocolate shells.”
Best Chocolate Types to Use
Choosing the right chocolate is crucial for rich flavor and proper setting. Consider these options:
| Chocolate Type | Cocoa Content | Melt Point | Best Use |
|---|---|---|---|
| Couverture Chocolate | 55-75% | 88-90°F (31-32°C) | Ideal for molding due to high cocoa butter |
| Dark Chocolate | 60-70% | 86-90°F (30-32°C) | Bold flavor, excellent structure |
| Milk Chocolate | 35-45% | 86-92°F (30-33°C) | Creamier and sweeter, good for Nutella pairing |
| Semi-sweet Chocolate | 40-60% | 88-90°F (31-32°C) | Balanced flavor, versatile for molds |
We recommend couverture chocolate or high-quality dark chocolate for glossy finishes and firm shells, while milk chocolate pairs beautifully to complement Nutella’s sweetness.
Storage Instructions
Proper storage preserves the texture and flavor of our chocolate candy mold recipes filled with Nutella:
- Store chocolates in an airtight container to prevent moisture absorption.
- Keep in a cool, dry place away from direct sunlight. Ideal temperature is 60-70°F (15-21°C).
- Avoid refrigeration unless in very warm climates; rapid temperature changes can cause bloom (white streaks).
- If refrigerated, bring chocolates to room temperature before unwrapping to prevent condensation.
Pro tip: Layer chocolates with parchment paper when stacking to avoid sticking.
By following these tips closely we ensure every bite of our Nutella-filled chocolates delights with perfect texture and flavor.
Variations and Flavor Ideas
Exploring chocolate candy mold recipes filled with Nutella offers endless possibilities to customize flavor profiles and textures. Here are creative variations and flavor ideas to elevate your homemade chocolates.
Nutella Filling Enhancements
We can enrich the classic Nutella filling by incorporating:
- Chopped Hazelnuts: Add a crunchy texture and enhance the nutty taste.
- Sea Salt: Sprinkle a small pinch into the Nutella for a balanced sweet-salty contrast.
- Espresso Powder: Mix a teaspoon into the filling to deepen the chocolate flavor with subtle coffee notes.
- Vanilla Extract: Add a few drops to brighten the Nutella’s richness.
Chocolate Shell Variations
Choosing different chocolate types alters the final bite:
| Chocolate Type | Flavor Profile | Best Use with Nutella |
|---|---|---|
| Dark Chocolate | Intense, slightly bitter | Balances Nutella’s sweetness perfectly |
| Milk Chocolate | Creamy, sweet | Enhances overall sweetness |
| White Chocolate | Sweet, rich, vanilla notes | Creates a softer contrast with Nutella |
We can also mix cocoa butter into the chocolate shells for a smoother texture and shinier finish.
Creative Filling Ideas Beyond Classic Nutella
Adding complementary ingredients to the filling can surprise the palate:
- Peanut Butter & Nutella Swirl: Combine equal parts for a nutty fusion.
- Berry Jam Layer: Add a thin layer of raspberry or strawberry jam underneath Nutella.
- Caramel Drizzle: Fold caramel sauce into Nutella for added decadence.
- Spiced Nutella: Stir in cinnamon or chili powder for a warm or spicy kick.
Decorative Toppings and Inclusions
Place small toppings on the chocolate shell before sealing for a visual and taste boost:
- Chopped Pistachios
- Crushed Freeze-Dried Berries
- Mini Chocolate Chips
- Edible Gold Flakes
Temperature and Texture Tweaks
To vary the mouthfeel:
- Chill the Nutella Filling in the refrigerator before piping for a firmer center.
- Warm the Nutella Slightly for easier filling and a creamier texture.
Summary Table of Flavor Variations
| Variation Type | Ingredient(s) | Effect | Tips |
|---|---|---|---|
| Nutella Filling | Hazelnuts, Espresso, Sea Salt | Texture & flavor enhancements | Use finely chopped nuts for smoothness |
| Chocolate Shell | Dark, Milk, White Chocolate | Alters sweetness and bitterness | Temper chocolate for shiny finish |
| Filling Add-ins | Peanut Butter, Jam, Caramel | Layered flavors | Add thin layers for clear distinctions |
| Decorative Toppings | Nuts, Berries, Gold Flakes | Visual appeal and texture | Apply before sealing molds |
By experimenting with these variations and flavor ideas we can craft irresistible chocolate candy mold recipes filled with Nutella tailored to any taste or occasion.
Conclusion
Crafting Nutella-filled chocolates with candy molds opens up endless possibilities for creativity and flavor. With the right ingredients, tools, and techniques, we can achieve professional-quality treats that impress both in taste and appearance.
By experimenting with different chocolate types and fillings, we make each batch uniquely our own. Whether for gifting or savoring, these homemade chocolates bring a special touch to any occasion. Let’s keep exploring and perfecting our chocolate-making skills to delight ourselves and those around us.
Frequently Asked Questions
What ingredients are needed to make Nutella-filled chocolates?
You need high-quality chocolate (dark, milk, or white), Nutella for the filling, and optional additions like cocoa butter, vegetable oil, and chopped hazelnuts to enhance texture and flavor.
What types of chocolate candy molds work best?
Polycarbonate molds offer a professional finish, silicone molds are flexible and easy to use, and metal molds provide sturdy shaping options.
How should I melt chocolate for these chocolates?
Melt chocolate slowly using a double boiler or microwave in short bursts, stirring frequently to avoid burning and achieve a smooth texture.
What is the importance of tempering chocolate?
Tempering ensures a glossy finish and crisp snap, giving chocolates a professional texture and preventing melting or blooming.
How do I fill the molds without air bubbles?
Pour chocolate slowly and tap the mold gently to release trapped air before adding the Nutella filling and sealing.
Can I customize the Nutella filling?
Yes, you can add chopped hazelnuts, sea salt, espresso powder, or vanilla extract to enhance the Nutella flavor.
How should I store homemade Nutella chocolates?
Store them in an airtight container in a cool, dry place away from heat and moisture to preserve texture and flavor.
What variations can I try with these chocolates?
Try different chocolate shells (dark, milk, white), add peanut butter swirls, berry jam, or caramel fillings, and top with decorative nuts or sprinkles.
Is it necessary to use couverture chocolate?
Couverture chocolate is recommended for its high cocoa butter content, which gives a glossy finish and smooth texture, but good-quality chocolate also works.
How long does it take for the chocolates to set?
Chocolates generally need about 20-30 minutes in the refrigerator to cool and set properly for removal from the molds.