
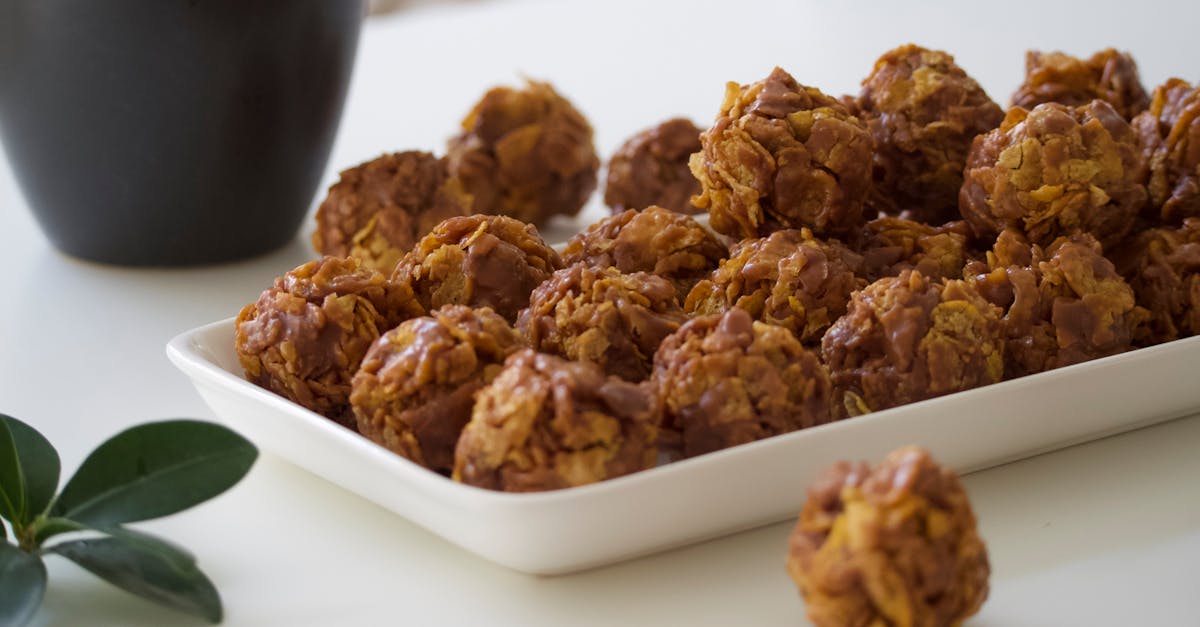
Chocolate Balls are a beloved Israeli treat that brings back memories of childhood and festive gatherings. These no-bake delights combine simple ingredients like cocoa, crushed biscuits, and sweetened condensed milk to create a rich and satisfying bite-sized snack. They’re perfect for when we want a quick dessert that doesn’t require an oven but still delivers on flavor.
Ingredients
To create authentic Chocolate Balls Israeli Recipe, we gather simple yet flavorful components. These ingredients combine to deliver that nostalgic taste and rich texture we all love.
Dry Ingredients
- 1 ½ cups crushed tea biscuits or rich digestive biscuits (finely crushed for smooth blending)
- ⅓ cup unsweetened cocoa powder (choose high-quality for the best chocolate aroma)
- ½ cup granulated sugar (adjust to your preferred sweetness)
Wet Ingredients
- 1 can (14 oz) sweetened condensed milk (acts as the sweet, creamy binder)
- 4 tablespoons unsalted butter (softened to room temperature for easy mixing)
- 1 teaspoon vanilla extract (enhances the chocolate and biscuit flavors)
Optional Add-ins and Toppings
- ½ cup chopped nuts (walnuts or almonds, for added crunch)
- ½ cup shredded coconut (to roll or mix in, adding texture and tropical aroma)
- Chocolate sprinkles or colored sprinkles (for decorating the finished balls)
- Pinch of salt (balances sweetness and intensifies chocolate taste)
| Ingredient Category | Ingredient | Quantity | Notes |
|---|---|---|---|
| Dry Ingredients | Crushed tea or digestive biscuits | 1 ½ cups | Finely crushed |
| Unsweetened cocoa powder | ⅓ cup | Use high-quality cocoa | |
| Granulated sugar | ½ cup | Adjust to taste | |
| Wet Ingredients | Sweetened condensed milk | 1 can (14 oz) | Acts as sweet and binder |
| Unsalted butter | 4 tablespoons | Softened | |
| Vanilla extract | 1 teaspoon | Flavor enhancer | |
| Optional Add-ins & Toppings | Chopped nuts | ½ cup | Walnuts or almonds optional crunch |
| Shredded coconut | ½ cup | Optional texture and flavor | |
| Chocolate or colored sprinkles | As desired | For decoration | |
| Salt | Pinch | Balances sweetness |
Equipment Needed
To prepare authentic Chocolate Balls Israeli Recipe, using the right equipment ensures efficiency and consistent results. Here is a detailed list of the essential tools we need:
- Mixing Bowl: A medium-sized bowl for combining dry and wet ingredients smoothly.
- Measuring Cups and Spoons: Accurate measuring tools for cocoa powder, sugar, and liquids to maintain precise proportions.
- Food Processor or Rolling Pin: To crush biscuits finely. A food processor speeds up the process, but a rolling pin works perfectly if pressed biscuits are sealed in a plastic bag.
- Spatula or Wooden Spoon: For thorough mixing without overheating the mixture.
- Plate or Tray: A flat surface to shape and place chocolate balls for chilling.
- Parchment Paper or Wax Paper: To prevent sticking when rolling and chilling the balls.
- Refrigerator: For chilling the formed balls until firm and ready to serve.
| Equipment | Purpose |
|---|---|
| Mixing Bowl | Combine ingredients |
| Measuring Tools | Accurate ingredient measurement |
| Food Processor | Crush biscuits finely |
| Rolling Pin | Alternative to food processor for crushing |
| Spatula/Wooden Spoon | Mix ingredients effectively |
| Plate or Tray | Shape and chill the balls |
| Parchment/Wax Paper | Prevent sticks during rolling and chilling |
| Refrigerator | Chill the chocolate balls, firming texture |
Tip: Using a chilled bowl can help maintain the right consistency during mixing especially in warm kitchens.
By gathering these key tools we streamline our process making it easier to achieve the perfect texture and delicious taste for our Chocolate Balls Israeli Recipe.
Prep Work
Before we start mixing our Chocolate Balls Israeli recipe, proper prep work sets the stage for smooth and speedy assembly. Let’s gather and ready everything to ensure a flawless process.
Preparing Ingredients
We begin by measuring and prepping all ingredients precisely. Accuracy here guarantees the perfect balance of flavor and texture in our Chocolate Balls.
- Crushed Biscuits: Use 2 cups of tea biscuits or digestive biscuits, crushed finely. Use a food processor for uniform crumbs or place biscuits in a sealed bag and crush with a rolling pin.
- Unsweetened Cocoa Powder: Measure ½ cup, sifted to remove lumps for a smooth mixture.
- Granulated Sugar: ⅓ cup, adjusted if you prefer sweeter or less sweet treats.
- Sweetened Condensed Milk: 1 cup, measured exactly to bind ingredients without making the mix too wet.
- Unsalted Butter: 4 tablespoons, softened to room temperature for easy blending.
- Vanilla Extract: 1 teaspoon for subtle aromatic depth.
- Optional Add-ins: ¼ cup chopped nuts, shredded coconut, or chocolate sprinkles for coating.
| Ingredient | Quantity | Preparation |
|---|---|---|
| Tea or Digestive Biscuits | 2 cups | Crushed finely |
| Unsweetened Cocoa Powder | ½ cup | Sifted |
| Granulated Sugar | ⅓ cup | Measured |
| Sweetened Condensed Milk | 1 cup | Measured |
| Unsalted Butter | 4 tablespoons | Softened |
| Vanilla Extract | 1 teaspoon | Measured |
| Optional Add-ins | ¼ cup | Chopped or shredded |
Preparing the Work Surface
We prepare our workspace to keep things tidy and efficient.
- Clean & Clear Surface: Wipe down the countertop or table, leaving ample room for mixing and rolling.
- Setup Equipment: Place the mixing bowl, spatula, and crushed biscuits within easy reach.
- Use Parchment or Wax Paper: Lay a sheet on a tray or plate for placing the formed balls; this prevents sticking and simplifies cleanup.
- Chilling Station Ready: Ensure your refrigerator space is available to chill the formed Chocolate Balls promptly, locking in their shape and texture.
By meticulously prepping our ingredients and workspace, we set ourselves up for a hassle-free process and authentic, rich Chocolate Balls Israeli dessert experience.
Instructions
Follow these detailed steps to create authentic Israeli Chocolate Balls that are rich in flavor and delightfully textured.
Making the Mixture
- Combine dry ingredients: In a large mixing bowl, add crushed tea or digestive biscuits, unsweetened cocoa powder, and granulated sugar. Mix thoroughly to ensure even distribution.
- Melt the butter: Gently melt the unsalted butter in a small saucepan over low heat or using a microwave in short bursts. Avoid overheating.
- Add wet ingredients: Pour the melted butter into the dry mixture, then add sweetened condensed milk and vanilla extract. Stir immediately and vigorously using a spatula or wooden spoon to blend all ingredients into a uniform, sticky dough.
- Optional add-ins: If desired, fold in a pinch of salt or chopped nuts to enhance flavor and texture.
Tip: Use a chilled bowl to maintain the right consistency, especially if your kitchen is warm.
Forming the Chocolate Balls
- Prepare your workspace: Lay down parchment or wax paper on a plate or tray to prevent sticking.
- Shape balls: Scoop about 1 tablespoon of the mixture with clean hands, then roll it between your palms to form a smooth, compact ball approximately 1 inch in diameter.
- Uniform sizing: To keep consistent sizes, use a tablespoon measuring spoon and roll balls gently but firmly.
| Step | Action | Notes |
|---|---|---|
| 1 | Scoop mixture | About 1 tablespoon |
| 2 | Roll into a ball | Approx. 1 inch diameter |
| 3 | Place on lined tray | Use parchment or wax paper base |
Coating and Decorating
- Choose coating: Roll each formed ball in your preferred coating—shredded coconut, chocolate sprinkles, or finely chopped nuts.
- Even coverage: Place the coating in a shallow bowl, then press and roll each ball gently to adhere the coating evenly.
- Set and chill: Arrange coated balls on the tray and refrigerate for at least 30 minutes to firm up and develop flavors.
Pro tip: Use a variety of coatings to create a visually appealing and texturally diverse treat platter.
By following these steps meticulously, we create classic Chocolate Balls that perfectly capture the nostalgic taste of Israel’s beloved no-bake dessert.
Directions for Storage
Proper storage is essential to maintain the freshness and rich flavor of our Chocolate Balls Israeli Recipe. Following these guidelines ensures they stay delicious and ready to enjoy whenever we want.
Storing in the Refrigerator
To keep the Chocolate Balls fresh and maintain their moist texture:
- Place the chocolate balls in an airtight container.
- Separate layers with parchment or wax paper to prevent sticking.
- Store the container in the refrigerator.
- Consume within 5 to 7 days for optimal taste and texture.
Tip: Before serving, let the Chocolate Balls rest at room temperature for about 10 minutes to soften slightly and enhance their rich, chocolatey flavor.
Freezing for Longer Storage
For extending the shelf life up to 3 months while preserving flavor and texture:
| Step | Details |
|---|---|
| Preparation | Arrange chocolate balls on a baking sheet lined with parchment paper, ensuring they don’t touch. |
| Initial Freeze | Freeze for 1-2 hours until firm. |
| Storage | Transfer the frozen balls into a freezer-safe airtight container or resealable bag. |
| Thawing | Allow to thaw in the refrigerator for a few hours before serving to prevent condensation. |
Important: Avoid thawing at room temperature directly to prevent moisture buildup that can affect texture and appearance.
By following these storage directions, our Chocolate Balls remain luscious and enjoyable whether for immediate indulgence or future treats.
Serving Suggestions
To enjoy our authentic Israeli Chocolate Balls to the fullest, we recommend the following serving ideas and pairings that enhance their rich, nostalgic flavor.
Presentation Tips
- Arrange the Chocolate Balls on a decorative platter lined with parchment paper.
- Sprinkle extra chopped nuts or shredded coconut around the edge for a vibrant contrast.
- Serve chilled to maintain the perfect firm yet tender texture.
Ideal Pairings
Our Chocolate Balls pair wonderfully with a variety of drinks and accompaniments that complement their intense cocoa flavor and sweetness.
| Beverage Pairing | Description |
|---|---|
| Fresh Mint Tea | Refreshing and light to balance sweetness |
| Black Coffee | Bold flavor contrast enhances chocolate richness |
| Cold Milk | Classic combination for a creamy finish |
| Sweet Dessert Wine | Adds a sophisticated touch to celebrations |
Serving Occasion Suggestions
- Afternoon Snack: Perfect with a cup of tea or coffee for a mid-day treat.
- Festive Gatherings: Offer them as bite-sized sweets at parties or holiday celebrations.
- Gift Idea: Package the Chocolate Balls in decorative boxes lined with wax paper as a delightful homemade gift.
“Serving these Chocolate Balls chilled and with complementary flavors highlights the nostalgic richness that makes this Israeli dessert a timeless favorite.”
By pairing and presenting our Chocolate Balls thoughtfully, we can elevate this simple no-bake treat into an impressive dessert experience that delights both the eyes and the palate.
Conclusion
Chocolate Balls bring a wonderful blend of simplicity and rich flavor that’s hard to resist. They’re a perfect treat for any occasion, offering a nostalgic taste that connects us to cherished memories. With just a few ingredients and minimal effort, we can create a delightful dessert that’s both satisfying and impressive.
By following the right steps and storage tips, these no-bake goodies stay fresh and ready to enjoy whenever the craving hits. Whether served with a warm cup of tea or gifted to loved ones, Chocolate Balls always add a special touch to our gatherings and everyday moments.
Frequently Asked Questions
What are Chocolate Balls and where do they originate from?
Chocolate Balls are a popular no-bake treat from Israel, made with cocoa, crushed biscuits, and sweetened condensed milk. They evoke nostalgia and are commonly enjoyed during festive occasions.
What ingredients are needed to make authentic Chocolate Balls?
The basic ingredients include crushed digestive or tea biscuits, unsweetened cocoa powder, granulated sugar, sweetened condensed milk, unsalted butter, and vanilla extract. Optional toppings include shredded coconut, chopped nuts, or chocolate sprinkles.
Do Chocolate Balls require baking?
No, Chocolate Balls are a no-bake dessert, making them quick and easy to prepare without the need for an oven.
What equipment is necessary to prepare Chocolate Balls?
You will need a mixing bowl, measuring cups and spoons, a food processor or rolling pin for crushing biscuits, a spatula or wooden spoon, a plate or tray for shaping, parchment or wax paper, and a refrigerator for chilling.
How do I achieve the right texture for Chocolate Balls?
Mix the ingredients into a sticky dough, shape into balls, and chill them in the refrigerator. Using a chilled bowl during mixing can help maintain the consistency, especially in warm kitchens.
How should I store Chocolate Balls to keep them fresh?
Store Chocolate Balls in an airtight container with parchment paper between layers in the refrigerator for up to 5-7 days. For longer storage, freeze them for up to 3 months and thaw properly before serving.
What are some serving suggestions for Chocolate Balls?
Serve Chocolate Balls chilled on a decorative platter. They pair well with mint tea, black coffee, cold milk, or sweet dessert wine, making them perfect for snacks, parties, or homemade gifts.
Can I customize Chocolate Balls with different coatings or add-ins?
Yes, you can enhance flavor and texture by adding toppings like shredded coconut, nuts, chocolate sprinkles, or a pinch of salt to the mixture or as coatings.