
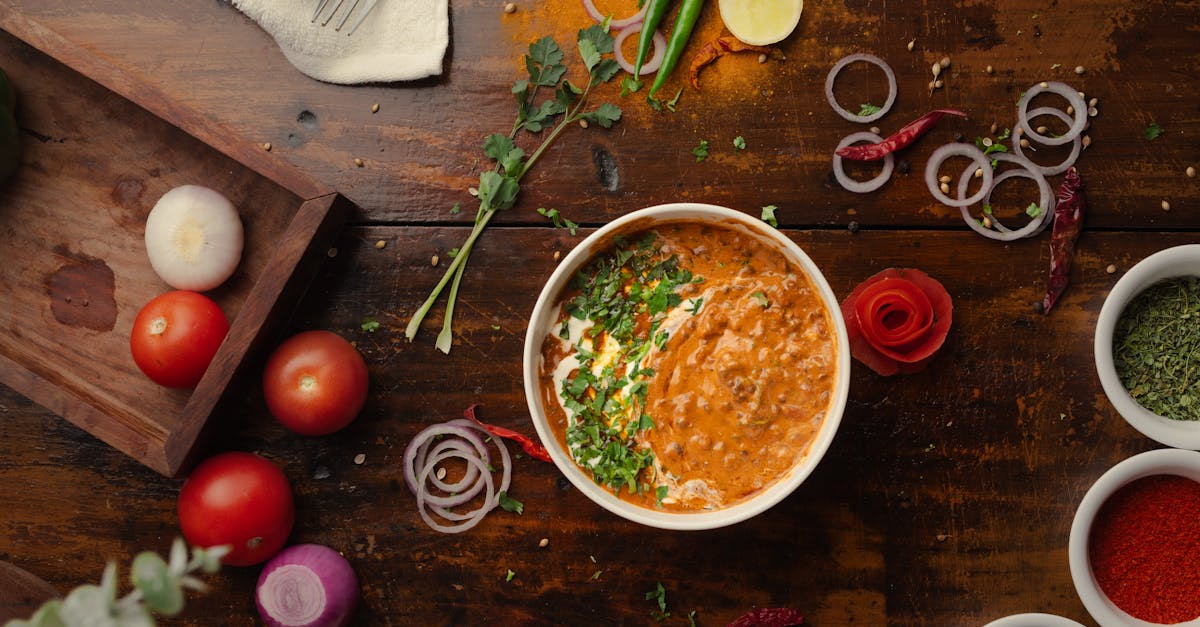
Who says comfort food can’t be diabetes-friendly? Our chili recipe is proof that you don’t have to compromise flavor to enjoy a hearty, satisfying meal. Packed with lean protein, fiber-rich beans, and a medley of spices, this dish is as nutritious as it is delicious. It’s crafted to keep blood sugar levels in check while still delivering that classic chili taste we all love.
Chili For Diabetics Recipe
This diabetes-friendly chili is packed with nutrient-dense ingredients that support blood sugar control while delivering bold, comforting flavors. Let’s walk through the step-by-step process to create this health-conscious dish.
Ingredients
Here’s what we’ll need to prepare this wholesome and tasty chili:
- 1 tablespoon olive oil
- 1 medium onion, finely diced
- 3 cloves garlic, minced
- 1 medium bell pepper (any color), chopped
- 1 pound lean ground turkey or ground chicken
- 2 cups low-sodium canned diced tomatoes, undrained
- 1 cup low-sodium chicken or vegetable broth
- 1 cup reduced-sodium black beans, rinsed and drained
- 1 cup reduced-sodium kidney beans, rinsed and drained
- 1 tablespoon chili powder
- 1 teaspoon ground cumin
- 1 teaspoon smoked paprika
- 1/4 teaspoon cayenne pepper (optional)
- 1/2 teaspoon fresh ground black pepper
- 1/4 teaspoon sea salt (adjust as needed)
- 1 tablespoon tomato paste
- 1/2 cup chopped fresh cilantro for garnish (optional)
- 1 small lime, cut into wedges (optional for serving)
Instructions
Step 1: Heat the olive oil
In a large, heavy-bottomed pot, heat 1 tablespoon of olive oil over medium heat. Add the finely diced onion and minced garlic. Sauté for about 3 minutes until the onion turns translucent and fragrant.
Step 2: Cook the bell peppers
Add the chopped bell pepper to the pot. Stir and cook for another 3–4 minutes until the vegetables soften slightly.
Step 3: Brown the meat
Add the lean ground turkey or chicken. Break the meat up with a wooden spoon as it cooks. Stir frequently for 7–8 minutes, ensuring the meat is browned all over and no pink remains.
Step 4: Add the seasoning
Sprinkle in the chili powder, ground cumin, smoked paprika, and cayenne pepper (if using). Stir to coat the ingredients evenly, and let it cook for about 1 minute to toast the spices and release their aroma.
Step 5: Combine the base
Stir in the tomato paste, then add the diced tomatoes (including their juices) and the broth. Mix everything well. Let the mixture come to a gentle simmer.
Step 6: Incorporate the beans
Add the rinsed and drained black beans and kidney beans. Stir them into the chili to combine evenly.
Step 7: Simmer
Reduce the heat to low and cover the pot with a lid, leaving it slightly ajar to prevent overflow. Let the chili simmer for 25–30 minutes, stirring occasionally. This allows the flavors to meld beautifully.
Step 8: Taste and adjust
Give the chili a taste. If necessary, adjust the seasoning by adding more salt, black pepper, or an extra squeeze of lime juice for brightness.
Step 9: Serve
Ladle the warm, hearty chili into bowls. Garnish with fresh cilantro and serve with lime wedges on the side, if desired.
Nutritional Information Table (Per Serving)
| Nutrient | Amount |
|---|---|
| Calories | 240 |
| Protein | 22 g |
| Carbohydrates | 24 g |
| Fiber | 7 g |
| Sugars | 4 g |
| Total Fat | 7 g |
| Saturated Fat | 1.5 g |
| Sodium | 350 mg |
This recipe makes approximately 4 servings. It’s a perfect balance of lean protein, fiber-rich beans, and low-sodium ingredients, making it ideal for maintaining stable blood sugar levels while enjoying a meal that feels indulgent.
Ingredients
Let’s start with gathering all the diabetes-friendly ingredients to create a chili that is both hearty and healthy. All measurements are carefully chosen to maintain balanced nutrition while ensuring a flavorful, satisfying dish.
Here’s what we’ll need:
- 1 tablespoon olive oil (heart-healthy fat)
- 1 medium onion, diced finely
- 2 cloves garlic, minced
- 1 medium bell pepper, diced (use red or green as preferred)
- 1 pound lean ground turkey or chicken (low-fat protein)
- 1 can (15 ounces) low-sodium kidney beans, drained and rinsed
- 1 can (15 ounces) low-sodium black beans, drained and rinsed
- 1 can (14.5 ounces) no-salt-added diced tomatoes, including juice
- 1 cup low-sodium chicken broth
- 2 tablespoons tomato paste
- 1 teaspoon ground cumin (for earthy warmth)
- 1 teaspoon smoked paprika (rich, smoky flavor)
- 1/2 teaspoon chili powder (mild spice; adjust for preference)
- 1/4 teaspoon cayenne pepper (optional, for heat)
- 1 teaspoon dried oregano
- 1/2 teaspoon ground black pepper
- 1/4 teaspoon salt (use sparingly to keep sodium levels low)
- Optional toppings: fresh cilantro, diced avocado, or shredded low-fat cheese
Each ingredient in this recipe is chosen intentionally to work within diabetic-friendly guidelines, emphasizing low sodium, high fiber, and lean proteins that support blood sugar control while delivering on taste and texture.
Important Notes:
- Substitute ground turkey/chicken with 99% lean ground meat for even lower fat if desired.
- Select canned ingredients labeled “no added salt” or “low sodium” to further reduce sodium content.
- Adjust spice levels by increasing or decreasing the amount of cayenne pepper or chili powder.
We’ll combine these ingredients step-by-step to craft a wholesome chili that’s perfect for mealtime without compromising health or flavor.
Tools And Equipment
To make our diabetes-friendly chili recipe, having the right tools and equipment is crucial for efficiency and ensuring the best results. Here’s what we need:
Essential Tools
- Large Pot or Dutch Oven: Perfect for sautéing and simmering the chili. A non-stick or heavy-bottomed one works best to prevent sticking and ensure even cooking.
- Cutting Board: A durable cutting board makes chopping vegetables and protein safe and clean.
- Chef’s Knife: A sharp chef’s knife is essential for dicing onions, chopping peppers, and preparing other ingredients efficiently.
- Wooden Spoon or Silicone Spatula: Ideal for stirring the chili to ensure the ingredients cook evenly and flavors meld.
- Measuring Cups and Spoons: For precise measurements, especially for spices and liquids, to maintain dietary balance.
- Can Opener: Needed for opening low-sodium canned beans and no-salt-added tomatoes cleanly and effortlessly.
- Mixing Bowl (optional): Useful for prepping and storing chopped veggies or measuring ingredients before adding them to the pot.
Optional Equipment
- Immersion Blender: For those who prefer a smoother chili consistency, this tool is perfect for lightly blending your chili without transferring it to a blender.
- Serving Ladle: Makes portioning the chili easier while keeping serving sizes consistent, which is important for managing nutritional intake.
Having these tools ensures that preparing our diabetes-friendly chili recipe is seamless and enjoyable, allowing us to focus on creating a dish that is both nutritious and flavorful. Here’s a quick-reference table:
| Tool | Purpose |
|---|---|
| Large Pot or Dutch Oven | Sautéing and simmering ingredients |
| Cutting Board | Safe chopping and prepping |
| Chef’s Knife | Dicing and slicing ingredients |
| Wooden Spoon/Spatula | Even stirring for melding flavors |
| Measuring Cups/Spoons | Accurate measurement of spices |
| Can Opener | Opening canned ingredients |
| Immersion Blender (Optional) | Smoothing chili texture if preferred |
| Serving Ladle | Easy portioning and serving |
Equipped with these tools, we are ready to create a hearty bowl of chili that aligns perfectly with our health goals.
Directions
Let’s dive into the step-by-step process for preparing this diabetes-friendly chili. Follow these simple instructions to create a hearty, nutritious dish that’s packed with bold flavor and tailored to maintain balanced blood sugar levels.
Prep
- Prepare the ingredients:
- Dice 1 small onion and 2 garlic cloves finely.
- Chop 1 small green bell pepper into small pieces.
- Rinse and drain 2 cups of low-sodium canned beans (kidney or black beans work well).
- Measure out the spices:
- 1 tablespoon chili powder
- 1/2 tablespoon ground cumin
- 1/2 teaspoon smoked paprika
- 1/4 teaspoon crushed red pepper flakes (adjust based on your spice tolerance).
- Have 1 pound of lean ground turkey or chicken ready for cooking.
- Open and have ready 1 can (14.5 oz) of no-salt-added diced tomatoes.
Cook
- Heat 1 tablespoon of heart-healthy olive oil in a large pot or Dutch oven over medium heat.
- Sauté the vegetables:
- Add the diced onion, garlic, and green bell pepper. Stir and cook for 4-5 minutes until softened and aromatic.
- Cook the protein:
- Push the veggies to the side of the pot. Add the ground turkey or chicken to the center. Cook for about 5-7 minutes, breaking it into small crumbles, until browned evenly.
- Incorporate the spices:
- Add the chili powder, ground cumin, smoked paprika, and crushed red pepper flakes. Stir well to coat the spices on the cooked meat and vegetables, ensuring the spices release their full aroma.
Simmer And Serve
- Add the prepared beans and no-salt-added diced tomatoes to the pot.
- Pour in 1 cup of low-sodium chicken or vegetable broth. Stir everything together, ensuring the ingredients are mixed thoroughly.
- Bring the mixture to a gentle boil. Then reduce the heat to low, cover the pot with a lid, and let it simmer for about 20-25 minutes, stirring occasionally.
- For a thicker consistency, mash a small portion of the beans with a fork or use an immersion blender for a smoother texture.
- Taste and adjust seasoning with a pinch of salt (optional) or more spices for extra flavor.
- Serve warm:
- Ladle the chili into bowls and top with optional diabetes-friendly garnishes like fresh cilantro, diced avocado, or a spoonful of plain Greek yogurt for creaminess.
| Prep Time | Cook Time | Total Time |
|---|---|---|
| 10 minutes | 30 minutes | 40 minutes |
Enjoy this wholesome chili as a flavorful and satisfying addition to your diabetes-friendly meal rotation.
Make-Ahead Instructions
For those of us who love meal prepping or simply want to save time during busy weeks, this diabetes-friendly chili is an excellent option. Not only does it reheat beautifully, but the flavors also tend to deepen and become even more satisfying after sitting overnight. Here’s how we can make it ahead and store it effectively:
Preparing the Chili Ahead of Time
- Cook the chili as directed in the recipe. Follow all the steps, including simmering, to ensure the flavors develop fully.
- Once cooked, allow the chili to cool to room temperature. Avoid rushing this step to maintain food safety and prevent condensation in the storage containers.
- Divide the cooled chili into portions based on your needs. We recommend using airtight, BPA-free containers for single servings or larger group portions.
Storage Instructions
To store your chili for later use, follow these simple guidelines:
| Storage Method | Storage Duration | Instructions |
|---|---|---|
| Refrigerator | Up to 4 days | Transfer chili into airtight containers. Label with the date and ensure the fridge maintains a consistent temperature of 40°F or below. |
| Freezer | Up to 3 months | Use freezer-safe containers or heavy-duty resealable freezer bags. Lay bags flat for compact storage. Leave a small amount of space to account for expansion. |
Thawing and Reheating Tips
- Thawing Frozen Chili: Move the frozen chili to the refrigerator the night before you plan to eat it. For quicker thawing, place the freezer-safe container in a basin of cold water, replacing the water every 30 minutes until thawed.
- Reheating Options:
- Stovetop: Place the chili in a pot and reheat over medium-low heat, stirring occasionally, until warmed through.
- Microwave: Use a microwave-safe container. Heat on high for 1-2 minutes for smaller portions, stirring midway, and adjust heating time as needed for the portion size.
- Notes for Both Methods: If the chili thickens during storage, stir in tablespoons of low-sodium broth or water while reheating to achieve the desired consistency.
Tips for Best Results
- Always label containers with the preparation date for easy tracking.
- Add fresh garnishes like cilantro, diced avocado, or a dollop of plain Greek yogurt after reheating to keep the textures and flavors vibrant.
- Avoid refreezing chili once it has been thawed to preserve both flavor and safety.
Tips For Making Diabetic-Friendly Chili
Crafting a diabetic-friendly chili is all about balancing flavor and nutrition while keeping an eye on blood sugar levels. Here are some practical tips that ensure this comforting dish remains healthy and satisfying:
Use Low-Glycemic Ingredients
Opt for ingredients that have minimal impact on blood sugar levels. Include fiber-rich components such as low-sodium beans, no-salt-added tomatoes, and fresh vegetables.
- Swap regular beans for low-sodium canned options, which help regulate sodium intake.
- Use non-starchy vegetables like bell peppers, zucchini, or spinach to add volume and nutrients without spiking blood sugar.
Choose Lean Protein Options
Protein is a key part of any diabetic-friendly diet. It keeps us full longer and helps stabilize blood sugar. For this recipe, we recommend:
- Ground turkey or ground chicken instead of higher-fat cuts.
- For vegetarian options, use tofu crumbles or lentils as a substitute.
Be Mindful of Spice Levels and Hidden Sugars
Pre-made spice blends often contain added sugars and excessive sodium. Create your own spice mix using:
- Ground cumin, chili powder, smoked paprika, and oregano.
- Avoid sauces or ketchups with added sugars. Look for sugar-free tomato paste or no-sugar-added salsas.
Portion Sizes Matter
Even healthy chili can elevate blood sugar if consumed in large amounts. We recommend sticking to a serving size of about:
- 1 – 1.5 cups (depending on individual caloric needs). Pair with a small side of whole grains like quinoa or a simple green salad.
Use Healthy Fats
Incorporate heart-healthy fats like:
- 1 tablespoon of olive oil for sautéing the vegetables.
- Avoid butter or other saturated fats to keep the dish diabetes-friendly.
Enhance Flavor Without Adding Carbs
To amplify the flavor without sugars or extra carbs:
- Add fresh herbs like cilantro or a squeeze of lime juice before serving.
- Sprinkle a light amount of low-fat shredded cheese or avocado slices as garnish.
Cook Smart with Right Equipment
Using the proper tools not only improves efficiency but also results in a better texture and taste:
| Tool | Purpose |
|---|---|
| Large Pot or Dutch Oven | Even cooking and simmering |
| Measuring Cups & Spoons | Accurate ingredient control |
| Immersion Blender | Optional for a smoother or thicker texture |
| Ladle | For appropriate portioning |
Serving Suggestions
When serving this diabetes-friendly chili, we can elevate both its presentation and nutritional profile with thoughtful accompaniments. Here are our favorite ways to enjoy this hearty dish:
1. Portion Control
It is important to pay attention to serving sizes to help maintain balanced blood sugar levels. We recommend a serving size of 1 to 1.5 cups of chili per person. This keeps the meal satisfying without overloading on carbohydrates.
2. Garnishing for Flavor and Texture
Adding garnishes not only boosts the flavor but also enhances the dish’s appearance. Consider these low-carb, nutritious garnishes to top off your chili:
- Chopped fresh cilantro: Adds a bright, herbal note.
- Diced avocado: Provides creamy texture and healthy fats.
- Sliced jalapeños: Brings a spicy kick for those who love heat.
- Low-fat Greek yogurt: A great substitute for sour cream with added protein.
- Shredded reduced-fat cheese: A small sprinkle offers richness without excessive fat.
3. Pairing Options
To keep the meal balanced and diabetes-friendly, pair the chili with side dishes that complement its bold flavors while maintaining a low glycemic load. Here are some pairing ideas:
| Side Dish | Why It’s a Good Pairing |
|---|---|
| Cauliflower rice | A low-carb alternative to rice, perfect for soaking up the chili’s savory sauce. |
| Steamed broccoli | Adds crunch and extra fiber while keeping the dish light. |
| Mixed greens salad | A fresh, low-carb side to provide contrast to the warm chili. |
| Zucchini noodles | A fun, low-glycemic substitute for traditional pasta to complement the hearty chili. |
4. Meal Customization
For a communal meal, we love creating a “chili bar” where everyone can customize their bowls with toppings and sides. Arrange the garnishes, pairing options, and chili in separate dishes, allowing everyone to tailor their serving to their liking without compromising on their dietary needs.
By incorporating these thoughtful Serving Suggestions, we can enjoy a wholesome, satisfying meal that caters to both flavor and diabetes-friendly nutrition.
Conclusion
Creating a diabetes-friendly chili doesn’t mean sacrificing flavor or comfort. With the right ingredients and thoughtful preparation, we can enjoy a hearty, satisfying meal that supports our health goals. This recipe proves that a few simple adjustments can transform a classic dish into a nutritious option for everyone at the table.
Whether you’re meal prepping for the week or hosting a cozy gathering, this chili offers versatility and balance. By focusing on wholesome, low-glycemic ingredients and mindful portioning, we can indulge in a flavorful bowl of chili that aligns with our dietary needs. Let’s embrace the joy of cooking and savor every bite!
Frequently Asked Questions
1. Is this chili recipe suitable for people with diabetes?
Yes, this chili recipe is designed to be diabetes-friendly. It uses lean protein, low-sodium beans, non-starchy vegetables, and heart-healthy olive oil to support blood sugar management while providing a flavorful and nutritious meal.
2. What are the main ingredients in this chili?
The main ingredients include lean ground turkey or chicken, low-sodium canned beans, no-salt-added tomatoes, olive oil, onions, garlic, bell peppers, and a blend of diabetes-friendly spices.
3. How long does it take to make this chili?
The total prep and cook time for this recipe is approximately 40 minutes, making it a quick and convenient option for a hearty meal.
4. Can this chili be meal prepped or stored for later?
Yes, the chili is perfect for meal prep. Cool it completely before storing in airtight containers. It can be refrigerated for up to 4 days or frozen for up to 3 months. Reheat on the stove or in the microwave before serving.
5. Can I adjust the spice level of the chili?
Absolutely! You can modify the spice level by adding more or less chili powder, cayenne pepper, or jalapeños. Start with small amounts and adjust to taste as you cook.
6. What serving size is recommended for portion control?
For portion control, a serving size of 1 to 1.5 cups is recommended. Pair it with low-carb sides like cauliflower rice or steamed broccoli for a balanced meal.
7. How can I make this chili vegetarian?
To make a vegetarian version, substitute the ground turkey or chicken with plant-based protein options like lentils, tofu crumbles, or textured vegetable protein (TVP).
8. Are there tips for adding more flavor without extra sodium?
Yes, use spices like cumin, paprika, black pepper, and fresh herbs like cilantro. Cooking with fresh garlic and onion also adds a depth of flavor without the need for extra salt.
9. What tools do I need to make this chili?
Essential tools include a large pot or Dutch oven, cutting board, chef’s knife, and measuring cups. Optional tools like an immersion blender can help achieve a smoother texture.
10. How can I serve the chili to guests?
Create a “chili bar” by setting out toppings like chopped cilantro, diced avocado, low-fat Greek yogurt, shredded cheese, and lime wedges. Guests can customize their bowls for a fun and interactive dining experience.