
Chili Brick is a hearty and flavorful dish that brings together the rich taste of chili with a unique twist. Originating from Southwestern cuisine, this recipe combines ground meat, beans, and spices baked into a compact brick shape, making it perfect for easy serving and meal prep. It’s a crowd-pleaser that’s both satisfying and convenient.
We love how this Chili Brick recipe balances bold flavors with a comforting texture. Whether you’re cooking for a family dinner or prepping meals for the week, this dish delivers on taste and simplicity. Plus, it’s versatile enough to customize with your favorite ingredients or spice levels.
Let’s dive into making this delicious Chili Brick that’s sure to become a staple in your kitchen. It’s a great way to enjoy classic chili with a fresh presentation and minimal fuss.
Ingredients
To create the perfect Chili Brick, we need to gather ingredients that deliver rich flavors and a balanced texture. Below are the essential components for both the chili base and the brick topping that will bring this unique dish to life.
For the Chili
We combine seasoned ground meat with beans and bold spices to achieve a hearty, savory chili that forms the foundation of our Chili Brick. Here’s what we’ll need:
| Ingredient | Quantity | Preparation Notes |
|---|---|---|
| Ground beef | 1 lb (450g) | Lean for balanced fat content |
| Onion | 1 medium | Finely chopped |
| Garlic cloves | 3 | Minced |
| Canned kidney beans | 1 can (15 oz/425g) | Drained and rinsed |
| Canned diced tomatoes | 1 can (14.5 oz/411g) | With juices |
| Tomato paste | 2 tbsp | |
| Chili powder | 2 tbsp | For deep smoky heat |
| Ground cumin | 1 tbsp | Adds earthiness |
| Paprika | 1 tsp | Smoked or sweet as preferred |
| Cayenne pepper | 1/4 tsp | Adjust for desired spice level |
| Salt | 1 tsp | To taste |
| Black pepper | 1/2 tsp | Freshly ground |
| Olive oil | 1 tbsp | For sautéing |
| Beef or vegetable broth | 1 cup (240ml) | Adds moisture and richness |
For the Brick Topping
A crispy, cheesy topping seals in flavor and adds texture contrast to the soft chili brick. Here are the ingredients needed for this delicious finishing layer:
- Cornbread mix – 1 cup (we’ll prepare it according to package instructions or homemade recipe)
- Sharp cheddar cheese – 1 cup shredded (adds a tangy, melty layer)
- Green onions – 2 stalks (thinly sliced for freshness)
- Jalapeño pepper – 1 small (finely diced; optional for extra heat)
- Butter – 2 tbsp (melted, to enrich the topping)
By carefully combining these ingredients, we prepare a Chili Brick packed with bold Southwestern flavors and a satisfying textural finish that makes every bite memorable.
Equipment Needed
To craft the perfect Chili Brick, we need the right equipment that ensures efficient cooking and a flawless presentation. Here’s what we recommend:
- Large Skillet or Sauté Pan
Use this to brown the ground beef and sauté the onions and garlic. A heavy-bottomed skillet promotes even cooking and prevents sticking.
- Mixing Bowls
Two bowls: one for combining the chili mixture, the other for preparing the cornbread topping.
- Wooden Spoon or Silicone Spatula
Essential for stirring the chili base gently without scratching your cookware.
- Baking Dish or Casserole Pan
A rectangular or square pan approximately 9×13 inches works best to shape the chili into a compact brick and bake the topping evenly.
- Measuring Cups and Spoons
For precise measurement of spices, liquids, and dry ingredients to maintain the perfect flavor balance.
- Oven Mitts and Cooling Rack
Protect your hands when handling hot bakeware. Cooling racks help the chili brick set properly after baking.
| Equipment | Purpose | Recommended Material | Size/Dimensions |
|---|---|---|---|
| Large Skillet/Sauté Pan | Browning meat, sautéing vegetables | Cast iron or stainless steel | 10-12 inches diameter |
| Mixing Bowls | Combining chili and cornbread topping | Glass or stainless steel | Medium and large |
| Wooden Spoon/Silicone Spatula | Stirring chili mixture | Heat resistant silicone | Standard length |
| Baking Dish/Casserole Pan | Baking chili brick and topping | Ceramic or glass | 9×13 inches |
| Measuring Cups & Spoons | Accurate ingredient measurement | Plastic or metal | Standard sets |
| Oven Mitts | Handling hot bakeware | Heat-resistant fabric | Standard size |
| Cooling Rack | Setting baked chili brick | Stainless steel | Medium-sized |
We prefer cast iron skillets for their heat retention, especially when browning the meat, but a non-stick pan also works well for easy cleanup. Ensuring the baking dish is the right size allows the brick to form with firm edges, making slicing clean and serving simple. Having these tools ready, along with precise measuring equipment, sets us up for success in delivering a perfect, flavorful Chili Brick every time.
Prep Work
Before we start cooking our Chili Brick, thorough preparation of all ingredients is essential to ensure smooth cooking and vibrant flavors. Let’s break down the prep work into two main parts for efficiency.
Preparing the Chili Ingredients
First, we prepare the core components of the chili base to maximize their flavor release during cooking:
- Ground Beef: Measure out 1 pound of lean ground beef. Pat it dry with paper towels to reduce excess moisture for better browning.
- Onions: Peel and finely dice 1 medium yellow onion to evenly disperse sweetness.
- Garlic: Mince 3 cloves of fresh garlic to infuse the chili with aromatic depth.
- Canned Kidney Beans: Drain and rinse 1 (15-ounce) can to remove excess sodium and preserve texture.
- Diced Tomatoes: Use 1 (14.5-ounce) can of fire-roasted diced tomatoes for a smoky, robust base.
- Tomato Paste: Have 2 tablespoons ready to add richness and thicken the chili.
- Spices: Measure spices precisely for balanced flavor:
| Spice | Quantity |
|---|---|
| Chili Powder | 2 tablespoons |
| Ground Cumin | 1 tablespoon |
| Cayenne Pepper | ½ teaspoon |
| Salt | 1 teaspoon (adjust to taste) |
| Black Pepper | ½ teaspoon |
Pro tip: We recommend mixing spices together in a small bowl before adding to the chili for even seasoning.
Preparing the Brick Topping Ingredients
Next, prepare the flavorful brick topping that adds texture and richness to our dish:
- Cornbread Mix: Measure out 1 cup of dry cornbread mix for quick and consistent topping.
- Sharp Cheddar Cheese: Grate 1 cup to contribute a melty, tangy layer on top.
- Green Onions: Thinly slice 2 green onions to add a fresh, mild bite.
- Jalapeño Pepper: Finely dice 1 jalapeño, removing seeds if less heat is desired.
- Melted Butter: Prepare ¼ cup for binding and browning the cornbread topping.
By completing these prep steps carefully, we set up our Chili Brick Recipe for optimal flavor development and easy assembly.
Cooking Instructions
Follow these detailed steps to create a rich, flavorful Chili Brick that combines a hearty chili base with a crispy, cheesy topping. Our method ensures even cooking and perfect texture with every bite.
How to Cook the Chili
- Heat a large skillet over medium-high heat. Add 1 pound of ground beef and cook, stirring frequently, until browned and fully cooked, about 6–8 minutes.
- Add 1 finely chopped medium onion and 2 minced garlic cloves. Sauté together with the beef for 3–4 minutes until the onion becomes translucent.
- Mix in the spices:
- 2 tablespoons chili powder
- 1 teaspoon ground cumin
- ¼ teaspoon cayenne pepper
Stir well to coat the beef and onion evenly.
4. Add the canned ingredients:
- 1 (15-ounce) can kidney beans, drained and rinsed
- 1 (14.5-ounce) can diced tomatoes, undrained
- 2 tablespoons tomato paste
- Simmer the chili base: Reduce heat to low, cover the skillet, and simmer for 20 minutes. Stir occasionally to prevent sticking. This allows the flavors to meld and the chili to thicken.
- Season to taste with salt and black pepper as needed. Remove from heat once the chili reaches a rich, hearty consistency.
How to Prepare the Brick Topping
- Preheat the oven to 375°F (190°C).
- In a medium mixing bowl, combine:
- 1 cup cornbread mix
- 1 cup shredded sharp cheddar cheese
- 2 sliced green onions
- 1 finely chopped jalapeño pepper (remove seeds for less heat)
- Add ⅓ cup melted butter and stir until the mixture is evenly moistened.
- Transfer the chili base to a greased 9×9-inch baking dish, spreading it out evenly.
- Spread the cornbread topping mixture evenly over the chili base, gently packing it down to form a smooth layer.
- Bake uncovered for 20–25 minutes or until the topping is golden brown and cooked through.
- Let the Chili Brick cool on a rack for 10 minutes before slicing into squares for serving.
| Step | Temperature | Time | Notes |
|---|---|---|---|
| Brown ground beef | Medium-high heat | 6–8 minutes | Stir frequently |
| Sauté onion and garlic | Medium-high heat | 3–4 minutes | Until translucent onion |
| Simmer chili base | Low heat, covered | 20 minutes | Stir occasionally |
| Bake Chili Brick | 375°F (190°C) oven | 20–25 minutes | Until topping is golden brown |
| Cooling time | Room temperature | 10 minutes | Allows setting for clean slices |
By following these steps precisely, we ensure that our Chili Brick delivers bold, layered flavors and a satisfying crunchy-cheese crust every time.
Assembly and Baking
Now that we have our chili base and brick topping prepared, it’s time to bring everything together. Proper assembly and baking are crucial to achieve the perfect Chili Brick with its signature layers and textures.
Assembling the Chili Brick
- Preheat your oven to 375°F (190°C) to ensure it reaches the right temperature by the time the dish is ready.
- Lightly grease your baking dish or casserole pan with butter or nonstick spray to prevent sticking.
- Pour the prepared chili base evenly into the baking dish. Use a spatula to spread it smooth, ensuring an even layer to support the topping.
- Next, spoon the cornbread topping mixture over the chili base. Carefully spread it out using a spatula or the back of a spoon to create a uniform layer.
- If desired, sprinkle extra sharp cheddar cheese on top for an added layer of cheesy goodness and golden crust.
- Optionally, garnish with chopped green onions or jalapeño slices for a flavorful and visually appealing finish.
Baking Instructions
| Step | Temperature | Time | Notes |
|---|---|---|---|
| Preheat oven | 375°F (190°C) | – | Ensure oven is fully preheated before baking. |
| Bake Chili Brick | 375°F (190°C) | 25-30 minutes | Bake until cornbread topping is golden brown. |
| Check doneness | – | After 20 min | Topping should be crispy and chili should bubble. |
| Rest before serving | – | 10 minutes | Let cool to allow flavors to set and easier slicing. |
- Insert baking dish onto the center rack of the oven.
- Bake until the cornbread topping turns golden brown and the chili base bubbles around the edges.
- Use oven mitts to carefully remove the dish and place it on a cooling rack.
- Allow the Chili Brick to rest for at least 10 minutes before slicing and serving to maintain its brick shape and layers.
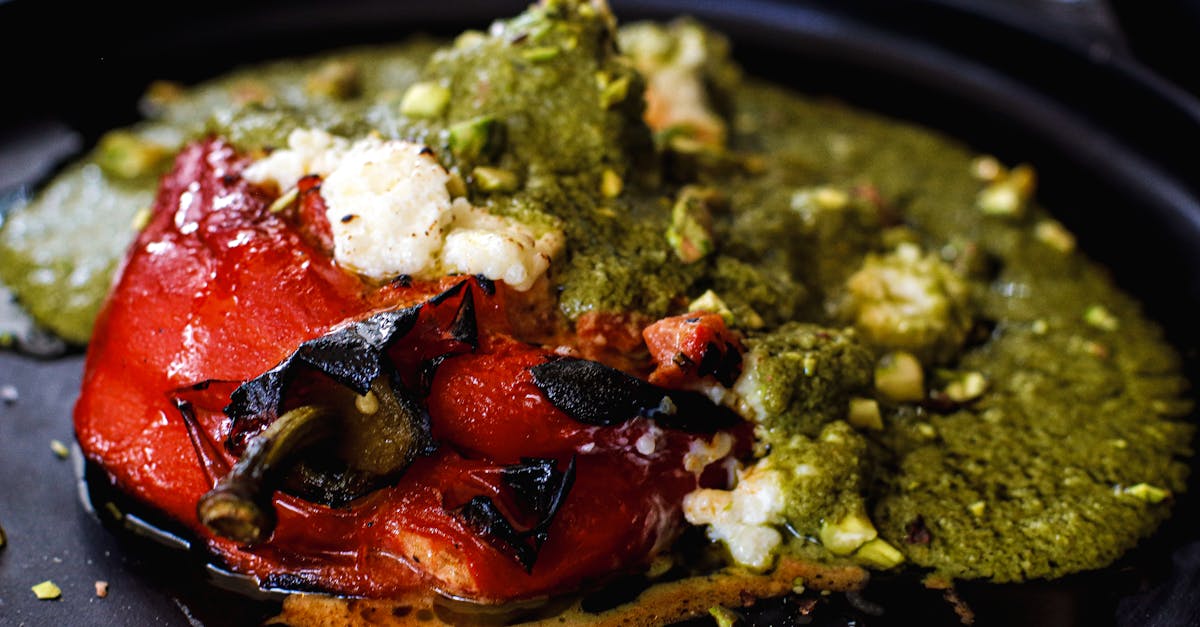
“The crisp, cheesy cornbread topping combined with the bold, hearty chili base creates a textural contrast that makes the Chili Brick a family favorite.”
Following these steps guarantees a flavorful, visually stunning Chili Brick with a perfectly baked topping and rich, savory chili beneath.
Serving Suggestions
To enjoy our Chili Brick at its best, we recommend pairing it with complementary sides and garnishes that enhance its bold flavors and satisfying texture. Here are some perfect ideas to elevate your meal:
Classic Accompaniments
- Fresh Garden Salad: Add a crisp contrast with a simple salad of mixed greens, cherry tomatoes, cucumber, and a light vinaigrette.
- Cornbread or Tortilla Chips: Serve extra cornbread or crunchy tortilla chips on the side to scoop up the hearty chili.
- Sour Cream or Greek Yogurt: A dollop of sour cream or tangy Greek yogurt softens the spice and adds creaminess.
Garnishes to Elevate Flavor
Sprinkle any of the following over individual servings to add color and flavor complexity:
| Garnish | Flavor Profile | Suggested Amount (per serving) |
|---|---|---|
| Chopped Cilantro | Fresh, herbaceous | 1 tablespoon |
| Diced Avocado | Creamy, mild | 2 tablespoons |
| Shredded Cheddar Cheese | Sharp, melty | 1-2 tablespoons |
| Sliced Jalapeños | Spicy, crunchy | 3-4 slices |
| Green Onions | Mild onion flavor | 1 tablespoon |
Beverage Pairings
Choose drinks that balance the chili’s heat and richness:
- Iced Tea or Lemonade: Refreshing cold drinks cut through the richness.
- Light Beer or Lager: A crisp lager complements the smokiness.
- Red Wine (Zinfandel or Syrah): Bold wines enhance the deep chili spices.
Serving Tips
- Portion Control: Slice the Chili Brick into squares approximately 3 inches wide for easy serving.
- Presentation: Serve the brick on a rustic wooden board or colorful plate to highlight its golden crust.
- Storage: Refrigerate leftovers in an airtight container and reheat gently to maintain texture.
By combining these serving suggestions with the rich, comforting flavors of our Chili Brick, we ensure each meal is a delicious, well-rounded experience that delights every sense.
Storage and Make-Ahead Tips
To keep our Chili Brick fresh and flavorful, following proper storage and make-ahead guidelines is essential. Whether we’re prepping for busy weeknights or planning a party, these tips help us enjoy the rich taste and texture the dish promises.
Refrigerating Leftovers
- Allow the Chili Brick to cool to room temperature after baking, about 30 minutes.
- Transfer leftovers to an airtight container, ensuring no air gaps to maintain moisture.
- Store in the refrigerator for up to 4 days.
- Reheat gently in the oven at 350°F (175°C) for 15-20 minutes or microwave in 1-minute intervals until warmed through to preserve the crispy topping.
Freezing for Longer Storage
- For extended storage, freeze the Chili Brick without the extra fresh garnishes.
- Wrap the cooled dish tightly with plastic wrap, then cover with aluminum foil or place it in a freezer-safe container.
- Store in the freezer for up to 3 months.
- When ready to serve, thaw overnight in the refrigerator.
- Reheat in the oven at 350°F (175°C) for 25-30 minutes until the center is hot and the topping is crisp again.
| Storage Method | Preparation | Duration | Reheating Instructions |
|---|---|---|---|
| Refrigerator | Cool completely, airtight | Up to 4 days | Oven 350°F 15-20 min or microwave in bursts |
| Freezer | Cool completely, wrap tightly | Up to 3 months | Thaw overnight, oven 350°F 25-30 min |
Make-Ahead Preparation
- We can prepare the chili base and brick topping separately a day in advance.
- Store them in separate airtight containers in the refrigerator.
- When ready, assemble the dish, then bake as directed for the freshest texture.
- This method enhances the melding of flavors while simplifying mealtime assembly.
Helpful Storage Tips
- Use containers that fit the shape of the dish to reduce air exposure.
- Avoid reheating multiple times to maintain optimal taste and texture.
- Add fresh garnishes like diced avocado, chopped cilantro, or sliced jalapeños after reheating to keep their brightness.
Pro Tip: For meal prep enthusiasts, cutting the chilled Chili Brick into individual portions before storing saves time and ensures easy grab-and-go meals.
By applying these storage and make-ahead tips, we can enjoy our Chili Brick with the same bold flavors and comforting texture from the first serving to the last.
Conclusion
The Chili Brick recipe offers a delicious and convenient way to enjoy bold Southwestern flavors with minimal fuss. Its unique combination of a hearty chili base and crispy cornbread topping makes it a standout dish perfect for any occasion. Whether you’re meal prepping or hosting family dinners, this dish adapts easily to your taste preferences and schedule.
With simple ingredients and straightforward steps, making a Chili Brick is both rewarding and satisfying. We’re confident it will become a favorite in your kitchen, delivering comforting meals packed with flavor and texture every time. Give it a try and experience how this versatile dish can elevate your meal routine.
Frequently Asked Questions
What is a Chili Brick?
A Chili Brick is a flavorful Southwestern dish made by combining a hearty chili base of ground meat, beans, and spices, topped with a crispy cornbread and cheese layer, then baked into a compact, easy-to-serve brick shape.
What ingredients are needed to make a Chili Brick?
Key ingredients include ground beef, onions, garlic, kidney beans, diced tomatoes, tomato paste, chili powder, cumin, cayenne pepper for the chili base, and cornbread mix, sharp cheddar, green onions, jalapeños, and melted butter for the topping.
What equipment do I need to prepare a Chili Brick?
You need a large skillet for browning meat, mixing bowls, a wooden spoon or spatula, a baking dish, measuring cups and spoons, oven mitts, and a cooling rack for handling and serving.
How do I prepare the chili base for the Chili Brick?
Brown the ground beef with onions and garlic, then add kidney beans, diced tomatoes, tomato paste, and spices. Simmer until flavors meld and the chili thickens for a hearty base.
How is the brick topping made?
Mix cornbread mix with sharp cheddar cheese, green onions, jalapeño, and melted butter until combined. This mixture is layered over the chili base to form a crispy, cheesy topping.
What temperature and time are best for baking a Chili Brick?
Preheat the oven to 375°F (190°C) and bake the assembled Chili Brick for around 25-30 minutes, or until the cornbread topping is golden brown and cooked through.
Can I customize the Chili Brick recipe?
Yes, the recipe is highly versatile. You can adjust spice levels, swap meats, add different beans or vegetables, and modify the cheese and toppings to suit your taste preferences.
How should I serve Chili Brick?
Serve it warm with sides like fresh salad, cornbread, or tortilla chips. Garnish with cilantro, avocado, shredded cheese, jalapeños, or green onions. Pair it with iced tea, light beer, or red wine.
How do I store leftovers of Chili Brick?
Cool the leftovers to room temperature, then refrigerate in an airtight container for up to 4 days. For longer storage, freeze the Chili Brick without garnishes, wrapped tightly to preserve freshness.
Can I prepare Chili Brick ahead of time?
Yes, you can prepare the chili base and cornbread topping separately a day before and assemble just before baking. This makes cooking on serving day quicker and easier.