
If you’re craving a tropical twist for dinner, our Chicken Waikiki recipe is just what you need. This dish brings together tender chicken, sweet pineapple, and a tangy sauce that instantly transports us to a Hawaiian paradise. It’s the perfect balance of savory and sweet, making it a hit for family dinners or casual gatherings.
The origins of this recipe are inspired by the vibrant flavors of Hawaiian cuisine, where pineapple often takes center stage. We love how easy it is to prepare while still delivering bold, unforgettable flavors. Whether you’re dreaming of an island getaway or simply want to shake up your dinner routine, this recipe is a must-try.
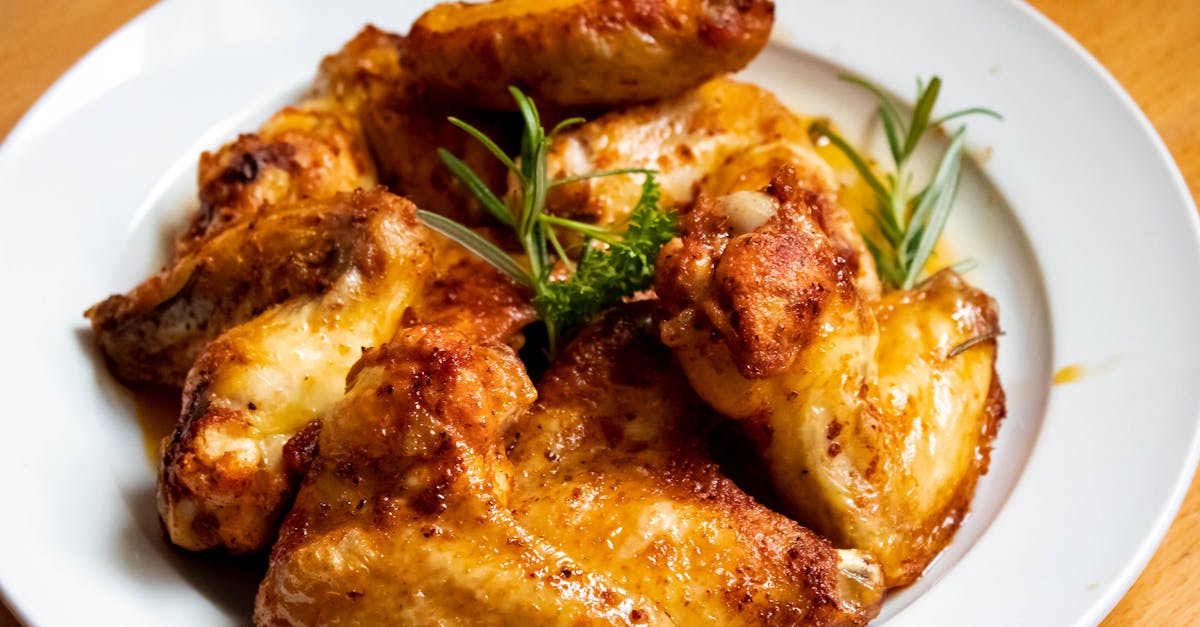
Chicken Waikiki Recipe
Creating this tropical-inspired Chicken Waikiki dish is straightforward and brings together a delightful blend of flavors. Follow our step-by-step instructions to enjoy this vibrant meal.
Ingredients
We’ll need the following fresh ingredients to create the perfect Chicken Waikiki:
- 4 boneless, skinless chicken breasts (about 1 pound, trimmed)
- 1 teaspoon salt
- 1/2 teaspoon black pepper
- 1/3 cup all-purpose flour (for coating)
- 2 tablespoons vegetable oil (or preferred cooking oil)
- 1 cup pineapple chunks (canned in juice or fresh)
- 1 cup green bell pepper (diced)
- 1/2 cup red bell pepper (diced)
- 1 clove garlic (minced)
- 1/3 cup soy sauce
- 1/3 cup white vinegar
- 1/2 cup brown sugar (packed)
- 1/4 cup ketchup (optional for added tang)
- 1/2 teaspoon ground ginger
- 2 tablespoons cornstarch (to thicken sauce)
- 1/4 cup pineapple juice (from canned or fresh)
Cooking Steps
1. Prepare the Chicken
- Pat the chicken breasts dry with a paper towel. Season both sides evenly with salt and black pepper.
- Coat each chicken breast in all-purpose flour, shaking off any excess.
- Heat vegetable oil in a large skillet over medium heat. Once hot, sear the chicken for 3–4 minutes per side until golden brown, ensuring not to overcrowd the pan. Remove and set aside.
2. Sauté Vegetables and Pineapple
- In the same skillet, add the green and red bell peppers along with minced garlic. Sauté for 2–3 minutes until softened.
- Add the pineapple chunks to the skillet and cook for an additional minute to enhance sweetness.
3. Create the Sauce
- In a small bowl, whisk together the soy sauce, white vinegar, brown sugar, ketchup (if using), ground ginger, and pineapple juice.
- Pour the mixture into the skillet with the bell peppers and pineapple. Stir gently to combine.
4. Thicken the Sauce
- In another small bowl, mix cornstarch with 2 tablespoons of water to make a slurry.
- Bring the skillet mixture to a low boil, then slowly stir in the cornstarch slurry. Allow the sauce to simmer for 2–3 minutes until thickened.
5. Combine and Simmer
- Return the seared chicken breasts to the skillet, spooning the sauce and vegetables over the top to coat them thoroughly.
- Reduce heat to low, cover the skillet, and simmer for 12–15 minutes, or until the chicken is fully cooked with an internal temperature of 165°F.
Serving Tips
Serve the Chicken Waikiki over fluffy white rice or steamed jasmine rice for a satisfying meal. Garnish with green onion slices or sesame seeds for extra flavor and color.
Cooking Timing Breakdown
| Step | Time Required |
|---|---|
| Prep Ingredients | 10 minutes |
| Sear Chicken | 8 minutes |
| Sauté Vegetables | 4 minutes |
| Prepare Sauce | 5 minutes |
| Simmer Chicken | 15 minutes |
| Total Time | 42 minutes |
This Chicken Waikiki Recipe marries ease of preparation with irresistible flavors, making it a family favorite in any season.
Ingredients
To prepare this delicious Chicken Waikiki recipe, we’ll need a mix of fresh ingredients and pantry staples. Each item is carefully chosen to deliver the perfect balance of sweet, tangy, and savory flavors. Here’s everything you’ll need:
Chicken:
- 4 boneless, skinless chicken breasts (approximately 6-7 oz each)
- Salt and black pepper (to taste, for seasoning)
Vegetables & Fruit:
- 1 medium red bell pepper, sliced into thin strips
- 1 medium green bell pepper, sliced into thin strips
- 1 (20 oz) can of pineapple chunks, drained (reserve the juice for the sauce)
Sauce:
- 1/3 cup soy sauce
- 1/2 cup apple cider vinegar
- 1/3 cup packed brown sugar
- 1/3 cup reserved pineapple juice
- 1 teaspoon fresh ginger, minced or grated
- 2 teaspoons cornstarch, mixed with 2 tablespoons of water (to thicken the sauce)
Garnish:
- 2 tablespoons green onions, finely sliced (optional, for serving)
- 1 teaspoon sesame seeds (optional, for serving)
Optional Side:
- Steamed white or jasmine rice (to serve alongside the dish)
Tools And Equipment
To ensure the Chicken Waikiki recipe is seamless and enjoyable, having the right tools and equipment is essential. Below is a detailed list of everything you’ll need, along with its use, to help you prepare this vibrant Hawaiian-inspired dish with precision and ease.
Must-Have Tools:
- Cutting board: For chopping chicken, bell peppers, and prepping other ingredients.
- Sharp knife: Essential for slicing chicken into even breast fillets and dicing vegetables effortlessly.
- Large skillet or sauté pan: A nonstick pan is ideal for searing chicken and combining the sauce with other ingredients.
- Wooden spoon or silicone spatula: Perfect for stirring the sauce and preventing scratches on your pan.
- Mixing bowls (small and medium): Helpful for combining the sauce ingredients like pineapple juice, soy sauce, and other flavorings.
- Measuring spoons and cups: For precise measurements of vinegar, brown sugar, and cornstarch.
- Whisk: To properly mix the sauce before pouring it into the dish for even thickness.
- Can opener: For opening the canned pineapple chunks.
- Tongs: Perfect for flipping chicken while searing and transferring it smoothly.
- Small saucepan (optional): If you prefer to thicken the sauce separately before adding.
- Serving platter or bowl: To plate the dish attractively for serving.
Organizational Tip:
We recommend arranging your tools and prepping ingredients first—this ensures a smoother cooking process. Sharp knives and sturdy skillets streamline the effort, while tools like tongs and a whisk make handling hot food and thick sauces much safer.
Step-by-Step Overview in a Tool Context:
| Task | Required Tool | Purpose |
|---|---|---|
| Slicing chicken | Sharp knife and cutting board | To create evenly sized chicken pieces that cook uniformly. |
| Mixing sauce | Whisk and mixing bowls | Ensures blending of pineapple juice, soy sauce, and cornstarch. |
| Simmering ingredients | Skillet or sauté pan | Combines flavors and cooks sauce to perfect consistency. |
| Flipping chicken | Tongs | Helps you safely turn chicken without breaking it. |
| Thickening sauce | Small saucepan or main skillet | Optional for separate sauce preparation for controlled texture adjustment. |
| Serving dish | Serving platter or bowl | Presents Chicken Waikiki beautifully with rice or garnish. |
By keeping these essential tools and equipment ready, cooking our Chicken Waikiki recipe will be an effortless and enjoyable experience. As we prepare the dish, every tool will play a vital role in ensuring both flavor and presentation shine vibrantly on your dinner table.
Directions
Let’s turn fresh ingredients into a tropical masterpiece! Follow these simple steps to prepare the perfect Chicken Waikiki with minimal effort and maximum flavor.
Prep
- Chicken: Pat dry 4 boneless, skinless chicken breasts with paper towels. Season both sides with a pinch of salt and pepper.
- Vegetables: Slice 1 red bell pepper and 1 green bell pepper into thin strips. Keep them aside for cooking.
- Pineapple: Open a can of pineapple chunks (20 oz). Drain the pineapple carefully, reserving ½ cup of the juice for the sauce.
- Sauce preparation: In a mixing bowl, whisk together:
- ½ cup reserved pineapple juice
- 3 tablespoons soy sauce
- 2 tablespoons apple cider vinegar
- ¼ cup packed brown sugar
- 1 tablespoon freshly grated ginger
- 1 tablespoon cornstarch (for thickening).
Stir until smooth and the cornstarch is fully dissolved.
Cook
- Sear chicken: Heat 2 tablespoons of vegetable oil in a large skillet over medium-high heat. Place the chicken breasts in the skillet. Sear each side for 3-4 minutes until they develop a golden crust. Remove from the skillet and set aside.
- Sauté vegetables: In the same skillet, add the sliced red and green bell peppers. Cook for 2 minutes until they soften slightly.
- Cook pineapple: Toss in the drained pineapple chunks and sauté with the peppers for 1-2 minutes until fragrant.
Assemble
- Combine ingredients: Nestle the seared chicken back into the skillet with the sautéed vegetables and pineapple.
- Pour the sauce: Slowly pour the prepared sauce over the ingredients, making sure everything is coated evenly.
- Simmer: Reduce the heat to low. Cover the skillet with a lid and let the dish simmer for 12-15 minutes, or until the chicken reaches an internal temperature of 165°F and the sauce thickens to a glossy consistency.
- Final touch: Garnish with sliced green onions and sesame seeds for an extra pop of flavor and color.
| Step | Action | Time |
|---|---|---|
| Prep Ingredients | Chop, mix sauce, and season chicken | ~10 minutes |
| Cook Chicken & Veggies | Sear, sauté, and blend flavors | ~17 minutes |
| Assemble & Simmer | Combine everything & finish cooking | 15 minutes |
Tips For Success
To master this Chicken Waikiki recipe and ensure it’s perfect every time, we’ve compiled expert tips and tricks to enhance your cooking process. By following these, your dish will deliver consistent and delicious results while capturing the vibrant, tropical flavors of Hawaiian cuisine.
1. Choose the Right Chicken
- Always use boneless, skinless chicken breasts for even cooking. If you prefer chicken thighs, adjust the cooking time slightly as they take longer to cook.
- Pat the chicken dry with paper towels before seasoning. This step ensures a proper sear, giving the chicken a golden-brown crust.
2. Prep Ingredients in Advance
- Have all your vegetables sliced (bell peppers, onions) and sauce ingredients whisked and ready to go. This step prevents delays during cooking, keeping the vegetables crisp and the chicken juicy.
- “Mise en place” (a French term for having everything in place) is especially important for this recipe since the cooking process moves quickly.
3. Achieve a Golden Sear
- Use medium-high heat and a large skillet to sear the chicken. Avoid overcrowding the pan as this lowers the temperature and prevents proper browning.
- If necessary, work in batches and wipe the skillet clean between rounds to avoid burning any residual bits.
4. Balance the Sauce Flavors
- Taste the sauce after whisking the ingredients together to adjust the flavor. For a sweeter glaze, add a teaspoon of brown sugar. For tanginess, increase the apple cider vinegar by half a teaspoon.
- Use the reserved pineapple juice for an authentic tropical taste. Fresh pineapple juice works too, but canned juice results in a more consistent flavor.
5. Cook Vegetables to Perfection
- Bell peppers should be sautéed until slightly tender but still have a crunch. This adds texture to the dish and prevents over-soggy vegetables.
- Avoid overcrowding the skillet during this step to maintain proper heat distribution.
6. Thicken the Sauce Properly
- Mix the cornstarch into the sauce while it’s cold or lukewarm to avoid lumps. Once added to the skillet, stir constantly as it heats to achieve a smooth and glossy finish.
- If the sauce becomes too thick, stir in a tablespoon of water or chicken stock until the desired consistency is achieved.
7. Simmer, Don’t Boil
- After combining all ingredients in the skillet, simmer the mixture on low heat. Boiling can toughen the chicken and break down the vegetables too much.
8. Serve with Style
- Pair Chicken Waikiki with steamed white rice, jasmine rice, or even cauliflower rice for a low-carb option.
- Garnish generously with green onions and sesame seeds for added aroma and presentation.
Quick Success Checklist
| Step | Key Tip |
|---|---|
| Chicken Selection | Boneless, skinless, pat dry for sear |
| Ingredient Prep | Organize all components beforehand |
| Searing Chicken | Medium-high heat, avoid crowding |
| Sauce Adjustment | Taste and balance sweet/tangy flavors |
| Vegetable Cooking | Slightly tender, keep crunch |
| Thickening Sauce | Stir cornstarch properly for gloss |
| Cooking Heat | Simmer gently, avoid boiling |
| Final Presentation | Garnish with green onions, sesame |
Variations And Substitutions
One of the best aspects of our Chicken Waikiki recipe is its flexibility, allowing us to customize the dish to match different preferences and dietary needs. Below, we explore several easy swaps and creative twists to help you make this tropical dish uniquely your own.
Protein Options
While the recipe traditionally calls for boneless, skinless chicken breasts, there are plenty of other protein choices that work equally well:
- Chicken thighs: Juicy and flavorful, these are a great alternative if you prefer dark meat. Just adjust the cooking time to ensure they are fully cooked (165°F internal temperature).
- Tofu: For a vegetarian version, firm or extra-firm tofu can replace the chicken. Cube it, pan-fry until golden, and proceed with the recipe.
- Shrimp: If you’re a seafood fan, shrimp can give this recipe a coastal twist. Add them in during the last few minutes, as shrimp cook quickly.
Vegetable Additions
To personalize the vegetable mix, consider adding or substituting ingredients like:
- Broccoli florets for a fresh crunch.
- Carrots, thinly sliced, for added sweetness.
- Snow peas or snap peas, to enhance the tropical vibrancy.
- Mushrooms, sliced, to lend an earthy depth.
Customizing The Sauce
The tangy and slightly sweet sauce is at the heart of Chicken Waikiki, and there are simple ways to tailor its flavor profile:
- Substitute hoisin sauce for soy sauce for a thicker texture and bolder umami flavor.
- Use honey or maple syrup in place of brown sugar for a natural sweetness.
- Swap balsamic vinegar or rice vinegar for apple cider vinegar to modify the tangy note.
- Add a splash of chili sauce or sriracha for a spicy kick.
Gluten-Free Adjustments
For anyone following a gluten-free diet:
- Replace the regular soy sauce with tamari or a certified gluten-free soy sauce.
- Ensure cornstarch or any thickener you use is labeled gluten-free.
Pineapple Substitutes
If canned pineapple isn’t available or preferred:
- Use fresh pineapple chunks for an extra burst of tropical flavor.
- Substitute with mango cubes or papaya for an innovative, fruity twist.
- As a last resort, canned peaches (in juice) can mimic the sweetness and texture of pineapples in the dish.
| Item | Substitution Options |
|---|---|
| Chicken Breasts | Chicken thighs, tofu, shrimp |
| Pineapple Chunks | Fresh pineapple, mango, papaya, canned peaches |
| Soy Sauce | Tamari, hoisin sauce |
| Brown Sugar | Honey, maple syrup |
| Apple Cider Vinegar | Balsamic vinegar, rice vinegar |
Serving Ideas
Switch up how you serve this vibrant dish:
- Replace white rice with cauliflower rice for a low-carb option.
- Pair it with quinoa or coconut rice for added texture and flavor.
- Serve over rice noodles for more of an Asian flair.
Make-Ahead And Storage Instructions
Making Chicken Waikiki ahead of time can save us effort on busy days, preserve its bold flavors, and allow for better time management. Here’s how to prepare and store this dish effectively while ensuring its taste and quality remain impeccable.
Making the Dish in Advance
We can easily prepare Chicken Waikiki ahead:
- Cook in Advance: Follow the recipe instructions up to the final simmer step, ensuring the chicken is fully cooked and the sauce is thickened.
- Cool Completely: Allow the dish to cool entirely at room temperature before transferring to storage containers. Cooling prevents condensation, which can alter texture.
- Store Properly: Divide the dish into airtight containers. If serving with rice or quinoa, store them separately to avoid sogginess.
Reheating Instructions
Reheating Chicken Waikiki is simple:
- Stovetop Method: Transfer the dish to a skillet or saucepan. Heat over low to medium heat, stirring occasionally, until warmed through. Add a splash of water or reserved pineapple juice if the sauce has thickened too much during storage.
- Microwave Method: For quick reheating, place a portion in a microwave-safe dish, cover loosely, and heat in 30-second intervals, stirring in between, until hot.
Freezing Chicken Waikiki
We can freeze this dish for a longer storage period without compromising the flavors.
- Use Freezer-Safe Containers: Place the cooled Chicken Waikiki in a freezer-safe container or resealable freezer bag.
- Label and Date: Clearly label the container with the date to track freshness.
- Freeze in Portions: For convenience, divide the dish into individual servings before freezing.
Pro Tip: Always freeze the dish without rice or sides to keep textures intact. Cook fresh sides when reheating.
Storage Durations
Here’s a quick guide to how long Chicken Waikiki can be stored:
| Storage Method | Duration | Notes |
|---|---|---|
| Refrigerator | Up to 4 days | Use airtight containers to maintain freshness. |
| Freezer | Up to 3 months | Properly seal and remove excess air. |
Thawing Frozen Chicken Waikiki
To thaw the frozen dish:
- Refrigerator Thawing: Move the container from the freezer to the refrigerator and let it thaw for 12-24 hours. This is the safest method to maintain quality.
- Quick Thaw Method: Place the sealed container in a bowl of cold water, changing the water every 30 minutes. Avoid using hot water to preserve texture.
Freshness Tip
For the best taste, consume refrigerated Chicken Waikiki within four days and consume the frozen dish within three months. Always check for any off smell or changes in texture before eating.
Conclusion
Chicken Waikiki is more than just a meal; it’s a delightful escape to tropical flavors that’s easy to bring to your table. With its vibrant ingredients, bold sauce, and versatile preparation, this recipe offers something special for every occasion. Whether you’re cooking for family or hosting friends, it’s a dish that’s sure to impress.
By following the tips and variations we’ve shared, you can make this recipe your own while ensuring consistent, delicious results. With make-ahead and storage options, it’s also a convenient choice for busy schedules. Let’s embrace the joy of cooking and savor the irresistible taste of Chicken Waikiki together!
Frequently Asked Questions
What is Chicken Waikiki?
Chicken Waikiki is a flavorful Hawaiian-inspired dish made with tender chicken breasts, sweet pineapple, and a tangy soy sauce-based glaze. It’s a perfect blend of savory and sweet, ideal for family dinners or casual gatherings.
What ingredients are needed to make Chicken Waikiki?
The key ingredients are boneless, skinless chicken breasts, red and green bell peppers, a can of pineapple chunks, and a sauce made from soy sauce, apple cider vinegar, brown sugar, reserved pineapple juice, fresh ginger, and cornstarch.
Can I use chicken thighs instead of chicken breasts?
Yes, chicken thighs can be used as a substitute for chicken breasts. They offer a slightly richer flavor and are great for those who prefer dark meat.
How long does it take to prepare Chicken Waikiki?
The total preparation and cooking time for Chicken Waikiki is approximately 42 minutes, including both prep work and simmering.
What can I serve with Chicken Waikiki?
Chicken Waikiki pairs perfectly with steamed rice, cauliflower rice, or quinoa. Garnish with green onions or sesame seeds for added flavor and presentation.
Can I make Chicken Waikiki ahead of time?
Yes, Chicken Waikiki can be made ahead, cooled, and stored in an airtight container. Reheat on the stovetop or microwave to serve fresh.
How do I store leftovers?
Store leftovers in an airtight container in the refrigerator for up to 3 days. For freezing, use freezer-safe containers and label with the date.
Can I customize the sauce?
Absolutely! You can adjust the sweetness, saltiness, or tanginess of the sauce by modifying the brown sugar, soy sauce, or vinegar amounts to your preference.
What are some variations of this recipe?
You can swap chicken for tofu, shrimp, or chicken thighs, and add vegetables like broccoli, carrots, or mushrooms. Gluten-free soy sauce can also be used for dietary adjustments.
How do I thicken the sauce?
The sauce is thickened with cornstarch. Mix cornstarch with water before adding it to the sauce for a smooth consistency.
Is this recipe gluten-free?
To make Chicken Waikiki gluten-free, use a gluten-free soy sauce alternative and ensure all other ingredients are gluten-free certified.
Can I substitute pineapple with another fruit?
Yes, you can use alternatives like mango, peaches, or even canned mandarin oranges if preferred. Adjust sweetness levels to taste.