
Chicken cutlets from Kerala are a beloved snack that perfectly blends crispy texture with rich, flavorful spices. This recipe brings out the authentic taste of Kerala’s coastal cuisine, where aromatic spices and tender chicken come together in a deliciously satisfying bite.
We love how these cutlets are easy to make yet pack a punch with every mouthful. Whether you’re looking for a tasty appetizer or a quick snack, this Kerala-style chicken cutlet recipe is sure to impress. Let’s dive into this flavorful journey and bring a piece of Kerala’s culinary heritage to our kitchen.
Ingredients
To craft authentic Kerala-style chicken cutlets, we focus on fresh, vibrant ingredients that bring out the rich spices and textures of this beloved snack. Here’s everything we need to prepare the chicken mixture, the essential coating, and the flavorful masala paste.
For the Chicken Mixture
- 500 grams boneless chicken, finely minced
- 2 medium potatoes, boiled and mashed
- 1 medium onion, finely chopped
- 2 green chilies, finely chopped (adjust to taste)
- 1 tablespoon ginger-garlic paste
- 1/2 teaspoon turmeric powder
- 1 teaspoon garam masala
- 1/2 teaspoon black pepper powder
- 1/2 teaspoon red chili powder
- 1 tablespoon fresh coriander leaves, chopped
- 2 tablespoons oil (for sautéing)
- Salt to taste
For the Coating
- 1 cup all-purpose flour (maida)
- 2 eggs, beaten
- 1 to 1.5 cups breadcrumbs (for a crispy outer layer)
- Oil for deep frying
For the Masala Paste
- 2 tablespoons coconut oil (traditional Kerala flavor)
- 1 teaspoon mustard seeds
- 1 sprig curry leaves, fresh
- 1 small onion, finely chopped
- 1 tablespoon ginger-garlic paste
- 1 teaspoon red chili powder
- 1 teaspoon coriander powder
- Salt as required
| Ingredient Group | Key Ingredients |
|---|---|
| Chicken Mixture | Minced chicken, boiled potatoes, onion, green chilies, spices, coriander, oil, salt |
| Coating | All-purpose flour, beaten eggs, breadcrumbs, deep frying oil |
| Masala Paste | Coconut oil, mustard seeds, curry leaves, onion, ginger-garlic paste, chili powder, coriander, salt |
These ingredients combined deliver the signature Kerala chicken cutlet taste—spicy, aromatic, and irresistibly crispy. Let’s move to preparing each component with precision next.
Equipment Needed
To create our authentic Kerala-style chicken cutlets flawlessly, assembling the right equipment is crucial. Each tool helps us maintain precision and efficiency during the preparation process to capture those vibrant flavors and textures.
Essential Kitchen Tools
- Mixing bowls: Use medium and large bowls to mix the minced chicken, boiled potatoes, and spices comfortably.
- Non-stick frying pan: Perfect for sautéing the masala paste ingredients such as mustard seeds and curry leaves without sticking or burning.
- Wooden spoon or spatula: Ideal for stirring the chicken and spice mixture gently to avoid breaking down ingredients.
- Pot for boiling potatoes: A medium saucepan works best to ensure even boiling of potatoes until soft.
- Measuring spoons and cups: Help us accurately measure spices and liquids to preserve the authentic flavor balance.
- Cutting board and sharp knife: For chopping onions, green chilies, and fresh herbs finely and efficiently.
- Food processor or manual mincer (optional): If minced chicken is not pre-bought, this tool helps us achieve the right texture smoothly.
- Shallow plates or trays: For setting up our coating stations with all-purpose flour, beaten eggs, and breadcrumbs.
- Frying pan or deep fryer: To shallow or deep-fry the cutlets until golden crispy. We recommend a heavy-bottomed pan for even heat distribution.
- Slotted spoon: For lifting the cutlets from hot oil while draining excess fat.
- Paper towels: To drain the cutlets after frying, ensuring the crispy exterior stays perfect and not oily.
Equipment Checklist Table
| Equipment | Purpose | Notes |
|---|---|---|
| Mixing Bowls | Combine chicken, potatoes, and spices | Multiple sizes for ease |
| Non-stick Frying Pan | Sauté masala paste ingredients | Helps prevent sticking |
| Wooden Spoon/Spatula | Stir mixture gently | Preserves texture |
| Pot for Boiling Potatoes | Boil potatoes evenly | Medium size recommended |
| Measuring Spoons & Cups | Precise spice and ingredient measurement | Improves recipe accuracy |
| Cutting Board & Knife | Chop onions, chilies, herbs | Sharp knife for fine cuts |
| Food Processor/Mincer | Mince chicken if needed | Optional, speeds up prep |
| Shallow Plates/Trays | Setup coating stations | Keeps ingredients organized |
| Frying Pan/Deep Fryer | Fry cutlets to golden crisp | Heavy-bottomed pan preferred |
| Slotted Spoon | Remove cutlets from hot oil | Drains excess oil |
| Paper Towels | Drain freshly fried cutlets | Maintains crispness |
Preparation
We begin our Chicken Cutlet Recipe Kerala by carefully preparing each component to achieve the authentic flavors and perfect texture. Following these precise steps ensures our cutlets turn out crispy, spicy, and true to Kerala’s culinary tradition.
Cleaning and Boiling Chicken
- Select fresh chicken pieces, preferably boneless to ease mincing.
- Rinse the chicken thoroughly under cold running water to remove impurities.
- Place the chicken in a large pot and cover with water.
- Add a pinch of salt and a few peppercorns to enhance flavor during boiling.
- Bring the water to a boil, then reduce heat and simmer for 10-12 minutes until the chicken is fully cooked.
- Remove the chicken pieces and let them cool before mincing finely.
| Step | Details |
|---|---|
| Chicken Type | Boneless preferred |
| Boiling Time | 10-12 minutes |
| Seasoning in Boil | Salt, Peppercorns |
Preparing the Masala Paste
Our signature masala paste is key to delivering the aromatic spice that defines Kerala’s chicken cutlets:
- Heat 2 tablespoons of coconut oil in a small pan over medium heat.
- Add 1 teaspoon mustard seeds; wait for them to splutter.
- Toss in 10-12 curry leaves for their unique fragrance.
- Add finely chopped 2 green chilies and 1-inch piece of ginger (grated).
- Sauté these ingredients until aromatic, about 1-2 minutes.
- Transfer the sautéed mixture to a blender along with:
- 1/2 teaspoon red chili powder
- 1/2 teaspoon garam masala
- 1/4 teaspoon turmeric powder
- Blend into a smooth paste, adding a splash of water if necessary.
This paste will be folded into the chicken mixture, intensifying the authentic Kerala flavor.
Chopping Vegetables
To complement our flavorful chicken, we need fresh and finely chopped vegetables:
- 1 medium onion: finely chopped to release sweetness and texture.
- 2 green chilies: finely sliced to maintain sharp heat.
- Fresh coriander leaves: chopped for garnish and added freshness.
Use a sharp knife on a clean cutting board. Ensuring the pieces are uniform helps the cutlets bind and cook evenly, giving us that perfect mouthfeel with every bite.
These preparation steps set the foundation for our Chicken Cutlet Recipe Kerala—vibrant spices, fresh ingredients, and finely tuned textures ready for the next steps.
Cooking the Chicken Mixture
To build the robust flavor of our Kerala-style chicken cutlets, we must skillfully cook the chicken mixture by combining the aromatic masala and tender chicken. This step brings together all elements to create the perfect spicy and savory base.
Sautéing the Masala and Vegetables
We begin by heating 2 tablespoons of coconut oil in a non-stick pan over medium heat. Once hot, we add 1 teaspoon of mustard seeds and wait until they start to crackle. Next, we incorporate the prepared masala paste—consisting of mustard seeds, curry leaves, green chilies, and ginger—into the pan.
Then, we add finely chopped onion (1 medium), green chilies (2 sliced), and a pinch of salt to balance the flavors. We sauté this mixture until the onions turn translucent and the spices release their aroma, about 5 minutes. This process intensifies the masala and allows the flavors to meld perfectly, setting the stage for the chicken.
“The secret to authentic Kerala chicken cutlets lies in the deep roasting of the masala and vegetables to unlock their full flavor.”
| Ingredient | Quantity | Purpose |
|---|---|---|
| Coconut oil | 2 tablespoons | Medium heat for sautéing |
| Mustard seeds | 1 teaspoon | Adds pungent note |
| Onions (finely chopped) | 1 medium | Brings sweetness and texture |
| Green chilies (sliced) | 2 | Adds heat and freshness |
| Salt | Pinch | Enhances taste |
Mixing the Cooked Chicken and Masala
Once the masala and vegetables are sautéed, we add the boiled, shredded chicken (about 2 cups) and boiled, mashed potatoes (1 cup) into the pan. We combine these gently, ensuring each piece is thoroughly coated with the masala mixture.
Next, we season with 1 teaspoon garam masala, 1/2 teaspoon black pepper powder, and adjust salt to taste. We cook this mixture on low heat for 5 to 7 minutes, stirring occasionally. This allows all the spices to infuse the chicken and potato mix fully, creating a moist, flavorful filling for the cutlets.
We finish by folding in chopped fresh coriander leaves (2 tablespoons) for a fresh herbal lift before removing the mixture from heat to cool.
| Ingredient | Quantity | Function |
|---|---|---|
| Boiled shredded chicken | 2 cups | Protein base |
| Boiled mashed potato | 1 cup | Adds moisture and binds filling |
| Garam masala | 1 teaspoon | Spices blend appeal |
| Black pepper powder | 1/2 teaspoon | Adds warmth |
| Fresh coriander leaves | 2 tablespoons | Brightens flavors |
This well-balanced chicken mixture is now ready for the final shaping and coating stage that will deliver the iconic crispy Kerala chicken cutlets.
Assembling the Cutlets
Now that we have prepared the flavorful chicken mixture and mashed potatoes, it’s time to bring everything together. Assembling the Chicken Cutlets Kerala style involves shaping the mixture into perfect portions and coating each piece to achieve that iconic crispy crust.
Shaping the Cutlets
We begin by Shaping the Cutlets to ensure uniform size and shape for even cooking and an attractive presentation.
- Take about 2 to 3 tablespoons of the chicken and potato filling.
- Roll the mixture gently between your palms to form a smooth ball.
- Flatten the ball lightly into an oval or round patty approximately ¾ inch thick.
- Keep the shaped cutlets on a plate lined with parchment or wax paper to prevent sticking.
- Continue shaping until all the filling is used.
Tip: Wetting your hands slightly with water will prevent the mixture from sticking to your palms and help you achieve smoother cutlets.
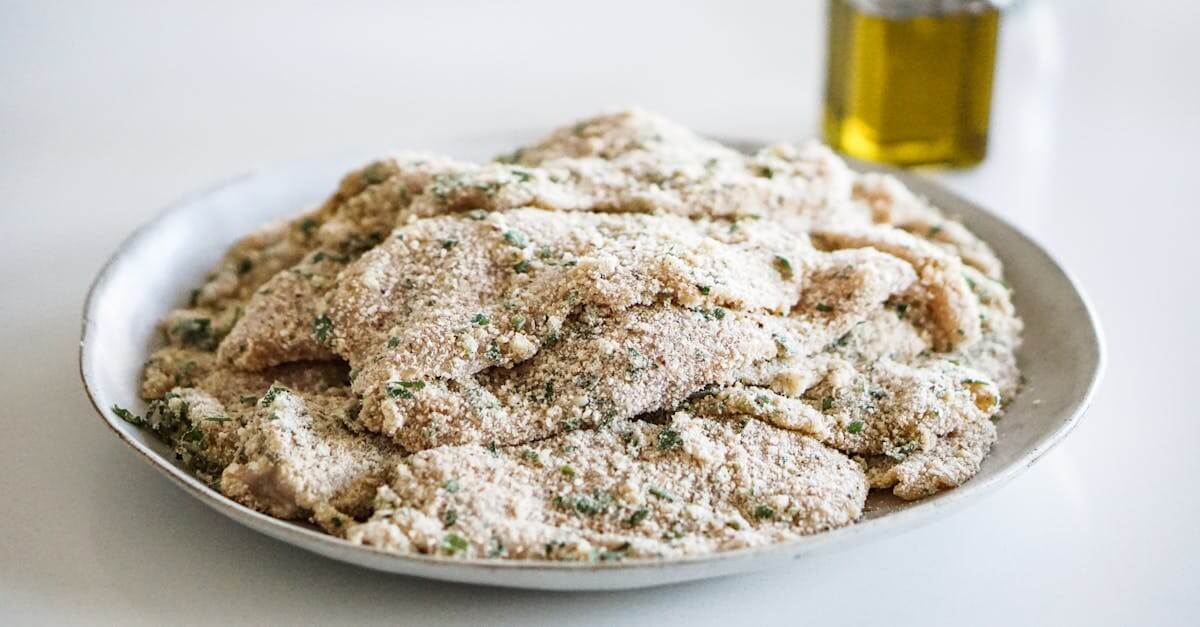
Coating Process
The crispy outer layer is what makes Kerala chicken cutlets so irresistible. Here’s how we coat them step-by-step:
| Step | Description |
|---|---|
| 1. Prepare coating | Arrange three shallow dishes: |
| – All-purpose flour | |
| – Beaten eggs seasoned lightly with salt | |
| – Breadcrumbs | |
| 2. Dredge in flour | Lightly dust each cutlet in flour, shaking off excess |
| 3. Dip in egg wash | Submerge the floured cutlet in beaten eggs ensuring an even coat |
| 4. Coat with crumbs | Roll the cutlet in breadcrumbs until fully coated |
| 5. Set aside | Place the coated cutlets on a clean tray ready for frying |
“A consistent coating ensures a golden crisp crust and seals in the juicy chicken filling.“
Following this structured approach to shaping and coating will guarantee we get that perfect balance of crispiness with the rich, spiced chicken center every time we prepare our Chicken Cutlet Recipe Kerala.
Frying the Chicken Cutlets
Frying the Kerala-style chicken cutlets to perfection is a crucial step to achieve their signature crispy exterior and juicy, flavorful interior. Let’s master this process with precise oil preparation and essential frying techniques.
Oil Preparation
To get the ideal crispy crust we need the right amount of oil at the perfect temperature. Follow these steps for optimal frying:
- Use fresh coconut oil or refined vegetable oil for authentic flavor and high smoking point.
- Pour enough oil to cover at least half the thickness of the cutlets in a deep, heavy-bottomed frying pan.
- Heat the oil on medium heat until it reaches about 350°F (175°C). Use a kitchen thermometer for accuracy.
- Test readiness by dropping a small piece of the coating into the oil. It should sizzle and rise steadily without burning.
| Aspect | Detail | Note |
|---|---|---|
| Oil Type | Coconut oil or vegetable oil | Enhances Kerala flavor |
| Oil Quantity | 1 to 1.5 inches depth | Ensures even frying |
| Temperature | 350°F (175°C) | To avoid soggy or burnt cutlets |
| Oil Test | Small batter piece sizzle test | Confirms proper frying temperature |
Frying Tips and Techniques
We want each cutlet to be golden, crisp and cooked through. Here are key tips:
- Don’t overcrowd the pan. Fry in batches to maintain consistent oil temperature.
- Gently lower each cutlet into the hot oil using a slotted spoon or spatula.
- Fry each side for 3 to 4 minutes or until golden brown and crisp.
- Maintain medium heat, adjusting as needed to keep oil temperature steady.
- Remove cutlets carefully and place on paper towels to drain excess oil.
- Allow cutlets to rest for a couple of minutes before serving to let the crust set fully.
“Frying is both a science and an art. Keeping the oil temperature steady and handling the cutlets gently ensures our Kerala chicken cutlets come out perfectly crisp and flavorful every time.”
By following these precise frying steps we capture the authentic Kerala taste and texture in each bite.
Serving Suggestions
To fully enjoy our Kerala Chicken Cutlet Recipe, let’s explore some ideal Serving Suggestions that complement the rich spices and crispy texture of these cutlets perfectly.
Accompaniments to Enhance Flavor
- Coconut Chutney
The cool, creamy coconut chutney balances the spicy, aromatic flavors. Its freshness adds a delightful contrast to the deep-fried cutlets.
- Spicy Tomato Sauce
A rich spicy tomato sauce or ketchup with a hint of chili powder enhances the savory notes and adds a tangy kick.
- Lemon Wedges
Squeezing fresh lemon juice over the cutlets just before serving awakens the palate and brightens the dish.
Beverage Pairings
Pairing the cutlets with drinks that cleanse the palate and complement the spices is essential:
| Beverage | Description |
|---|---|
| Masala Chai | Spiced Indian tea with cardamom and ginger |
| Tender Coconut Water | Refreshing and subtly sweet, cools the spice |
| Fresh Lime Soda | Zesty and bubbly, balances the fried texture |
Plating Ideas for Presentation
- Nestle the cutlets on a bed of fresh curry leaves to add fragrance and a visual hint of Kerala’s culinary roots.
- Use a rustic wooden platter to give an authentic Kerala coastal vibe.
- Garnish with finely chopped coriander leaves and thin rings of red onion for freshness and color contrast.
Serving Size and Portions
For a snack or appetizer platter, 3 to 4 cutlets per person is ideal. For a hearty meal, pair with steamed rice or Kerala-style chapathi accompanied by a side vegetable curry.
Summary Table of Serving Components
| Component | Role | Serving Tip |
|---|---|---|
| Chicken Cutlets | Main dish | Serve hot for crispiness |
| Coconut Chutney | Cooling dip | Serve chilled |
| Spicy Tomato Sauce | Flavor enhancer | Provide on the side |
| Lemon Wedges | Brightness and acidity | Offer freshly cut |
| Curry Leaves | Aroma and garnish | Scatter beneath cutlets |
| Beverage Options | Palate cleanser and complement | Serve chilled or hot based on choice |
With these Serving Suggestions, our Kerala Chicken Cutlet experience blossoms into a multi-sensory celebration of texture and flavor.
Make-Ahead Tips
Preparing Kerala Chicken Cutlets in advance can save us time and ensure the snack is ready to enjoy whenever hunger strikes. Here are effective make-ahead strategies to keep the cutlets fresh and crispy:
1. Prepare the Chicken Mixture Ahead
We can make the spiced chicken and potato filling up to 24 hours before frying. Store it in an airtight container and refrigerate. This allows the flavors to meld beautifully, making the cutlets even tastier.
2. Shape and Coat in Advance
After forming the cutlets and coating them with flour, egg wash, and breadcrumbs, arrange them on a tray lined with parchment paper. Cover tightly with plastic wrap and keep in the fridge for up to 12 hours.
3. Freezing for Longer Storage
For extended storage, freeze the shaped, coated cutlets on a baking sheet for 1-2 hours until firm. Then transfer them to a sealed freezer-safe bag or container. Frozen cutlets stay fresh for up to 1 month.
| Storage Stage | Refrigerator Duration | Freezer Duration |
|---|---|---|
| Chicken mixture | 24 hours | N/A |
| Shaped and coated cutlets | 12 hours | Up to 1 month |
4. Frying from Frozen
We recommend frying cutlets straight from frozen for the best texture. Heat oil to 350°F (175°C) and carefully place the cutlets in the hot oil. Increase frying time slightly to ensure even cooking.
“Tip: Avoid thawing frozen cutlets before frying, as this can cause sogginess and uneven cooking.”
5. Reheating Cooked Cutlets
If we fry cutlets ahead of time, reheat them in a preheated oven at 350°F (175°C) for 8–10 minutes to restore crispiness. Avoid microwave reheating, which can make the cutlets soft.
Using these Make-Ahead Tips helps us enjoy authentic Kerala chicken cutlets anytime, with minimal last-minute effort while keeping their signature crispy, flavorful profile intact.
Conclusion
Kerala chicken cutlets bring a burst of flavor and texture that’s hard to resist. With the right blend of spices and a perfectly crispy coating, they make for an exceptional snack or appetizer.
By following the steps carefully and using fresh ingredients, we can recreate this beloved coastal treat in our own kitchens. Whether for a casual get-together or a special occasion, these cutlets never fail to impress.
We encourage you to try this recipe and enjoy a delicious taste of Kerala’s rich culinary heritage anytime you want.
Frequently Asked Questions
What are Kerala-style chicken cutlets?
Kerala-style chicken cutlets are a popular snack from Kerala, India, made with minced chicken, boiled potatoes, spices, and herbs, coated with flour, egg, and breadcrumbs, then fried to crispy perfection.
What ingredients are essential for authentic Kerala chicken cutlets?
Key ingredients include minced chicken, boiled potatoes, onions, green chilies, curry leaves, mustard seeds, coconut oil, spices like garam masala, and coating materials like all-purpose flour, eggs, and breadcrumbs.
How do you make the masala paste for these cutlets?
The masala paste is made by sautéing mustard seeds, curry leaves, green chilies, and ginger in coconut oil, then blending them with spices to enhance the cutlets’ flavor and aroma.
What equipment is needed to prepare Kerala chicken cutlets?
You’ll need mixing bowls, a non-stick pan, a wooden spoon or spatula, a pot for boiling, measuring tools, cutting board, knife, shallow plates for coating, frying pan or deep fryer, and paper towels.
Can the chicken mixture be prepared in advance?
Yes, the chicken mixture can be made up to 24 hours ahead and stored in the refrigerator, which helps to save time and deepen the flavors.
How should the cutlets be coated before frying?
The cutlets should be dredged in all-purpose flour, dipped in beaten eggs, then rolled in breadcrumbs to achieve a golden, crispy crust when fried.
What is the ideal oil and temperature for frying these cutlets?
Fresh coconut oil or refined vegetable oil heated to around 350°F (175°C) is ideal for frying Kerala chicken cutlets to ensure a crispy exterior and juicy interior.
How can I serve Kerala chicken cutlets for the best experience?
Serve with coconut chutney, spicy tomato sauce, lemon wedges, and drinks like masala chai or fresh lime soda. Garnish with curry leaves, coriander, and red onion for added flavor and presentation.
Is it possible to freeze Kerala chicken cutlets?
Yes, shaped and coated cutlets can be frozen for up to a month and fried directly from frozen to enjoy fresh, crispy cutlets later.
How do I reheat pre-fried Kerala chicken cutlets without losing crispiness?
Reheat in a hot oven or air fryer at around 350°F (175°C) for 5-10 minutes to maintain their crispy texture without drying them out.