
Chicken Cutlet Kerala style is a beloved snack that perfectly blends crispy textures with rich, aromatic flavors. Originating from the southern state of Kerala, this dish showcases the region’s love for spices and deep-fried delights. It’s a popular street food and a must-have at festive gatherings that never fails to impress.
We love how these cutlets combine tender chicken with a flavorful mix of spices, herbs, and sometimes potatoes, all coated in a crunchy breadcrumb crust. They’re perfect as an appetizer or a quick snack with chai. Making them at home is surprisingly easy and rewarding, bringing a taste of Kerala straight to our kitchen.
If you’re craving something crispy, spicy, and utterly satisfying, our Chicken Cutlet Kerala recipe will guide you through every step. Let’s dive into this classic treat that’s sure to become a favorite in your recipe collection.
Ingredients
To create the authentic Chicken Cutlet Kerala Recipe, we need a perfect blend of ingredients that bring out its crispy texture and rich flavors. Below, we divide them into the main components for clarity and ease.
For the Chicken Filling
- 500 grams boneless chicken, finely minced
- 1 large onion, finely chopped
- 2-3 green chilies, chopped
- 1 tablespoon ginger-garlic paste
- 1 medium boiled potato, mashed (optional but adds softness)
- 1/4 cup fresh coriander leaves, chopped
- 2 tablespoons oil (preferably coconut oil for authentic flavor)
- Salt, to taste
- Juice of half a lemon
For the Cutlet Coating
- 1 cup all-purpose flour (for binding)
- 2 large eggs, beaten
- 1.5 cups fresh breadcrumbs (use fine breadcrumbs for extra crispiness)
- Oil for deep frying (vegetable or coconut oil)
For Seasoning and Spices
| Ingredient | Quantity | Purpose |
|---|---|---|
| Black pepper powder | 1 teaspoon | Adds mild heat and aroma |
| Garam masala | 1 teaspoon | Enhances warmth and depth |
| Turmeric powder | 1/4 teaspoon | Imparts color and subtle flavor |
| Red chili powder | 1/2 teaspoon | Adds spiciness, optional |
| Curry leaves (fresh) | 10-12 leaves | Gives a distinctive Kerala flavor |
Tip: Using fresh curry leaves and coconut oil is key to authentic Kerala chicken cutlets. These ingredients elevate the aroma, taste, and overall experience of the dish dramatically.
With these ingredients in hand, we are ready to proceed to the cooking steps that yield perfectly spiced, juicy chicken cutlets with a crispy coating.
Equipment Needed
To make Chicken Cutlet Kerala recipe perfectly crispy and flavorful, having the right equipment is essential. Below is the list of tools we recommend for smooth preparation and cooking.
Essential Kitchen Tools
- Mixing Bowls: Use medium and large bowls to combine the chicken filling ingredients and for the breadcrumb coating process.
- Non-stick Pan or Skillet: Choose a sturdy non-stick pan to sauté the spiced minced chicken filling evenly without sticking.
- Knife and Cutting Board: For finely chopping onions, green chilies, coriander leaves, and other ingredients.
- Grater or Ricer (optional): If using boiled potatoes, a ricer helps mash them smoothly into the filling.
- Measuring Spoons & Cups: Accurate measurement of spice powders, oil, and other ingredients is crucial for authentic flavor balance.
- Deep Fryer or Heavy-Bottomed Kadai: For deep frying the cutlets to golden-brown perfection.
- Slotted Spoon or Spider Strainer: To safely remove cutlets from hot oil without excess oil retention.
- Plate or Tray with Paper Towels: To drain and keep the fried cutlets crisp and oil-free.
Cooking Station Setup Table
| Equipment | Purpose | Notes |
|---|---|---|
| Mixing Bowls | Combining chicken filling and coating ingredients | At least 2 sizes needed |
| Non-stick Pan/Skillet | Sautéing spiced minced chicken mixture | Medium size preferred |
| Knife and Cutting Board | Chopping vegetables and herbs | Sharp knife for finely chopping |
| Grater or Ricer | Mashing boiled potatoes (optional) | Ensures smooth texture |
| Measuring Spoons/Cups | Precise measurement of spices and liquids | Ensures perfect seasoning |
| Deep Fryer or Kadai | Deep frying cutlets | Maintains consistent heat |
| Slotted Spoon/Spider | Removing cutlets from oil | Prevents excess oil |
| Plate with Paper Towels | Draining fried cutlets | Keeps cutlets crisp |
Using these tools efficiently enhances our control over the cooking process, resulting in the signature crispy crust and juicy, flavorful filling of the Kerala-style chicken cutlets.
Prep Work
Before we dive into cooking, thorough prep work ensures our Chicken Cutlet Kerala recipe turns out perfect. Let’s break down the essential steps to get everything ready.
Preparing the Chicken
- Use minced chicken for the filling, ideally with a bit of fat for juiciness.
- Rinse the chicken mince under cold water and drain well to avoid excess moisture.
- Marinate it briefly with salt, turmeric, and a pinch of black pepper to enhance the flavor.
- Let it rest for 10 minutes to absorb the spices fully.
Boiling and Mashing the Potatoes
| Step | Instructions |
|---|---|
| Boil | Place peeled potatoes in salted water. Boil until fork-tender (about 15-20 minutes). |
| Drain | Drain thoroughly to avoid water in the mash. |
| Mash | Use a masher or ricer to get smooth, lump-free mashed potatoes. |
| Cool | Let the mashed potatoes cool to room temperature before mixing. |
- We prefer boiled potatoes to add softness without overpowering the chicken’s flavor.
- Properly mashed potatoes bind the filling and provide the signature tender texture.
Chopping Vegetables and Herbs
- Finely chop the onions and green chilies for even flavor distribution.
- Mince fresh ginger and garlic or use a paste for convenience.
- Chop the vibrant coriander leaves and fresh curry leaves finely to preserve their aroma in the cutlet.
- Keep everything finely chopped to ensure a consistent texture throughout the filling.
“When preparing the filling, uniform chopping enhances both texture and taste.”
By carefully following these prep steps, we set the foundation for moist flavorful Chicken Cutlet Kerala that stays true to its authentic roots.
Instructions
Follow these detailed steps to master the Chicken Cutlet Kerala recipe and enjoy the perfect balance of flavors and textures in every bite.
Making the Chicken Filling
- Heat 2 tablespoons of coconut oil in a non-stick pan over medium heat.
- Add finely chopped onions (1 cup), green chilies (2, finely chopped), and sauté until onions turn translucent.
- Stir in ginger-garlic paste (1 tablespoon) and cook for 1-2 minutes until fragrant.
- Add the marinated minced chicken (500 grams) along with turmeric (1/2 teaspoon), red chili powder (1 teaspoon), black pepper (1/2 teaspoon), and garam masala (1 teaspoon).
- Cook the chicken mixture on medium heat, stirring frequently, until it is fully cooked and any moisture evaporates (approximately 10-12 minutes).
- Stir in the boiled and mashed potatoes (1 cup) to bind the mixture together.
- Add finely chopped fresh coriander leaves (2 tablespoons) and curry leaves (10 leaves, finely chopped).
- Season with salt to taste, and finish with a squeeze of fresh lemon juice (1 tablespoon) to enhance flavor.
- Remove the mixture from heat and let it cool completely before shaping.
Forming the Cutlets
- Take a small portion of the cooled chicken filling (approximately 2 tablespoons).
- Roll it gently between your palms to form a smooth ball.
- Flatten the ball into an oval or round cutlet shape about 1/2 inch thick.
- Place the formed cutlets on a clean plate or tray lined with parchment paper.
- Repeat the process with the remaining filling, ensuring consistent size for even cooking.
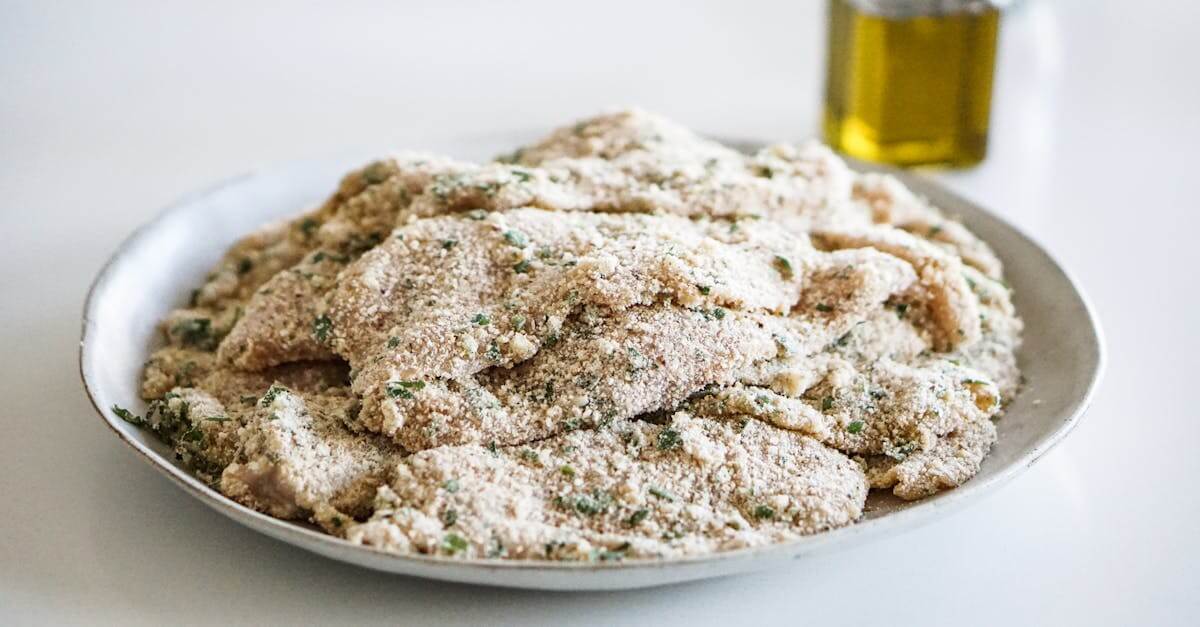
Coating the Cutlets
We will prepare a three-step coating to achieve the signature crispy crust:
| Step | Ingredients/Method | Quantity |
|---|---|---|
| 1. Flour | All-purpose flour for dry coating | 1 cup |
| 2. Egg Wash | Beaten eggs | 2 large eggs |
| 3. Breadcrumbs | Fresh breadcrumbs | 1.5 cups |
- Dip each cutlet into the all-purpose flour, coating evenly and shaking off excess.
- Next, immerse the floured cutlet into the beaten eggs, ensuring full coverage.
- Finally, coat the cutlet thoroughly with fresh breadcrumbs, pressing lightly so the crumbs adhere well.
- Place the coated cutlets on a plate and let them rest for 10 minutes to set the coating.
Frying the Cutlets
- Heat oil for deep frying (approximately 3-4 cups) in a heavy-bottomed kadai or deep fryer to 350°F (175°C).
- Carefully place 3-4 cutlets in the hot oil without overcrowding.
- Fry each batch for 3-4 minutes, turning occasionally until the cutlets are golden brown and crisp.
- Use a slotted spoon or spider strainer to remove cutlets and drain excess oil on a plate lined with paper towels.
- Allow cutlets to cool slightly before serving to retain their shape and crunch.
Tip: Maintain consistent oil temperature for even crispiness and to prevent cutlets from absorbing excess oil.
This process guarantees that your Chicken Cutlet Kerala will be juicy inside with a perfectly crispy crust, showcasing the authentic flavors and textures of Kerala street food.
Serving Suggestions
To elevate our Chicken Cutlet Kerala experience, pairing it with complementary sides and beverages enhances the rich flavors and crispy texture. Here are some serving ideas that bring out the best in this iconic Kerala snack.
Accompaniments
- Coconut Chutney: A traditional Kerala pairing, its creamy, slightly tangy profile balances the spiced cutlets perfectly.
- Green Coriander-Mint Chutney: The fresh herbs add a vibrant contrast and bright aroma.
- Tomato Ketchup: A classic favorite offering sweet and tangy notes against the savory crust.
- Sliced Onions and Lemon Wedges: Serve on the side for an added zing and crunch, typical of Kerala street food stalls.
Beverage Pairings
| Beverage | Flavor Profile | Why It Works |
|---|---|---|
| Masala Chai | Spiced and warm | Complements the spices in cutlets |
| Filter Coffee | Bold and robust | Cuts through the richness |
| Fresh Lime Soda | Refreshing and tangy | Cleanses palate and refreshes |
| Tender Coconut Water | Naturally sweet and hydrating | Pairs authentically with Kerala flavors |
Presentation Tips
- Arrange the Chicken Cutlet Kerala on a banana leaf or a rustic wooden platter to embrace the traditional Kerala aesthetic.
- Garnish with fresh curry leaves or chopped coriander to highlight the authentic herbal notes.
- Serve hot, ensuring the crisp breadcrumb crust remains crunchy. Use paper towels to drain excess oil before plating.
“Serving Chicken Cutlet Kerala with the right accompaniments brings an immersive culinary experience—combining textures, aromas, and vibrant tastes true to Kerala’s street food heritage.”
By pairing these cutlets with the suggested chutneys and beverages, we create a harmonious balance that makes every bite memorable.
Tips for Best Results
To master the Chicken Cutlet Kerala recipe we must focus on precise techniques that bring out its authentic flavors and signature crispiness. Here are essential tips to help us perfect every step.
How to Get Crispy Cutlets
Achieving the perfect crispy exterior is crucial for our Kerala-style chicken cutlets. Follow these key points to ensure a golden crunchy crust every time:
- Maintain the correct oil temperature: Keep frying oil between 350°F to 375°F (175°C to 190°C). Use a kitchen thermometer for accuracy. Too low a temperature absorbs excess oil making cutlets soggy; too high burns the coating.
- Dry the cutlets before coating: After shaping, let the cutlets rest on a wire rack or plate for 10 minutes to reduce moisture on the surface.
- Use fresh breadcrumbs: Freshly ground or store-bought crisp breadcrumbs create a superior crunchy texture.
- Stick to the three-step coating: First coat with all-purpose flour, then dip in beaten eggs, and finally roll in breadcrumbs. This triple layer ensures adherence and maximum crunch.
- Avoid overcrowding the pan: Fry cutlets in batches with enough space to prevent them from sticking and to maintain even cooking.
- Drain excess oil: Use a slotted spoon to remove cutlets and place on paper towels for optimal oil absorption.
| Tip | Reason |
|---|---|
| Maintain oil temp 350-375°F | Ensures even cooking & crispiness |
| Let cutlets dry before coating | Reduces moisture to prevent sogginess |
| Use fresh breadcrumbs | Adds better crunch and flavor |
| Follow flour-egg-breadcrumb coating | Creates sturdy crust for frying |
| Fry in batches | Avoids sticking and uneven cooking |
| Drain on paper towels | Removes excess oil to keep crisp |
“Crispy cutlets start with hot oil and a dry surface.“
Variations to Try
We can customize our Chicken Cutlet Kerala by experimenting with flavors and textures:
- Add boiled and grated carrots or beetroot to the filling for enhanced color and subtle sweetness.
- Swap potatoes for sweet potatoes to add earthy tones and a slightly sweeter profile.
- Incorporate finely chopped mint or basil leaves alongside coriander for herbal freshness.
- Use a mix of black pepper and garam masala for a warm and complex spice blend.
- Try baking instead of frying: Coat cutlets as usual and bake at 400°F (200°C) for 20-25 minutes, flipping once for a healthier option.
- Stuff with grated cheese or boiled eggs inside the cutlet for a surprise creamy center.
- Experiment with different chutneys like tamarind or peanut for unique dips.
These twists allow us to celebrate tradition while adding personal flair to our Kerala chicken cutlet experience.
Make-Ahead Instructions
Preparing Chicken Cutlet Kerala ahead of time can save us valuable time while preserving its authentic flavor and crispy texture. Here are the essential make-ahead tips and steps to ensure perfect cutlets anytime:
Prepare and Cook the Filling in Advance
- Cook the chicken filling following the recipe instructions.
- Allow the filling to cool completely to room temperature.
- Transfer the cooled filling into an airtight container.
- Store in the refrigerator for up to 2 days.
“Tip: Letting the filling rest enhances the flavors as the spices meld together, making our cutlets even tastier.”
Shaping and Coating the Cutlets Ahead
- Form the cooled filling into cutlet shapes (oval or round).
- Place the shaped cutlets on a tray lined with parchment paper.
- Cover the tray tightly with plastic wrap.
- Refrigerate for up to 1 day before coating.
Coating and Frying Timing
- It is best to coat and fry the cutlets just before serving for optimal crispness.
- If needed, we can prep the coating station beforehand:
- Set bowls for flour, beaten eggs, and fresh breadcrumbs.
- Have oil heated when ready to fry.
Freezing for Longer Storage
If we want to prepare a batch for longer storage:
| Step | Instructions | Storage Duration |
|---|---|---|
| Shape cutlets | Follow the shaping step and place on parchment-lined tray | Freeze immediately |
| Freeze cutlets | Freeze cutlets individually for 2-3 hours till firm | 2-3 hours |
| Transfer to freezer bag | Once firm, transfer to airtight freezer bags | Up to 1 month |
| Thawing | Thaw in refrigerator overnight before coating and frying | 8-12 hours |
“Reminder: Do not coat the cutlets before freezing as breadcrumbs can become soggy upon thawing.”
Reheating Cooked Cutlets
- For reheating pre-cooked cutlets, use a hot oven at 350°F (175°C) for 8–10 minutes.
- Avoid microwaving as it can soften the crispy crust.
By following these Make-Ahead Instructions, we can enjoy freshly fried Chicken Cutlet Kerala with all its traditional crispness and flavorful punch, anytime we crave this Kerala street food favorite.
Conclusion
Making Chicken Cutlet Kerala at home brings the vibrant flavors of Kerala street food right to our kitchen. With the right ingredients, tools, and techniques, we can easily create these crispy, flavorful cutlets that everyone will love.
Whether served as a snack or part of a festive spread, this recipe offers a satisfying experience that’s both authentic and customizable. By following the steps and tips, we ensure every bite delivers that perfect balance of juicy filling and crunchy coating.
Let’s embrace this culinary tradition and enjoy the delicious journey of making Chicken Cutlet Kerala together.
Frequently Asked Questions
What is Chicken Cutlet Kerala style?
Chicken Cutlet Kerala style is a popular southern Indian snack featuring spiced minced chicken mixed with herbs and sometimes potatoes, coated in breadcrumbs, and deep-fried to a crispy golden crust.
What ingredients are needed to make Kerala Chicken Cutlets?
Key ingredients include minced chicken, boiled potatoes, onions, green chilies, ginger-garlic paste, spices (turmeric, garam masala, pepper), fresh curry leaves, coconut oil, all-purpose flour, eggs, and breadcrumbs.
Which kitchen tools are essential for preparing this dish?
You’ll need mixing bowls, a non-stick pan, knife and chopping board, measuring spoons, a deep fryer or heavy-bottomed kadai, slotted spoon, and paper towels for draining.
How do you prepare the chicken filling for the cutlets?
Sauté onions and chilies in coconut oil, add ginger-garlic paste, cook marinated minced chicken with spices till done, then mix with mashed boiled potatoes, fresh herbs, and lemon juice.
What is the best method to coat the cutlets for a crispy texture?
Use a three-step coating: first coat with all-purpose flour, then dip in beaten eggs, and finally roll in fresh breadcrumbs before frying.
How do you fry Chicken Cutlet Kerala perfectly?
Fry in oil heated to medium-high temperature, cook in batches to avoid overcrowding, and drain excess oil on paper towels for a crispy, golden exterior.
Can I make Chicken Cutlets Kerala in advance?
Yes, prepare and cook the filling ahead, chill it, shape the cutlets, and refrigerate or freeze them. Fry or bake just before serving to maintain crispiness.
What are some good side dishes and drinks to serve with Kerala Chicken Cutlets?
Serve with coconut chutney, coriander-mint chutney, tomato ketchup, sliced onions, lemon wedges, and pair with masala chai, filter coffee, lime soda, or tender coconut water.
Are there any variations to this traditional recipe?
Yes, you can add grated vegetables, swap potatoes for sweet potatoes, try baking instead of frying, or incorporate fresh herbs for different flavors.
Why is coconut oil important in making Kerala Chicken Cutlets?
Coconut oil imparts authentic Kerala flavor and aroma, enhancing the overall taste and giving the cutlets a distinct traditional character.