
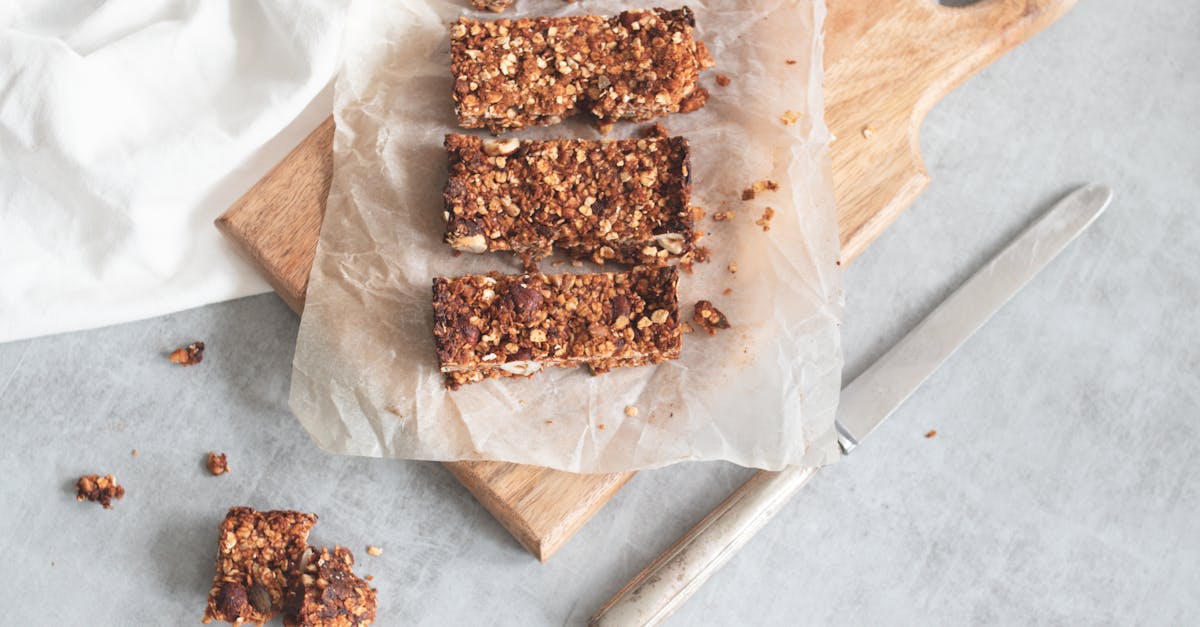
Cheryl’s Cookies have earned a special place in the hearts of cookie lovers everywhere. Known for their perfect balance of chewy and crispy textures, these cookies bring a comforting homemade feel to every bite. Whether you’re craving a sweet treat for an afternoon snack or looking to impress guests with a classic dessert, Cheryl’s Cookies never disappoint.
We’re excited to share this easy-to-follow recipe that captures the essence of Cheryl’s famous cookies. With simple ingredients and straightforward steps, you can recreate that bakery-fresh taste right in your own kitchen. Let’s dive into making these irresistible cookies that’ll quickly become a family favorite.
Ingredients
To recreate Cheryl’s Cookies at home, we need a perfect balance of dry, wet, and optional mix-in ingredients. Each plays a crucial role in achieving the signature chewy yet crispy texture that makes these cookies unforgettable.
Dry Ingredients
Our dry ingredients form the foundation of the dough, providing structure and flavor. Measure precisely for consistent results.
- 2 ¼ cups all-purpose flour (sifted)
- 1 teaspoon baking soda
- ½ teaspoon salt
- 1 cup semisweet chocolate chips (can be substituted with chunks for extra texture)
Wet Ingredients
The wet ingredients bring moisture and richness, blending with the dry to create that perfect cookie texture.
- 1 cup (2 sticks) unsalted butter (softened at room temperature)
- ¾ cup granulated sugar
- ¾ cup packed light brown sugar
- 2 large eggs (at room temperature)
- 2 teaspoons pure vanilla extract
Optional Mix-Ins
To personalize our Cheryl’s Cookies recipe, we can include these mix-ins without compromising the classic taste.
| Ingredient | Quantity | Purpose |
|---|---|---|
| Chopped nuts (walnuts/pecans) | ½ cup | Adds crunch and depth of flavor |
| Rolled oats | ½ cup | Provides a rustic chewy texture |
| Toffee bits | ¼ cup | Infuses a sweet buttery crunch |
We recommend starting with the classic ingredients and gradually experimenting with mix-ins to suit your preference.
Equipment Needed
To achieve the perfect Cheryl’s Cookies texture and flavor, having the right equipment on hand is essential. Each tool plays a specific role in ensuring consistent mixing, shaping, and baking. Below is a detailed list of the equipment that will help us master this recipe:
- Mixing Bowls
Use medium and large bowls to separate and combine dry and wet ingredients efficiently without making a mess. Glass or stainless steel bowls are ideal for durability and ease of cleaning.
- Electric Mixer
A hand mixer or stand mixer provides consistent creaming of butter and sugars, which is crucial for the soft and chewy cookie texture Cheryl’s Cookies are known for.
- Measuring Cups and Spoons
Precise measurements of all-purpose flour, sugars, baking soda, and salt ensure the right balance in the dough.
- Spatula and Wooden Spoon
A rubber spatula helps scrape bowl sides thoroughly, while a wooden spoon is perfect for folding in chocolate chips and optional mix-ins without over-mixing.
- Cookie Scoop or Tablespoon
Using a scoop or tablespoon ensures uniform cookie size, promoting even baking for that signature chewy center and crisp edge.
- Baking Sheets
Heavy-duty, non-stick baking sheets or lined with parchment paper prevent cookie spreading and sticking, maintaining the ideal cookie shape.
- Cooling Rack
Cooling cookies on a wire rack allows air circulation on all sides, preserving the texture by preventing sogginess.
- Oven Thermometer (optional but recommended)
Ovens can vary in temperature accuracy. Using a thermometer guarantees our oven reaches and maintains the ideal 350°F (175°C) baking temperature for Cheryl’s Cookies.
| Equipment | Purpose | Key Feature |
|---|---|---|
| Mixing Bowls | Combine ingredients | Durable glass or stainless steel |
| Electric Mixer | Cream butter and sugars | Hand or stand mixer |
| Measuring Cups/Spoons | Accurate ingredient measurement | Standardized measurement sizes |
| Spatula/Wooden Spoon | Mix and fold ingredients | Flexible spatula and sturdy spoon |
| Cookie Scoop/Tablespoon | Portion dough uniformly | Ensures consistent cookie sizes |
| Baking Sheets | Bake cookies | Non-stick or lined with parchment |
| Cooling Rack | Cool cookies evenly | Wire rack for air circulation |
| Oven Thermometer | Monitor oven temperature | Ensures precise baking temperature |
Equipping ourselves with these tools sets a solid foundation to recreate the classic Cheryl’s Cookies Recipe at home flawlessly. This setup minimizes guesswork and keeps the focus on perfecting the rich, buttery, and chocolate-studded dough we love.
Prep Work
Before we start baking Cheryl’s Cookies it is essential to prepare the dough carefully and chill it properly. These steps ensure the cookies develop their signature texture and flavor.
Preparing the Dough
To prepare the dough for Cheryl’s Cookies we begin by creaming the wet ingredients thoroughly. This means beating the unsalted butter, granulated sugar, and brown sugar together until light and fluffy using an electric mixer. This process incorporates air creating a soft and rich base.
Next we add the eggs one at a time beating well after each addition. Then, add the vanilla extract for flavor.
In a separate bowl we combine the dry ingredients: all-purpose flour, baking soda, and salt. Gradually add the dry mix to the wet ingredients mixing on low speed until just combined. Avoid overmixing to keep the dough tender.
Finally fold in the semisweet chocolate chips and any optional mix-ins like chopped nuts or toffee bits. Mixing these thoroughly ensures even distribution of flavors throughout the dough.
| Step | Ingredients Used | Key Action |
|---|---|---|
| Creaming | Unsalted butter, granulated sugar, brown sugar | Beat until fluffy |
| Adding Wet | Eggs, vanilla extract | Add one egg at a time |
| Combining Dry Mix | Flour, baking soda, salt | Mix separately and add slowly |
| Mixing In | Chocolate chips, optional mix-ins | Fold gently |
Chilling the Dough
Chilling the dough is a crucial step for Cheryl’s Cookies because it helps solidify the butter which improves the cookie’s texture and prevents excessive spreading while baking.
We recommend covering the dough tightly with plastic wrap and refrigerating for at least 1 hour, but ideally 2 to 3 hours or overnight. This resting period allows the flavors to meld and the dough to firm up making it easier to scoop out uniform portions.
If you’re short on time chilling for 30 minutes is still beneficial but do not skip this step entirely. When ready to bake remove the dough from the fridge and let it sit for a few minutes to soften slightly for easier scooping.
Instructions
Follow these steps carefully to craft Cheryl’s Cookies with the perfect blend of chewy and crispy textures. Precision and patience will reward us with doughy, golden cookies.
Shaping the Cookies
- After chilling, remove dough from the fridge and allow it to sit for 5 minutes to soften slightly.
- Use a cookie scoop (about 2 tablespoons) to portion out even dough balls for consistent baking.
- Roll each portion lightly between your palms to form smooth rounds—this helps in even spreading.
- Arrange dough balls 2 inches apart on heavy-duty baking sheets lined with parchment paper or silicone mats.
- For an extra touch, gently press a few semisweet chocolate chips or chopped nuts on top of each dough ball before baking.
Baking the Cookies
Set the oven carefully and bake to optimum crisp-chewy perfection.
| Step | Detail |
|---|---|
| Preheat oven | 350°F (175°C) |
| Baking time | 10 to 12 minutes |
| Baking sheet type | Heavy-duty, lined with parchment |
| Position in oven | Middle rack |
| Rotation | Rotate sheets halfway through |
- Place one baking sheet at a time in the middle rack for the most even heat distribution.
- Bake cookies until edges become golden brown while centers remain soft.
- If baking multiple sheets, swap places halfway for uniform baking.
- Remove cookies just before they appear fully firm—they will continue baking on the hot sheet.
Cooling and Storing
- Let cookies cool 5 minutes on the baking sheet to set shape and texture.
- Transfer to a wire cooling rack to cool completely, preventing sogginess.
- Once cooled, store cookies in an airtight container at room temperature.
- To maintain freshness, insert a slice of bread into the container; it absorbs moisture and keeps cookies softer longer.
- Cookies can last up to one week stored this way or be frozen for up to 3 months in a freezer-safe bag.
By following these detailed baking and handling instructions, our Cheryl’s Cookies will consistently deliver the delicious flavor and classic texture so loved by fans everywhere.
Tips for Perfect Cheryls Cookies
To consistently bake perfect Cheryls Cookies, we need to focus on key factors that influence texture, flavor, and appearance. Here are our expert tips for achieving bakery-quality cookies every time.
1. Use Room Temperature Ingredients
Butter and eggs should be at room temperature for optimal creaming. This helps create a smooth, aerated mixture that contributes to the cookies’ tender crumb.
- Butter: Softened but not melted
- Eggs: Out of the fridge for 30 minutes before use
2. Measure Ingredients Precisely
Accurate measurements preserve the delicate balance between dry and wet ingredients. Use a digital scale or standardized measuring cups and spoons.
| Ingredient | Measurement Tip |
|---|---|
| All-purpose flour | Spoon into cup then level off |
| Brown sugar | Pack firmly into measuring cup |
| Granulated sugar | Scoop and level with flat edge |
| Butter | Use weight or stick markings |
3. Don’t Overmix the Dough
When combining dry and wet ingredients, mix gently just until incorporated. Overmixing develops gluten which can make cookies tough and dense.
“Mixing less equals softer, chewier cookies.”
4. Chill the Dough Thoroughly
The dough should rest in the refrigerator for at least 1 hour, ideally 2-3 hours, or overnight. This step:
- Prevents excessive spreading
- Enhances flavor development
- Firms dough for easier shaping
5. Use a Cookie Scoop for Uniform Size
Using a cookie scoop ensures even-sized cookies that bake evenly. We recommend a medium scoop (about 1.5 tablespoons) to replicate the classic Cheryl’s size.
6. Bake at Proper Oven Temperature
Preheat the oven to 350°F (175°C). Oven temperature accuracy is critical:
| Oven Type | Recommended Temp |
|---|---|
| Conventional | 350°F (175°C) |
| Convection | 325°F (165°C) |
Use an oven thermometer to confirm calibration.
7. Remove Cookies Slightly Underbaked
Pull the cookies from the oven when the edges are golden but the centers still look soft and slightly underbaked. They will firm up on the baking sheet during cooling, preserving a chewy interior.
8. Cool Properly
After baking, cool cookies on the baking sheet for 5 minutes before transferring to a wire rack. This prevents breaking and helps set their shape.
9. Store with a Slice of Bread
To maintain softness, store cookies in an airtight container with a slice of bread. The bread releases moisture, keeping cookies soft longer.
Summary of Key Steps for Cheryls Cookies Perfection
| Step | Purpose | Key Tip |
|---|---|---|
| Room-temp ingredients | Better texture and mixing | Soften butter, warm eggs |
| Precise measuring | Balanced dough and consistent results | Use scale or level cups |
| Gentle mixing | Avoids toughness | Mix until just combined |
| Dough chilling | Controls spread and flavor depth | Chill at least 1 hour |
| Even scooping | Uniform cookies | Use 1.5 tbsp cookie scoop |
| Correct baking temp | Proper rise and doneness | Use oven thermometer |
| Slightly underbake | Retain chewiness | Watch edges for golden color |
| Cooling on sheet | Prevents breaking | Cool 5 min before wire rack |
| Store with bread | Maintain softness | Airtight container + bread |
Variations on Cheryls Cookies Recipe
Exploring variations allows us to customize Cheryl’s Cookies while preserving their beloved texture and flavor. Here are several popular and delicious twists we can try to elevate our baking experience.
1. Nutty Delight: Adding Chopped Nuts
Incorporate ½ cup of chopped walnuts, pecans, or almonds into the dough. Nuts add crunch and a rich complexity without altering the cookie’s chewy center. We fold them in gently during the final mix stage to maintain even distribution.
2. Oatmeal Twist: Rolled Oats Addition
For a heartier bite, mix in ⅓ cup of rolled oats. This variation boosts fiber and introduces a subtle nuttiness that complements the chocolate chips perfectly. Add oats when combining dry ingredients to ensure the right texture.
3. Toffee Crunch
To add a caramelized sweetness, mix ⅓ cup of toffee bits into the dough. Toffee pieces melt slightly during baking, creating delightful pockets of buttery crispness. Add these bits along with chocolate chips for balanced richness.
4. Double Chocolate
For chocolate lovers, substitute ¼ cup of all-purpose flour with ¼ cup cocoa powder. This variation intensifies chocolate flavor and adds a subtle bitterness that contrasts beautifully with the sweet chocolate chips. Adjust drying ingredients to maintain dough consistency.
5. Citrus Zest Infusion
Add 1 teaspoon of finely grated orange or lemon zest to the wet ingredients before combining with the dry mix. The zest introduces a light, refreshing aroma that brightens the classic cookie flavor.
Key Ingredients for Variations
| Variation | Added Ingredient(s) | Quantity | When to Add |
|---|---|---|---|
| Nutty Delight | Chopped walnuts/pecans | ½ cup | During final mixing |
| Oatmeal Twist | Rolled oats | ⅓ cup | With dry ingredients |
| Toffee Crunch | Toffee bits | ⅓ cup | With chocolate chips |
| Double Chocolate | Cocoa powder | ¼ cup | Alongside dry ingredients |
| Citrus Zest | Orange or lemon zest | 1 teaspoon | With wet ingredients |
Tips for Successful Variations
- Always chill the dough after adding mix-ins to prevent spreading and preserve cookie shape.
- Use a cookie scoop to portion dough evenly, especially important when incorporating extras for uniform baking.
- Adjust baking time slightly if adding moist ingredients like oats to ensure the cookie centers bake through without drying out.
“Remember, variations on Cheryl’s Cookies give us endless ways to delight family and friends while keeping the core texture and flavor that make these cookies a classic favorite.”
Feel free to experiment with combinations above or add your own favorite mix-ins for personalized batches.
Conclusion
Baking Cheryl’s Cookies at home is a rewarding experience that brings the perfect balance of chewy and crispy textures straight to your kitchen. With the right ingredients, tools, and techniques, we can create a treat that feels both classic and customizable.
Whether sticking to the original recipe or trying one of the delicious variations, these cookies are sure to become a staple for any occasion. Let’s get baking and enjoy the warm, comforting flavors that Cheryl’s Cookies are famous for!
Frequently Asked Questions
What makes Cheryl’s Cookies unique?
Cheryl’s Cookies are loved for their perfect chewy and crispy texture, offering a homemade feel with a rich, buttery flavor and chocolate chips in every bite.
What are the essential ingredients for Cheryl’s Cookies?
The key ingredients include all-purpose flour, baking soda, salt, semisweet chocolate chips, unsalted butter, granulated sugar, brown sugar, eggs, and vanilla extract.
Can I add extra ingredients to the recipe?
Yes, optional mix-ins like chopped nuts, rolled oats, toffee bits, cocoa powder, or citrus zest can be added to customize flavors without losing the classic cookie texture.
What equipment do I need to bake Cheryl’s Cookies?
You’ll need mixing bowls, an electric mixer, measuring cups and spoons, a spatula, wooden spoon, cookie scoop, heavy-duty baking sheets, cooling racks, and optionally an oven thermometer.
Why is chilling the dough important?
Chilling the dough for at least one hour helps develop flavor, improve texture, reduce spreading, and makes scooping consistent cookie sizes easier.
How long should I bake Cheryl’s Cookies?
Bake at 350°F (175°C) for 10 to 12 minutes. Remove cookies just before they fully firm to keep the centers soft and chewy.
How do I store Cheryl’s Cookies to keep them fresh?
Store cooled cookies in an airtight container at room temperature with a slice of bread to maintain softness. They last up to a week or can be frozen for three months.
Any expert tips for perfect Cheryl’s Cookies?
Use room temperature ingredients, measure precisely, mix gently, chill dough thoroughly, use a cookie scoop, bake at the right temperature, and remove cookies slightly underbaked.