
Cherry pepper pickles bring a perfect balance of sweet heat and tangy crunch to any dish. These vibrant little peppers are packed with flavor and add a delightful kick to sandwiches, salads, and charcuterie boards. Making our own cherry pepper pickles lets us control the spice level and customize the flavor to our liking.
Ingredients
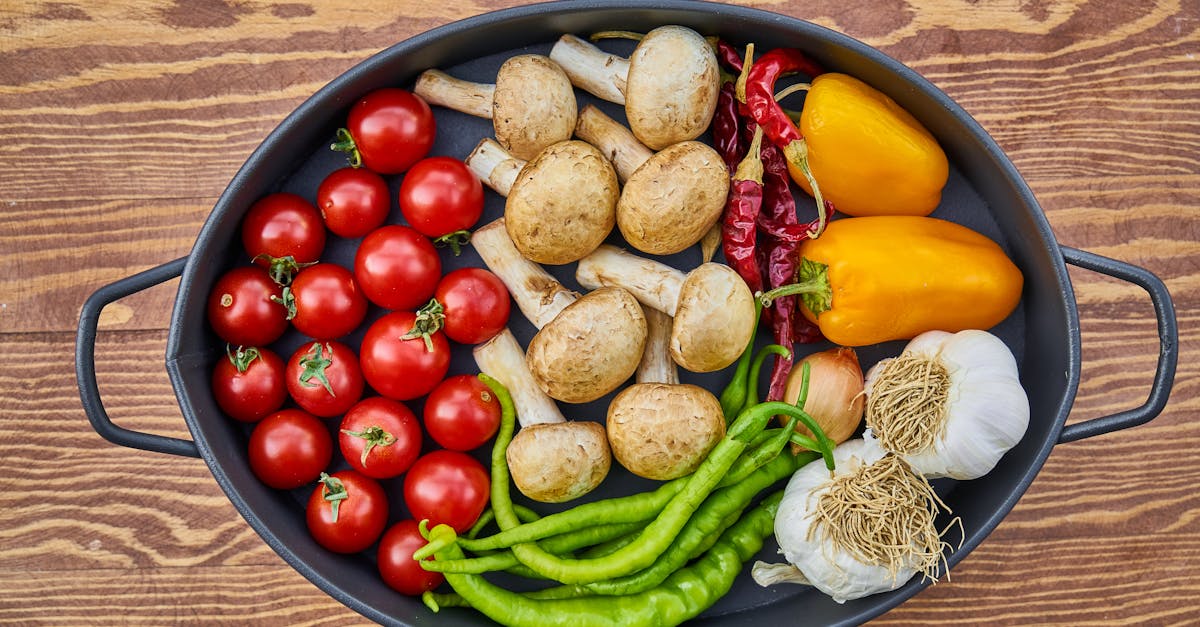
To create the perfect cherry pepper pickle, we carefully select each ingredient to balance sweetness, heat, and tang. Below is a detailed list of what we need to make our flavorful batch:
- Cherry peppers – 1 pound, washed and stems removed
- White vinegar – 2 cups, for the tangy pickling solution
- Water – 1 cup, to balance acidity
- Granulated sugar – 3/4 cup, to add subtle sweetness
- Kosher salt – 2 tablespoons, essential for brine preservation
- Garlic cloves – 4, peeled and lightly crushed to infuse aroma
- Whole black peppercorns – 1 teaspoon, for a mild peppery note
- Mustard seeds – 1 teaspoon, to enhance the brine’s complexity
- Dill seeds – 1/2 teaspoon, for a fresh herbal undertone
- Red pepper flakes – 1/4 teaspoon (optional), to adjust heat level
| Ingredient | Quantity | Preparation |
|---|---|---|
| Cherry peppers | 1 pound | Washed, stems removed |
| White vinegar | 2 cups | |
| Water | 1 cup | |
| Granulated sugar | 3/4 cup | |
| Kosher salt | 2 tablespoons | |
| Garlic cloves | 4 | Peeled, lightly crushed |
| Whole black peppercorns | 1 teaspoon | |
| Mustard seeds | 1 teaspoon | |
| Dill seeds | 1/2 teaspoon | |
| Red pepper flakes | 1/4 teaspoon (optional) | For extra heat |
“A well-balanced brine is the heart of every successful cherry pepper pickle.” This list covers all the essentials for a pickle that is vibrantly flavorful and perfectly zesty with just the right amount of kick.
Equipment Needed
To craft the perfect Cherry Pepper Pickle, having the right equipment is essential for both safety and flavor. Below is a detailed list of tools we recommend to make the pickling process efficient and enjoyable.
Essential Tools for Pickling
- Canning Jars: Use clean, sterilized glass jars with airtight lids. We suggest quart-sized jars for larger batches or half-pint jars for smaller quantities.
- Lid and Band Sets: New lids ensure a proper seal; reuse bands if undamaged.
- Large Saucepan: To prepare the brine and boil jars for sterilization.
- Jar Lifter: For safely removing hot jars from boiling water without risk.
- Funnel: A wide-mouth funnel helps fill jars neatly without spills.
- Tongs: Useful for handling garlic cloves and spices or placing ingredients into jars hygienically.
- Measuring Cups and Spoons: For precise measurement of vinegar, sugar, salt, and spices to balance the brine perfectly.
- Cutting Board and Sharp Knife: Essential for coring and slicing the cherry peppers evenly.
- Mixing Bowl: To combine ingredients or soak peppers before pickling if desired.
Recommended Optional Tools
- Pickling Weight: Keeps peppers submerged in the brine to prevent spoilage.
- Timer: Helps monitor boiling and cooling times accurately.
| Equipment | Purpose | Notes |
|---|---|---|
| Canning Jars | Store pickles safely | Use sterilized glass |
| Lid and Band Sets | Seal jars airtight | Use new lids |
| Large Saucepan | Boil brine and sterilize jars | At least 6-quart capacity |
| Jar Lifter | Handling hot jars | Avoid burns |
| Funnel | Cleanly fill jars with brine and peppers | Wide-mouth recommended |
| Tongs | Handle spices and ingredients hygiene | Metal or food-safe plastic |
| Measuring Tools | Accurate ingredient measurement | Essential for balanced brine |
| Cutting Board & Knife | Prepare cherry peppers | Sharp for clean cuts |
| Mixing Bowl | Combine and soak ingredients | Optional but useful |
| Pickling Weight | Keep ingredients submerged | Prevents mold formation |
By gathering this equipment beforehand we set ourselves up for success, ensuring the process flows smoothly and our Cherry Pepper Pickles come out with vibrant flavor and crisp texture.
Prep Work
Before we dive into the pickling process, thorough preparation is key to achieving the perfect cherry pepper pickle. Let’s ensure our ingredients and equipment are ready for a smooth and successful pickling experience.
Washing and Preparing Cherry Peppers
- Start with fresh cherry peppers from a reputable source.
- Rinse them under cold running water to remove any dirt or residues.
- Pat dry with a clean kitchen towel or paper towels to prevent extra moisture in the jars.
- Using a sharp knife on a cutting board, carefully slice off the stems.
- For a milder pickle, remove the seeds and membranes. For more heat, leave them intact.
- Slice peppers into rings or halves according to your texture preference.
Tip: Wear gloves when handling cherry peppers to protect your skin from irritation and avoid transferring capsaicin to sensitive areas like your eyes.
Sterilizing Jars and Lids
To prevent contamination and ensure food safety, sterilizing your jars and lids is crucial. Follow these steps:
| Step | Instruction | Notes |
|---|---|---|
| 1 | Wash jars and lids in hot, soapy water. | Use a sponge or brush to remove debris. |
| 2 | Rinse thoroughly to remove all soap residue. | Soap can affect pickle flavor and preservation. |
| 3 | Boil jars and lids in large saucepan or pot for 10 minutes. | Submerge completely in boiling water. |
| 4 | Use a jar lifter to remove jars and lids; place on a clean towel. | Avoid touching inner surfaces. |
| 5 | Keep jars warm until ready to fill to prevent cracking from hot brine. | Warming jars helps them adapt to temperature changes. |
Sterilized jars and lids create a safe environment for our cherry pepper pickles to develop their vibrant flavors and crunch while preventing spoilage.
Pickling Brine Preparation
To create the perfect cherry pepper pickle, the pickling brine is the foundation for achieving that signature balance of sweet, tangy, and spicy notes. Let’s break down the steps to prepare a vibrant and flavorful brine that will elevate our pickles.
Step 1: Measure and Combine Ingredients
We start by combining the essential pickling brine components: vinegar, water, sugar, and kosher salt. Precise measurements are crucial for consistent results:
| Ingredient | Quantity |
|---|---|
| White vinegar | 2 cups (16 fl oz) |
| Water | 2 cups (16 fl oz) |
| Granulated sugar | 1/4 cup |
| Kosher salt | 1 tablespoon |
Step 2: Heating the Brine
- Pour the vinegar and water into a large saucepan.
- Add the granulated sugar and kosher salt.
- Place the saucepan over medium-high heat.
Important: Stir the mixture continuously until the sugar and salt fully dissolve. This ensures a smooth and evenly seasoned brine. Avoid boiling vigorously — a gentle simmer is enough.
Step 3: Infusing Flavor with Spices and Aromatics
Our brine gains its complexity from the aromatic spices we add. Once the sugar and salt dissolve, we introduce the following:
- 4 garlic cloves, halved or lightly crushed
- 1 tablespoon whole black peppercorns
- 1 tablespoon mustard seeds
- 1 tablespoon dill seeds
For those who desire an extra kick, add 1/2 teaspoon red pepper flakes. These spices infuse the brine with a warm, robust foundation that complements the cherry peppers’ natural sweetness and heat.
Step 4: Simmer and Cool
- Let the brine simmer with the spices for 5 minutes.
- Remove the saucepan from heat and allow the brine to cool to room temperature.
Cooling is critical. Pouring hot brine over the peppers will cook them, softening their prized crunch. Our goal is to preserve that satisfying snap while imparting vibrant flavor.
Step 5: Strain Before Use
Before filling our sterilized jars with peppers, strain the brine to remove the garlic and spices. This step prevents overly strong or bitter flavors from developing during pickling and maintains a clear pickling liquid that looks as good as it tastes.
“The right pickling brine transforms fresh cherry peppers into a perfectly balanced tangy and spicy delight.” By mastering these preparation steps, our cherry pepper pickles develop depth, brightness, and a balanced level of heat every time.
Instructions
Follow these clear steps to craft our flavorful Cherry Pepper Pickle with a perfectly balanced brine and crisp peppers.
Preparing the Pickling Brine
- Measure precisely the following ingredients:
- 2 cups white vinegar
- 2 cups water
- 3 tablespoons granulated sugar
- 1 tablespoon kosher salt
- In a large saucepan, combine the vinegar, water, sugar, and kosher salt.
- Place the saucepan over medium heat and stir continuously until the sugar and salt completely dissolve — about 5 minutes.
- Add aromatics to infuse depth:
- 4 garlic cloves, peeled and lightly crushed
- 1 tablespoon whole black peppercorns
- 1 tablespoon mustard seeds
- 1 tablespoon dill seeds
- Optional: ½ teaspoon red pepper flakes for extra heat
- Bring the mixture to a gentle simmer. Simmer for 5 minutes to allow spices to release their flavors.
- Remove the saucepan from heat and let the brine cool to room temperature to preserve the peppers’ crunch.
- Before using, strain the brine through a fine mesh sieve to remove solids.
| Ingredient | Quantity | Purpose |
|---|---|---|
| White vinegar | 2 cups | Acid base, tang |
| Water | 2 cups | Diluent |
| Granulated sugar | 3 tablespoons | Sweetness balance |
| Kosher salt | 1 tablespoon | Flavor enhancer |
| Garlic cloves | 4, crushed | Aromatic depth |
| Black peppercorns | 1 tablespoon | Spice |
| Mustard seeds | 1 tablespoon | Warmth and flavor |
| Dill seeds | 1 tablespoon | Herbaceous notes |
| Red pepper flakes | ½ teaspoon (opt.) | Extra heat option |
Packing the Jars with Peppers and Spices
- Wear gloves to protect your hands from pepper oils.
- Take your sterilized canning jars and pack in the prepared cherry peppers. Slice or leave whole based on your heat preference.
- Add 1 or 2 garlic cloves into each jar for additional flavor.
- Sprinkle ½ teaspoon each of mustard seeds and black peppercorns evenly into each jar.
- Press the peppers gently but firmly to ensure they are snug without bruising.
Pouring the Brine and Sealing Jars
- Using a funnel, pour the cooled and strained brine over the packed peppers, filling each jar to about ½ inch from the top.
- Remove any air bubbles by running a non-metallic utensil around the inside edge of the jar.
- Wipe rims clean with a damp cloth to ensure a proper seal.
- Place new sterilized lids and screw on bands until fingertip-tight — don’t overtighten.
- Process jars in a boiling water bath for 10 minutes to ensure safety and longevity.
- Remove jars carefully using the jar lifter and let them cool completely on a kitchen towel. As they cool you’ll hear the satisfying “pop” indicating the seal.
- Store your Cherry Pepper Pickles in a cool, dark place. Wait at least one week before tasting for the flavors to fully develop.
Directions for Pickling
Follow these step-by-step instructions to create perfect cherry pepper pickles with vibrant flavor and crisp texture. Whether you choose the Refrigeration Method or the Water Bath Canning Method, we guide you through the entire process with precision and care.
Refrigeration Method
This method is perfect for small batches and quick flavor development. It maintains the peppers’ crunch and allows us to enjoy our cherry pepper pickles sooner.
- Pack the prepared cherry peppers tightly into sterilized jars. Use gloves to protect your skin from the oils in the peppers.
- Add garlic cloves, black peppercorns, mustard seeds, dill seeds, and optional red pepper flakes evenly into each jar.
- Pour the cooled brine slowly over the peppers, leaving about 1/2 inch headspace at the top.
- Use a clean utensil to remove any air bubbles by gently pressing around the jar.
- Wipe the rims of the jars with a clean cloth and secure with sterilized lids and bands, tightening until fingertip-tight.
- Place jars in the refrigerator. Allow them to pickle for at least 7 days before tasting to develop the full sweet heat and tangy flavor.
- The pickles will stay fresh for up to 2 months refrigerated.
| Step | Details |
|---|---|
| Packing Peppers | Gloves recommended |
| Brine Filling | Leave ½ inch headspace |
| Sealing | Fingertip-tight lids |
| Refrigeration Time | Minimum 7 days |
| Shelf Life | Up to 2 months refrigerated |
Water Bath Canning Method
For longer shelf life and pantry storage, this is our go-to technique that ensures safety and lasting flavor.
- Preheat a large pot of water to a gentle boil for the water bath.
- Follow the packing steps as above, filling each sterilized jar with peppers, spices, and cooled brine, leaving 1/2 inch headspace.
- Wipe jar rims thoroughly and seal with new lids and screw bands.
- Using a jar lifter, lower jars into the boiling water bath. Ensure jars are completely submerged with at least 1 inch of water above.
- Process jars in boiling water for 10 minutes (adjust time for altitude if necessary).
- Carefully remove jars and place them on a towel without tilting. Let jars cool undisturbed for 12–24 hours.
- Check seals: lids should be concave and not move when pressed.
- Store sealed jars in a cool, dark place. Allow at least 1 week for flavors to mature before opening. Properly canned jars can last for up to 1 year.
| Step | Time / Detail |
|---|---|
| Water Bath Processing | 10 minutes boiling |
| Water Depth over Jars | At least 1 inch |
| Cooling Time | 12–24 hours |
| Flavor Development Period | Minimum 1 week |
| Shelf Life | Up to 1 year (sealed) |
Pro Tip: Always label your jars with the date and method used to track freshness easily. This ensures you enjoy the vibrant crunch and balanced spicy-sweet flavor of your homemade cherry pepper pickles at their best.
Storage Tips
Proper storage of our Cherry Pepper Pickles is crucial to maintain their vibrant flavor, tangy crunch, and balanced heat. Follow these tips to ensure the best quality and safety:
Refrigeration Storage
- After using the Refrigeration Method, store the jars in the coldest part of the refrigerator.
- Ensure jars are tightly sealed to prevent contamination and moisture loss.
- Label each jar clearly with the date packed.
- Use within 2 months for optimal freshness and texture.
- Avoid leaving jars out of the refrigerator more than 30 minutes before resealing.
Room Temperature Storage (Water Bath Canning)
- Store jars processed with the Water Bath Canning Method in a cool, dark place such as a pantry or cellar.
- Keep the jars away from direct sunlight and temperature fluctuations.
- Ideal temperature range: 50°F to 70°F (10°C to 21°C).
- Check jar seals periodically; a proper seal should not flex up or down when pressed.
- Use within 1 year of canning date for best quality.
Handling and Opening
- Before opening, wipe jars clean to avoid introducing contaminants.
- Once opened, always store the jar in the refrigerator.
- Use a clean utensil to take out pickles to avoid cross-contamination.
- Consume opened jars within 4 to 6 weeks for peak flavor and safety.
Storage Summary Table
| Storage Method | Temperature | Duration | Key Notes |
|---|---|---|---|
| Refrigeration Method | 35°F to 40°F (2°C-4°C) | Up to 2 months | Keep jars sealed and cold, label with date. |
| Water Bath Canning Method | 50°F to 70°F (10°C-21°C) | Up to 1 year | Store in dark, cool place away from sunlight. |
| Opened Jars (Any Method) | Refrigerated | 4 to 6 weeks | Use clean utensils, re-seal tightly after use. |
Pro Tip: Always maintain a consistent storage temperature to preserve the crispness and flavor of our cherry pepper pickles. Fluctuating temperatures can cause spoilage or loss of texture.
By following these Storage Tips, we ensure our homemade Cherry Pepper Pickles stay delicious, safe, and ready to enhance our meals any time.
Serving Suggestions
Our cherry pepper pickles bring a vibrant burst of sweet heat and tangy crunch to countless dishes. Here are some of our favorite ways to enjoy them:
As a Flavor-Packed Condiment
- Add sliced cherry pepper pickles to sandwiches and burgers for a spicy-sweet kick that elevates every bite.
- Layer them on grilled cheese or paninis to balance rich melted cheese with their bright acidity and moderate heat.
- Use whole or chopped pickles as a finishing touch on tacos, wraps, or flatbreads to introduce complex flavors and satisfying texture.
Enhancing Salads and Bowls
- Toss chopped cherry pepper pickles into green salads for a delightful contrast of flavors and a crunchy element that enlivens each forkful.
- Mix them into grain bowls or pasta salads to add piquant notes and balance hearty ingredients like beans, roasted veggies, or proteins.
Star of the Charcuterie Board
- Include cherry pepper pickles alongside cured meats, cheeses, olives, and nuts for a colorful, flavorful medley.
- Serve them in small bowls with toothpicks allowing guests to nibble on their distinct sweetness and spice between bites of rich meats and creamy cheeses.
Creative Culinary Uses
- Chop and stir into homemade dips like cream cheese spreads, hummus, or guacamole for added dimension.
- Use pickle slices as a garnish for Bloody Mary cocktails or other savory drinks to complement their bold flavors.
- Incorporate pickled peppers into savory baked goods like breads or muffins to surprise with a taste contrast.
| Serving Idea | Description | Flavor Profile |
|---|---|---|
| Sandwiches and Burgers | Layer slices for bright heat and tanginess | Sweet, spicy, crisp |
| Salads and Grain Bowls | Toss chopped pickles for crunch and flavor contrast | Tangy, crunchy, mildly spicy |
| Charcuterie Boards | Pair whole pickles with meats and cheeses | Sweet heat complements rich savory elements |
| Dips and Spreads | Mix chopped into creamy dips for flavor enhancement | Zesty, piquant, fresh |
| Cocktail Garnishes | Use slices to add flair and complexity | Sharp, vibrant, complementary |
Pro Tip: Always keep a jar of our homemade cherry pepper pickles handy in the fridge or pantry to instantly elevate your everyday meals and gatherings.
By experimenting with these serving suggestions, we can savor the bold, sweet, and spicy character of our cherry pepper pickles in delightfully versatile ways.
Conclusion
Making cherry pepper pickles at home lets us enjoy a perfect blend of sweet heat and tangy crunch anytime. With control over spice levels and flavor, we can tailor each batch to our taste buds. The process is straightforward and rewarding, especially when we have the right tools and follow safe preparation steps.
Whether we choose quick refrigeration or classic water bath canning, proper storage ensures that our pickles stay fresh and flavorful. These versatile pickles add a vibrant kick to a variety of dishes, making them a pantry staple worth the effort. Let’s keep a jar ready to brighten up meals and share with friends.
Frequently Asked Questions
What makes cherry pepper pickles unique and flavorful?
Cherry pepper pickles combine sweet heat with a tangy crunch, enhancing dishes with their balanced blend of spice, sweetness, and acidity. The flavorful brine and fresh peppers create a vibrant taste ideal for sandwiches, salads, and snacks.
Why should I make homemade cherry pepper pickles?
Homemade pickles allow you to control spice levels, customize flavors, and ensure freshness. You can adjust sweetness, heat, and seasoning to your preference for the perfect pickle.
What ingredients are essential for cherry pepper pickles?
Key ingredients include cherry peppers, white vinegar, water, granulated sugar, kosher salt, garlic cloves, whole black peppercorns, mustard seeds, dill seeds, and optional red pepper flakes.
What equipment do I need for pickling cherry peppers?
You’ll need sterilized canning jars with lids and bands, a large saucepan for brine, jar lifter, funnel, tongs, measuring tools, a sharp knife, cutting board, and a mixing bowl.
How should I prepare cherry peppers before pickling?
Rinse the peppers, dry them thoroughly, and slice according to your heat preference. Wearing gloves is recommended to avoid skin irritation from the pepper oils.
How do I sterilize jars and lids properly?
Wash jars and lids, rinse well, then boil them for 10 minutes. Keep jars warm until filling to prevent contamination and ensure safe preservation.
How do I make the pickling brine?
Combine measured vinegar, water, sugar, and salt in a saucepan. Add garlic, peppercorns, mustard seeds, dill seeds, and optional red pepper flakes, then simmer until ingredients dissolve. Cool before using.
What is the best method to pack and seal jars?
Wear gloves to handle peppers, pack them with spices into sterilized jars, pour in cooled brine, seal lids tightly, and process by boiling or refrigerate depending on the method used.
What are the differences between Refrigeration and Water Bath Canning methods?
Refrigeration is quicker (flavors in 7 days) with a shelf life of 2 months in the fridge. Water Bath Canning requires boiling jars for 10 minutes and yields shelf-stable pickles lasting up to 1 year.
How should I store cherry pepper pickles?
Store refrigerated pickles in the coldest fridge section for up to 2 months. Canned jars should be kept in a cool, dark place for up to 1 year. Once opened, consume within 4 to 6 weeks.
What are some popular ways to serve cherry pepper pickles?
Use them as sandwich condiments, salad toppings, charcuterie board additions, ingredients in dips, or cocktail garnishes to add bold flavor and crunch.